1. Welcome to Tundras.com!

    You are currently viewing as a guest! To get full-access, you need to register for a FREE account.

    As a registered member, you’ll be able to:
    • Participate in all Tundra discussion topics
    • Transfer over your build thread from a different forum to this one
    • Communicate privately with other Tundra owners from around the world
    • Post your own photos in our Members Gallery
    • Access all special features of the site

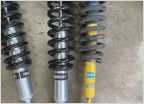
Don't be (very) afraid to build Bilstein 6112

Discussion in 'Suspension' started by justfortun, Dec 1, 2018.

  1. Dec 1, 2018 at 3:50 PM
    #1
    justfortun

    justfortun [OP] New Member

    Joined:
    May 30, 2016
    Member:
    #3484
    Messages:
    420
    Gender:
    Male
    First Name:
    James
    Boston
    Vehicle:
    2016 SR5
    Ever jam your hand down the disposal to get the spoon that's fallen in? And even though you can see the on/off switch on the wall, and KNOW that it's off, you're still afraid the rest of your life you'll be wiping your arse with the other hand?

    Thats sort of like my experience today building the 6112s.

    I'm going to walk you through what I bought to get er done. And then what I did.

    Spring compressors.
    OEMTOOLS 25550 MacPherson Strut Spring Compressor
    $28, Amazon. They got good reviews, and for those who hate suspense, they were rock solid.

    IMG_7363.jpg

    However they don't fit over the coils.

    IMG_0550.jpg

    So, I trimmed them. I figured they weren't doing the heavy lifting, they were more to keep the puppies in place. Nobody ever praised my brains.

    IMG_4116.jpg IMG_9932.jpg
    IMG_8420.jpg IMG_4484.jpg IMG_4208.jpg

    Once I was happy with the fit. I was onto cranking them down. I spent a while trying to figure out how to mitigate the possible explosion that every how-to video describes. I decided to tighten the springs vertically. I liked the down pressure idea. Here's what I did.

    IMG_5689.jpg

    Vised a 6' clamp down and covered it with pipe insulation - looking back, the insulation wasn't necessary, but at this point I was trying to pad everything.

    IMG_1811.jpg
    What I wanted to achieve with this setup was a direction for blowout. ie if this thing went bad and exploded, it would explode up. (and then most likely brain me as it ricochets off the ceiling)

    Did a little wetting the whistle. Oh ya. Nice and slippery. Omnomnom

    IMG_8071.jpg
    Next I needed a 19mm socket. Some female to male converters and an impact gun.

    IMG_3353.jpg

    Alternating from right to left, I began the tightening. All the while envisioning somebody flipping the switch to the disposal.

    IMG_5376.jpg
    IMG_8584.jpg

    Put the shock parts together (without the coil) so I would know what measurement I needed to achieve before I could stop.

    IMG_7837.jpg

    I was setting my shocks to the second setting - the 1.3" - and that was just around 14"

    IMG_2038.jpg

    Most people do the third setting of 1.9" so that would be 13.5" compression.

    I'd measure back and forth between the two compressors. I've watched videos where they explain that if you go too far on one side the threaded bar would start to bend, but that didnt happen with me. They also said that you should do this by hand, but if you did, you'd end up looking like popeye when you got done. So I used impact driver. Half way around turns on each side in the beginning, then, when it started to get closer to the 14" spot, I'd just do a burst, alternating sides.

    Once at 14" I moved it over to the bench and slid the shock inside it.

    IMG_8418.jpg

    Followed the diagram that came with the shocks as far as how to put these together. Used a vise grip to move the setting to the 1.3" second spot. doohicky this and washer that. easy.

    Bought these:

    IMG_1339.jpg

    IMG_9728.jpg
    IMG_5600.jpg

    Lined up the "Out" label on the mount with the writing on the coils and the bottom.

    IMG_9666.jpg IMG_7653.jpg IMG_8400.jpg

    Then I power wrenched it until the rubber gasket started to balloon, then I switched to the torque wrench - 20lbs per foot til it clicked.

    IMG_5417.jpg IMG_6730.jpg IMG_3621.jpg

    Grabbed the inner shaft with vice clamp while tightening the nut, or else the whole thing just spins. So torqued with the right hand and held the vice grips with the left hand.

    IMG_8897.jpg

    released the tension on the coil

    IMG_0276.jpg

    done and done

    IMG_0339.jpg
    IMG_4713.jpg

    I didn't install them yet, I'm awaiting the coachbuilder .5" shim for driver side. Thanks to all 30 people for ordering from Coachbuilder, they are en route. Pop that sucker in and get er aligned.

    Bob's your uncle.

    Still have both hands.

    Don't be afraid.
     
  2. Dec 1, 2018 at 3:58 PM
    #2
    RangerBP

    RangerBP SC Expat. Go gamecocks.

    Joined:
    Oct 11, 2017
    Member:
    #10210
    Messages:
    535
    Gender:
    Male
    Colorado
    Vehicle:
    2017 4x4 DC, Silver Sky
    Outstanding writeup. Thank you!
     
    justfortun[OP] likes this.
  3. Dec 1, 2018 at 5:40 PM
    #3
    Sterlinglwood

    Sterlinglwood Never enough!

    Joined:
    Mar 18, 2018
    Member:
    #13671
    Messages:
    458
    Gender:
    Male
    First Name:
    Sterling
    Newbury Park, CA
    Vehicle:
    2017 Tundra Double Cab SR5 4X4
    Anti seize is the best. Nice write up
     
    justfortun[OP] likes this.
  4. Dec 2, 2018 at 3:45 AM
    #4
    justfortun

    justfortun [OP] New Member

    Joined:
    May 30, 2016
    Member:
    #3484
    Messages:
    420
    Gender:
    Male
    First Name:
    James
    Boston
    Vehicle:
    2016 SR5
    coachbuilder .5" shim and 1" shackles arrive this Wednesday!
     
  5. Dec 2, 2018 at 4:54 AM
    #5
    RLHULK

    RLHULK Too many gamma rays in all that BBQ smoke.

    Joined:
    Nov 3, 2015
    Member:
    #2054
    Messages:
    5,552
    Gender:
    Male
    First Name:
    Rich
    Oklahoma, Toyota seat trim durability tester
    Vehicle:
    2022 Silverado LT.
    Still rolling stock baby....
    Great job, no way I would attempt that without a safety cage....
     
  6. Dec 2, 2018 at 11:01 AM
    #6
    plumber802

    plumber802 New Member

    Joined:
    Apr 13, 2018
    Member:
    #14412
    Messages:
    905
    Gender:
    Male
    First Name:
    Andy
    Vermont
    Vehicle:
    2018 White Platinum CM
    Thanks for the great write up including pics!!!
     
    justfortun[OP] likes this.
  7. Dec 2, 2018 at 11:06 AM
    #7
    MotoTundra

    MotoTundra The Ocho

    Joined:
    Jan 6, 2014
    Member:
    #8
    Messages:
    7,650
    Gender:
    Male
    First Name:
    Don
    -TRS Mini D2S Retrofit on TRD Pro Headlights (Apollo 2.0 Shrouds, 35w XB Ballasts, 5500k Bulbs) -Baja Designs Squadron R Sport Aux lights. -TRD Pro Grill -TRD Rear Sway Bar -BakFlip VP Tonneau w/BakBox -Dipped wheels & bumpers -Iron Cross HD steps -Undercover Swingcase -SunTek Paint Protection film -Tinted glass -Bedmat -OEM Towing Mirrors
    I do have an Uncle Bob.

    Great job! Thanks for sharing.
     
    Law323 and justfortun[OP] like this.
  8. Dec 2, 2018 at 11:18 AM
    #8
    Berdine

    Berdine Voodoo Sport

    Joined:
    Aug 2, 2017
    Member:
    #8877
    Messages:
    1,901
    Gender:
    Male
    First Name:
    Frank
    Binghamton, NY
    Vehicle:
    2020 VooDoo Blue Trd Sport
    Yeah, great write up! I used ones off of Amazon for $26, in my driveway.
     
  9. Dec 2, 2018 at 3:46 PM
    #9
    justfortun

    justfortun [OP] New Member

    Joined:
    May 30, 2016
    Member:
    #3484
    Messages:
    420
    Gender:
    Male
    First Name:
    James
    Boston
    Vehicle:
    2016 SR5
    @MotoTundra I think everyone has an uncle Bob. I have one. And a brother Bob. Dont hear the name too much anymore.

    update to this thread. I did the drive side lean measurements and I was 3/16" lower on driver side, with over 30 gallons of gas, so I decided to put the 6112s in today and if my drive side sags later, I now know how to put it in later.

    And man am I mad.

    I've driven around the last 17 years in tundras with absolute shit suspension! These things are like taking off a pair of loafers and putting on Nikes. I installed the 5160s the other day, and the difference was minimal. These 6112s in the front make a huge difference!

    Went with the 1.3" second setting and when everything was put together, it was darker than a raccoon's asshole outside, so this picture will be updated tomorrow.
    From what I can see, she sits pretty level. Still going to put in the 1" Coachbuilder shackle but I'll have a better sense in the morning.

    If I go with bigger tires than these 275/70r18's I'll just take these guys apart and bump them up a setting or two.

    Tomorrow I'll get it aligned. I did have some rubbing when backing up, hard over to port. But I'm going to sus that out in the AM.


    IMG_2207.jpg
     
    Broncobroke, equin, aminter0 and 3 others like this.
  10. Dec 3, 2018 at 8:13 AM
    #10
    justfortun

    justfortun [OP] New Member

    Joined:
    May 30, 2016
    Member:
    #3484
    Messages:
    420
    Gender:
    Male
    First Name:
    James
    Boston
    Vehicle:
    2016 SR5
    Bilstein 6112 at 1.3"
    6112_1.3inch.jpg
     
  11. Dec 3, 2018 at 8:28 AM
    #11
    Smoofers

    Smoofers New Member

    Joined:
    Jun 20, 2018
    Member:
    #16294
    Messages:
    89
    Gender:
    Male
    N TX
    Vehicle:
    2018 TRD Sport
    Great job and excellent write up. I have to ask though, WTF happened to you fingernail in the anti seize picture?!?!?!?
     
    justfortun[OP] likes this.
  12. Dec 3, 2018 at 8:28 AM
    #12
    deedubb

    deedubb New Member

    Joined:
    Jul 23, 2018
    Member:
    #17300
    Messages:
    532
    Gender:
    Male
    First Name:
    David
    Vehicle:
    2018 Tundra SR5
    I was nervous just reading/looking at pictures! Nice write up!
     
    justfortun[OP] likes this.
  13. Dec 3, 2018 at 8:43 AM
    #13
    yosh2000

    yosh2000 New Member

    Joined:
    Aug 9, 2017
    Member:
    #8964
    Messages:
    266
    Denver
    Vehicle:
    '17 MGM CM Tundra
    i always do the on the truck method. i've used those spring compressors in the past, but so much easier to just take two bolts off the lower arm and let a jack do all the work for you!
     
    kparrow likes this.
  14. Dec 3, 2018 at 9:28 AM
    #14
    justfortun

    justfortun [OP] New Member

    Joined:
    May 30, 2016
    Member:
    #3484
    Messages:
    420
    Gender:
    Male
    First Name:
    James
    Boston
    Vehicle:
    2016 SR5
    Ah, the fingernail. I was picking my nose and the snail got it.
     
    panicman likes this.
  15. Dec 3, 2018 at 9:32 AM
    #15
    justfortun

    justfortun [OP] New Member

    Joined:
    May 30, 2016
    Member:
    #3484
    Messages:
    420
    Gender:
    Male
    First Name:
    James
    Boston
    Vehicle:
    2016 SR5
  16. Dec 3, 2018 at 9:45 AM
    #16
    justfortun

    justfortun [OP] New Member

    Joined:
    May 30, 2016
    Member:
    #3484
    Messages:
    420
    Gender:
    Male
    First Name:
    James
    Boston
    Vehicle:
    2016 SR5
    That’s sounds efficient. I’d never done it before, so I figured I’d go by the rules before I learned to break them. Really couldn’t have been easier putting the shocks together though. I guess it’s never a big deal until suddenly it is.

    Next time you do it, take pictures please!
     
  17. Dec 3, 2018 at 9:52 AM
    #17
    Sephon

    Sephon Don't be an American't

    Joined:
    Oct 29, 2018
    Member:
    #21093
    Messages:
    334
    Gender:
    Male
    First Name:
    Chris
    Northwest PA
    Vehicle:
    2020 Black Tundra TRD Pro
    Icon Rebounds w/285/75 BFG KO2’s, Coachbuilder +2
    Dude! As a kid my mother threatened me with the Silverstein poem. I'm still nervous.....

    Also, this write up was awesome.
     
  18. Dec 3, 2018 at 12:30 PM
    #18
    yosh2000

    yosh2000 New Member

    Joined:
    Aug 9, 2017
    Member:
    #8964
    Messages:
    266
    Denver
    Vehicle:
    '17 MGM CM Tundra
    already done...and there are a few others and videos as well...

    http://www.toyota120.com/forum/showthread.php?t=3270
     
  19. Dec 3, 2018 at 12:50 PM
    #19
    justfortun

    justfortun [OP] New Member

    Joined:
    May 30, 2016
    Member:
    #3484
    Messages:
    420
    Gender:
    Male
    First Name:
    James
    Boston
    Vehicle:
    2016 SR5
  20. Dec 3, 2018 at 2:19 PM
    #20
    yosh2000

    yosh2000 New Member

    Joined:
    Aug 9, 2017
    Member:
    #8964
    Messages:
    266
    Denver
    Vehicle:
    '17 MGM CM Tundra
    haha, i cant take any credit other than searching the intarwebz for that post! but its a good one and what i have followed on my trucks for years now. very easy. just make sure you have red locktite and a 250# or whatever tq wrench (can be rented for free at vatozone or orieleys) to reinstall the lower bolts to the spindle.
     
    justfortun[OP] likes this.
  21. Dec 7, 2018 at 9:36 AM
    #21
    georgiey22

    georgiey22 Moving to Idaho

    Joined:
    Nov 30, 2018
    Member:
    #22423
    Messages:
    857
    Gender:
    Male
    Vehicle:
    2019 Tundra | TRD Sport | Cavalry Blue | Crew Max
    What a great write up @JustForFun! I just purchased a 2019 Tundra and I too have the 6112 on order. When I remove the factory yellow Bilsteins, I want to keep them assembled for future use. I don't want to take them apart just to use the 'top hat.'. With that, how do you like the KYB top hat product? Would you mind sharing the KYB part number you used, if you like and approve it, I'll buy them today! You have a good photo of th box but I don't see a part number anywhere. Thanks in advance!

    Thanks,
    George
     
  22. Dec 7, 2018 at 10:12 AM
    #22
    justfortun

    justfortun [OP] New Member

    Joined:
    May 30, 2016
    Member:
    #3484
    Messages:
    420
    Gender:
    Male
    First Name:
    James
    Boston
    Vehicle:
    2016 SR5
    Heya George,

    This brand top hat was what Amazon recommended as the most popular purchase for those who had purchased the 6112s. They seemed well made, but I guess only time will tell.

    KYB SM5737 mount kit.

    Good luck!

    D12DD5B8-9E94-462E-BB3A-8220068F4485.jpg
     
    georgiey22 likes this.
  23. Dec 7, 2018 at 10:17 AM
    #23
    csuviper

    csuviper Moderator Staff Member

    Joined:
    Jan 6, 2014
    Member:
    #38
    Messages:
    17,272
    Gender:
    Male
    First Name:
    Brian
    Broomfield, CO
    Vehicle:
    2019 TRD Sport CM 5.7L 4X4
    Some Mods :) See build thread for details
    Good work on the writeup. Those spring compressors look much better than the harbor freight ones i have used.

    [​IMG]
     
  24. Dec 7, 2018 at 10:18 AM
    #24
    csuviper

    csuviper Moderator Staff Member

    Joined:
    Jan 6, 2014
    Member:
    #38
    Messages:
    17,272
    Gender:
    Male
    First Name:
    Brian
    Broomfield, CO
    Vehicle:
    2019 TRD Sport CM 5.7L 4X4
    Some Mods :) See build thread for details
  25. Dec 7, 2018 at 10:19 AM
    #25
    csuviper

    csuviper Moderator Staff Member

    Joined:
    Jan 6, 2014
    Member:
    #38
    Messages:
    17,272
    Gender:
    Male
    First Name:
    Brian
    Broomfield, CO
    Vehicle:
    2019 TRD Sport CM 5.7L 4X4
    Some Mods :) See build thread for details
  26. Dec 7, 2018 at 10:56 AM
    #26
    georgiey22

    georgiey22 Moving to Idaho

    Joined:
    Nov 30, 2018
    Member:
    #22423
    Messages:
    857
    Gender:
    Male
    Vehicle:
    2019 Tundra | TRD Sport | Cavalry Blue | Crew Max
    Thank you justforfun. Does two sets come in the box or should I purchased to boxes? Will order them today. Thanks man!
     
  27. Dec 7, 2018 at 11:12 AM
    #27
    georgiey22

    georgiey22 Moving to Idaho

    Joined:
    Nov 30, 2018
    Member:
    #22423
    Messages:
    857
    Gender:
    Male
    Vehicle:
    2019 Tundra | TRD Sport | Cavalry Blue | Crew Max
    James - I live in Southern California but travel to Framingham a few times a year for work. I noticed you are in Boston, that is a fun place to live.
     
  28. Dec 7, 2018 at 11:21 AM
    #28
    TundraCoast

    TundraCoast Member In Good Standing

    Joined:
    Feb 25, 2018
    Member:
    #13151
    Messages:
    592
    Gender:
    Male
    First Name:
    Ian
    California
    Vehicle:
    1794 4x4
    1794 on the inside - PRO on the outside
    Well done write up
     
  29. Dec 7, 2018 at 12:19 PM
    #29
    TXRailRoadBandit73

    TXRailRoadBandit73 YOTAS,RAILROADIN',RÖKnRÖLLN',BEER,MAX/GEMMA

    Joined:
    May 30, 2016
    Member:
    #3487
    Messages:
    50,495
    Gender:
    Male
    First Name:
    Adam
    The 956, TEXAS
    None yet
    Hellafied write up!
     
  30. Dec 7, 2018 at 12:43 PM
    #30
    15whtrd

    15whtrd Mr. Blonde

    Joined:
    Sep 20, 2015
    Member:
    #1829
    Messages:
    9,373
    Gender:
    Male
    First Name:
    Sean
    SoCal
    Vehicle:
    White 2015 Tundra DC SR5 TRD 4x4 5.7L, White 2003 Sequoia 2WD
    TRD Pro suspension, +2 Coachbuilder shackles, 2015 TRD Pro headlights, 20% ceramic tinted windows, clear ceramic tinted front windshield, aFe drop in pro s dry air filter, TRD airflow accelerator, TRD oil fill cap, TRD 18 psi radiator cap, BDX Bullydog tuner, Weathertech floor mats front and rear, rear seat fold down mod, DNA hard trifold tonneau cover, Linex with uv protection, TRD rear swaybar, TRD center caps, TRD Pro grille insert with color matching surround and bulge, TRD PRO headlights, aluminum oil filter canister, Real truck tailgate seal, Pop-n-lock tailgate lock actuator, rear diff breather relocate, RCI front skid plate. 275/70 R18 BFG KO2s
    Did the vice grips on the shaft scratch it up pretty good? Hopefully it’s not in the area of travel for the shock and seals. I thought the square end of the shock shaft was used to keep the shaft secure when tightening?

    Shaft shaft shaft shaft LMFAO
     
    HighDesertSurfer and Law323 like this.

Products Discussed in

To Top