1. Welcome to Tundras.com!

    You are currently viewing as a guest! To get full-access, you need to register for a FREE account.

    As a registered member, you’ll be able to:
    • Participate in all Tundra discussion topics
    • Transfer over your build thread from a different forum to this one
    • Communicate privately with other Tundra owners from around the world
    • Post your own photos in our Members Gallery
    • Access all special features of the site

COACHBUILDER SHIMS AND SHACKLES INSTALL

Discussion in 'Suspension' started by TRDProLife, Jul 17, 2019.

  1. Jul 17, 2019 at 9:33 AM
    #1
    TRDProLife

    TRDProLife [OP] LETS GO BLUES

    Joined:
    Jan 19, 2017
    Member:
    #6026
    Messages:
    755
    Gender:
    Male
    St.Louis
    Vehicle:
    Barcelona Red Metallic TRD Pro Tundra
    Window Tint, ICI Magnum Steps, firestone spring helpers for towing, 295/70R18 Atturo Trsil blade X/T's
    Whats up y'all, I am writing this to explain how I went about the install of my coachbuilder kit, this is only a guide to supplement coachbuilders instructions. I hope it is helpful.

    Lets start with the front end.

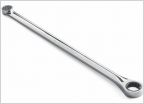
    Bumper shim kit: you will need a 14mm wrench I prefer a ratchet wrench, and some blue loctite. Remove the inner fender liner (the piece that covers the fog lights), and disconnect the fog lights, then its pretty straight forward four 14mm nuts on each side, remove them install shims, put loctite on the nuts and snug them up.

    steering kit: this step must be done to install coilover shims. Loosen the tie rod jam nut first, then remove the heim joint nut and smack the top of it with a hammer (if you don"t have a puller) If you are re-using your tie rods you can smack it with the nut on but you still may damage the threads doing it this way.

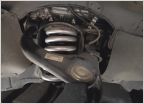
    coilover shims: Remove the three bolts holding the brake line and wire in place or they will be stretched and possibly damaged. Remove the UCA ball joint nut and tap upwards on the UCA with a hammer until it pops out. Remove the lower bolt for the coilover. Remove the bolt for the front sway bar and use a pry bar to pop it out of its bracket. Now you can place the pry bar in the sway bar bracket and pull down on the LCA enough for the coilover to pop out ( you may loosen the top four bolts first but i had good luck leaving the in for this step). This will likley pull your axle out a bit, just pop it back in. Now remove the for bolts on top of the coilover and slide it out. Follow coachbuildlers instructions for installing the shims. When re-installing you may loosen the UCA Bolt to free it up some, however it has a torque spec of 173 ft-lbs and isn't easy to get on. I simply installed the coilover, sway bar, and tie rod, then I used a HEAVY DUTY RATCHET STRAP (not some sissy strap) and went around the UCA and LCA to pull the ball joint back into the spindle. Make sure you guide it in as you go because if you have to let the slack out of your strap it could get ugly there is a lot of pressure there. install nut torque everything to spec and repeat for the other side.

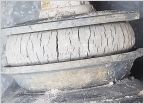
    Rear shackles: Put truck on jack stands. Remove wheels, place jack under the pumpkin, remove lower shock bolt, if you have air bags remove the lower bolt for those, loosen brake/other lines so they do not stretch, and remove the rear exhaust hangers if you have the TRD dual exhaust. Now you are ready to remove the shackles. Remove nuts and play around with the jack height until the come out easily. Now this is the tricky part. If you dont have a puller you can use a drill to drill out the rubber for the bushings in the leaf springs. once this is done use a large C-clamp or hammer to push out the inner part of the bushings, now you can use a saws-all/reciprocating saw to make a cut in the outer bushing, heat the spring around it with a torch, and grab your big hammer and a chisel. I think you know what to do from there.

    I hope this is helpful and HAPPY INSTALLING GUYS!
     
    Last edited: Jul 18, 2019
  2. Jul 17, 2019 at 9:38 AM
    #2
    TRDProLife

    TRDProLife [OP] LETS GO BLUES

    Joined:
    Jan 19, 2017
    Member:
    #6026
    Messages:
    755
    Gender:
    Male
    St.Louis
    Vehicle:
    Barcelona Red Metallic TRD Pro Tundra
    Window Tint, ICI Magnum Steps, firestone spring helpers for towing, 295/70R18 Atturo Trsil blade X/T's
  3. Jul 18, 2019 at 7:09 PM
    #3
    ColoradoTJ

    ColoradoTJ Certified tow LEO Staff Member

    Joined:
    Feb 24, 2016
    Member:
    #2766
    Messages:
    40,260
    Gender:
    Male
    Colorado
    Vehicle:
    LML 3500HD, Roush Mustang, Jeep Crawler
    Calibrated Power 5 Tune pack, Allison 1000 tune, PPE deep trans pan, Cold/Hot CAC pipes, Banks CAI, PCV reroute, resonator delete, S&B 62 gal fuel tank, B&W GN hitch
    Would you change all the Hammer’s to dead blow hammers?

    No way at any time should anyone be smacking these parts with a regular hammer.
     
    speckmon and EDDO like this.

Products Discussed in

To Top