1. Welcome to Tundras.com!

    You are currently viewing as a guest! To get full-access, you need to register for a FREE account.

    As a registered member, you’ll be able to:
    • Participate in all Tundra discussion topics
    • Transfer over your build thread from a different forum to this one
    • Communicate privately with other Tundra owners from around the world
    • Post your own photos in our Members Gallery
    • Access all special features of the site

8112dsa+/8100dsa and new ucas

Discussion in 'Suspension' started by Jaywhy, Jul 17, 2025.

  1. Jul 17, 2025 at 3:24 PM
    #1
    Jaywhy

    Jaywhy [OP] Old Member

    Joined:
    Jul 2, 2017
    Member:
    #8386
    Messages:
    111
    Gender:
    Male
    First Name:
    Jeff
    Vehicle:
    2016 SW TRD Pro CM
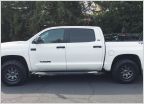
    After 150k miles it was time to bite the bullet and replace the Bilstein trd pro suspension. Thanks @memario1214 for selling the shocks and answering all my questions. I know it's not you, but sitting on a rear right and a front left such a tease.

    Update when they're installed with all the problems 150k salt winter miles caused and if I blow a hose off the first time I drive since my stock wheels are out of the backspace spec Bilstein recommends.PXL_20250717_221927885.jpg
     
  2. Jul 17, 2025 at 5:02 PM
    #2
    memario1214

    memario1214 Hotshot Offroad Staff Member Vendor

    Joined:
    Dec 13, 2015
    Member:
    #2252
    Messages:
    12,757
    Gender:
    Male
    First Name:
    Colton
    Missoula, MT
    Vehicle:
    '21 Limited MGM CrewMax
    Haha I knew that initial shipping spec would be a killer. That said, your other rear is enroute, and that missing front has gotten a tracking number on some other orders. I suspect we'll have your missing link incoming very soon!
     
  3. Jul 19, 2025 at 2:24 PM
    #3
    Jaywhy

    Jaywhy [OP] Old Member

    Joined:
    Jul 2, 2017
    Member:
    #8386
    Messages:
    111
    Gender:
    Male
    First Name:
    Jeff
    Vehicle:
    2016 SW TRD Pro CM
    Rears are done! Had the rear passenger, rear driver got delivered halfway through install.

    I was pleasantly surprised with how well this install went. No sawzall or grinder needed to remove the old Bilsteins.

    Install instructions from Bilstein were very detailed and pretty easy to follow. I probably spent more time on the first one figuring out the strategy for manipulating the axle up and down than I did with the install. The new 8100s ship fully extended, and there was no way I was collapsing them to secure them to the lower shock mount.

    The solution I landed on was to jack the rear passenger side of the axle up with the jack positioned at the axle spring mount high enough to remove the tire. From there, a jack stand was placed below the front leaf spring mount and the truck was lowered until the jackstand just made contact with the spring mount. The old shock was removed and the new one secured to the frame mount first. By continuing to slowly lower the jack supporting the axle with the jackstand catching the front leaf spring mount, the axle would droop and the lower shock mount came down right into position. Super easy.

    Really the only difficulty I ran into with the installation was the driver's side resi mount. It calls for two bolts on the top rail of the frame to be removed, mount placed and then secured with these bolts. They were stuck AF. I ended up removing them with a 14mm box wrench and 3lb sledge, going about 20 degrees before having to reset. Once loosened a little, I was able to use a 14mm ratcheting wrench with another larger wrench hooked around the open end to provide more leverage (see picture below). I probably lost about 45 minutes removing these two bolts. Worth noting as well, once the bolts were removed, I used a thread file and thread repairer to clean the bolts up for reinstalling. I've taken to doing this with every bolt I remove from the vehicle and it makes reasssembly a breeze.

    Other thoughts:

    I felt like I was wrenching down forever on the upper shock mounts. The instructions call for 20 ft-lbs of torque on the upper mount. This really squeezes that bushing flat. Had to use (and buy because I didn't own a set) an 18mm crow's foot on the torque wrench to torque to spec.

    Resi's were wrapped in a towel secured with zip ties until it was time to mount them so I didn't scratch them up.

    A third arm was very helpful for bolting on the passenger side resi mount.

    Instructions (both bilstein and toyota via alldata) call for lower bolt to be torqued to 66 ft-lb with the weight of the truck on it. I went to 40 ft-lbs in the air, put the tire back on, lowered and brought it to 52 ft-lb (reduced toyota spec by 20ish% due to anti-seize use). I hope this works out okay.

    Good news on the clearance issue as well. After install, I have roughly 1-1/4" gap between the banjo bolt and the tire. After manipulating the axle up and down a few times, I don't think I'm going to have any issues with the tire hitting the bolt.

    Bonus bolt shipped by Bilstein had me re-reading the instructions and scratching my head for 20 minutes thinking I missed something after I completed the passenger side.


    TRD billies: passenger side was dead. Could push the shaft in and out at will. Could hear sloshing when shaking it and weird suction noises when operating the shaft. Driver's side didn't make sloshing noises and was a little harder to collapse, but still totally doable with one hand.

    Passenger side installed

    Driver's side installed

    Banjo bolt clearance (bad angle and shadows make it look like the body of the shock is closer than it is)

    Wrench on wrench trick for more torque on hard to access bolts
     
    Last edited: Jul 19, 2025
  4. Jul 21, 2025 at 4:47 PM
    #4
    Tracer1794

    Tracer1794 New Member

    Joined:
    Jan 26, 2023
    Member:
    #90934
    Messages:
    14
    Gender:
    Male
    Missouri
    Vehicle:
    2019 CM 1794
    Hey I just ordered my 8112s and 8100s! I went with DSA options on both. I see you are running a stock leaf pack. How has the 8100 improved the rear end of your truck with stock springs? I feel like the stock springs are super rough.
     
    Last edited: Jul 21, 2025
  5. Jul 21, 2025 at 4:58 PM
    #5
    Tundra234

    Tundra234 New Member

    Joined:
    Nov 30, 2018
    Member:
    #22402
    Messages:
    18,495
    Gender:
    Male
    First Name:
    George
    Florida
    Vehicle:
    2020 Tundra DC SR5 Barcelona
    Alot of them
    The front coilovers are a gym workout lol. They have some solid weight to them.
     
  6. Jul 21, 2025 at 5:16 PM
    #6
    Jaywhy

    Jaywhy [OP] Old Member

    Joined:
    Jul 2, 2017
    Member:
    #8386
    Messages:
    111
    Gender:
    Male
    First Name:
    Jeff
    Vehicle:
    2016 SW TRD Pro CM
    Given the state of the shocks I took off, I do feel like the rear is much more stable and planted, the rough road hits are "less rough". I also have a set of HD RAS springs on there to help with sag when towing my M1101 around, so that's coming into play as well.

    I have yet to adjust the 8100s at all to see how it effects ride quality. Install was completed friday night and I worked a 48 this weekend, so no time to play around.

    Future plans include replacing the tired stock leaf pack with something custom from Alcan, but I gotta let the household CFO do some of her things after dropping this kind of cash on a suspension.
     
  7. Jul 21, 2025 at 5:18 PM
    #7
    Jaywhy

    Jaywhy [OP] Old Member

    Joined:
    Jul 2, 2017
    Member:
    #8386
    Messages:
    111
    Gender:
    Male
    First Name:
    Jeff
    Vehicle:
    2016 SW TRD Pro CM
    Thankfully the boy learned righty-tighty and how to operate a wrench at a young age, so he should be able to secure them while I hold them. Child labor is so helpful.
     
    Tundra234[QUOTED] likes this.
  8. Jul 21, 2025 at 5:52 PM
    #8
    Tracer1794

    Tracer1794 New Member

    Joined:
    Jan 26, 2023
    Member:
    #90934
    Messages:
    14
    Gender:
    Male
    Missouri
    Vehicle:
    2019 CM 1794
    I will be going from rough country 2.0s to the 8112s so I really hope I get some
    Ride quality improvements! I’ve got coachbuilder +2s on stock springs at the moment. I’m looking for something a little more buttery in the future. I’m thinking deaver u748s with a shorter shackle to keep from lifting too high.

    thanks for the reply man! Enjoy the new shocks!
     
  9. Jul 21, 2025 at 5:55 PM
    #9
    Mend0k

    Mend0k New Member

    Joined:
    Sep 24, 2019
    Member:
    #36565
    Messages:
    96
    Gender:
    Male
    Vehicle:
    2015 TRD Pro
    Ughhh now I’m having buyers remorse with my 6112/5160.. :annoyed:
     
    Tracer1794 likes this.
  10. Jul 21, 2025 at 6:17 PM
    #10
    Tundra234

    Tundra234 New Member

    Joined:
    Nov 30, 2018
    Member:
    #22402
    Messages:
    18,495
    Gender:
    Male
    First Name:
    George
    Florida
    Vehicle:
    2020 Tundra DC SR5 Barcelona
    Alot of them
    I went from Toytecs to the Bilstein setup...night and day difference.
     
    Tracer1794[QUOTED] likes this.
  11. Jul 21, 2025 at 6:34 PM
    #11
    memario1214

    memario1214 Hotshot Offroad Staff Member Vendor

    Joined:
    Dec 13, 2015
    Member:
    #2252
    Messages:
    12,757
    Gender:
    Male
    First Name:
    Colton
    Missoula, MT
    Vehicle:
    '21 Limited MGM CrewMax
    If where you picked them up from doesn’t have any on the shelf, let me know. We just got shipping notification of a reload :cool:.

    @Jaywhy missing piece should be getting out any day now!
     
  12. Jul 21, 2025 at 7:06 PM
    #12
    Tracer1794

    Tracer1794 New Member

    Joined:
    Jan 26, 2023
    Member:
    #90934
    Messages:
    14
    Gender:
    Male
    Missouri
    Vehicle:
    2019 CM 1794
    That makes me feel more confident! The YouTube channels talk these shocks up a lot but it’s nice to hear the same stuff from real buyers. What is your rear setup?
     
  13. Jul 21, 2025 at 7:09 PM
    #13
    Tracer1794

    Tracer1794 New Member

    Joined:
    Jan 26, 2023
    Member:
    #90934
    Messages:
    14
    Gender:
    Male
    Missouri
    Vehicle:
    2019 CM 1794

    Thanks! I bought from shock surplus but they haven’t given me an update on the expected delivery. Their site says expect 2-3 weeks.
     
  14. Jul 21, 2025 at 7:10 PM
    #14
    Tundra234

    Tundra234 New Member

    Joined:
    Nov 30, 2018
    Member:
    #22402
    Messages:
    18,495
    Gender:
    Male
    First Name:
    George
    Florida
    Vehicle:
    2020 Tundra DC SR5 Barcelona
    Alot of them
    Tracer1794[QUOTED] likes this.
  15. Jul 21, 2025 at 7:14 PM
    #15
    Tundra234

    Tundra234 New Member

    Joined:
    Nov 30, 2018
    Member:
    #22402
    Messages:
    18,495
    Gender:
    Male
    First Name:
    George
    Florida
    Vehicle:
    2020 Tundra DC SR5 Barcelona
    Alot of them
    I just noticed that you are new to the forum. @memario1214 is our forum go to guy for all kinds of stuff...suspension, wheels, lighting, etc. He can get you just about anything that you need. :hattip:
     
    Tracer1794[QUOTED] likes this.
  16. Jul 22, 2025 at 3:43 AM
    #16
    Jaywhy

    Jaywhy [OP] Old Member

    Joined:
    Jul 2, 2017
    Member:
    #8386
    Messages:
    111
    Gender:
    Male
    First Name:
    Jeff
    Vehicle:
    2016 SW TRD Pro CM
    I was on the fence about 6112/5160 or 6112/8100 combo prior to pulling the trigger on this, but I sold myself on the fact that I'm never getting rid of this vehicle and I'd rather just eat the extra $ up front than run the 6112s for a while, be underwhelmed and go 8112s down the road. It's probably way overkill for my 95% daily driver, 5% fun stuff life style, but hey... why not?
     
  17. Jul 22, 2025 at 3:44 AM
    #17
    Jaywhy

    Jaywhy [OP] Old Member

    Joined:
    Jul 2, 2017
    Member:
    #8386
    Messages:
    111
    Gender:
    Male
    First Name:
    Jeff
    Vehicle:
    2016 SW TRD Pro CM
    Thanks for the update!
     
  18. Jul 23, 2025 at 7:12 PM
    #18
    Mend0k

    Mend0k New Member

    Joined:
    Sep 24, 2019
    Member:
    #36565
    Messages:
    96
    Gender:
    Male
    Vehicle:
    2015 TRD Pro
    I have a similar thought process, but what pushed me over to the 6112/5160 was because I purchased OEM UCAs on sale during 4th of July and couldn’t return them. And of course I did prefer OEMs to a degree.. but now it’s bugging that I don’t get to experience the 8112s :(
     
  19. Aug 6, 2025 at 6:58 PM
    #19
    Tracer1794

    Tracer1794 New Member

    Joined:
    Jan 26, 2023
    Member:
    #90934
    Messages:
    14
    Gender:
    Male
    Missouri
    Vehicle:
    2019 CM 1794
    @Jaywhy It’s been a little while, how are you liking the shocks so far? I still haven’t got mine in yet so I like living through others experience while I wait LOL

    BTW huge shout out to @memario1214 for coming through with a set of 8112s for me when SS dropped the ball. Thanks man!
     
    memario1214 and RobertD like this.
  20. Aug 7, 2025 at 5:51 PM
    #20
    Jaywhy

    Jaywhy [OP] Old Member

    Joined:
    Jul 2, 2017
    Member:
    #8386
    Messages:
    111
    Gender:
    Male
    First Name:
    Jeff
    Vehicle:
    2016 SW TRD Pro CM
    The right front arrived two days before my trip to the upper peninsula (mi). Didn't have time to get them installed and alignment done before leaving. Installing this Sunday, Monday and car care nut is doing my alignment Tuesday. Will let you know.
     
  21. Aug 12, 2025 at 9:11 AM
    #21
    Jaywhy

    Jaywhy [OP] Old Member

    Joined:
    Jul 2, 2017
    Member:
    #8386
    Messages:
    111
    Gender:
    Male
    First Name:
    Jeff
    Vehicle:
    2016 SW TRD Pro CM
    Update! They're on and I'm sitting in TCCN's waiting room getting alignment done. Initial ride quality is great, but I was on busted 150k TRD Pro Bilsteins, so anything is probably better at this point. I'll update after I've gotten to play around with them a bit.

    Install thoughts:

    UCAs
    I started with doing the UCAs on both sides. There was a video I found on youtube produced by TRQ that did a really nice job showing what to expect and how to get the old UCAs out. My install was a little different due to the aftermarket UCAs.
    • The Bilstein UCAs don't come with the bushings installed. As I don't have a press, I used my bench vise to press the bushings in. Alignment was difficult operating the vise alone, and with the narrow jaws. I ended up buying two oak plinth blocks from Menards to create a larger flat surface and had my son close the vise while I held the bishings in alignment. Worked very well.
    • In the TRQ video, the guy just bangs on the spindle right where the UCA ball joint inserts. Can verify this works on a midwest salt truck with 150k miles. Couple whacks with a 3lb sledge and it popped right out.
    • Using a cam strap (NRS Strap) to keep the spindle from moving too far was very helpful - I think better then a bungee because I had some adjustment in spindle position.
    • The UCA bolt was REALLY difficult to get moving, even after spraying with kroil once a day for 3 days leading up to the install. Biggest breaker bar I had was a 20" and I ended up using a pipe to extend to 36. Driver side sucks because the body is in the way on the bolt(front)side and brake lines are in the way on the nut (rear) side. It was like 20 degrees at a time. Eventually it loosened enough that I could get a 1/2 ratchet in with the pipe on it to keep from resetting the breaker bar. Passenger side was easer because you can get the bar on the nut side with a 3" extension.
    • Driver's side UCA bolt was easy, just watch the TRQ video for the method. Passenger side required more finagling, and unclamping two sets of hoses in the engine bay.
    • Bilstein instructions packaged with the UCAs stated to torque the UCA bolts without mentioning doing so at ride height. The online instructions state to do it at ride height to prevent premature wear on the bushings. I followed the online instructions, just went easy-wrench tight while the truck was in the air.
    • When torquing UCA bolts, it is very possible to get the torque wrench stuck on the UCA bolt because of body interference. Ask me how I know. When solving this problem, I found it would probably be easier to do your final torquing through the engine bay (from the top)
    • This is actually a fairly easy DIY. Tools required: basic socket set in 3/8 and 1/2, 22mm wrench, breaker bar and a pipe (long handled 1/2 ratchet would be amazing to own), sledge or deadblow hammer and a torque wrench.
    Coilovers
    If you're doing UCAs at the same time, do not secure the UCA ball joint to the spindle until the coilovers are in.
    I did my UCAs all the way and then found it near impossible to remove the old coilovers without detaching either the UCA or the tie rod. One or the other will give you the clearance you need to remove and replace the coilovers.
    • The alldata process lists removing the LCA sway bar end link bolts and 2 LCA ball joint to spindle bolts to make room to remove the coilover. This is the process I followed, with the additional step of disconnecting the UBJ to give me room to remove and replace. I did both sides of the sway bar at the same time.
    • Lower shock mount bolts came out fairly easily with a Milwaukee mid-torque impact, then a hammer and punch with some prybar action on the lower shock mount. One of the nuts seized after about half an inch of movement and took some more Kroil before it would go again. On the second one, I cleaned and filed the exposed threads to prevent this. Worked like a charm. Leave the bolt in until you're ready to remove the coilover.
    • Upper mount nuts were pretty easy. The inboard nuts on both sides are more easily removed if accessed through the engine bay with ~18 inches of extensions. I left one nut on as the final hold-in-place until I was ready to pull it.
    • My LCAs did not droop enought to remove the coilover. A strategy I saw another guy use was a ratchet strap to one of his jack stands to pull the LCA down. My stands were in the wrong position, but my jack was centered until the vehicle. Ratchet strap from jack to LCA did the trick and provided incremental adjustment in both directions.
    • I used microfiber cloths and zipties to wrap and protect the resevoirs during installation.
    • Coilovers are heavy AF and only like to come out one way. Be prepared to use your legs to move the spindle around while you take the coilover out with your arms, or have a helper.
    • New 8112s have a fancy bushing setup that likes to come apart while you're maneuvering your new 65lb coilover into position. I was able to get them without it falling apart, but saw another guy use a small metal putty knife to keep the rear facing bushing in place while installing.
    • Coilover was set mostly in place in the lower mount, then lifted and two top mount nuts placed to hold it.
    • Once the top was mostly secure, I used the combination of a second jack, the ratchet strap to the main jack and a pry bar to jockey the LCA in place and get the lower shock mount bolt in place.
    • From there, secure the top bolts to torque spec and you're good to go. Lower mount bolt went "gentle tight" because you're supposed to torque this one in neutral position.
    • I had mega trouble getting the sway bar end links to line up to the LCA while the truck was in the air. Dropping it down with the wheels on and weighting the system made it really easy.
    • If you have ARK splash guards because your toyota paper ones got destroyed, there's some custom cutting to do to make them fit with the resevoir mounts. I'll update when I figure that out.
    • I laid under the truck struggling like an idiot trying to torque the lower shock bolts to spec (144 ftlb) until I realized you can use a bunch of extensions and get the torque wrench past the tire and torque from the side.
    Torque Specs (ft/lb) - alldata
    Bilstein UBJ castle nut: 81
    UCA bolt: 173
    Upper shock mount(4): 33 (cross pattern)
    Lower shock bolt: 144
    Sway bar to LCA: 89
    LBJ attachment: 221

    Pics:
    Dirty garage after this project:Mystery metal piece I found while in the engine bay:

    Sorry this is a bit of a rant/wall of words, but I hope some of this helps another person trying to DIY their suspension. I was on a clock to get this done before my alignment appointment today, so didn't really have time for pictures or videos of the install trouble spots.
     
    DeepBushCaboose likes this.

Products Discussed in

To Top