1. Welcome to Tundras.com!

    You are currently viewing as a guest! To get full-access, you need to register for a FREE account.

    As a registered member, you’ll be able to:
    • Participate in all Tundra discussion topics
    • Transfer over your build thread from a different forum to this one
    • Communicate privately with other Tundra owners from around the world
    • Post your own photos in our Members Gallery
    • Access all special features of the site

2013 5.7 Tundra Oil Change and Grease 4x4

Discussion in '2nd Gen Tundras (2007-2013)' started by 1971ChevyC10, Jun 4, 2025 at 7:20 PM.

  1. Jun 4, 2025 at 7:20 PM
    #1
    1971ChevyC10

    1971ChevyC10 [OP] New Member

    Joined:
    Jan 31, 2021
    Member:
    #58433
    Messages:
    1
    Gender:
    Male
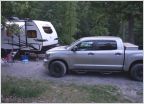
    Gezuz Crisp what a )(^ PITA. I took good notes this time, and this is the first I've greased the shafts. About time I got around to greasing it, though I've only put 12K on it since I bought it in 2020, it has 82K on her. Cool truck man, mine is the Rock Warrior package, the previous owner loaded it up, and really, I kind of stole it for $23,500.

    Sure I've seen videos, some mistakes, some better than others. My difference is primarily, you don't have to remove the steel skid plate, because it's geezuzzz, a PIA to have to reinstall it if you do. I threw the bottom procedure together, it will help me, I'll forget five minutes from now, never mind this is an annual event. Please feel free to input, thank you.

    Oil Change and Grease for 2013 Tundra 4WD, with OEM steel skid plate:

    With filter this 5.7 liter engine takes 7.9 Qts. of full synthetic 0W20 oil. I use Mobil-1 only.

    The oil drain plug is 14mm hex and takes a crush washer. The filter kit is part # 04142-YZZA4

    The skid plate takes five (5) 12mm hex screws, and three (3) 10mm hex screws. Three 12mm hex screws are at the rear, and two are in front; a rachet extension is required. The three 10mm hex screws are located in front.

    You don’t need to remove the steel skid plate, and it’s a genuine PIA if you do. Hold the plate in place as all the screws are removed, beginning with the 10mm, working back, and slowly lower the plate’s rear onto a firm bed pillow or of similar height; clear of the oil filter. The plate’s rear must not drop all the way, it must be supported with its front hooks still secured in the support, without twisting. The plate should line right up for reattachment, where the rear center screw is installed first, somewhat loosely, followed by any plate adjustment for the 10mm screws.

    Remove the filter canister metal drain cap with a 3/8” rachet extension.

    Drive the kit’s plastic drain plug into the filter canister’s bottom aided with a pipe, draining the oil into a container perhaps 10” wide, with handle. I use an 8” ¾” PVC pipe; and medium size kitchen pot. Note some plastic drains thread into the canister. Employ a throw-away towel should you leave a mess or tire of holding the container. I install the drain plug with the old drain cap O-ring in place, reducing mess, and if necessary, for prying the pho-king drain plug out. PIA oil change man, my Subaru is 10X easier.

    The filter canister requires aspecific filter canister remover/installer tool. Use a 3/8” rachet extension to turn this tool; with an option for loosening by the 1.1/16” hex on common tools. Do not turn the canister by the canister drain cap – this is the reason some are stuck, and the O-ring is jacked up too.

    Lubricate and install the new drain cap and canister O-rings with oil> Install the canister’s metal drain cap to stop > Install the filter into the canister to click > Add oil to inside the filter > Install the filter canister to stop > Lubricate the oil filler cap’s rubber seal.

    This truck’s drivetrain has five (5) grease zerk fittings. The rear differential shaft has a fitting on each end; the “middle shaft’s” front has one at the transfer case; and the front differential shaft has one on each end, which you must remove the access panel’s 12mm hex screws to grease its rear fitting.


    Maintenance Required (MR) Reset: Turn the ignition to the "On" position without starting the engine > Press the display button to "Trip A", do not release this button until MR is reset > Turn the ignition Off, then return to the On position > Release the button after the display finishes subtracting dashes “-“.
     
    TheBeast and AdamK like this.
  2. Jun 4, 2025 at 8:05 PM
    #2
    Mdl

    Mdl Hey there...

    Joined:
    Jun 14, 2023
    Member:
    #98638
    Messages:
    3,133
    Gender:
    Male
    PNW, WA
    Vehicle:
    2007 TRD SC'd
    JBA Longtubes, Snivs 2.0 SC pulley, ASP crank overdrive pulley 6.71 in, DD Full 3inch dual exhaust, IPT valve body, Airbox mod, 4.5inch intake, Denso 750, 450 Walbro, W/M injection, GM 95mm TB, SABM, Camburg UCA, Icon shocks, Speedmaster LSD, Motive 5.29 Gears, Mickey Thompson Baja Legend EXP 35's, Solid Offroad engine and transmission mounts, DIY Traction Bars, Tuning by Snivspeedshop.com
    Welcome to the Tundra. Lots of DIY info on the site...don't forget to change the atf every 30-60k.
     

Products Discussed in

To Top