1. Welcome to Tundras.com!

    You are currently viewing as a guest! To get full-access, you need to register for a FREE account.

    As a registered member, you’ll be able to:
    • Participate in all Tundra discussion topics
    • Transfer over your build thread from a different forum to this one
    • Communicate privately with other Tundra owners from around the world
    • Post your own photos in our Members Gallery
    • Access all special features of the site

1st gen amp/power accessory firewall wiring options

Discussion in '1st Gen Tundras (2000-2006)' started by shifty`, Jul 17, 2025 at 9:19 AM.

  1. Jul 17, 2025 at 9:19 AM
    #1
    shifty`

    shifty` [OP] Countin' and breathin', disappearin' in the fade

    Joined:
    Jun 20, 2020
    Member:
    #48239
    Messages:
    30,187
    ATL
    Vehicle:
    '06 AC Limited V8/4WD
    (see signature for truck info)
    I'm going to create this reply and a couple of placeholders to possibly add stuff later.

    I'm specifically NOT putting this in the audio section because, while I'm using it for an amp, I know at least one or two other people who'll use it for powering other accessories (fridge/fans/etc.) in the cab. But tossing this out there in case it's interesting for others.

    This is for my 2006 access cab, so the pics may not be identical to your year/cab type. But hey, more info to share, right?

    I'm pretty OCD about wiring with upgrades and add-ons. I do it right, or I just don't do it. I've been procrastinating (or patient?) on wiring up my 900w/5-channel JL amp in the truck which calls for 4awg wiring. The real issue here is the size/gauge JL calls for ... If this was a 10-12awg wire, I'd simply untape the OEM power feed coming through the firewall next to the brake booster, feed it through with the OEM harness, and tape it all back up. With a fatass 4awg, it ain't happening.

    As some may've recognized, the rubber boot/grommet for that OEM harness and hood release cable doesn't leave much space to properly circle-punch the rubber grommet so you can feed wires through, at least not for later-year AC and probably RC trucks. I always circle-punch rubber grommets because it's really shitty to cut a slit or X into the rubber and shove wires through, unless you don't care about leaks etc. That grommet can't be replaced later without slitting it in half, so any cutting decision you make needs to factor in water/dirt/etc. intrusion.

    In my case, the red circle here is roughly what my 4awg wire would consume, but when I popped the grommet out of the firewall to inspect how hard it would be to circle-punch a new 3/8" hole tight enough for the wire to snug through, putting it in that spot on the OEM grommet would've had the wire sheath rubbing against the metal hole in the firewall, which would probably cause problems down the road.

    upload_2025-7-17_11-30-40.png

    I've seen some OEM factory grommets posted, like this one for a 2006 DC which have a nice, neat little provision to pass a cable through, but my AC doesn't have one - I wish! The original poster of this picture on TS said that's a 4awg passing thru it, it looks awful skinny to me, but even having the option to add wires into the OEM grommet would be fantastic. Sadly, Toyota doesn't sell this grommet separately, and even if they did, I'd have to unhook so much stuff to get the wire/release bundles through without cutting the grommet, which you never want to do.

    upload_2025-7-17_11-34-10.png

    Since it wasn't really an option for me, and Toyota (apparently, on many models) doesn't bother to give any blanks on the firewall to add aftermarket options, I started digging on how to tackle it. I know whatever I do should protect my cable from touching metal, should pass into the vehicle without major hassles or intereference to other stuff, cannot let my sheathing touch bare metal, and needs to be sealed so no water can pass into the cab and cause a short/rust/damage. In light of that, I know I'll be using a firewall bushing, like this PG12 from Stinger:

    upload_2025-7-17_11-43-49.png

    Or this EFX WPG4 unit from Scosche which is what I'll probably end up using:

    upload_2025-7-17_11-46-24.png


    These grommets are ideal because it effectively allows you:
    • Provides a plastic tube to feed your wire thru the firewall without touching metal
    • When you screw down the top dome, the fingers clamp into the rubber sleeve holding your wire tight and preventing water intrusion
    • It sits fixed-in-place and can't accidentally pull/push thru like a standard grommet
    • If functions and seals tightly with a wide array of metal thicknesses, unlike standard grommets
    • Looks super clean and will provide a lifetime of trouble-free operation (as long as you don't buy cheap no-name crap that will go brittle with time)
    The only issue with using weatherproof grommets is, you've no choice but to drill the firewall. Which is probably super daunting for some, but I guarantee you, if you take your vehicle to any pro shop, that's exactly what the overwhelming majority of reputable shops will do if there's no clean/clear OEM pass-thru to use. Given I was in this boat, the looming question was, "Oh furck. Where do I drill?!"

    It needed to be somewhere near the OEM bundle, and away from heat.
    It needed to be basic sheetmetal with no interference on the back side.
    It needed to be a spot where I didn't need to rip out firewall padding/insulation.
    It needed to look clean be logical, and have a pinch-free wiring path on the other side.

    Looking at the firewall there's a lot of open space around the grommet, but you can't get too close to anywhere with seam sealer (what looks like weld beads or caulking), where panels come together, because you don't want to crack that stuff, or you'll end up with other leaks/rusting. Spacing off a half inch or so from any panel/opening, and not going so high we'd be in the cowl puts us pretty much in this range, although I'm worried anything above the blue line may be overly close to getting into the cowl:

    upload_2025-7-17_11-59-12.png

    But ... what's on the other side. Wouldn't it suck to blindly drill a hole into the firewall only to find the e-brake pedal on the other side, and any time I set the e-brake, I'd crunch my amp's power wire? :rofl:

    I went to the inside to look, using the OEM grommet and cable bundle as a reference. Looking at that, on my 2006 at least, they used a really substantial rubber-backed mat. I'm circling the cable pass-thru here in blue, and echoing my exterior pattern against the mat.

    upload_2025-7-17_12-3-47.png

    I spied something interesting in the firewall mat. What's that little finger-like protrusion in the middle of the mat, that looks pre-punched from the factory? I was able to cut a couple of 3mm tabs holding that piece in place, and ... lo and behold, we have a factory-cut access to the firewall for some kind of accessory?

    upload_2025-7-17_12-5-27.png
    This is promising! Toyota would've never bothered to put a cut in that exact spot in the mat, if there wasn't a possibility for something to come through right there....

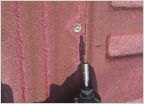
    So I took a spring-loaded center punch, and popped (from the inside) right in the middle of that radius where this red dot is, because that's a totally perfect spot to enter the truck for a wild array of reasons.

    upload_2025-7-17_12-10-43.png


    I'm really hoping my punch reveals a good spot on the other side. And ... hot damn, there we are:

    upload_2025-7-17_12-12-46.png
    To put that spot into better perspective, I think this is a great location to pass-thru from the firewall also. It's good proximity to the OEM pass-thru. It's a flat location that's not too high up. Good entry point into the cab. And it'll fall right into that spot in the OEM firewall mat, such that I'll be able to holepunch a 1/4" hole into the mat for a clean, low-noise passthru that apears professional on both sides.

    upload_2025-7-17_12-16-44.png

    That's as far as I got today. It's hot as an elephant's asscrack outside, and I was in the shaded garage while doing this stuff. Mindboggling. I probably won't get to work on this for a few more days, so more to come later ....
     
    Last edited: Jul 17, 2025 at 1:19 PM
    des2mtn, Sirfive, w666 and 2 others like this.
  2. Jul 17, 2025 at 9:19 AM
    #2
    shifty`

    shifty` [OP] Countin' and breathin', disappearin' in the fade

    Joined:
    Jun 20, 2020
    Member:
    #48239
    Messages:
    30,187
    ATL
    Vehicle:
    '06 AC Limited V8/4WD
    (see signature for truck info)
    [PLACEHOLDER1]
     
  3. Jul 17, 2025 at 9:19 AM
    #3
    shifty`

    shifty` [OP] Countin' and breathin', disappearin' in the fade

    Joined:
    Jun 20, 2020
    Member:
    #48239
    Messages:
    30,187
    ATL
    Vehicle:
    '06 AC Limited V8/4WD
    (see signature for truck info)
    [PLACEHOLDER2]
     
  4. Jul 17, 2025 at 11:50 PM
    #4
    Nicklovin

    Nicklovin Yap Yap

    Joined:
    Sep 29, 2019
    Member:
    #36748
    Messages:
    504
    Gender:
    Male
    First Name:
    Nick
    Huntington Beach, CA
    Vehicle:
    00’ 4.7 AC 4x4 - GFC
    Looks pretty sweet, bet you'll make it so clean that no one would know it isn't factory
     
    shifty`[OP] likes this.
  5. Jul 18, 2025 at 10:32 AM
    #5
    Kimosabe

    Kimosabe Slacker

    Joined:
    Jul 28, 2020
    Member:
    #50004
    Messages:
    1,269
    Gender:
    Male
    First Name:
    Chris
    Sun Valley, Idaho
    Vehicle:
    06 Tundra DC TRD 4WD
    W.I.P - FOX 2.5 with DSC, SCS F5 wheels with MT Baja ATZ 285s
    That's some good info there. I'm sure those pass through bushings are great, but you could always add a little silicone around it on the engine side. I added some around my hole in the grommet just as a precaution
     
    shifty`[OP] likes this.
  6. Jul 18, 2025 at 10:59 AM
    #6
    The Black Mamba

    The Black Mamba A pure specimen of TX Black Snek

    Joined:
    Sep 6, 2023
    Member:
    #103472
    Messages:
    4,862
    First Name:
    Snek
    DFW
    Vehicle:
    Black 00 SR5 AC 5VZ PreRunner
    Imma keep it stock
    I run all of mine through the drain grommet on the drivers side above the frame rail at the transmission crossmember.

    upload_2025-7-18_12-59-3.jpg
     
  7. Jul 18, 2025 at 11:50 AM
    #7
    shifty`

    shifty` [OP] Countin' and breathin', disappearin' in the fade

    Joined:
    Jun 20, 2020
    Member:
    #48239
    Messages:
    30,187
    ATL
    Vehicle:
    '06 AC Limited V8/4WD
    (see signature for truck info)
    I was taught to make your cable runs exposed to the elements for the least amount of time possible, and always loom or sleeve anything while it's on the exterior. Totally not mandatory, you can do anything you want as long as you're fusing anything with power within 12-18" of the battery. There's a lot of stuff that can happen to a cable once you depart the engine bay, pinching, exterior elements, road debris, etc.
     
  8. Jul 18, 2025 at 12:32 PM
    #8
    The Black Mamba

    The Black Mamba A pure specimen of TX Black Snek

    Joined:
    Sep 6, 2023
    Member:
    #103472
    Messages:
    4,862
    First Name:
    Snek
    DFW
    Vehicle:
    Black 00 SR5 AC 5VZ PreRunner
    Imma keep it stock
    Good points. I'll use this as an example of what not to do.
     
  9. Jul 18, 2025 at 2:17 PM
    #9
    shifty`

    shifty` [OP] Countin' and breathin', disappearin' in the fade

    Joined:
    Jun 20, 2020
    Member:
    #48239
    Messages:
    30,187
    ATL
    Vehicle:
    '06 AC Limited V8/4WD
    (see signature for truck info)
    I mean, ultimately you do you, it's not "wrong", but there's room for improvement. I was going to link this video above, and maybe still will in one of the placeholders, with some other tips. Mark @ CAF basically shows everything in the way I was taught how to do everything. This goes for bed/cap wiring and in-cab wiring. It's worth a watch just to see how it's typically done in the industry.

     
    Last edited: Jul 18, 2025 at 2:29 PM
  10. Jul 18, 2025 at 2:23 PM
    #10
    Sirfive

    Sirfive Socially feral

    Joined:
    Jan 24, 2021
    Member:
    #58078
    Messages:
    5,435
    Gender:
    Male
    SATX
    Vehicle:
    ‘02 Limited AC TRD
    Bassani cat-back
    IMG_1346.jpg IMG_1345.jpg
    my aux lights come through here. That red wire runs to the bed for my 12v phone charger. But i do appreciate this thread i am eventually going to have to run a fair sized cable into my cab.
     
  11. Jul 18, 2025 at 2:29 PM
    #11
    des2mtn

    des2mtn Down to seeds and stems again, too

    Joined:
    Jul 1, 2020
    Member:
    #48721
    Messages:
    4,613
    SW
    Vehicle:
    2004 Black DC Limited 4x4
    Tonto cover


    I think I need to do this and just get rid of everything that I have going into the grommet currently.​
     
    shifty`[QUOTED][OP] likes this.

Products Discussed in

To Top