1. Welcome to Tundras.com!

    You are currently viewing as a guest! To get full-access, you need to register for a FREE account.

    As a registered member, you’ll be able to:
    • Participate in all Tundra discussion topics
    • Transfer over your build thread from a different forum to this one
    • Communicate privately with other Tundra owners from around the world
    • Post your own photos in our Members Gallery
    • Access all special features of the site

theTupper's Not-A-Build Thread

Discussion in '3rd Gen Builds (2022+)' started by theTupper, Mar 10, 2024.

  1. Mar 10, 2024 at 5:17 PM
    #1
    theTupper

    theTupper [OP] New Member

    Joined:
    Jan 19, 2014
    Member:
    #122
    Messages:
    72
    Gender:
    Male
    First Name:
    Jake
    Vehicle:
    2024 Limited Crewmax HV, Lunar Rock
    This thread will serve to document the current state and history of the Tundra, such that there will be. I don't have major plans for this truck; it serves my suburbanite purposes just fine. "Mods" will be mostly cosmetic as I decide they're wanted, but the truck will not see any serious offroad use, so mods will be mild. Those looking for off-the-rails, over-the-top overlanding builds should look elsewhere.

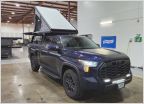
    Most Current Picture (as she sits)
    [​IMG]
    Stats
    • 2024 Limited Crewmax Hybrid
    • Nightshade Package
    • Lunar Rock
    Completed Mods
    On Order/Waiting for Install
    Planned Mods

    • Tint
    When I Win the Lottery
    • AlphaRex Nova Headlights in Alpha Black

     
    Last edited: Dec 19, 2024
    maldo012 and Taikowaza like this.
  2. Mar 10, 2024 at 5:17 PM
    #2
    theTupper

    theTupper [OP] New Member

    Joined:
    Jan 19, 2014
    Member:
    #122
    Messages:
    72
    Gender:
    Male
    First Name:
    Jake
    Vehicle:
    2024 Limited Crewmax HV, Lunar Rock
    As an anti-chrome person, and having a truck with the nightshade package, the first thing that had to go were the ugly chrome OEM wheel caps. There was no way I was paying $40 per wheel cap for the heritage caps I liked (and I didn't like their Bronze coloring either), and I didn't want the same caps that everyone else put on the truck, so I decided to do something custom.

    So I started by buying the same center caps everyone else buys :rofl:. I bought mine used from a local on FB marketplace for basically nothing.

    Image and explanation of customization follows.

    [​IMG]

    Step 1
    I discovered the red letters were not removable easily, so I measured and cut some replacement inserts and spacers out of high density polystyrene on my laser. If I can't remove the letters, I'll just cover them up.

    Step 2
    Glue the spacers onto the existing caps and then the new inserts on top of the spacers.

    Step 3
    Acquire some color-matched Lunar Rock vinyl (it's not really color matched, but it's close enough to not be able to tell). Use the vinyl cutter to cut your desired pattern in said vinyl. Pattern in the image includes the final outer ring AND a concentric ring for placement of the lettering.

    Step 4
    Adhere vinyl to doctored center caps. The outer ring was fidgety, but worked well. I considered making the lettering 3 dimensional with more HDPS, but opted for Vinyl as it will be relatively easy to change the design/wording/image/color on the wheel caps if I ever desire to do so.

    Step 5
    Put them on the truck.
    -------------------------

    This project took an afternoon once all materials were acquired, including the generation of the cut files for the laser and vinyl cutter. I'm happy with the color match and like the look of these caps WAY more than the stock chrome ones.
     
    Last edited: Mar 10, 2024
    Taikowaza and Bob like this.
  3. Mar 10, 2024 at 5:17 PM
    #3
    theTupper

    theTupper [OP] New Member

    Joined:
    Jan 19, 2014
    Member:
    #122
    Messages:
    72
    Gender:
    Male
    First Name:
    Jake
    Vehicle:
    2024 Limited Crewmax HV, Lunar Rock
    The next step in total chrome removal was the ugly iForce Max hood vents. I actually quote like the LOOK of the vents themselves, but didn't care for the chrome, and the blue accents didn't match the LR paint. They had to go. But what to do about them? I didn't want vents that said "TRD Pro." I don't have a TRD Pro and I don't like the whole digital camo look anyway. After peeping some people's projects in customizing the TRD vents by removing some letters, I thought, "This could work...but I have a crazy idea."

    Images and explanation follow:
    [​IMG]

    1. Bought some TRD Pro hood vents. Acquired from an online dealer on sale. The piece with the letters is held in by some plastic friction clips, so I removed them to make them easer to work with. I used a utility knife to cut off the melted plastic rivet points on the back of the letters and removed them.

    2. I wanted to get rid of the digital camo. I contemplated a couple pathways forward (including using glazing putty and sanding), but opted to leverage the technology I have at hand instead of trying to sand satisfactorily. I needed a template, but the desired piece was curved. So I used some painter's tape as an inlay, and trimmed it to fit.

    3. I then removed the painter's tape and laid it flat. I then scanned the template into the computer, used calipers to get the exact size, and coverted it to a laser cut file.

    4. I then used my laser to cut new panels out of some 1/16th inch high densitiiy polystyrene.

    5. These pieces were then glued in over the digital camo section of the hood vent inserts. The assembly was drilled for 5mm amber LEDs, and then sanded with 80 grit sandpaper in preparation for spraying. The assemblies were then sprayed with truck bed liner to texture them and give them a finish similar to the other plastic trim on the truck.

    6. Now the fun part. I used 6 5mm amber flat-top LEDs with appropriate resistors for a 12v implementation (3 on each side) and fabricated a simple circuit and wiring harness to run the lights. The harness has weatherproof quick connects which will allow for easy installation and removal if necessary. The entire harness is wrapped in wireloom for protection and a pseuodo-OEM look.

    7. I scanned the Tundra badges which I removed from my truck and converted them to vinyl cut files. The wording was cut from color matched Lunar Rock vinyl (not exact match, but super close).

    8. Vinyl adhered to vent insert and insert placed back in the larger vent piece. You can see the rubberbanded wiring harness in this image.

    9. Installation. Vents installed as normal EXCEPT, I left off one push clip from each vent, instead feeding the wiring for the LEDs through the clip hole in the hood. The wire comes through the hood, is routed along the hood hinges and joins in a Y near the passenger fuse box. The setup is powered by an empty ignition powered fuse slot in the fuse box with a 5amp fuse (the whole assembly only uses less than an amp of power. If I can find smaller fuses, I'll use them.

    10. Lights come on with ignition.
    -------------------

    This project was relatively easy, but did take some fiddling around. I like the way they turned out and they're the first lighted set I've seen.
     
    Last edited: Mar 10, 2024
  4. Mar 11, 2024 at 5:54 AM
    #4
    Taikowaza

    Taikowaza New Member

    Joined:
    Oct 20, 2021
    Member:
    #69581
    Messages:
    577
    Absolutely fantastic work @theTupper ! You have taken the designs on this part to the next level and beyond. Not only with your custom fabrication but the lighting is spectacular!

    I don’t have holes in my hood and won’t be doing lighting (I have the lit TRD Pro wheel well wired instead), but am super interested in the rest.

    Are you willing to possibly sell 2 polystyrene inserts cut to size with cut vinyl letters on them? I would be so willing to pay you for your time and materials for this. Can you potentially do TRD Offroad letters, with the Offroad in Red?
     
  5. Mar 11, 2024 at 9:17 AM
    #5
    theTupper

    theTupper [OP] New Member

    Joined:
    Jan 19, 2014
    Member:
    #122
    Messages:
    72
    Gender:
    Male
    First Name:
    Jake
    Vehicle:
    2024 Limited Crewmax HV, Lunar Rock
    Thanks for the kind words!

    I'm not sure I should be discussing selling of items out here in the open as I'm not a forum sponsor, but if you drop me a PM, we can chat about possibilities.

    -Jake
     
    Taikowaza[QUOTED] likes this.
  6. Mar 11, 2024 at 4:08 PM
    #6
    Ipaddick

    Ipaddick New Member

    Joined:
    Apr 16, 2023
    Member:
    #95577
    Messages:
    630
    Gender:
    Male
    Canada
    Vehicle:
    Platinum hybrid w/advanced package
    I’d be interested. I would want something more simple though. Eiter keep the camo or not, but just say tundra.
     
  7. Mar 11, 2024 at 4:35 PM
    #7
    theTupper

    theTupper [OP] New Member

    Joined:
    Jan 19, 2014
    Member:
    #122
    Messages:
    72
    Gender:
    Male
    First Name:
    Jake
    Vehicle:
    2024 Limited Crewmax HV, Lunar Rock
    Drop me a PM if you like. :)
     
    Taikowaza likes this.
  8. Mar 20, 2024 at 4:14 PM
    #8
    theTupper

    theTupper [OP] New Member

    Joined:
    Jan 19, 2014
    Member:
    #122
    Messages:
    72
    Gender:
    Male
    First Name:
    Jake
    Vehicle:
    2024 Limited Crewmax HV, Lunar Rock
    Wheels/tires ordered. Too much wheel and not enough sidewall w/ 20s for me so went with 18s and reasonably sized ATs (275/70/18). May have to resize my wheel caps. lol

    Heritage grill ordered. Amber fogs and bumper light ordered from Diode Dynamics. Will upgrade the cheap grill light to something better later on. Things are trickling in; just need to find the time to install.
     
    BabyMoose likes this.
  9. Mar 27, 2024 at 1:02 PM
    #9
    theTupper

    theTupper [OP] New Member

    Joined:
    Jan 19, 2014
    Member:
    #122
    Messages:
    72
    Gender:
    Male
    First Name:
    Jake
    Vehicle:
    2024 Limited Crewmax HV, Lunar Rock
    Wheels/tires are on, as well as redesigned center caps (again), because—did the ones I JUST bought work on the new wheels? Of course not. Why would they. lol
     
  10. Apr 7, 2024 at 7:57 PM
    #10
    theTupper

    theTupper [OP] New Member

    Joined:
    Jan 19, 2014
    Member:
    #122
    Messages:
    72
    Gender:
    Male
    First Name:
    Jake
    Vehicle:
    2024 Limited Crewmax HV, Lunar Rock
    Got the grill switched over, foglights updated to Diode Dynamics SS6s (what a difference!), and the SS18 stealth kit installed along with an Auxbeam switch panel. Nothing complicated, but fiddly.

    Need to get updated pictures soon!
     
    Ipaddick likes this.
  11. Jul 30, 2024 at 6:49 PM
    #11
    theTupper

    theTupper [OP] New Member

    Joined:
    Jan 19, 2014
    Member:
    #122
    Messages:
    72
    Gender:
    Male
    First Name:
    Jake
    Vehicle:
    2024 Limited Crewmax HV, Lunar Rock
    OE Panels Switch Panel Replacement installed. Nervewracking to trim the plastic behind, but still able to revert to OEM if needed.
    [​IMG]
     
    Last edited: Dec 15, 2024
    MAC25Tundra likes this.
  12. Sep 10, 2024 at 2:46 PM
    #12
    theTupper

    theTupper [OP] New Member

    Joined:
    Jan 19, 2014
    Member:
    #122
    Messages:
    72
    Gender:
    Male
    First Name:
    Jake
    Vehicle:
    2024 Limited Crewmax HV, Lunar Rock
    Wrapping the grab handles in paracord is something I've done on nearly all of my vehicles. I think the idea of "having it if you need it" is valid, but mainly I like the way it looks and feels under then hand when hoisting yourself in/out of the door.
    [​IMG]
     
    Last edited: Dec 15, 2024
  13. Dec 15, 2024 at 1:28 PM
    #13
    theTupper

    theTupper [OP] New Member

    Joined:
    Jan 19, 2014
    Member:
    #122
    Messages:
    72
    Gender:
    Male
    First Name:
    Jake
    Vehicle:
    2024 Limited Crewmax HV, Lunar Rock
    If FedEx every gets their act together, my roofrack will arrive. It's been "out for delivery" for 3 days in a row.
     
  14. Dec 18, 2024 at 7:41 AM
    #14
    theTupper

    theTupper [OP] New Member

    Joined:
    Jan 19, 2014
    Member:
    #122
    Messages:
    72
    Gender:
    Male
    First Name:
    Jake
    Vehicle:
    2024 Limited Crewmax HV, Lunar Rock
    Got the GoRhino Ceros low-profile roof-rack installed yesterday. Overall, I'd rate the product a 7/10. The deductions aren't necessarily for the product itself, but due to packaging and parts errors. (more on that in a bit)

    Package took forever to get delivered. FedEx wasn't happy effing with the box. It wasn't MASSIVE, but apparently large enough that they were persnickety about it. Once it finally arrived, the box wasn't even taped shut. Like...not that it was accidentally opened in transit, but it was never secured in the first place? No traces of tape or zip ties or bands or anything; it arrived on my doorstep open. (minus 1 point)

    Fortunately, nothing seemed to be missing and I began assembly. Pretty straight-forward. The parts are of good quality but there is a lot of bolting going on. When I got to the point where I was supposed to install the...I'll call it "back brace (the part that runs longitudinally from front to back, in the middle of the rack, tying all the cross bars together), we ran into issues. I'm 98% positive they sent the wrong part. The box was marked as "Tundra" but this part was too small. It was impossible to install per their directions. Ultimately, I left it off as I don't plan on running any crazy heavy loads up top. If it becomes an issue, I'll track down the correct part in the future. (minus 1 point)

    The front wind-break/valance also could not be installed with the bolts they provided. I was able to switch two longer bolts from elsewhere in product and make it work, but the directions were incorrect for my installation. (minus 1 point).

    When it came time to mount on the truck, I had purchased some rubber gasket material to use as a barrier between the clamps and the bodywork as I wasn't thrilled with the "metal on paint" contact of the clamp-on system the rack uses. I was pleasantly surprised to find that the clamping hardware came precoated in rubber so I didn't need the extra I had purchased.

    My wife and I were able to wrestle the luggage rack on in the dark after work and it looks good! You do need double jointed-wrists to get the final bolts in place and a ratcheting box-end wrench will be your life saver.

    Ultimately, I'm pleased with the outcome, parts issues aside. The finish is good quality and seems to be durable; time will tell. I haven't tested it with the moonroof yet, but it MAY work...it will be close. I don't open the moon-roof usually so I'm not heartbroken if I'm no longer able to do so.

    I purchased this rack on sale from a third party vendor (not directly from GoRhino) for around $600 total. This is one of the reasons I didn't pursue an immediate replacement part for the back-brace mentioned above. If I need to buy one from GoRhino in the future, I will. This rack is obviously produced generically with only a few parts swapped out for different applications (front valance, clamps, back-brace). I think they need to look a bit more carefully at how the truck-specific kits work.

    Posting on break at work and installed in the dark last night, so no pictures yet. Will post some when I can.
     
    Last edited: Dec 18, 2024
    BabyMoose likes this.
  15. Dec 19, 2024 at 6:37 PM
    #15
    theTupper

    theTupper [OP] New Member

    Joined:
    Jan 19, 2014
    Member:
    #122
    Messages:
    72
    Gender:
    Male
    First Name:
    Jake
    Vehicle:
    2024 Limited Crewmax HV, Lunar Rock
    Current picture finally updated. Never mind the dirt and the Christmas lights. :)
     
To Top