1. Welcome to Tundras.com!

    You are currently viewing as a guest! To get full-access, you need to register for a FREE account.

    As a registered member, you’ll be able to:
    • Participate in all Tundra discussion topics
    • Transfer over your build thread from a different forum to this one
    • Communicate privately with other Tundra owners from around the world
    • Post your own photos in our Members Gallery
    • Access all special features of the site

Replace a 2006 SR5 steering wheel with a radio control steering wheel

Discussion in '1st Gen Tundras (2000-2006)' started by junderling, Dec 1, 2020.

  1. Dec 1, 2020 at 10:02 AM
    #1
    junderling

    junderling [OP] New Member

    Joined:
    Dec 1, 2020
    Member:
    #55554
    Messages:
    1
    Gender:
    Male
    First Name:
    tom
    Hi, new here. I own a 2006 SR5. Has anyone swapped out the steering wheel with a Limited steering wheel where you can control the head unit and cruise? Can it be done successfully? Thanks.
     
  2. Dec 1, 2020 at 6:08 PM
    #2
    Lil Steve

    Lil Steve Living the dream

    Joined:
    Apr 15, 2020
    Member:
    #45041
    Messages:
    724
    Gender:
    Male
    First Name:
    Steve
    Gilbert, AZ
    Vehicle:
    2002 Tundra SR5 Access Cab 2WD V8

    Hi and welcome! I can't quite remember who but I know I have read one or two instances of steering wheel swaps retaining those controls. Hopefully someone with more specific info will chime in soon.
     
  3. Dec 1, 2020 at 6:16 PM
    #3
    Hooptytrix

    Hooptytrix Squeaky Chicken

    Joined:
    Nov 12, 2016
    Member:
    #5179
    Messages:
    1,700
    Gender:
    Male
    Dirty South
    Vehicle:
    2000 AC 4x4, 2001 AC 4x4 Sold. 2005 DC SR5 2WD
    Welcome
    I haven't done this mod but I do know that most of the wiring for this is buried in the column so it is possible. Chances are that the OEM radio will not have those cables connected through. Keep us posted on your findings
     
  4. Dec 1, 2020 at 7:02 PM
    #4
    MrDirtjumper

    MrDirtjumper Ol’ dickhead

    Joined:
    Jun 19, 2019
    Member:
    #32133
    Messages:
    1,055
    Gender:
    Male
    First Name:
    Josh
    Slam Angelo, Texas
    Vehicle:
    06 DC TRD, 2wd to 4wd Conv.
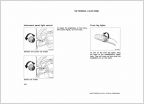
    I keep saying I’ll get around to doing a write up on this but I never have. I can tell you that the controls will plug directly into the clock spring and then you need to run 3 wires from the back of the clock spring over to the head unit. One is a ground, and the other 2 are resistance wires. If you can, depin some old harness and slide them onto the pins pictured below.
    Then do some careful trimming with a razor blade and you can make the old airbag cover fit around them.

    I know this is super vague but maybe this will help a little. I did this to my truck back when I was doing car audio and had access to pinout diagrams. The colors of the wires below are arbitrary because I pulled them from some old harness. So don’t go looking for those colors anywhere. I also don’t know which wires did which functions because that picture was taken in like 2011.

    I need to do some work this weekend and might pull some of the column apart. If so, I’ll try to get pictures of what pins on the clock spring I plugged those corresponding colors into.

     
    Last edited: Dec 1, 2020
    Weagle, Lil Steve and Hooptytrix like this.
  5. Dec 1, 2020 at 7:07 PM
    #5
    Tundra2

    Tundra2 Zoinked

    Joined:
    Feb 10, 2019
    Member:
    #25875
    Messages:
    12,432
    Gender:
    Male
    First Name:
    Noah
    Western Kentucky
    Vehicle:
    '00 Tundra V8 SR5 '03 Corolla Virus
    Hooptytrix and jpink like this.
  6. Dec 1, 2020 at 7:18 PM
    #6
    jpink

    jpink Aspiring Shade Tree Mechanic

    Joined:
    Sep 25, 2020
    Member:
    #52763
    Messages:
    370
    Gender:
    Male
    First Name:
    John
    Knoxville
    Vehicle:
    05 Black Tundra DC SR5
  7. Dec 1, 2020 at 7:21 PM
    #7
    artsr2002

    artsr2002 2005 Tundra DC SR5

    Joined:
    Sep 2, 2019
    Member:
    #35520
    Messages:
    2,108
    'Yonder
    Vehicle:
    Red-Maroon-Something 05 DC 4.7 4x2
    My steering wheel controls are portable. Lol.

    88e7f5145359b7cc2e2882c949ffd3d2.jpeg.jpg
     
    Lil Steve and Hooptytrix like this.
  8. Jan 27, 2024 at 12:13 PM
    #8
    Paulh

    Paulh New Member

    Joined:
    Dec 2, 2023
    Member:
    #107854
    Messages:
    4
    So, it's not a 60 minute swap. Dang. Was hoping it was easy!! Thanks for the information!
     
  9. Jan 27, 2024 at 12:17 PM
    #9
    shifty`

    shifty` In South Dakota Trouble ain't hard to find

    Joined:
    Jun 20, 2020
    Member:
    #48239
    Messages:
    28,718
    ATL
    Vehicle:
    '06 AC Limited V8/4WD
    (see signature for truck info)
    Weagle likes this.
  10. Jan 28, 2024 at 4:08 PM
    #10
    Weagle

    Weagle I survived my timing belt change

    Joined:
    Sep 24, 2023
    Member:
    #104402
    Messages:
    1,072
    Gender:
    Male
    Prattville, AL
    Vehicle:
    2006 Tundra SR5 DC 4.7 2WD LSD towing pkg
    Bilstein 5100's with 2883's - close to 2" Replacing the 2883's and going back to the bottom perch ASAP -mobile/apple play stereo with sub and backup cam -Power stop HD front calipers and rotors for towing -20" wheels with 32" tires (305/50's) Toyo AT 3's with no rubbing -Westin nerf bars -Detroit axle new (not rebuilt) steering rack with poly bushings, inner and outer TRE's -Suspension Maxx extended front sway bar links -Overland tuning - medium level -Power front leather seats and steering wheel from 06 Sequoia -fully de-chromed/blacked out trim -all light housings incl 3rd brake light and tag lights replaced with smoked lenses, LED where appropriate -mini projector headlights -fully rebuilt trans and new torque converter -new complete drive shaft with spicer u-joints and carrier bearing -all LED interior lights including backlighting -new lower window seals for all 4 doors -all new hardware and clips for tailgate Next: Dirty Deeds racing exhaust with LT headers, yellow box, 12 hole DD fuel injectors, redo or replace door panels
    shifty`[QUOTED] likes this.
  11. Jan 28, 2024 at 9:13 PM
    #11
    artsr2002

    artsr2002 2005 Tundra DC SR5

    Joined:
    Sep 2, 2019
    Member:
    #35520
    Messages:
    2,108
    'Yonder
    Vehicle:
    Red-Maroon-Something 05 DC 4.7 4x2
    I still have the OEM controls that Assassin sent me as I ended up with the Chinesium controls on my final install if anyone needs them. I'll post a pic of what I have if anyone needs them. We'll keep passing them down so someone can make use of them.
     
    Weagle and assassin10000 like this.
  12. Feb 12, 2024 at 12:32 PM
    #12
    Weagle

    Weagle I survived my timing belt change

    Joined:
    Sep 24, 2023
    Member:
    #104402
    Messages:
    1,072
    Gender:
    Male
    Prattville, AL
    Vehicle:
    2006 Tundra SR5 DC 4.7 2WD LSD towing pkg
    Bilstein 5100's with 2883's - close to 2" Replacing the 2883's and going back to the bottom perch ASAP -mobile/apple play stereo with sub and backup cam -Power stop HD front calipers and rotors for towing -20" wheels with 32" tires (305/50's) Toyo AT 3's with no rubbing -Westin nerf bars -Detroit axle new (not rebuilt) steering rack with poly bushings, inner and outer TRE's -Suspension Maxx extended front sway bar links -Overland tuning - medium level -Power front leather seats and steering wheel from 06 Sequoia -fully de-chromed/blacked out trim -all light housings incl 3rd brake light and tag lights replaced with smoked lenses, LED where appropriate -mini projector headlights -fully rebuilt trans and new torque converter -new complete drive shaft with spicer u-joints and carrier bearing -all LED interior lights including backlighting -new lower window seals for all 4 doors -all new hardware and clips for tailgate Next: Dirty Deeds racing exhaust with LT headers, yellow box, 12 hole DD fuel injectors, redo or replace door panels
    thanks @shifty, got my old worn out and torn steering wheel replaced with the leather steering wheel from a sequoia today. Took less than an hour counting the time to discharge after disconnecting the battery

    Unfortunately, I've got to go back in because apparently I did not align it correctly and now the steering wheel is turned quite left to keep it straight. I am sure it wasn't like this before. I went through great lengths to ensure I had it aligned properly, or so I thought

    I didn't bother with the radio controls since I would either have to have a different horn/airbag assembly or cut the existing one. I'll worry about that another day. I couldn't tell if it was prewired since both old and new wheel's connectors plugged into the same size wiring connector from the steering column

    This was quite easy. And like you I was easily able to remove the steering wheel without the removal tool. Not sure why I dreaded this little project so much. Thanks for the help

    also ordered one of those Toyota emblem overlays off of eBay. I saw where they weren't being made anymore so I hope this is legitimate and works. only $19.

    Old:

    IMG_3533.jpg

    New leather from Sequoia:

    IMG_5258.jpg IMG_5257.jpg
     
    This site contains affiliate links for which the site may be compensated.
    #12
    shifty`[QUOTED] likes this.
  13. Feb 12, 2024 at 12:51 PM
    #13
    shifty`

    shifty` In South Dakota Trouble ain't hard to find

    Joined:
    Jun 20, 2020
    Member:
    #48239
    Messages:
    28,718
    ATL
    Vehicle:
    '06 AC Limited V8/4WD
    (see signature for truck info)
    Yeah, it doesn't show well, but ... if you look at this pic, you may notice a faint yellow mark at 12 and 6 o'clock on the wheel itself, it's washed out on the center post of the column though. A couple of things I always do when I know I need to remove steering wheel:
    • Start car, straighten up the wheels, jiggle the wheel back/forth to center it, then turn off car.
    • Neg battery cable pull, wait 5-10 mins.
    • Remove airbag, mark steering wheel and its fastener bolt at 12 and 6 o'clock so the position of the wheel is known, both on the wheel and the bolt, at least within a tooth or so.
    I pretty much do the latter of those three on anything I'm removing & need to keep track of where it's positioned, like for steering wheels and rag joints, or where it's tightened to, like for tie rod ends, or to monitor for back-out, like on lower ball joint bolts. Take a paint marker and mark a position on the fastener and part. Doing this, it's hard to screw up re-assembly.

    If I were you, and you're positive you reinstalled the wheel 'off', I'd straighten up the front wheels to parallel, remove neg batt cable, remove the airbag, mark 12 o'clock position only on its flanged post/bolt (and only if the wheels are still straight), then line up the wheel as close to the proper position as you can.

    My wheel has always been maybe one tooth off, and I've never gone in to fix it, nor brought it up during an alignment (b/c I have no idea if it's the wheel or alignment or what). But generally speaking it's pretty straight.
     
    This site contains affiliate links for which the site may be compensated.
    #13
    Weagle[QUOTED] likes this.
  14. Feb 12, 2024 at 12:55 PM
    #14
    shifty`

    shifty` In South Dakota Trouble ain't hard to find

    Joined:
    Jun 20, 2020
    Member:
    #48239
    Messages:
    28,718
    ATL
    Vehicle:
    '06 AC Limited V8/4WD
    (see signature for truck info)
    Here's a close-up shot. You actually can kinda see both marks at the 12 position, but the one at the 6 position isn't too visible because of the top nut.

    Only need to mark it once on the center shaft and it's good for as long as it lasts!

    upload_2024-2-12_15-54-8.png
     
    Weagle likes this.

Products Discussed in

To Top