1. Welcome to Tundras.com!

    You are currently viewing as a guest! To get full-access, you need to register for a FREE account.

    As a registered member, you’ll be able to:
    • Participate in all Tundra discussion topics
    • Transfer over your build thread from a different forum to this one
    • Communicate privately with other Tundra owners from around the world
    • Post your own photos in our Members Gallery
    • Access all special features of the site

2013 Sequoia Subwoofer/Amp Upgrade

Discussion in 'Sequoia Builds' started by mj7juice, Dec 12, 2022.

  1. Dec 12, 2022 at 4:37 PM
    #1
    mj7juice

    mj7juice [OP] New Member

    Joined:
    Jun 25, 2020
    Member:
    #48450
    Messages:
    26
    GA
    Vehicle:
    2013 Sequoia Platinum
    Hello all, first want to thank all the prior posters to this forum. There’s so much information that has been so helpful to me. We just wanted to post this information due to us not being able to find much content on this subject.

    Our goal was to upgrade the subwoofer and add an amp in our 2013 Sequoia, while keeping a factory look as much as possible. Prior to the final build, I did order a Skar and Kicker subwoofer. After cutting around the subwoofer enclosure (using a hammer drill with drill bit), the scar subwoofer sounded worse than the factory subwoofer. On the other hand the kicker sub actually sounded about equal to the factory JBL sub. Both were 2ohm DVC.

    Decided to take a risk and go for a higher performance subwoofer. Found a pretty sweet deal on eBay for a JL 8W3V3, so went ahead and bought. Shortly after, was scrolling through Amazon and found the Memphis Mojo 8. I know JL has a more reputable brand, but went for the Memphis Mojo in the event I wanted to upgrade the amp in the future. Also because it looks like a poor mans JLW7 (no way I’m paying $700 for a sub).

    Also purchased and 8.5 spacer to give the subwoofer enough clearance. I bought mine off eBay, but they have the same thing on Amazon:
    I also had purchased some MDF spacer rings, but they were too small in the 8 inch size. Couldn’t find anything slightly bigger.

    Decided the best course of measure would be to take all the side paneling off on the side of the subwoofer, so that I could remove the subwoofer enclosure. I needed to do this because I had planned on applying the plastic spacer and reinforcing it with fiberglass.
    We also added a 4 inch 2 x 4, screwed it into the bottom of the subwoofer enclosure. This was planned as a brace to support the big magnet on the back of the Mojo, to offset some of the weight on the spacer ring.

    After sanding down the spacer ring, we started on the fiberglass process. Fiberglass is pretty straightforward, just be sure that you have the right amount of resin and hardener. You need to do this in less than 10 minutes before it really starts to become hardened or too sticky to work with.

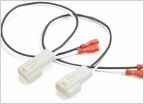
    While letting the fiberglass cure, I put the amp kit with the RCA cables in (for future proof if we upgrade to aftermarket head unit), and bass boost remote. We chose to go with the NVX VADM1 amp. They seem to be a decent quality, but most importantly the size and that it was a class D amp. NVX website says it can run at 500 W RMS at 1ohm, which is the set up we have in place for the mojo dual voice coil 2ohm.


    Remember, we are using the JBL OEM Headunit. We highly recommend the Kicker 2-Channel LOC (this converts your speaker line to RCA outputs). We originally purchased a Scosche 2-Channel LOC that was junk.

    Everything up & running. Realize it could be much cleaner, but we are happy with the results. Bass is very tight, and really pumps just by barely turning the bass boast to maybe 1/10. Really excited about the results and eager to see what it can do once broken in. It’s fantastic. Hope this encourages someone else to take the plunge. Last thing to do will be to modify the factory sub cover. It currently will not fit due to the Mojo surround protruding out. God Bless

    *Side Note*
    We applied sound deadening material to the roof, all 4 doors, and floor the week prior. No rattling. Everything is crisp
     
    Last edited: Dec 13, 2022
    This site contains affiliate links for which the site may be compensated.
    #1
  2. Dec 12, 2022 at 6:57 PM
    #2
    hoof hearted

    hoof hearted New Member

    Joined:
    Dec 23, 2021
    Member:
    #72146
    Messages:
    91
    Gender:
    Male
    Vehicle:
    2018 Sequoia Limited 4WD
    Very cool. How was applying the sound damping to the roof?
     
  3. Dec 13, 2022 at 5:13 AM
    #3
    mj7juice

    mj7juice [OP] New Member

    Joined:
    Jun 25, 2020
    Member:
    #48450
    Messages:
    26
    GA
    Vehicle:
    2013 Sequoia Platinum
    Detaching the hood liner was a lengthy task. It took me about 6 to 8 hours maybe more to do it. Probably could’ve done faster if I had another person, but I did it by myself. Applying the sound deadener easy. I first applied 3mm sound mat, then 5mm closed foam on top.

    We would recommend the Siless mats, relatively cheap, and were of good quality.

    If you are taking off the head liner, we would recommend watching this YouTube video:
    https://m.youtube.com/watch?v=3CNcp0454k4

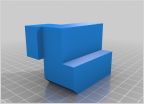
    The video is an overview of a Prius, but many of the points of contact are the same in the Sequoia. Recommend this tool to remove the hooks & handles on the headliner (this is what hold the headliner to the roof):
     
    Bama likes this.
  4. Dec 13, 2022 at 6:03 AM
    #4
    e30cabrio

    e30cabrio I'm e30cabrio, I'm a modaholic

    Joined:
    Oct 20, 2017
    Member:
    #10410
    Messages:
    6,125
    Gender:
    Male
    West Valley, Phoenix, Az.
    Vehicle:
    Boosted 2013 Sequoia TRD FAUX
    Maggy, Dobinsons, TRD PRO conversion, 18+ lights & cluster too much more to list
  5. Dec 13, 2022 at 6:15 AM
    #5
    Danimal86

    Danimal86 Looks clean even when its dirty!

    Joined:
    Aug 29, 2017
    Member:
    #9321
    Messages:
    4,950
    Gender:
    Male
    First Name:
    Daniel
    Sacramento, CA
    Vehicle:
    2017 White Tundra SR5
    Man, with that big area where you put the amp, did you ever think about putting the box down there? Looks like plenty of room to fit something in.

    If you ever pull the speaker out again, you could stuff the box with polyfill (pillow stuffing....they sell it at craft stores and walmart). it fakes some added cuft for the box.
     
  6. Dec 13, 2022 at 7:33 AM
    #6
    Bama

    Bama Member

    Joined:
    Sep 25, 2018
    Member:
    #19820
    Messages:
    161
    Gender:
    Male
    Vehicle:
    2016 MGM Tundra 2015 MGM Sequoia 2014 LX
    Excellent work! I've been wanting to add a sub and deadener for a while, just haven't taken the plunge yet! No factory sub here...
     
  7. Dec 13, 2022 at 1:15 PM
    #7
    mj7juice

    mj7juice [OP] New Member

    Joined:
    Jun 25, 2020
    Member:
    #48450
    Messages:
    26
    GA
    Vehicle:
    2013 Sequoia Platinum
    Oh yea! Strap it in, tape it in, however you get in there man.

    But could definitely place a custom box in that lower area. Crutchfield used to sell a JL custom enclosure, but it’s like trying to find Jimmy Hoffa. Oddly enough they still have custom boxes for 2007-older Sequoia, just not 2008+ Sequoias. I previously measured it and it is plenty of space for 2-3 shallow mount 8’s. To maximize space, you would probably again want to make a custom fiberglass enclosure, which is absolutely possible. Just don’t have the time!
     
  8. Dec 21, 2022 at 7:40 PM
    #8
    e30cabrio

    e30cabrio I'm e30cabrio, I'm a modaholic

    Joined:
    Oct 20, 2017
    Member:
    #10410
    Messages:
    6,125
    Gender:
    Male
    West Valley, Phoenix, Az.
    Vehicle:
    Boosted 2013 Sequoia TRD FAUX
    Maggy, Dobinsons, TRD PRO conversion, 18+ lights & cluster too much more to list
    How much cloth/resin/hardner is needed to do the OEM sub box conversion?

    The more I look at my JL box taking up space the more I want to do this.
     
  9. Dec 22, 2022 at 9:28 AM
    #9
    mj7juice

    mj7juice [OP] New Member

    Joined:
    Jun 25, 2020
    Member:
    #48450
    Messages:
    26
    GA
    Vehicle:
    2013 Sequoia Platinum
    I just purchased one package of fiberglass cloth, and used about a fourth of it. I probably could’ve use more. I just generally went around the circumference of the enclosure three or four times with strips of the fiberglass cloth. You can totally do it man.
     
    e30cabrio likes this.
  10. Dec 22, 2022 at 9:35 AM
    #10
    e30cabrio

    e30cabrio I'm e30cabrio, I'm a modaholic

    Joined:
    Oct 20, 2017
    Member:
    #10410
    Messages:
    6,125
    Gender:
    Male
    West Valley, Phoenix, Az.
    Vehicle:
    Boosted 2013 Sequoia TRD FAUX
    Maggy, Dobinsons, TRD PRO conversion, 18+ lights & cluster too much more to list
  11. Dec 22, 2022 at 9:37 AM
    #11
    mj7juice

    mj7juice [OP] New Member

    Joined:
    Jun 25, 2020
    Member:
    #48450
    Messages:
    26
    GA
    Vehicle:
    2013 Sequoia Platinum
    No worries! This path is much easier than creating your own custom enclosure (which you could do), but is extremely time intensive.


    You will also need Resin & hardener. The Resin I bought from Lowes came with the hardener.
     
  12. Dec 22, 2022 at 9:38 AM
    #12
    e30cabrio

    e30cabrio I'm e30cabrio, I'm a modaholic

    Joined:
    Oct 20, 2017
    Member:
    #10410
    Messages:
    6,125
    Gender:
    Male
    West Valley, Phoenix, Az.
    Vehicle:
    Boosted 2013 Sequoia TRD FAUX
    Maggy, Dobinsons, TRD PRO conversion, 18+ lights & cluster too much more to list
    Thanks!
     
  13. Dec 22, 2022 at 9:39 AM
    #13
    mj7juice

    mj7juice [OP] New Member

    Joined:
    Jun 25, 2020
    Member:
    #48450
    Messages:
    26
    GA
    Vehicle:
    2013 Sequoia Platinum
    Here is the Resin. Home Depot has the same thing, and actually sells a kit I believe around $30-$40. Unfortunately they were sold out when I was trying to do this

     
  14. Dec 22, 2022 at 10:13 AM
    #14
    e30cabrio

    e30cabrio I'm e30cabrio, I'm a modaholic

    Joined:
    Oct 20, 2017
    Member:
    #10410
    Messages:
    6,125
    Gender:
    Male
    West Valley, Phoenix, Az.
    Vehicle:
    Boosted 2013 Sequoia TRD FAUX
    Maggy, Dobinsons, TRD PRO conversion, 18+ lights & cluster too much more to list
    I was already in, now I'm totally in!

    Did you use both spacers? Are the fiberglass supplies right?

    Thanks!

    Memphis sub and spacer rings.jpg fiberglass stuff.jpg
     
  15. Dec 22, 2022 at 10:52 AM
    #15
    mj7juice

    mj7juice [OP] New Member

    Joined:
    Jun 25, 2020
    Member:
    #48450
    Messages:
    26
    GA
    Vehicle:
    2013 Sequoia Platinum
    Looks good! We just used (1) spacer. The only thing I don’t see, and I may have left it out, is sandpaper. You want to sand down the spacer a little so the fiberglass can bond easier. Also to sand down any rough areas after. Also use N95 face mask or respirator when sanding!

    I don’t think you need the bondo spreader unless you plan on doing some body work down the line. A decent paintbrush is all you need to apply the resin to the fiberglass.
     
  16. Dec 22, 2022 at 10:52 AM
    #16
    mj7juice

    mj7juice [OP] New Member

    Joined:
    Jun 25, 2020
    Member:
    #48450
    Messages:
    26
    GA
    Vehicle:
    2013 Sequoia Platinum
    That’s a good deal on the Mojo as well!
     
  17. Dec 22, 2022 at 10:54 AM
    #17
    e30cabrio

    e30cabrio I'm e30cabrio, I'm a modaholic

    Joined:
    Oct 20, 2017
    Member:
    #10410
    Messages:
    6,125
    Gender:
    Male
    West Valley, Phoenix, Az.
    Vehicle:
    Boosted 2013 Sequoia TRD FAUX
    Maggy, Dobinsons, TRD PRO conversion, 18+ lights & cluster too much more to list
    Thanks, I'm ok with the 4 bucks I "wasted" on the spreaders, I got a brush (top item) and I have a few from other projects.

    Edit, I have sandpaper & masks, thanks for the reminder.

    Thanks!
     
    Last edited: Dec 22, 2022
  18. Dec 22, 2022 at 5:05 PM
    #18
    e30cabrio

    e30cabrio I'm e30cabrio, I'm a modaholic

    Joined:
    Oct 20, 2017
    Member:
    #10410
    Messages:
    6,125
    Gender:
    Male
    West Valley, Phoenix, Az.
    Vehicle:
    Boosted 2013 Sequoia TRD FAUX
    Maggy, Dobinsons, TRD PRO conversion, 18+ lights & cluster too much more to list
    I'm using a Pioneer GM-D9601, it's 1200 @ 1 ohm parallel max, do you think the Memphis that can take 1800 but wants 900 rms will be ok?

    Pioneer:
    Screen Shot 2022-12-22 at 6.00.54 PM.jpg

    Memphis:

    Screen Shot 2022-12-22 at 6.00.41 PM.jpg
     
  19. Dec 22, 2022 at 6:04 PM
    #19
    mj7juice

    mj7juice [OP] New Member

    Joined:
    Jun 25, 2020
    Member:
    #48450
    Messages:
    26
    GA
    Vehicle:
    2013 Sequoia Platinum
    Man that is going to pound. I would be hesitant to put that high RMS on it. However, I think it could work. Would guess that your bass boost would need to be turned all the way down. Gain turned all the way down, don’t know if that would make your amp work harder if you have high volt pre-outs.
     
  20. Dec 22, 2022 at 6:27 PM
    #20
    e30cabrio

    e30cabrio I'm e30cabrio, I'm a modaholic

    Joined:
    Oct 20, 2017
    Member:
    #10410
    Messages:
    6,125
    Gender:
    Male
    West Valley, Phoenix, Az.
    Vehicle:
    Boosted 2013 Sequoia TRD FAUX
    Maggy, Dobinsons, TRD PRO conversion, 18+ lights & cluster too much more to list
    It's running through a DMX 1057 with 5v & I can control the output on every level.

    It didn't kill the stock JL and hasn't killed the DD that's in there now (running at 4 ohms)

    Also, I rarely run it at full volume.

    Screen Shot 2022-12-22 at 7.26.22 PM.jpg
     
  21. Dec 23, 2022 at 8:04 AM
    #21
    mj7juice

    mj7juice [OP] New Member

    Joined:
    Jun 25, 2020
    Member:
    #48450
    Messages:
    26
    GA
    Vehicle:
    2013 Sequoia Platinum
    Worth a shot then!
     
    e30cabrio likes this.
  22. Dec 27, 2022 at 7:58 AM
    #22
    e30cabrio

    e30cabrio I'm e30cabrio, I'm a modaholic

    Joined:
    Oct 20, 2017
    Member:
    #10410
    Messages:
    6,125
    Gender:
    Male
    West Valley, Phoenix, Az.
    Vehicle:
    Boosted 2013 Sequoia TRD FAUX
    Maggy, Dobinsons, TRD PRO conversion, 18+ lights & cluster too much more to list
    Most of my parts are supposed to come today so I started the interior panel disassembly. I'm stuck on hidden fasteners towards the front of the rear panel, near the door & also the strip along the threshold of the rear door where the two metal hold downs are. I searched and as usual, 99% of the hits are first gen related,

    Edit, the rings are all that came and I need the full capacity of the seats for the rest of the week so I put everything but the under floor storage bin back & will start over "next year"

    sub ring.jpg

    Rear area reassambled.jpg
     
    Last edited: Dec 27, 2022
  23. Dec 27, 2022 at 6:09 PM
    #23
    mj7juice

    mj7juice [OP] New Member

    Joined:
    Jun 25, 2020
    Member:
    #48450
    Messages:
    26
    GA
    Vehicle:
    2013 Sequoia Platinum
    You’re going to have to remove the rear seats on left side. There’s four bolts on the underside. Next, to do this there is one locking pin at the bottom of the side panel, then you’ll have to takeoff the seat belt assembly towards the middle row, unscrew bolt holding middle row seat belt.

    There’s a bolt hidden behind a square panel, that can popped out above the rear seat position near the arm rest.

    There are bolts behind the “srs airbag” (believe that’s what’s it says). Anyways they are the oval indention on the pillars. (1) on the seat belt assembly mid-row, (1) rear pillar back left.

    I did not take off the rear pillar due to it also securing the power gate assembly. You don’t have to remove this (or at least I did not).

    Both pillars are secured to the large rear side panel. Pop these out, then you should be able to access the factory subwoofer box. Believe it was 3-4 screws securing it to the frame.


    The strip on the threshold is easy. Press the clip vertical on the hold downs, and you can use a prior tool to pop open the access. Underneath the access there is a bolt securing the threshold to the frame.

    I believe you may be stuck on the mechanism that is just behind the rear seats. It’s spring loaded with a carpeted panel that rest behind the rear seats. So when it’s reclined it’s against the back and when it’s folded down, it’s against the back.

    The piece I believe you’re referring to is one solid piece that is secured on the left and right side and also on the bottom integrated within the factory jack. To access the hidden screws on the left side unhinge the spring to release the carpeted backing. This should give you access to the hidden screw that is pretty inaccessible on the left hand side.
     
    Last edited: Dec 28, 2022
    e30cabrio likes this.
  24. Dec 27, 2022 at 6:51 PM
    #24
    e30cabrio

    e30cabrio I'm e30cabrio, I'm a modaholic

    Joined:
    Oct 20, 2017
    Member:
    #10410
    Messages:
    6,125
    Gender:
    Male
    West Valley, Phoenix, Az.
    Vehicle:
    Boosted 2013 Sequoia TRD FAUX
    Maggy, Dobinsons, TRD PRO conversion, 18+ lights & cluster too much more to list
    Thanks! I appreciate the help!
     
  25. Dec 31, 2022 at 8:49 AM
    #25
    mj7juice

    mj7juice [OP] New Member

    Joined:
    Jun 25, 2020
    Member:
    #48450
    Messages:
    26
    GA
    Vehicle:
    2013 Sequoia Platinum
    Is this the location you were having trouble with? The screws have tops that pop off to access.
     
    e30cabrio likes this.
  26. Dec 31, 2022 at 9:06 AM
    #26
    e30cabrio

    e30cabrio I'm e30cabrio, I'm a modaholic

    Joined:
    Oct 20, 2017
    Member:
    #10410
    Messages:
    6,125
    Gender:
    Male
    West Valley, Phoenix, Az.
    Vehicle:
    Boosted 2013 Sequoia TRD FAUX
    Maggy, Dobinsons, TRD PRO conversion, 18+ lights & cluster too much more to list
    Yes! I did not see that it opened that way, I was on the wrong side.

    Thanks!
     

Products Discussed in

To Top