1. Welcome to Tundras.com!

    You are currently viewing as a guest! To get full-access, you need to register for a FREE account.

    As a registered member, you’ll be able to:
    • Participate in all Tundra discussion topics
    • Transfer over your build thread from a different forum to this one
    • Communicate privately with other Tundra owners from around the world
    • Post your own photos in our Members Gallery
    • Access all special features of the site

Suspension Upgrade Issues

Discussion in 'Suspension' started by SnowmanX34, Dec 20, 2021.

  1. Dec 20, 2021 at 12:26 PM
    #1
    SnowmanX34

    SnowmanX34 [OP] New Member

    Joined:
    Mar 28, 2020
    Member:
    #44402
    Messages:
    7
    Gender:
    Male
    Upstate NY
    Vehicle:
    2011 Silver Sky Tundra TRD Off Road Double Cab
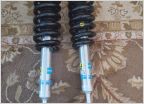
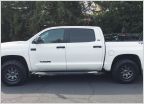
    So my goal was to get everything installed font coil-overs, rear shocks, and an add a leaf. Then get an alignment with my new 35 tires and wheels.
    20211216_144621.jpg

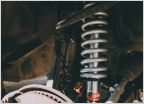
    First up was the fronts. Could not for the life of me get the upper ball joint bolt to pop off. I'm guessing it's all corroded, even tried using a c-clamp. I didn't want to damage the bolt so figured I'd have the shop install the coil-overs and let them deal with it.
    20211215_142835.jpg

    Next up was the rear leafs. Got everything off just fine until the bolt that holds the leafs together. Found out it's welded to the axle! From all the vids I have seen, non have been like this and have no idea why it's welded. To get the longer add a leaf bolt in, I would have to cut this one out and drill a hole for the new bolt to sit.
    20211217_142634.jpg

    Ended up calling a shop and they quoted me a bit more than I would have liked. I'm already invested in this project and trying to not spend much more. Anyone have any ideas? Should I just bite the bullet and have the shop finish the job? They can't get me in for a couple weeks either.
     
  2. Dec 20, 2021 at 12:36 PM
    #2
    SouthWestGA

    SouthWestGA New Member

    Joined:
    Oct 1, 2018
    Member:
    #20074
    Messages:
    1,424
    Gender:
    Male
    Vehicle:
    2007 Tundra CrewMAX and 2014 Nissan NV3500 Passenger
    I have no experience with your rear situation.

    Perhaps the factory bolt has the socket cap rusted or oxidized into the recess, and only by appearance looks welded?

    Maybe a good penetrating oil and smack with a hammer will break the bottom of the bolt out of its hole?

    What happens if you leave the top nut on,and put jack strands of props under the leaf then lower the axle? Will it separate properly?

    Just spitballing ideas here

    As for the fronts…I’ve been there before

    Here’s what I did

    Thread the ball joint nut on about 1/2 way up the threads. Give it some space to move and separate. You don’t want the arm coming out of the spindle and flying upward when it separates

    Now,take your hammer and hit the upper spindle area itself squarely on the sides where the ball joint stud goes through.

    You aren’t hitting the ball joint stud itself,or the upper control arm.

    You are hitting the spindle top sides and hopefully it will “shock it” and release the ball joint from the hole

    I hope that helps
     
    Bprose likes this.
  3. Dec 20, 2021 at 1:05 PM
    #3
    blackoutt

    blackoutt YEAH BUDDY!

    Joined:
    Oct 21, 2018
    Member:
    #20805
    Messages:
    1,029
    Indy
    Vehicle:
    07 DC Long Bed - Old Man Tan
    OEM+
    Ah yes, the joys of living in the great northeast. As mentioned, PB blaster soaking and smacking of the spindle on the side of where the ball joint stud goes through with the nut threaded on to catch it is the best approach. Although, that upper ball joint boot is looking a little crumbly anyway. It may be time to order some new arms and just pickle fork that sucker out. Next area of concern for you may be if the lower control arm adjuster bolts are seized, start soaking them up with PB now too. If they get too crusty they need to be cut out and replaced. I prefer OEM bolts/washers over the aftermarket styles and they ain't cheap either.

    For the center pin on the leafs I also suspect corrosion just has the head of the bolt stuck in there. Soak with PB blaster, put the leaf pack back together, lower that axle down (shocks disconnected) with the frame supported with some extra jack stands under the axle to catch it, and again blows with the big hammer to the side of the leaf pack. Make sure not to overstretch the brake lines/ABS sensor wires when the axle drops, you can unbolt the brackets near the center of the axle and the EVAP canister to give you some extra length on those.
     
  4. Dec 21, 2021 at 5:51 PM
    #4
    SnowmanX34

    SnowmanX34 [OP] New Member

    Joined:
    Mar 28, 2020
    Member:
    #44402
    Messages:
    7
    Gender:
    Male
    Upstate NY
    Vehicle:
    2011 Silver Sky Tundra TRD Off Road Double Cab
    Yeah living in the northeast rustbelt is the worst for vehicles. So for the front I did try hitting the spindle and even tried torching it. Which is probably why the boot is looking a bit crispy. I've been using tons of pb plaster and most of the nuts are coming out with no issue, well other than the one in the spindle. Might give it another go at some point once I finish the rear.

    I did get a chance to work on the rear today and got the other side done. Add a leaf is in! @blackoutt pretty sure you're right and that bolt is corroded. I am hoping the angle I had the axle at will have worked it enough for it too come out. I'll find out tomorrow when I get to it.

    Thanks for the replies, appreciate the advise.
     
  5. Dec 21, 2021 at 6:04 PM
    #5
    RobertD

    RobertD SSEM#123, ASCM#4 "I call it Vera" ~Jayne Cobb

    Joined:
    May 18, 2020
    Member:
    #46765
    Messages:
    4,875
    Gender:
    Male
    First Name:
    Robert
    DFW, Texas
    Vehicle:
    2018 Blazing Blue SR5 4x4 Crewmax
    I did my suspension swap over the Thanksgiving holiday. I was doing a different method for my fronts but also got stuck in a similar situation where the lower bolt for that spindle wouldn't come free. @Squatting Pigeon recommended this one instead
    https://youtu.be/Od02vc2LWrA

    Has you loosen the lower control arm and move it out of the way. The bolts for the lower control arm are torqued super high. Was a royal pain to get them loose (I didn't remove my Pro skid plate, or cat protection plates) so access what limited. But once you get the 2 bolts on each lower control arm loosened, the swap is a piece of cake
     
    Last edited: Dec 21, 2021
    Squatting Pigeon likes this.

Products Discussed in

To Top