1. Welcome to Tundras.com!

    You are currently viewing as a guest! To get full-access, you need to register for a FREE account.

    As a registered member, you’ll be able to:
    • Participate in all Tundra discussion topics
    • Transfer over your build thread from a different forum to this one
    • Communicate privately with other Tundra owners from around the world
    • Post your own photos in our Members Gallery
    • Access all special features of the site

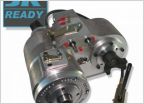
Recent axle seal tips, hints, and prayers

Discussion in '1st Gen Tundras (2000-2006)' started by remington351, Jul 31, 2021.

  1. Jul 31, 2021 at 11:04 PM
    #1
    remington351

    remington351 [OP] New Member

    Joined:
    Dec 18, 2018
    Member:
    #23214
    Messages:
    452
    Gender:
    Male
    Vehicle:
    2006 SR5 DoubleCab
    Hi Guys,
    I just finished doing rear axle seals in my 2006 DC. I relied on lots of the posts here so the procedure went pretty smoothly, but I still am disappointed in the design from Toyota that causes us so much grief. This is going to be a pretty long post, so for the younger TL/DR among us here are the take-a-ways:

    1. Harbor Freight 20 ton press works but needs to be modified
    2. If you don't have welding skills and a spare axle tube, buy the tool from Donald the Bonald. It works nicely.
    3. Watch this posting youtube from Toyota Timmy. Lots of good info on here.
    4. 5mm is not the magic distance for the retainer ring seal interface. More like 3mm.

    https://www.youtube.com/watch?v=R-c2x3F8DU4

    To start. Harbor Freight 20 ton works well. I just bought a new one in July. Based on other youtube vids and Timmy's I believe Harbor Freight changed the dimensions of the frame and made it a few inches shorter. Because of this you will need to cut the crossmember bar from the frame and raise the frame on blocks in order to fit your axle to press off the retainer ring and ABS wheel.

    This is a pic of the axle being 1/4 too long to fit in the press frame.
    IMG_6177.jpg

    Same view zoomed out. Couple things to point out. I added the aluminum bracket to hold the jack in place. I know the springs are supposed to keep the jack squeezed to the top, but I wanted something a little more secure.
    As to HF springs. Poor quality control. As you see in Timmy's video he is able to move the jack up and down to screw out/in the press ram. The springs i received from HF made this impossible. Each of these HF springs are about 120 pounds of force. I'm 200lb, my teen age son is 180. Both of us tried to push/hang from each side of the bottle to pull it down so my wife could unscrew it. No chance. We could only move it about 2 inches. So I had to buy lighter springs(not shown) from the hardware store. 8 inch x 1 inch by .120 wire rated at 50 pounds worked. Not perfect as the spring could not squeeze the ram all the way back when pressure was released, but at least we could make use of the ram screw which you will need to fit the axles.
    IMG_6178.jpg

    Third pic of same. The hub sits on this cross-member iron which causes the problem in the above pic. I cut the cross-member off and mounted the angle iron feet on wood 4x4's.
    IMG_6179.jpg

    Once the press was modified the Donald the Bonald tool worked as easily for me as Timmy's video.

    My backing plates were rusted with holes so I purchased new from McGeorge Toyota along with bearings, brakes, and misc hardware. Reassembly of all components was straight forward. As Timmy mentioned, a 3 inch pvc hub was the perfect size to press the bearing into the backing plate cup. No need for the press. Stack the backing plate, then bearing, then pvc, then wood block and 2-3 taps with a 22oz hammer pushed it in.

    Retaining rings:
    Timmy mentions 5mm of polished axle being the setting for positive seal engagement. For me, it was 3mm. I pressed the first one on at 5mm and did a test fit.

    This was the seal engagement that i got with 5mm of axle polish showing. It's the sharp little line at the top of the ring, right near the bevel. The line on the axle is where I moved the retainer and abs up to using the Donald tool. Money well spent let me tell you.
    IMG_6201.jpg

    Same ring, better view of seal location.
    IMG_6202.jpg

    5.5mm allen key
    IMG_6204.jpg

    IMG_6205.jpg


    Once I moved to 3mm of polish this is the seal fit test. Seal erased half the black dry erase ink.
    IMG_6215.jpg


    Same axle. Showing with the 3mm allen key as a guide.
    IMG_6216.jpg

    Unlike Timmy, I did not use the press or Donald tool to install the rings. It's kind of a pain to set up and the retainer is not super hard to knock on with a pipe. Pipe needed is schedule 40 11/2 iron pipe. This pipe has a OD of 1.9, wall thickness of .145 which give ID of 1.9 -.145 -.145= 1.61. My axles were just under 1.59 so the pipe fit perfectly and seated against the full face of the retaining ring.
    Maybe overkill, but I also put my heat gun set a medium on the abs and retaining ring for about 30 seconds each to expand them a little. Install was not a violent banging. My pipe was 28 inches and all I had to do was raise it about 4 inches and let it fall to move the rings.

    This is a pic of the removed ring from the non leaking axle. I suspect this may have been factory installed. Truck has 170k miles. Professional Hand Model, notice suppleness of hands. I'm available for Instagram collaborations.

    IMG_6211.jpg


    Better view.
    IMG_6212.jpg

    Before I forget, seals. Seals were a bear for me to install. I believe the leaking axle had the seals replaced, possibly to pass inspection by the used car dealer as there were some slight gouges in the bore that I cleaned up with 600 then 1500 grit paper. But installing the seals was still a pain for me. Remove the abs sensor magnet as it sucks the seal to the top every time. Then I advise buying extra seals as the fit is tight and I didn't get it right the first try.

    Final thoughts:
    My dealer wanted $580 plus shop fees per axle so the $185 press, $110 tool, $50 per bearing is putting me way ahead money wise.

    I read a thread discussing that gear oil my seep past the abs retaining ring if it is not well seated. I'm assuming these is no taper to the polished area of the axle, but if it seeps, not much I can do since driving the retainer further down compromises seal/retainer interface.

    Some threads mention running the gear oil level slightly low, 1/2 inch below the fill hole as gear oil on our trucks is not needed to migrate up the tube to the bearing, but just lubes the ring and pinion. This seems like a good idea to minimize premature seal leakage. But then I was curious if the seals are intend to perform for over 100k miles, does the seal survive on just the thin layer of red and tacky that is smeared on the seal and ring at assembly?

    This is a pic of the seal bore. When installed the rubber seal will sit just above the u-shaped cutout in the axle tube. I'm not sure if the 4 cutouts are for manufacturing purposes to align the outer portion with the axle tube (there is a huge weld seen from the outside). Or, if these cutouts are to allow some gear oil to migrate to the seal to keep it lubed and more importantly, cool, for millions of revolution of the axle shaft. Assuming 30 inch wheel, 670 revolutions per mile, x 100k miles. 67 million revolutions. That's a lot of friction.

    IMG_6174.jpg

    I'm gonna keep my fluid level as instructed, just weeping out of the fill hole. I'll pull my drums in a few thousand miles and report back. Cheers.
     
    des2mtn, bmf4069, Sunnier and 5 others like this.
  2. Aug 1, 2021 at 5:12 AM
    #2
    tvpierce

    tvpierce Formerly New Member

    Joined:
    May 6, 2019
    Member:
    #30129
    Messages:
    1,284
    Maine
    Vehicle:
    2000 Tundra AC SR5 4WD, 4.7 Automatic
    I've done this job too. Great write-up and pics.
    Interesting about the modifications you had to make to the press. I bet it's because you have a Double Cab. I have the same press from HF and had no issue with my axles fitting without removing the lower support... but mine is a Access Cab. And Timmy's in the video would be even shorter as he's doing axles from a 3rd Gen 4Runner.
    Regarding the aluminum bracket you added. Does the cross member under the jack not have a plate welded to it that the jack bolts to, like this?
    upload_2021-8-1_7-40-39.jpg

    I don't know what your issue was installing the seals, but I found it helped to have a seal driver.
    I improvised by taking a seal to Home Depot and poking around the plumbing section until I found something that would work.
    This is the perfect size. It's a 2" barbed to theaded PVC adapter.
    upload_2021-8-1_8-0-27.jpg
     
  3. Aug 1, 2021 at 10:14 AM
    #3
    remington351

    remington351 [OP] New Member

    Joined:
    Dec 18, 2018
    Member:
    #23214
    Messages:
    452
    Gender:
    Male
    Vehicle:
    2006 SR5 DoubleCab
    TV, you may be right that some models have longer/shorter axle shafts, i didn't think of that.

    My press did not come with a base plate for the jack to sit on or attach to. Mine just sat there squeezed by the springs. This may explain why my springs are ridiculously overkill. HF saved money by omitting welding the plate.

    In the video it seems like Timmy's ram is the same length as the axle splines, about 2 inches. Mine ram bar is 4.5 inches long.

    timmy.jpg
     
  4. Aug 1, 2021 at 10:27 AM
    #4
    Sunnier

    Sunnier Pity the warrior that slays all his foes

    Joined:
    Aug 21, 2017
    Member:
    #9171
    Messages:
    12,275
    First Name:
    Sunny
    San Diego, CA
    Vehicle:
    2017 Inferno Tundra DC TRD & Longtravel 1st Gen, Banner/ HulkSmash build
    Good write up. Additional points for the PHM mention and invitation…!

    I saw you held that item awkwardly, in such a way as to hide your fingernails. Lol! I do the same. PHM legacy.
     
    bmf4069, Glock 40 and FrenchToasty like this.
  5. Aug 1, 2021 at 11:14 AM
    #5
    FrenchToasty

    FrenchToasty The Desert rat, 6 lug enthusiast

    Joined:
    Sep 15, 2019
    Member:
    #36156
    Messages:
    15,613
    First Name:
    Mo
    The SoAz
    Vehicle:
    2006 DC 4.88s Elocker and some other trippy stuff
    None
    I had a friend from high school that played music, so did quite a few of my other friends; I would just chill and absorb. This one guy would never come and just “jam out” and it sorta bothered my other friends. It finally came out that he didn’t wanna “JO” because he wasn’t being paid……….
     
    YardBird and Sunnier[QUOTED] like this.
  6. Aug 1, 2021 at 11:45 AM
    #6
    Sunnier

    Sunnier Pity the warrior that slays all his foes

    Joined:
    Aug 21, 2017
    Member:
    #9171
    Messages:
    12,275
    First Name:
    Sunny
    San Diego, CA
    Vehicle:
    2017 Inferno Tundra DC TRD & Longtravel 1st Gen, Banner/ HulkSmash build
    Hmmmn. You think @remington351 wants cash to show his cuticles?

    or do you mean, that’s why we never got to see Hand Model nekid? I always figured that was some contractual obligation… like how @Marty McFly and I (his stunt double) don’t ever get photographed together….

    :cool:
     
  7. Aug 1, 2021 at 11:56 AM
    #7
    FrenchToasty

    FrenchToasty The Desert rat, 6 lug enthusiast

    Joined:
    Sep 15, 2019
    Member:
    #36156
    Messages:
    15,613
    First Name:
    Mo
    The SoAz
    Vehicle:
    2006 DC 4.88s Elocker and some other trippy stuff
    None
    Haha exactly, that’s why we never saw any cuticles from him. You gotta pay to see those paws!

    you two never get photographed together………..because your the same person inside the matrix still……..
     
  8. Aug 1, 2021 at 12:18 PM
    #8
    Sunnier

    Sunnier Pity the warrior that slays all his foes

    Joined:
    Aug 21, 2017
    Member:
    #9171
    Messages:
    12,275
    First Name:
    Sunny
    San Diego, CA
    Vehicle:
    2017 Inferno Tundra DC TRD & Longtravel 1st Gen, Banner/ HulkSmash build
    Everyone that’s seen us together knows. We are twins.
     
  9. Aug 2, 2021 at 4:29 AM
    #9
    tvpierce

    tvpierce Formerly New Member

    Joined:
    May 6, 2019
    Member:
    #30129
    Messages:
    1,284
    Maine
    Vehicle:
    2000 Tundra AC SR5 4WD, 4.7 Automatic
    Interesting. I just measured mine and it’s 2 1/4”...
    My ram...
    On my press!:rofl:

    Here's a pic from under the beam that the jack sits on. Comparing it to yours, it appears your beam is not square stock -- there's a lip on the bottom. Or is that just a shadow from the photo/flash? Also, your beam looks wider. Mine's 1 9/16" x 2 3/8". Again, might just be an optical illusion from the photo.

    upload_2021-8-2_7-18-51.jpg

    It's been a a few years since I bought mine, but as I recall there was only one 20 ton shop press on display, but there were two models -- each with its own part number and its own envelope of slips to take up to the register. When you search their site, only one comes up.

    Having the 4" ram was inconvenient for the axle job, but I could see it coming in handy in some applications -- it would give some nice reach.:thumbsup:
     
    bmf4069 likes this.
  10. Aug 2, 2021 at 5:12 AM
    #10
    bmf4069

    bmf4069 Yup, that's car parts in a dishwasher

    Joined:
    Sep 1, 2018
    Member:
    #18880
    Messages:
    7,366
    Gender:
    Male
    TX
    Vehicle:
    02 AC sr5 4wd v8
    I'm not a fan of those axle seals. Mine are still leaking. Looks like yours should be gtg. Awesome write up!
     
    Sunnier likes this.
  11. Aug 2, 2021 at 12:34 PM
    #11
    remington351

    remington351 [OP] New Member

    Joined:
    Dec 18, 2018
    Member:
    #23214
    Messages:
    452
    Gender:
    Male
    Vehicle:
    2006 SR5 DoubleCab
    Hi BMF, I remember your prior thread discussing the bearing job and how your local shop pressed them in to far. That thread was one of the first where I learned the challenges of this particular repair. Are you saying that subsequent attempts to reset the ring seal interface have also failed?
     
    flewis99 likes this.
  12. Aug 2, 2021 at 9:20 PM
    #12
    remington351

    remington351 [OP] New Member

    Joined:
    Dec 18, 2018
    Member:
    #23214
    Messages:
    452
    Gender:
    Male
    Vehicle:
    2006 SR5 DoubleCab
    TV, my crossbar is a piece of C channel 4 inches wide. Overall height of the side legs is 59 inches from bottom to top.
     
  13. Aug 3, 2021 at 5:09 AM
    #13
    bmf4069

    bmf4069 Yup, that's car parts in a dishwasher

    Joined:
    Sep 1, 2018
    Member:
    #18880
    Messages:
    7,366
    Gender:
    Male
    TX
    Vehicle:
    02 AC sr5 4wd v8
    Yeah, I bought the tool thing and we tried to use it, but ultimately failed. Time, summer heat, exhaustion, and lack of understanding on how to use the tool lead to a sub-par install. It leaks pretty bad as I know have a coating of oil on everything in the rr wheel bay. Including the wheel bay itself.
     
  14. Aug 3, 2021 at 6:45 AM
    #14
    KNABORES

    KNABORES Sarcasm incoming

    Joined:
    Jan 1, 2020
    Member:
    #40572
    Messages:
    9,163
    Gender:
    Male
    Arkansas
    Vehicle:
    2000 Limited TRD AC 4X4 Thunder Grey 270k miles. 2019 Limited TRD CM 4x4 Cement Grey 75k miles
    2000: Bilstein 5100's 16x8 589's with 265/75/16 and 1.25" spacers Flowmaster 50 series over the axle dump Pioneer touchscreen with backup camera Full interior and dash LED conversion Trailer brake controller with 7 pin Bedliner coat bumpers & trim ARE topper 2019: ARE topper with full Bedrug kit and Vortex rack TRD shifter 1.25" wheel spacers (I like to live dangerously) Red tow hooks for that +15 grip bonus
    I have not had to perform this job yet, so I can only offer the prayers. Looks like a real bitch. Like the front wheel bearings are gonna be. Only worse.
     
  15. Aug 3, 2021 at 9:03 AM
    #15
    Marty McFly

    Marty McFly Nobody calls me chicken!! Except when off roading

    Joined:
    Oct 24, 2016
    Member:
    #4983
    Messages:
    6,125
    Gender:
    Male
    First Name:
    Morty McBoonJug
    McBoonJug = McDonald’s and Moonshine in a Jug
    Vehicle:
    2016 StormTrooper Tundra CrewMax TRD PRO
    are you implying that I’m Danny DeVito LOL
     
    bmf4069 and Sunnier[QUOTED] like this.
  16. Aug 3, 2021 at 10:06 AM
    #16
    Sunnier

    Sunnier Pity the warrior that slays all his foes

    Joined:
    Aug 21, 2017
    Member:
    #9171
    Messages:
    12,275
    First Name:
    Sunny
    San Diego, CA
    Vehicle:
    2017 Inferno Tundra DC TRD & Longtravel 1st Gen, Banner/ HulkSmash build
    Absolutely not. :cool:

    Everyone knows you’re the star, and I’m your understudy!
     
    Marty McFly[QUOTED] and bmf4069 like this.
  17. Aug 3, 2021 at 10:31 AM
    #17
    bmf4069

    bmf4069 Yup, that's car parts in a dishwasher

    Joined:
    Sep 1, 2018
    Member:
    #18880
    Messages:
    7,366
    Gender:
    Male
    TX
    Vehicle:
    02 AC sr5 4wd v8
    Labor wise, it's not bad. It's just getting the MFers lined up to the 1/2 mm so they don't leak. And if you mess it up, you basically have to cut it all off and start over new.

    Fronts are..... eh. Getting the spindle out isn't fun, and it's kind of a weird shape to get into the press.
     
    Marty McFly likes this.
  18. Aug 3, 2021 at 6:31 PM
    #18
    Marty McFly

    Marty McFly Nobody calls me chicken!! Except when off roading

    Joined:
    Oct 24, 2016
    Member:
    #4983
    Messages:
    6,125
    Gender:
    Male
    First Name:
    Morty McBoonJug
    McBoonJug = McDonald’s and Moonshine in a Jug
    Vehicle:
    2016 StormTrooper Tundra CrewMax TRD PRO
    i meant are you saying I’m short LOL. You know I’m like 6’5 :laughing:
     
    Sunnier[QUOTED] likes this.
  19. Aug 3, 2021 at 6:42 PM
    #19
    Sunnier

    Sunnier Pity the warrior that slays all his foes

    Joined:
    Aug 21, 2017
    Member:
    #9171
    Messages:
    12,275
    First Name:
    Sunny
    San Diego, CA
    Vehicle:
    2017 Inferno Tundra DC TRD & Longtravel 1st Gen, Banner/ HulkSmash build
    I know you are, Ahhnold!
     
    Marty McFly[QUOTED] likes this.
  20. Aug 5, 2021 at 11:20 AM
    #20
    remington351

    remington351 [OP] New Member

    Joined:
    Dec 18, 2018
    Member:
    #23214
    Messages:
    452
    Gender:
    Male
    Vehicle:
    2006 SR5 DoubleCab
    Quick update. Another poster is having trouble with his seals as well here.

    https://www.tundras.com/threads/wheel-bearing-axle-seal-diff-vent-or-all-the-above.93150/

    In his thread he included a pic which is interesting. Notice the difference in seal location between his access cab, and my double cab. The seal in double cabs is recessed in about 2 1/2 inches into the axle bore. I guess that's how Toyota widened the DC platform. I think this is why I was having trouble setting the seal. It was difficult to get it started flush into the bore and I ended up rolling the edge on a couple of them.

    AC flange.jpg

    Flangebore.jpg

    upload_2021-8-5_14-13-58.jpg

    upload_2021-8-5_14-16-18.jpg
     
    bmf4069 likes this.
  21. Aug 5, 2021 at 11:28 AM
    #21
    NetGnome

    NetGnome New Member

    Joined:
    Nov 30, 2019
    Member:
    #39322
    Messages:
    90
    Gender:
    Male
    NJ
    Vehicle:
    2003 RC V8 4wd, 2007 Sequoia V8 4wd
    Removed lots of rust.
    It looks like one has ABS and other does not.
     
    tvpierce and des2mtn like this.
  22. Aug 5, 2021 at 12:11 PM
    #22
    bmf4069

    bmf4069 Yup, that's car parts in a dishwasher

    Joined:
    Sep 1, 2018
    Member:
    #18880
    Messages:
    7,366
    Gender:
    Male
    TX
    Vehicle:
    02 AC sr5 4wd v8
    Good eye. Are the axle housings deeper? Here's my 02:

    20190215_175849.jpg

    20190215_180142.jpg

    20200703_125311.jpg
     
  23. Aug 5, 2021 at 2:19 PM
    #23
    tvpierce

    tvpierce Formerly New Member

    Joined:
    May 6, 2019
    Member:
    #30129
    Messages:
    1,284
    Maine
    Vehicle:
    2000 Tundra AC SR5 4WD, 4.7 Automatic
    +1
     
  24. Apr 14, 2024 at 11:52 AM
    #24
    ToyotaDude

    ToyotaDude New Member

    Joined:
    Jul 8, 2023
    Member:
    #99955
    Messages:
    281
    Vehicle:
    2003 Tundra AC V8 4x4
    With the apparent OEM axle seal redesign moving the seal lip inward toward the 3rd member, is everyone having the best luck leaving the inner retainer in the OEM orientation or flipping it so bevel is toward the ABS ring as recommended per Timmy @19:30 and @22:41 in his video?

    Thanks @remington351 for this great write up.

    Notice you showing not flipping the inner retainer in the first post of this thread but needing to install only at about 3mm not 5mm, likely due to the redesign.

    Looks like that wasn’t a problem without flipping and just installing further inward at 3mm?

    But then no problem with the ABS ring alignment with sensor, being 2mm too far inward?

    With OEM orientation and grease/sharpie testing to finalize placement, Timmy notes @ 24:07 a risk of installing the retainer too far outward and the retainer hitting the axle housing, and hence the suggested "flip" of the retainer to move more surface under the redesigned seal. Maybe that's not a concern.

    The '03 4x4 v8 axle housing seals (90310-50006) and the retainers (42423-20010) appear to be the same part numbers (as well as the o-rings and c-clips) on the axle Timmy is working on (although the outer axle dust seals and bearings appear to be different part #s).
     
    Last edited: Apr 14, 2024

Products Discussed in

To Top