1. Welcome to Tundras.com!

    You are currently viewing as a guest! To get full-access, you need to register for a FREE account.

    As a registered member, you’ll be able to:
    • Participate in all Tundra discussion topics
    • Transfer over your build thread from a different forum to this one
    • Communicate privately with other Tundra owners from around the world
    • Post your own photos in our Members Gallery
    • Access all special features of the site

RainMan's 2021 Lunar Rock TRD Pro Build

Discussion in '2.5 Gen Builds (2014-2021)' started by RainMan_PNW, Oct 30, 2020.

  1. Apr 24, 2021 at 2:06 PM
    #331
    RainMan_PNW

    RainMan_PNW [OP] SSEM #82 RGBA #4 “That Guy” Vendor

    Joined:
    Oct 27, 2020
    Member:
    #54134
    Messages:
    14,945
    Gender:
    Male
    First Name:
    Casey
    Clark County, WA
    Vehicle:
    2021 Lunar Rock TRD Pro CM
    Check the build link in my signature.
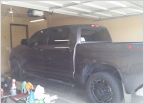
    And a picture after a fresh bath on Thursday...
    upload_2021-4-24_14-43-27.jpg

    upload_2021-4-24_14-3-49.jpg
     
    Last edited: Apr 24, 2021
    GAknight and Rica25 like this.
  2. Apr 24, 2021 at 2:40 PM
    #332
    MoonRock2021

    MoonRock2021 New Member

    Joined:
    Mar 15, 2021
    Member:
    #60476
    Messages:
    319
    Gender:
    Male
    First Name:
    Steve
    SoCal
    Vehicle:
    2021 TRD Pro Crewmax Lunar Rock 2021 4Runner Nightshade
    You didn't mark out your plate :crazy:
     
    bulldog93 and Rica25 like this.
  3. Apr 24, 2021 at 2:45 PM
    #333
    RainMan_PNW

    RainMan_PNW [OP] SSEM #82 RGBA #4 “That Guy” Vendor

    Joined:
    Oct 27, 2020
    Member:
    #54134
    Messages:
    14,945
    Gender:
    Male
    First Name:
    Casey
    Clark County, WA
    Vehicle:
    2021 Lunar Rock TRD Pro CM
    Check the build link in my signature.
    :facepalm:
    Well...now I did...
     
    Last edited: Apr 24, 2021
    Rica25 and MoonRock2021[QUOTED] like this.
  4. Apr 24, 2021 at 2:53 PM
    #334
    MoonRock2021

    MoonRock2021 New Member

    Joined:
    Mar 15, 2021
    Member:
    #60476
    Messages:
    319
    Gender:
    Male
    First Name:
    Steve
    SoCal
    Vehicle:
    2021 TRD Pro Crewmax Lunar Rock 2021 4Runner Nightshade
    LOL I just had to chuckle as the license plate pics above you did and not the ones after. I put my frames on too finally. A different route but still TRD Pro. Good advice on the washers behind front plate I cut the tabs off and heated up their bracket to bend in a tad to get the cover to fit right. I don't now why they couldn't make it 1/8" smaller to fit the frames easier.
     
    Rica25 likes this.
  5. Apr 24, 2021 at 2:55 PM
    #335
    RainMan_PNW

    RainMan_PNW [OP] SSEM #82 RGBA #4 “That Guy” Vendor

    Joined:
    Oct 27, 2020
    Member:
    #54134
    Messages:
    14,945
    Gender:
    Male
    First Name:
    Casey
    Clark County, WA
    Vehicle:
    2021 Lunar Rock TRD Pro CM
    Check the build link in my signature.
    Yep. :anonymous:
    cuz it was $12 import plastic. I thought about a few options that involved sanding, dremeling, trimming, epoxying, and then thought "SHIMS!"
     
    Rica25 and MoonRock2021[QUOTED] like this.
  6. Apr 29, 2021 at 8:57 AM
    #336
    te37_daniel

    te37_daniel New Member

    Joined:
    Nov 2, 2020
    Member:
    #54399
    Messages:
    139
    Gender:
    Male
    Vehicle:
    Lunar Rock TRD Pro
    18 TE37 large PCD, KM3s
    Nice work on the BSM/RCTA install Casey! Any plans to do the fronts anytime soon?
     
  7. Apr 29, 2021 at 9:19 AM
    #337
    RainMan_PNW

    RainMan_PNW [OP] SSEM #82 RGBA #4 “That Guy” Vendor

    Joined:
    Oct 27, 2020
    Member:
    #54134
    Messages:
    14,945
    Gender:
    Male
    First Name:
    Casey
    Clark County, WA
    Vehicle:
    2021 Lunar Rock TRD Pro CM
    Check the build link in my signature.
    That would be the sonar sensors, and no - no plans for front or rear sonar. That requires a TON of additional stuff (I've researched it):
    • 6 sonar sensors
    • sonar switch (in cab)
    • sonar ECU (in cab)
    • 2 wiring harnesses (in engine bay)
    • Modification of existing engine bay wiring harness (add missing wires)
    • New/additional wiring harnesses under truck and in rear bumper

    I just don't see any value in having the sonar sensors - I've got a rear and a front camera. :D
     
  8. Apr 30, 2021 at 8:57 AM
    #338
    dradd

    dradd Sometimes there is just us

    Joined:
    Dec 27, 2017
    Member:
    #11760
    Messages:
    258
    Gender:
    Male
    First Name:
    Dan
    City of Champyinz
    Vehicle:
    '17 TRD Pro
    pending...
     
  9. Apr 30, 2021 at 11:01 AM
    #339
    RainMan_PNW

    RainMan_PNW [OP] SSEM #82 RGBA #4 “That Guy” Vendor

    Joined:
    Oct 27, 2020
    Member:
    #54134
    Messages:
    14,945
    Gender:
    Male
    First Name:
    Casey
    Clark County, WA
    Vehicle:
    2021 Lunar Rock TRD Pro CM
    Check the build link in my signature.
    I did it in my 2008, but I'm not sure that the process would directly map across to the 2014+.
    In the 2008 it required:
    • New control panel
    • New AC "amplifier" (ECU) specific to the trim level and cab configuration that matched the control panel
    • adding one new damper servo (even though it didn't actually connect to a damper)
    • replacing the servo wiring harness with one that connected the new servo (this kept the system from resetting every time it was turned on)
    • Adding the venturi tube parts inside the dash and heater box for the thermister sensor
    • adding the thermister sensor

    The 2007-2013 trucks all had dual-zone climate control (even the non-digital ones) so that functionality was consistent. On the 2014+, the manual control trucks do not have the dual zone, so the air distribution box and servo setups may not work.
     
    dradd[QUOTED] likes this.
  10. May 1, 2021 at 4:21 PM
    #340
    RainMan_PNW

    RainMan_PNW [OP] SSEM #82 RGBA #4 “That Guy” Vendor

    Joined:
    Oct 27, 2020
    Member:
    #54134
    Messages:
    14,945
    Gender:
    Male
    First Name:
    Casey
    Clark County, WA
    Vehicle:
    2021 Lunar Rock TRD Pro CM
    Check the build link in my signature.
    Coachbuilder +2 shackles installed.
    I didn’t really get any pictures during the work - was too busy working. My “Older Daughter’s Boy Friend” (ODBF) has a full shop at his disposal at his parent’s, so we tackled it there.

    Jacked up the truck at the rear hitch until the pressure was off the old shackles, then pulled the nuts and got the old shackles off pretty easy.

    Getting the leaf bushings out was a mix of bearing pullers, various sockets to act as press bushings, heat, and hammers. We did spend some time trying to push a socket that was too big through the hole, but we needed to use that same one on the other side to get it started pressing out anyway, so not all was lost. And no skinned knuckles or blood!

    New bushings went in easy, and we used a small bottle jack to fine tune the leaf position to get the lower bolts in place.

    Carrier bearing shims took only a minute.

    measurements (with ~34 gallons of fuel)
    Before, Center of hub to fender opening
    Drivers side 23.25”
    Passenger side 24.25”

    Before, slab to fender opening through Center off hub
    Drivers side 39.25”
    Passenger side 40.25”

    After, slab to fender opening
    Drivers side 40.5”
    Passenger side 41.5”
    upload_2021-5-1_16-13-15.jpg

    upload_2021-5-1_16-15-14.jpg

    upload_2021-5-1_16-17-22.jpg
     
  11. May 6, 2021 at 11:03 AM
    #341
    RainMan_PNW

    RainMan_PNW [OP] SSEM #82 RGBA #4 “That Guy” Vendor

    Joined:
    Oct 27, 2020
    Member:
    #54134
    Messages:
    14,945
    Gender:
    Male
    First Name:
    Casey
    Clark County, WA
    Vehicle:
    2021 Lunar Rock TRD Pro CM
    Check the build link in my signature.
    Got my ESP Crewmax Long Box installed last night, with a little help from @GIN•OKUMA.
    If you're shopping for one of these, use coupon code TNDRASDTCM for 10% off.

    Not a whole lot to the installation - follow the directions that come with it, and learn to get over the fact you're slicing the carpet and foam out of the floor of your $50k truck. It was great to have a second person, especially for the removal and install of the larger rear seat.

    One thing we did have to do - on the driver's side outboard seat frame at the front bolt, we had to shim under the seat frame with (3) 5/8" washers to raise the front of that corner of the seat up just a little so that the latch on it would properly engage when the seat was down. There was just a little bit of interference with the seat and the lid otherwise. Now I've got to figure out what to fill it up with, because I've got more room than just laying things on the floor under the seat!

    IMG_1928.HEIC.jpg

    IMG_1943.HEIC.jpg

    IMG_1946.HEIC.jpg

    IMG_1948.HEIC.jpg

    IMG_1951.HEIC.jpg

    (all picture credit to @GIN•OKUMA )

    got the curious piece of carpet trimmed to size today and dropped in the bottom, then put everything back into new places.

    Inside the box are (4) ratchet straps, my safety vest, and an extendable windshield scraper… and plenty of room for more stuff.
    upload_2021-5-8_21-19-19.jpg

    Behind it on the floor is the Toyota first aid kit that came with the truck and a folding bow saw (nestled in by the jack), jumper cables, tow strap, plastic “long load” flag and a small blanket in the middle, and a spare grocery bag on the drivers side…so also room for more stuff.
    upload_2021-5-8_21-23-46.jpg
     
    Last edited: May 8, 2021
    WVI, bulldog93, WawaLunar and 10 others like this.
  12. May 6, 2021 at 11:27 AM
    #342
    MoonRock2021

    MoonRock2021 New Member

    Joined:
    Mar 15, 2021
    Member:
    #60476
    Messages:
    319
    Gender:
    Male
    First Name:
    Steve
    SoCal
    Vehicle:
    2021 TRD Pro Crewmax Lunar Rock 2021 4Runner Nightshade
    I'm paying ESP $125 to install mine since they're local lol
     
    Rica25 likes this.
  13. May 6, 2021 at 11:35 AM
    #343
    RainMan_PNW

    RainMan_PNW [OP] SSEM #82 RGBA #4 “That Guy” Vendor

    Joined:
    Oct 27, 2020
    Member:
    #54134
    Messages:
    14,945
    Gender:
    Male
    First Name:
    Casey
    Clark County, WA
    Vehicle:
    2021 Lunar Rock TRD Pro CM
    Check the build link in my signature.
    Shit - if you were local to me I'd only charge you $100. ;)
     
  14. May 6, 2021 at 7:33 PM
    #344
    RainMan_PNW

    RainMan_PNW [OP] SSEM #82 RGBA #4 “That Guy” Vendor

    Joined:
    Oct 27, 2020
    Member:
    #54134
    Messages:
    14,945
    Gender:
    Male
    First Name:
    Casey
    Clark County, WA
    Vehicle:
    2021 Lunar Rock TRD Pro CM
    Check the build link in my signature.
    Got my @abomb60 cup holder inserts in the mail today, and immediately dropped them into place. Great product, great price, and quick shipping. Thanks Adam!
    upload_2021-5-6_19-32-17.jpg
     
  15. May 6, 2021 at 7:50 PM
    #345
    RainMan_PNW

    RainMan_PNW [OP] SSEM #82 RGBA #4 “That Guy” Vendor

    Joined:
    Oct 27, 2020
    Member:
    #54134
    Messages:
    14,945
    Gender:
    Male
    First Name:
    Casey
    Clark County, WA
    Vehicle:
    2021 Lunar Rock TRD Pro CM
    Check the build link in my signature.
    I sort of struggled a bit with shape/profile of the AJT climate knobs. The bevel on the front took away a significant part of the “useable” knob, at least on the Auto AC controls. I also like the lower-key knurling on the factory 4x4 knob (the reason I went with the MESO chrome delete option for that knob), and the factory AC controls have matching knurling but just in the ugly silver color.

    I found a place that would do custom color-matched spray paint and ordered up a few cans of paint to match the Tungsten Cerakote that I have on my steering wheel trim and shifter knob. It wasn’t cheap after you figure in shipping and the “batch fee” but I am thinking of using it to do the silver on my door panels and possibly even the horizontal “bar” along the dash. I decided to use my knobs as a test for the color match and for the durability - those knobs get a lot of use in my truck when my wife is riding along.

    First I hit them with two light coats of Bulldog Adhesion Promoter, and then three coats of the Tungsten paint, then let that cure for a full 24 hours.
    upload_2021-5-6_19-44-23.jpg

    Tonight was a quick disassembly of the AC controller again to swap then knobs back out with the newly-painted originals. The color match doesn’t look quite the same to the camera because of the lighting, but sitting in the cab the shifter and the knobs are indiscernible from each other.
    upload_2021-5-6_19-48-33.jpg

    Now it’s got me thinking about doing my radio knobs too. Gotta find someone that can cut me a vinyl stencil for the backlighting on them…
     
  16. May 15, 2021 at 9:48 PM
    #346
    RainMan_PNW

    RainMan_PNW [OP] SSEM #82 RGBA #4 “That Guy” Vendor

    Joined:
    Oct 27, 2020
    Member:
    #54134
    Messages:
    14,945
    Gender:
    Male
    First Name:
    Casey
    Clark County, WA
    Vehicle:
    2021 Lunar Rock TRD Pro CM
    Check the build link in my signature.
    Ordered the SDHQ Billet Battery Terminal kit last weekend from CaliRaised Off Road and they arrived Friday. So I had to run out an install them real fast.
    Not much to the install - but now I'll be able to land some terminal block and distribution boxes off the battery without having to pull the post and disconnect everything else every time. They went together very easily, fit perfectly, and other than the fact that it is impossible to open antiseize compound without it getting on EVERYTHING, it was an uneventful install.
    IMG_2024.HEIC.jpg
     
    bulldog93 likes this.
  17. May 15, 2021 at 10:30 PM
    #347
    RainMan_PNW

    RainMan_PNW [OP] SSEM #82 RGBA #4 “That Guy” Vendor

    Joined:
    Oct 27, 2020
    Member:
    #54134
    Messages:
    14,945
    Gender:
    Male
    First Name:
    Casey
    Clark County, WA
    Vehicle:
    2021 Lunar Rock TRD Pro CM
    Check the build link in my signature.
    I also upgraded my power-folding tow mirrors to be AUTO-FOLDING whenever I shut the truck off. :bananadance:
    The best part is I think this write-up will take longer than it actually took me to do the mod (since I already had the power folding part done).

    I'd been thinking about how to do this pretty much since the day after I finished the power fold installation. Since I've never had power folding mirrors, I would forget to fold them until the truck was shut off, and the button doesn't work after the truck is off because the switch is run off of ACC power. So, I started thinking about how I could either switch the power to the mirror switch to come off the battery, OR I could come up with a way to just use the "ACC OFF" event to cause the mirrors to then fold. I knew the solution was going to be a relay of some sort, which would energize when the ACC power was on and de-energize when the ACC power was off. I knew that a double-throw relay would allow for two contacts - one "Normally Open" (when the relay is not energized) and one "Normally Closed" - I just needed to sit down and do some head scratching on how exactly to apply that logic to make the mirrors receive power to fold when the ACC power was cut.

    Then, randomly, I stumbled across this thread in the Gen 2 forum. If you've followed my build at all, you may recall that the way my mirrors are wired for power fold is essentially how the Gen 2 Limited trucks (which had power folding mirrors) were wired if they didn't have the memory feature. The switch I am using is the same switch those Gen 2 non-memory Limited trucks use. There, in the very first post, was the answer I was looking for and had been circling in on without realizing it - a Double Pole Double Throw relay (so it has TWO circuits running through it that both have a NO and NC contact on each circuit). This is important, because the way that the mirror fold/unfold motor works is the switch is actually reversing polarity of the power being sent to the motor. When you push the switch in (to fold) the positive runs to the MR (Mirror Retract?) side of the motor and the MF side then connects to ground. When you set the switch to the out (un-fold) position, that polarity reverses. So, for the stock switch to function as desired when the truck is on, you need to have the circuit wired as it was originally designed. BUT, when you shut the truck off, you want to sent battery power to the MR side and then the MF to return that back to ground so that the mirrors will automatically fold.

    So, back to the custom Remote Control Mirror wiring diagram for some more updates to make this work (PDF attached):
    upload_2021-5-15_22-25-35.jpg

    And also a tweak to the Reverse Flood Lamp wiring diagram (to show the taps for the BAT power and ground)
    upload_2021-5-15_22-29-43.jpg

    Anyway, I didn't know such a thing existed, but they do and so I needed to find one.
    https://www.amazon.com/gp/product/B07QXXM1RV?ie=UTF8
    (Make sure to order the 12V DC 8 pin version. I did the 10A, though it is overkill).

    By now, I've been into my dash and other trim parts so many times, I'm a little surprised they still snap back into place. Anyway, I popped the driver side wire gutter trim, then the kick panel, and then popped down the lower knee trim to get to the backs of the switches.

    Originally, I thought I'd wire it up using some female spade connectors, but the contacts aren't the standard 0.25" spade size (They are not as wide). And I'm having shit luck lately with flat crimp connectors, so I ultimately decided to go ahead and use the terminal screw base that came with the relay.
    IMG_2025.HEIC.jpg

    and a few close-ups of the terminals on either end:
    IMG_2026.HEIC.jpg

    IMG_2027.HEIC.jpg

    I started out tapping the ACC power and GROUND wires on the existing mirror switch (pins 7 and 8) with pigtails of new wire to power the coil in the relay switch (pins 7 and 8 as well). I used these Y taps for this because they are a little smaller and easier to manage on these tiny 22AWG wires.

    Next, I tapped the BAT power and GROUND wires running from my Reverse Flood Light switch, which is located in the same panel as the mirror switch (it's where my rear window switch used to be). These wires connect to the NC terminals on the relay (power to Pin 1 and ground to Pin 2).

    Next, I CUT the two power-fold wires that come out of the mirror switch to fold the mirrors, doing it between the switch and where the wire splits to run to each individual mirror. On the SWITCH side of these two wires, they connect to the NO terminals on the relay (MR to pin 3 and MF to pin 4). On the MIRROR side of these two wires, they connect to the COMMON terminals on the relay (MR to pin 5 and MF to pin 6).

    I knew I did something right when, as soon as I popped the relay into the terminal block, the mirrors folded closed! Then I ran it through several cycles of testing (including driving around today), and everything is working perfectly.

    I will say that one thing you will notice. When you go to start the truck, ACC power turns on before the starter engages to start the truck (which pauses the ACC power for a second). So, with the switch in the "extend" position, the mirrors will start to unfold immediately, but only move an inch or so and then actually start to retract before the truck starts and then they will fully extend. It just takes a little getting used to.

    EDIT 2/11/23: I added an On/Off switch to be able to control when the Auto-Fold function operates. Details can be found in this post.
     

    Attached Files:

    Last edited: Feb 11, 2023
  18. May 15, 2021 at 11:55 PM
    #348
    RainMan_PNW

    RainMan_PNW [OP] SSEM #82 RGBA #4 “That Guy” Vendor

    Joined:
    Oct 27, 2020
    Member:
    #54134
    Messages:
    14,945
    Gender:
    Male
    First Name:
    Casey
    Clark County, WA
    Vehicle:
    2021 Lunar Rock TRD Pro CM
    Check the build link in my signature.
    OK, and because I know a LOT of people have asked, here is what I THINK might be possible for doing Auto-Fold on the trucks that have memory:

    1. The trucks with memory (seat, mirror, steering wheel) have a bunch of individual ECUs that control the memory functions, including one located in each door for the mirrors. The mirror control switch on those trucks has it's own processor and is sending the signals from the switch to the Main Body ECU, which then sends data over CANBUS to the LH and RH mirror ECUs. There is also an ECU for the seat position and another one for the steering wheel position that all get information from the Main Body ECU, and there are inputs to the Main Body ECU for things like the transmission selector position, etc.

    2. The button to fold/unfold the mirrors stays in position when it is pressed. If you press it in for FOLD, it stays pressed in and the mirrors stay folded until you press it again to "click it out" to the EXTEND position, where it will stay until cycled again. This latched position means that, at least for the fold signal, the signal that is being sent is constant (rather than a momentary signal). That is why you can press the fold button after you have shut the truck off, and if you then turn the truck on the mirrors will fold.

    3. The mirrors themselves, other than the number of functions they have (like auto-dimming glass and puddle lights), are mechanically identical to any other mirror in how they operate. The difference is that the signal to operate them (moving the glass or folding/unfolding) is coming from the Mirror ECU. In this screen clip from the 2018-2021 trucks, the arrows point at the two wires from the mirror ECU to the mirror folding motor (passenger side, then driver side). Remember that to FOLD the mirrors, +12V is sent to the motor MR and Ground is connected to MF. To open the mirror, that polarity is switched.

    upload_2021-5-15_23-34-52.jpg upload_2021-5-15_23-48-15.jpg

    Armed with that information, here is what I THINK would work:
    If you were to cut the wires that run from the mirror ECU to the mirror fold motor in each door and then hook up a DPDT relay like I did at the back of the mirror switch, then you would be doing the same function but simply doing it physically in a different place in the truck. Look at the ECU as the "switch" that I have, and the mirror is still the load. You would need to supply ACC (or IG) power to the coil on the relay. And you would need to supply BAT power to the NO contacts on the relay. Each Mirror ECU has a 20A BAT power source and a 10A IG power source, and grounds are also available within the doors to tap into.

    I'm not sure if there are any ACC power sources in either door, but thinking about it, using IG for the relay coil power would mean the mirrors would not unfold when you simply turned on ACC, but instead would wait until ignition power was provided...
    (I might have to consider that for my own truck). :monocle:

    So...going back to the relay wiring, we can ignore the colors but apply the same wiring logic to a DPDT relay in each door.
    upload_2021-5-15_23-54-22.jpg

    That's my thoughts. Whether you want to try it or not is entirely up to you...
     
  19. May 16, 2021 at 12:03 AM
    #349
    RainMan_PNW

    RainMan_PNW [OP] SSEM #82 RGBA #4 “That Guy” Vendor

    Joined:
    Oct 27, 2020
    Member:
    #54134
    Messages:
    14,945
    Gender:
    Male
    First Name:
    Casey
    Clark County, WA
    Vehicle:
    2021 Lunar Rock TRD Pro CM
    Check the build link in my signature.
    One last thought on the subject of Auto-Fold. The configuration I have does not have a method to override it...basically to turn off the auto-fold feature. I have a thought there, and it is relatively simple, BUT I'm not sure if it would potentially be a long term issue.

    My thought is that a SPDT (single pole, double throw) switch could be used upstream of the power to the auto-fold relay coil. One leg of the switch could be power incoming from ACC (or IG as it is with the memory trucks). The other leg of the switch could be power coming from BAT. The common on the switch would then supply +12V to the relay coil.

    With the switch set to the ACC (or IG) side, you would have AUTO-FOLD because when the truck was turned off, that power would be cut off, the coil would de-energize, and the relay would open to the folding setting. With the switch set to BAT, you would have standard / stock control because the battery power would continue to keep the relay coil energized and would maintain the stock setup. WHAT I DON'T LIKE ABOUT THIS IDEA is that I would be keeping constant power on the relay to keep it energized at all times. I realize there are a lot of things that use constant battery power when the truck is off (many of the ECUs), but the idea of adding more to that just doesn't really sound good to me. So that's why I'm still brainstorming on some other options.
     
    MoonRock2021 and Dsptundra like this.
  20. May 16, 2021 at 3:57 AM
    #350
    PNW_Husky

    PNW_Husky New Member

    Joined:
    Nov 11, 2017
    Member:
    #10905
    Messages:
    478
    Great Pacific Northwest
    Vehicle:
    2018 MGM CM Platinum
    :yes:Where do I send the beer? :cheers:
     
  21. May 16, 2021 at 7:13 AM
    #351
    Dsptundra

    Dsptundra Still a new member...

    Joined:
    Feb 25, 2021
    Member:
    #59629
    Messages:
    1,313
    Gender:
    Male
    First Name:
    Dan
    Austin TX Area
    Vehicle:
    2021 Silver Limited CM
    Husky X-act, front windows tint, Xpel PPF, center console organizer and tray, TRD rear sway bar, touch screen cover, transmission cooler, wireless charger, keyless tailgate lock.
    Another awesome write up @RainMan_PNW! Amazing amount of information and well written as always.:hattip:
     
  22. May 16, 2021 at 8:03 AM
    #352
    RainMan_PNW

    RainMan_PNW [OP] SSEM #82 RGBA #4 “That Guy” Vendor

    Joined:
    Oct 27, 2020
    Member:
    #54134
    Messages:
    14,945
    Gender:
    Male
    First Name:
    Casey
    Clark County, WA
    Vehicle:
    2021 Lunar Rock TRD Pro CM
    Check the build link in my signature.
    Ok - I woke up realizing that I WAY over thought how to override the auto-fold feature.

    All that needs to be done is for a simple switch in-line on the BAT power to the relay. If the switch is on, then BAT power is fed to the mirror fold when the relay coil de-energizes and you have Auto-Fold. If the switch is off, then no power is sent to the mirror when the relay de-energizes, and so it doesn’t move.
     
    MoonRock2021 likes this.
  23. May 16, 2021 at 8:36 AM
    #353
    MoonRock2021

    MoonRock2021 New Member

    Joined:
    Mar 15, 2021
    Member:
    #60476
    Messages:
    319
    Gender:
    Male
    First Name:
    Steve
    SoCal
    Vehicle:
    2021 TRD Pro Crewmax Lunar Rock 2021 4Runner Nightshade
    You Sir are the Tundra Guru!
     
    Jpd0144 and RainMan_PNW[OP] like this.
  24. May 16, 2021 at 10:39 AM
    #354
    French Avocado

    French Avocado Double Entundra

    Joined:
    Apr 27, 2020
    Member:
    #45583
    Messages:
    1,399
    Gender:
    Male
    First Name:
    Steve
    Utah / Wyo
    Vehicle:
    2020 Platinum MGM; 2008 Ltd TRD SRP
    You are an electrical wizard. THANKS.
     
    Jpd0144 and RainMan_PNW[OP] like this.
  25. May 16, 2021 at 8:20 PM
    #355
    French Avocado

    French Avocado Double Entundra

    Joined:
    Apr 27, 2020
    Member:
    #45583
    Messages:
    1,399
    Gender:
    Male
    First Name:
    Steve
    Utah / Wyo
    Vehicle:
    2020 Platinum MGM; 2008 Ltd TRD SRP
    As I think about my Lexus, when auto fold is engaged it will fold on lock and unfold on open - which means that it is tied to the lock/unlock circuit and that circuit would always be on - and located in the door. I need to think more about how to do this.
     
  26. May 16, 2021 at 8:42 PM
    #356
    RainMan_PNW

    RainMan_PNW [OP] SSEM #82 RGBA #4 “That Guy” Vendor

    Joined:
    Oct 27, 2020
    Member:
    #54134
    Messages:
    14,945
    Gender:
    Male
    First Name:
    Casey
    Clark County, WA
    Vehicle:
    2021 Lunar Rock TRD Pro CM
    Check the build link in my signature.
    I think a person could apply the same principal logic to this mod several ways.

    But that lock/unlock would complicate things a bit because when you are driving, your doors lock again. That’s part of why the memory control system reads the shift selector position as well - so that the auto fold only happens if the doors are locked while the vehicle is in park… and yes, this could still be done using switches and relays, but it starts to get a lot more complicated and take up a lot more space to get all of that right.
     
  27. May 16, 2021 at 8:55 PM
    #357
    French Avocado

    French Avocado Double Entundra

    Joined:
    Apr 27, 2020
    Member:
    #45583
    Messages:
    1,399
    Gender:
    Male
    First Name:
    Steve
    Utah / Wyo
    Vehicle:
    2020 Platinum MGM; 2008 Ltd TRD SRP
    Yikes you are right.
     
  28. May 17, 2021 at 10:13 PM
    #358
    RainMan_PNW

    RainMan_PNW [OP] SSEM #82 RGBA #4 “That Guy” Vendor

    Joined:
    Oct 27, 2020
    Member:
    #54134
    Messages:
    14,945
    Gender:
    Male
    First Name:
    Casey
    Clark County, WA
    Vehicle:
    2021 Lunar Rock TRD Pro CM
    Check the build link in my signature.
    Took care of the rear differential breather relocation yesterday morning.

    Here’s the parts I bought:
    upload_2021-5-17_21-56-40.jpg

    First up, remove the old breather. It was 14mm wrench. Then install the new “union” (nipple) instead. 12mm wrench for that one. No thread tape - just make sure it’s good and snug but don’t Mongo it in there.
    upload_2021-5-17_21-58-3.jpg

    Then put the hose on (I put a little spit on the union first to help slide the hose on). MAKE SURE TO PUT THE HOSE CLAMP ON FIRST. Then tighten the clamp. Put a u-bend loop in the hose for suspension travel (you’ll see ABS wires that have a similar loop in that same area), then route it up next to the black module (I forget what that is) with a zip tie. I have the dual exhaust, so I didn’t want to use the threaded hole in the underside of the bed that others use because it’s right next to the exhaust. Then I followed along the top of the frame.
    upload_2021-5-17_22-1-29.jpg

    From there, I passed along the frame until I met up with the wiring harness heading to the rear taillights, then followed that harness into the rear taillight area.
    upload_2021-5-17_22-6-28.jpg

    upload_2021-5-17_22-8-19.jpg

    Once up inside the taillight cavity, I figured out the length to put the breather just above the metal tab with the two holes (pretty much like everyone else that does this mod). Then, put the breather on the end of the tube, secured with a hose clamp, and then used two zip ties to hold the tube in place.
    upload_2021-5-17_22-10-11.jpg

    Then button up the taillight, and go search for a water crossing to test it in! (Or just go crack a beer and wait for the next 12” rain storm in Louisiana.)
     
    1lowlife, bulldog93, Yzed608 and 4 others like this.
  29. May 31, 2021 at 9:15 AM
    #359
    RainMan_PNW

    RainMan_PNW [OP] SSEM #82 RGBA #4 “That Guy” Vendor

    Joined:
    Oct 27, 2020
    Member:
    #54134
    Messages:
    14,945
    Gender:
    Male
    First Name:
    Casey
    Clark County, WA
    Vehicle:
    2021 Lunar Rock TRD Pro CM
    Check the build link in my signature.
    Simple mod Sunday:
    Charvonia Design tie downs by forum member @602runner

    Quality design, fast shipping, fair price.
    My front tie downs are kind of hidden by the roll top canister, so I only did my rear ones.

    Tools I used:
    Razor knife
    Ratchet
    T40 torx bit
    M6 hex bit (with socket adapter)
    Pick tool
    028EDE10-0FC2-4661-85EB-F0755FF83020.jpg

    I used the razor knife to cut the LineX off the face of the old mounting screws, then the pick to get it out of the screw head torx socket. Then remove the old screws, pop the old tie downs off, and trim the edges of the linex to clean it up.

    Then install the new tie downs using the new hardware.
    upload_2021-5-31_9-13-16.jpg
     
  30. May 31, 2021 at 9:21 AM
    #360
    CCLJ03

    CCLJ03 Tundra forever

    Joined:
    Aug 3, 2018
    Member:
    #17695
    Messages:
    756
    Gender:
    Male
    First Name:
    Craig
    Colorado
    Vehicle:
    2018 TRD Off-Road - Cement
    Man you are busy!!
     
    RainMan_PNW[OP] likes this.

Products Discussed in

To Top