1. Welcome to Tundras.com!

    You are currently viewing as a guest! To get full-access, you need to register for a FREE account.

    As a registered member, you’ll be able to:
    • Participate in all Tundra discussion topics
    • Transfer over your build thread from a different forum to this one
    • Communicate privately with other Tundra owners from around the world
    • Post your own photos in our Members Gallery
    • Access all special features of the site

SloppyJ's Crewmax Audio Upgrade Part 1 of 2 - Head Unit, Speakers, Amp, & More

Discussion in 'Audio & Video' started by SloppyJ, Mar 2, 2021.

  1. Mar 2, 2021 at 6:42 PM
    #1
    SloppyJ

    SloppyJ [OP] New Member

    Joined:
    Aug 3, 2018
    Member:
    #17712
    Messages:
    138
    Gender:
    Male
    NW Arkansas
    Vehicle:
    2023 Black SR5 Crewmax Long Bed
    This thread is to document my audio upgrade and hopefully save some people some time when they are researching. I spent weeks trying to figure everything out. The stock wiring schematic really threw me for a loop and I didn't fully understand it until I was done. My truck is a NON JBL model just so everyone is clear. I want to compile all of the items I used and exactly how I did it as I know this will help someone out going through the same thing.

    This all started with a silent auction at a New Year's Day dirtbike harescramble race. There was a Kenwood DMX907s that I snagged for less than half price. I knew the carplay would be nice and one thing led to another and now I've done all of my speakers, added an amp, and will shortly be rounding this build out with 2 ported 10" woofers behind the rear seat.

    To start, I've built about 4 systems in my personal trucks over the years and helped my friends with countless more. With that said, I had no idea how much swapping a head unit has changed in the past 10yrs. I called Tech12v and asked him what I needed to fully integrate this thing and he had everything in stock so I paypal'd him some cash and got all the parts. Super helpful to work with.

    I started this off by taking a Saturday to install the head unit. I programmed the maestro and overall it was pretty smooth. I used all of the outputs from the head unit and wired them into the harness as directed. This is a Metra dash kit and it is decent. I did add some black tape between the headunit and the dash kit surround so no gaps showed. You cannot use the OEM microphone with this head unit (maybe all aftermarket head units?) so I routed a new one. It is mounted in the overhead console and the cord runs along the windshield, tucked into the head liner then to the A-Pilar, then snaked through the dash and dropped under the steering wheel. I then took it back up into the dash right behind the head unit. It wasn't too hard I just wasn't expecting to do that.

    image0.jpg


    IMG_3073.jpg

    At first, my wireless screen mirroring worked fine then it only worked every now and then, and finally it quit working. It's a quite buggy with an iphone. My wife's android worked more consistently. I got fed up with it and removed one of the 12v ports under the AC controls and put in a HDMI port, wired it to a composite video to HDMI cord and then finally into a composite video cable to Kenwood 3.5mm jack to hook up to the back of the head unit. Make sure to ground your parking brake wire on the back of the head unit and now you can watch anything going down the road. I actually waited until I had to pull the head unit back out to hook up RCAs for the amp to complete this.

    The new head unit really woke up the stock system. The EQ abilities from the Kenwood unit and the extra power perked it up. It really wasn't half bad. But at this point I had the bug and had to keep going. If you want the best bang for your buck, this is hands down the best option.

    I went back and forth researching speakers for another week or so. Things have changed so much since the last time I researched speakers. I actually listed my stock head unit on ebay since I didn't need it laying around. A reseller bought it for $475 within 12hrs of listing it so that funded part of my speaker upgrade and I was able to roll right into that.

    I initially wanted a set of Morel components up front and a set of coax in the rear doors. I got to looking around at what I needed and despite the reviews, I took a look at what TT had to offer. I liked their Image Dynamics components, the coaxs for the rear and the fact that they had everything I needed to mount the crossovers, the stock speaker wire adapters.

    I spoke with Tech12v and he wanted to sway me away from upgrading speakers. Told me it was a bad idea and kept saying there would be no bass from the new speakers because they have a crossover even though I was planning on running a new amp. I didn't understand it and still don't.

    My main goal in this build was to not cut into any of the stock wiring so it could be returned to stock if need be without hacking up all of the wire harnesses. I found the Auto Harness House adapter to hook into the stock plug that goes to the stock amp and decided that was the ticket. This is the first new vehicle that I have ever purchased and I wanted this install to be as clean as possible.

    I ordered the Image Dynamics components, Image Dynamics coax speakers for the rear doors, crossover mounts, speaker adapters, speaker wire harness, and new sail panels. I got the harness from Auto Harness House to save some money. Pricing things out separately, the set from TT was actually a little cheaper than gathering parts from other retailers and the quality of the ID speakers was a little higher than the Morels I was looking at. I pulled the trigger.

    Next came the amp and everything else I needed to put this all together. I found a very clean used JL XD400/4 (75w x 4 RMS @ 4ohm) that I picked up. I got on Sonic Electronix and ordered everything else:

    NVX 1/0 Dual Amp wiring kit - 100% OFC and true gauge
    NVX Speaker Baffle kit
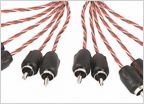
    NVX 4 Ch. RCAs (speakers)
    NVX 2 Ch. RCA (future sub)
    A bunch of accessories like speaker wire, connectors, etc..
    I also purchased 36sf of

    I did some research and the NVX brand had great reviews. I took a chance and have to say that everything I got from them was quality. I'm extremely pleased in my choices and the wire kit was beyond my expectations. I never really paid up for a wire kit before but this time I'm a little older and wiser so I went with it.

    Next came the waiting. TT's shipping is a little frustrating. You can pay extra for expedited shipping through your courier of choice. If you pay for faster shipping, your order gets processed quicker if not, it's 5-7 days just to get it shipped out. I don't agree with that but it is what it is. My Sonic Electronix parts came in and I went through it all. Just had to wait on my speakers to come in.

    Well as luck has it, all of the snow hit and my TT package was stuck in Arlington for over a week in a UPS warehouse. This is no fault of the supplier and I understood that. Finally it started moving. I had a certification test scheduled for a Friday morning and I had the rest of the day off. Luckily my package came the Wednesday before and I was in business. I get home and my stomach sank. The box was quite tiny. I open it up and I was only shipped the front component set and all of the accessories. I was missing everything for the rears. OH NO I GOT STRUCK BY THE DREADED TT CURSE. Well I emailed them that night around 10pm. The next morning I received a response and they had asked for some pictures. Luckily I took some the night before and sent them over. I requested expedited processing and shipping due to the mistake and they took care of me no problem. I got a shipping notice later that afternoon. While they made a mistake, they corrected it and got me taken care of in a very timely manner.

    So install day, I woke up early drove to take that test and absolutely smoked it (Hello 10% raise) and now it is game time. Kiddo is at daycare, wife is at work, and she will pick him up so I have full clearance to start ripping this sucker apart. Let's get into it. My entire goal on this was to minimize any additional work needed to add in another amplifier for my future subwoofers.

    First thing I did was rip the head unit back out and run my RCAs. While I was in there, I did the HDMI mod for video on the head unit. Pro tip: take the center dash speaker out so you can reach behind the head unit and route the ridiculous amount of wires that you need to stuff into that cavity. Getting that stock 12v plug out of the panel was a pain but it came out. There is a great length of wires that are needed for the HDMI harnesses so stuffing them behind the AC controls was a little challenging as well. The RCAs were routed towards the drivers side and the dropped right through an opening and fall into the drivers side floor board. We will deal with those later and get the head unit back in and get this buttoned up.

    Next was routing the power wire. Oh boy, I had read so many horror stories on this one. Most people had issues running 4ga wire. I had 1/0 wire which is much bigger. My first step was to dismantle the interior by taking out the seats and the center console because I knew it would all need to come out and it would give me room to work.

    The console is easy, there are 4 bolts in the bottom of it under the carpet. The seats are easy as well. There are four total 14mm bolts for each seat. There are three plugs under each seat as well (possibly more if you have heated seats). The yellow plug is for the airbags. I recommend that you disconnect the battery before you unplug these to avoid throwing an airbag code. I read that if you power on the truck without these plugged in you will get a code that has to be reset by the dealer. Not sure if it's true because at one point I got that message and then it went away.

    Onto the power wire. My plan was to go through the existing grommet in the firewall. You can cut the nipple off of it and then look under your carpet on the firewall and see the hole you just opened up. I took two different sized wood chisels and ran them through the hole from the inside. I sprayed the first couple feet of the power wire with Maxima SC1 (silicone spray) and to my surprise it slid right through as I fed it in from the cab of the truck. I then installed the inline fuse and mounted it in the engine well. I setup the two distribution blocks under the driver's seat where my sub amp will be going. Excuse the dirty engine bay.

    IMG_3043.jpg


    IMG_3052.jpg


    IMG_3044.jpg


    After this I decided to ground with 1/0 to the seatbelt bolt that goes to the frame under the carpet right behind the driver's seat. I used a wire brush to clean the paint off and mounted it. I then ran it back under the carpet to the distribution block. I routed the blue power wire out of footwell area and under the carpet into my power distribution block. From there I ran 4ga wire under the carpet, over the transmisson hump and under the center console.

    The RCAs were tucked up under the plastic piece that you see pictured where the cup holders go. The sub RCAs were wrapped, shielded and stuffed under the carpet to exit where the seat wire harness comes out of the carpet. The speaker RCAs were routed over the transmisson hump well away from the power wire to avoid interference and then under the carpet on the passenger seat. The 4ga power and ground wire are also under the carpet and routed away from the RCAs to come out under the passenger seat.

    Here's a shot of the finished drivers side seat area.

    IMG_3054.jpg


    At this point it was time to start on the amp install. First thing I did was use the harness and figure out which wires I needed and which I didn't. There are both inputs (signal) and output wires from each speaker on this harness. I taped all of the input wires and got them bundled up and then stripped all of the output wires as I didn't want to rewire the truck just to send 75w through it. I did complete a test where I used my own 14ga speaker wire to the speakers and I didn't notice any difference so I continued on my plan to use the stock wires. I didn't have a amp plate to mount the amp to so I used the rigid part of velcro on the bottom of the amp to stick it directly to the carpet. I will build an amp rack for my subwoofer amplifier and at that time I will build one for the passenger side too. But so far so good.


    Wiring in the amp from the Auto Harness House plugs....

    IMG_3048.jpg

    Finished product under the passenger seat.

    IMG_3050.jpg

    At this point I tested it to make sure it worked and I went to bed. This took me much longer than I planned. I was about 6.5hrs deep at this point and my truck was still torn apart.

    My wife took me out to a nice dinner to congratulate me on passing my test and I went to bed. I woke up right at dawn the next morning to start the sound deadening and speaker install.

    It was a nice foggy morning.

    IMG_3046.jpg


    I didn't take many pictures of this process but I used all but three sheets of the noico sound deadening material on just the two front doors. This took FOREVER to get it completed in the manner I wanted. I ripped the stock plastic vapor barrier out and put as much as I could on the outer door panel. Then I started closing up everything by deadening the inner door panel. The difference is amazing though and I would recommend that product. I don't think there is a better budget sound deadener. It's a SOLID thud on the front door compared to the very tinny and lingering resonance of the rear door that isn't completed yet.

    IMG_3058.jpg

    It probably took me about 1.5hr or more per door to get this completed in the way I wanted to. I was still waiting for my rear speakers at this point so I buttoned up the front and started tuning the amp.

    I set my head unit EQ flat, turned off any and all effects or boosts and then unplugged the wires from the amp and set my head unit to 75% of full power. At this point my dash speakers were zinging like crazy with the 1000hz sine wave going through them. I was under the impression they wouldn't play but I guess since I installed the head unit and wired everything in, there were still getting power. I set the voltage on each channel with my multimeter per the amp manual (17.4v) and hooked everything back up. I was underwhelmed. It did take quite a bit of EQ work, trial and error to get this sounding good. There was a noticeable lack of bass output from the speakers. Less than the stock speakers actually. However, the clarity is what you would expect from the upgrade. It really sounds good in that regard. I'm finally to a point after a week of tweaking everything that I'm very happy with the sound. It's going to be a perfect setup when the subwoofers get installed. The tweeters start to distort/clip a little earlier than I had hoped and well before I get any sort of distortion from the mids. Right when the mids get to where I want them, the tweeters start to limit the output. I'm still working through that and will likely do some additional tuning of the amplifier with my EQ settings to adjust the voltage. I'll report back with what I find.

    Overall I'm extremely happy with the install and the way it turned out. If I had to do it over again, I might look at some different speakers. However, this is ID's lowest line of components and with that said I am more than satisfied with the upgrade. I ended up unplugging all of the dash speakers as they couldn't perform at the volume of the components. Once the subs get in this will be a very balanced system. Who knows, maybe I will go with a 6ch amp for my speakers and run it active in the future? After a few days of tweaking I have flattened my EQ quite a bit and re-tuned the amp with a -5db 1,000hz audio file that allows for a little more headroom and it's getting very close to being how I want it.

    Since this time, I received the rear coax speakers and got them installed. It sounds much better with those in the truck. I believe I will wait until I get into the sub install to mat the rear doors or if I get some free time and a day I don't want to do anything else I will do that. Overall I expect to use a full 64sf of mat to do all of the doors, the rear wall, and under the rear seats.

    If anyone has any questions, pointers, or anything else, please post up as I'm happy to help anyone else out. I didn't take too many pictures as I was just trying to maximize my time working so I could get back to the family.

    Thanks for reading!!

    Stay tuned for Part 2 where I add some bass....
     
    Last edited: Mar 3, 2021
    This site contains affiliate links for which the site may be compensated.
    #1
  2. Mar 4, 2021 at 7:44 AM
    #2
    Danimal86

    Danimal86 Looks clean even when its dirty!

    Joined:
    Aug 29, 2017
    Member:
    #9321
    Messages:
    4,950
    Gender:
    Male
    First Name:
    Daniel
    Sacramento, CA
    Vehicle:
    2017 White Tundra SR5
    Great looking install! Very Clean!

    You set yourself up very nicely for future upgrade additions to the stereo.
     
  3. Mar 4, 2021 at 5:09 PM
    #3
    SloppyJ

    SloppyJ [OP] New Member

    Joined:
    Aug 3, 2018
    Member:
    #17712
    Messages:
    138
    Gender:
    Male
    NW Arkansas
    Vehicle:
    2023 Black SR5 Crewmax Long Bed

    Appreciate it man! That was the whole goal with this. Do it right and only do it once.
     
  4. Mar 4, 2021 at 5:12 PM
    #4
    SloppyJ

    SloppyJ [OP] New Member

    Joined:
    Aug 3, 2018
    Member:
    #17712
    Messages:
    138
    Gender:
    Male
    NW Arkansas
    Vehicle:
    2023 Black SR5 Crewmax Long Bed
    I've been noticing that the speakers are starting to sound more full in the lower end response and just overall in general. I imagine they are getting broken in. Had my best friend hop in my truck today and we listened to a few songs. It was pink floyd, lamb of god, and then some random rap song, so a little of everything. He was super impressed and called it a "Pure" sound. I liked that explanation. These things are sounding better and better by the day.
     
  5. Mar 22, 2021 at 9:04 AM
    #5
    SloppyJ

    SloppyJ [OP] New Member

    Joined:
    Aug 3, 2018
    Member:
    #17712
    Messages:
    138
    Gender:
    Male
    NW Arkansas
    Vehicle:
    2023 Black SR5 Crewmax Long Bed
    Got my Zapco 1350 mono amp in and ordered a ported dual 10" sub box from James. I plan to stuff it with two Sundown SLD 10s at 1ohm and let them go. Should be pushing somewhere just south of 1200w at them when it's all said and done. I will mat the back wall, the back part of the floor, and the rear doors at that time.... that will be fun!

    Be on the lookout for Part 2 of this build.
     
    MillMatter and PlaysARobin like this.

Products Discussed in

To Top