1. Welcome to Tundras.com!

    You are currently viewing as a guest! To get full-access, you need to register for a FREE account.

    As a registered member, you’ll be able to:
    • Participate in all Tundra discussion topics
    • Transfer over your build thread from a different forum to this one
    • Communicate privately with other Tundra owners from around the world
    • Post your own photos in our Members Gallery
    • Access all special features of the site

Painted my camper shell on 2005 Double Cab

Discussion in 'Tonneau Covers, Caps and Shells' started by skunk, Aug 14, 2020.

  1. Aug 14, 2020 at 7:37 AM
    #1
    skunk

    skunk [OP] New Member

    Joined:
    May 8, 2020
    Member:
    #46196
    Messages:
    28
    Gender:
    Male
    First Name:
    Matt
    Vehicle:
    2005 Maroon Tundra DC
    Hey guys,

    A few weeks ago I purchased a camper shell for my 05 DC for $200, it was in great shape structurally but had serious peeling of clear coat on the top and coming down the sides. A friend of mine has an air compressor and paint gun and so I did some homework and decided to paint the shell myself to match my truck. I am following up here in case anyone could find this information useful in the future when doing this themselves.

    I had not painted anything on an automobile before or used a paint gun but it was pretty straight forward after watching some youtube videos. As most people indicated the most time consuming parts were the sanding and prep work.

    As for the paint, I found in a build thread by a member here @Professional Hand Model a company online called "AutomotiveTouchup" that has a website by which you can order paint to match the color code of my truck. I ordered 1 quart of ready to spray basecoat in Salsa Red, and 1 quart of the clear coat to go with it. I got the clear coat that must be mixed with a hardener upon receipt, I think it is of a better quality. The paint also can be ordered in a rattle spray can but since my friend had a paint gun I just got that type. The paint and clear coat cost me $160 total including shipping and was mixed and arrived at my house in about 3 weeks. Overall I felt like the paint was a really good quality for the price.

    My friend and I removed the shell in his shop and I used a palm sander to sand the entire shell. We removed the back window but left the side and front windows on the shell. I think I palm sanded beginning with 400 grit and then worked my way up to 600 and then wet sanded with 1200. I really took my time doing this and sanded the entire top layer off of the whole shell. This meant taking it down to the primer level in some areas.

    I then cleaned it and primed it with a spray can of filler primer, mostly just in the areas that had the most paint removed. I then wet sanded the entire shell and cleaned it really well, drying it with a towel and then using the air compressor to blow any moisture off of the shell and out of all of the spaces surrounding the windows to avoid getting any water in the paint when painting it.

    Then we taped the windows. I used a green "Frog Tape" from Lowe's that worked well for all of the windows because of how flexible it was.

    We then painted it. The painting didn't take long, probably less than two hours to apply four coats of base and then 2-3 coats of clear. The main thing here as shown in the youtube videos is the apply an even coat using the paint gun at a proper distance and angle in order to avoid any runs and get solid coverage. This was the one part of the whole job that probably could have gone better, I didn't quite get full coverage on a couple of the areas on top of the shell that had been sanded all the way down to primer. This was my fault for not painting those areas first as I had seen in other videos. Since the top of the shell would not be visible and it wasn't noticeable I just went ahead and applied the clear coat instead of waiting to get more paint.

    After about 4 coats of the base, letting it become tacky between each coat as instructed on the directions from the company that made the paint, we let dry for maybe 20-30 minutes and then applied the 3 coats of clear.

    I let the shell sit for 2 days after painting it and then wet sanded it with 1200 grit and then again with 2000. I dried it off and then buffed it with Meguiar's ultra-cut compound and then followed that with the finishing compound. I buffed it twice to get as clean of a finish on it as I could. Then cleaned all of the windows and put it back on my truck.

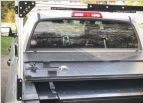
    I'm attaching photos of the process, I didn't take a whole lot of them but it was pretty straight forward. Overall I was really happy with the results. I didn't need it to be perfect but the paint actually matches the truck pretty well and we got good results without spending much money. I expect the paint and clear to outlast that of my truck so I couldn't really ask for much more. I'm probably about $375 into the shell overall, including original purchase of it and the paint as well as a new set of keys in order to lock it.

    Maybe this will help someone else in the future, I had no experience doing something like this before but it really wasn't too bad of a job just time consuming.


    IMG_20200704_151622.jpg IMG_20200705_143901.jpg IMG_20200708_125627.jpg IMG_20200804_171529.jpg IMG_20200807_151935.jpg
     
    Kongap, Sean492, drobb and 2 others like this.
  2. Aug 14, 2020 at 7:42 AM
    #2
    Professional Hand Model

    Professional Hand Model A.K.A ‘Golden Hands’

    Joined:
    Apr 29, 2018
    Member:
    #14878
    Messages:
    14,993
    Gender:
    Male
    First Name:
    Fred
    ‘Somewhere’... a State of Mind
    Vehicle:
    2002 Tundra SR5 4WD 4.7L AC Silver Metallica
    Hand Protectors
  3. Aug 14, 2020 at 7:49 AM
    #3
    Rockgate

    Rockgate New Member

    Joined:
    Oct 6, 2017
    Member:
    #10112
    Messages:
    945
    Gender:
    Male
    First Name:
    Terry
    Middle TN
    Vehicle:
    2022 CMLB TRD OR Prem. 4X4 and 2002 RCLBV65Spd
    Looks great! I was going to paint mine but ended up wrapping it. Wrapping was easier to me and I'm impatient. Spraying is no problem though, I kinda spray for a living last 20years.
     
    skunk[OP] likes this.
  4. Aug 14, 2020 at 7:51 AM
    #4
    RobertD

    RobertD SSEM#123, ASCM#4 "I call it Vera" ~Jayne Cobb

    Joined:
    May 18, 2020
    Member:
    #46765
    Messages:
    4,859
    Gender:
    Male
    First Name:
    Robert
    DFW, Texas
    Vehicle:
    2018 Blazing Blue SR5 4x4 Crewmax
    Well done! Shell looks brand new.
     
    skunk[OP] likes this.
  5. Aug 14, 2020 at 8:00 AM
    #5
    Trooper2

    Trooper2 Premium Lone Star Member / SSEM #13

    Joined:
    Feb 7, 2018
    Member:
    #12738
    Messages:
    6,774
    Gender:
    Male
    First Name:
    JR
    Houston, TX (Suburban South)
    Vehicle:
    2019 Tundra 5.7L Crewmax TSS 2WD
    Looks Great!
     
    skunk[OP] likes this.
  6. Aug 14, 2020 at 8:04 AM
    #6
    ForceV4

    ForceV4 Pull my finger

    Joined:
    Sep 8, 2018
    Member:
    #19162
    Messages:
    191
    Gender:
    Male
    Sacramento
    Vehicle:
    2018 DC TRD 4x4
    Wow, that turned out great. Nice job.
     
    skunk[OP] likes this.
  7. Aug 14, 2020 at 8:38 AM
    #7
    frichco228

    frichco228 Valued Member

    Joined:
    Jan 9, 2020
    Member:
    #40952
    Messages:
    5,090
    Gender:
    Male
    First Name:
    Frank
    Virginia
    Vehicle:
    2016 Crewmax 4WD, TRD Offroad
    Eibach Pro Truck Stage 2 suspension, HD RAS, 285/75-18 Nokian Outpost AT, LoPro bed cover, TRD rear sway bar, DD 10 inch exhaust, and various other goodies
    looks great. I love restoring things like that to beautiful condition. Good job!
     
    skunk[OP] likes this.

Products Discussed in

To Top