

-
Welcome to Tundras.com!
You are currently viewing as a guest! To get full-access, you need to register for a FREE account.
As a registered member, you’ll be able to:- Participate in all Tundra discussion topics
- Transfer over your build thread from a different forum to this one
- Communicate privately with other Tundra owners from around the world
- Post your own photos in our Members Gallery
- Access all special features of the site
 Item stuck in air vent...
 Trans cooler
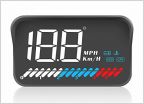 Digital speedometer
 Looking for creative way to monitor tail gate open and closed position
 Remote Start questions/reviews
 Cellphone mount
Painting chrome trim bezel around shifter
Discussion in '2.5 Gen Tundras (2014-2021)' started by Pudge, Jun 27, 2018.
Page 5 of 8
Page 5 of 8


