

-
Welcome to Tundras.com!
You are currently viewing as a guest! To get full-access, you need to register for a FREE account.
As a registered member, you’ll be able to:- Participate in all Tundra discussion topics
- Transfer over your build thread from a different forum to this one
- Communicate privately with other Tundra owners from around the world
- Post your own photos in our Members Gallery
- Access all special features of the site
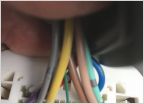 CC rear door speaker wire
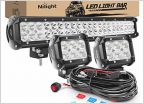 Wiring from Hood Mounted Lights into Cab?
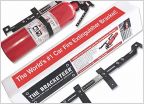 Fire extinguisher mount
 Problems With Integrated Brake Controller?
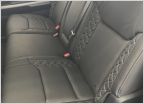 DIY Alea Leather Seat Install 2019 Crewmax
 Bolt in On Board Air Compressor Mount
Seat heater install on 2014+ Tundra
Discussion in '2.5 Gen Tundras (2014-2021)' started by trdlife, Jan 27, 2018.
Page 1 of 3
Page 1 of 3
Products Discussed in


