1. Welcome to Tundras.com!

    You are currently viewing as a guest! To get full-access, you need to register for a FREE account.

    As a registered member, you’ll be able to:
    • Participate in all Tundra discussion topics
    • Transfer over your build thread from a different forum to this one
    • Communicate privately with other Tundra owners from around the world
    • Post your own photos in our Members Gallery
    • Access all special features of the site

Fox 2.5 With DSC Rear and ToyTec Shackles Installed

Discussion in 'Suspension' started by UTTundra, Nov 19, 2017.

  1. Nov 19, 2017 at 7:55 AM
    #1
    UTTundra

    UTTundra [OP] New Member

    Joined:
    Aug 4, 2017
    Member:
    #8898
    Messages:
    655
    Gender:
    Male
    First Name:
    Lou
    Utah
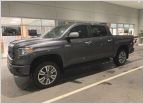
    After recently upgrading my 5100's to ADS coilovers and JBA control arms up front, I decided it was time to upgrade the rear 5100's and get a little bit of a rake back. My front end was about 1/2 inch higher after the coilovers were installed.

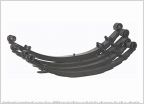
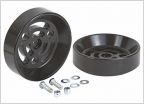
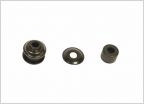
    I was looking at Fox 2.0 or sticking with ADS for the rear, but I got an awesome deal on some unused Fox 2.5's with DSC adjuster on ebay. I went with the ToyTec shackles due to their adjustability and price. They might not be as beefy as the Coachbuilders, but they are pretty damn beefy. I purchased the the new bushings with them, which I highly recommend not only because they might improve ride quality, but also because you might have to destroy the old bushings in the course of removing the OEM shackles like I did.

    Seemed like a pretty straightforward job, so decided to tackle it myself and save a few hundred bucks on labor. It also gave me a chance to break in my new Milwaukee 2767 impact.


    I rented the ball joint removal tool along with the additional set of adapters from autozone. The stock shackle bolts on the driver's side came out without too much trouble. A little pry bar while jacking up and lowering the pumpkin several times did the trick. Once the stock shackle was removed, the ball joint press and impact got the rest of the bushing out without too much trouble.

    The passenger's side was a completely different story. That lower bolt would just not give in no matter how much prying, PB blaster, or adjusting of the diff I did. This left me with half the stock shackle stuck on, since the stock shackle is actually two pieces held together by the through bolts.

    I started to drill the rubber bushing from the exposed side. This helped loosen the inner sleeve which holds the bolt. But due to the limited working space, and the freed half of the bolt keeping me from getting the drill in further with my bit set, I hit a wall with that method. I didn't have a torch to melt the bushing, and didn't want to deal with the mess. Off to Lowe's to buy an angle grinder. I also realized that once I cut the bolt, I would still have to remove the outer metal bushing sleeve and mangled mess of inner rubber + inner bushing sleeve and bolt. Since much of the bushing was already gone, the ball joint press would no longer be able to push the outer sleeve out. Might as well purchase a reciprocating saw too while I'm out.

    After cutting the bolt, removing the rest of the shackle, drilling out more of the rubber to get the inner sleeve and rest of the bolt out, I tried to pound out the outer sleeve with screwdriver and hammer. I was making progress, but it would have taken all afternoon. Plus, I'm sure the elderly lady in the adjoining town home would not have been happy. I made two cuts in the outer sleeve with the reciprocating saw and was finally able to pound it out with hammer and screw driver. Great success! I only had to break a drill bit, screwdriver, cutoff wheel, and saw blade to get it done.


    The install on the driver's side was a breeze. It took a bit more to install the shackle on the passenger's side. Maybe since the driver's was already bolted up, allowing less flexibility to maneuver the passenger side leaf spring.


    Yes, I realize I have the top bushing and washer switched around in this photo. After battling that lower shackle bushing all afternoon, my mind was in a fragile state.


    Mounting the reservoir on the driver's side was a bit of a pain. Fox's instructions aren't very good. The lack of flexibility in the hose leaves you with few options. I've seen others mention that there are already holes that can be used to mount the bracket, but my truck did not come with any good options. So yes, I had to drill into the frame. Not a big deal. However, there is a part of the bed that sticks down and comes very close to rubbing the reservoir. I padded it with a piece of thick velcro. Depending on how that holds up, I might have to relocate the bracket lower on the frame. Only problem is that there is not much room to go lower due to the mounting point of what I believe is the hitch/bumper.


    Took it out on a short ride last night down some bumpy gravel roads. I just set the shocks to their lowest setting for now, which I assume to be the softest ride. The improvement in ride over the 5100's was very noticeable. Even more so than when I upgraded the front. I'll mess with it more today and get the rear dialed in. I appreciate any suggestions on the best way to use the adjusters.

    A few additions. I set the shackles on the middle setting, or the lowest since Tundras don't use the bottom setting on these shackles, which should give 1" of lift. I did a quick measure as soon as I set the truck down, and it was much higher than 1". I'm sure this will settle down once the truck is driven. I also used marine grease on all parts of the new bushings and sleeves. I've read some people say they can be a bit noisy. Hopefully this takes care of that.
     
    Last edited: Nov 19, 2017
    This site contains affiliate links for which the site may be compensated.
    #1
  2. Nov 19, 2017 at 8:04 AM
    #2
    TXRailRoadBandit73

    TXRailRoadBandit73 YOTAS,RAILROADIN',RÖKnRÖLLN',BEER,MAX/GEMMA

    Joined:
    May 30, 2016
    Member:
    #3487
    Messages:
    50,708
    Gender:
    Male
    First Name:
    Adam
    The 956, TEXAS
    None yet
    Awesome Sauce!!! Great job!!!
     
  3. Nov 19, 2017 at 8:13 AM
    #3
    UTTundra

    UTTundra [OP] New Member

    Joined:
    Aug 4, 2017
    Member:
    #8898
    Messages:
    655
    Gender:
    Male
    First Name:
    Lou
    Utah
    Thanks!
     
  4. Nov 19, 2017 at 8:25 AM
    #4
    ColoradoTJ

    ColoradoTJ Certified tow LEO Staff Member

    Joined:
    Feb 24, 2016
    Member:
    #2766
    Messages:
    40,267
    Gender:
    Male
    Colorado
    Vehicle:
    LML 3500HD, Roush Mustang, Jeep Crawler
    Calibrated Power 5 Tune pack, Allison 1000 tune, PPE deep trans pan, Cold/Hot CAC pipes, Banks CAI, PCV reroute, resonator delete, S&B 62 gal fuel tank, B&W GN hitch
    Looks like a clean install. Well done. I need to start looking on EBay for some RR shocks for my current truck.

    I wouldn’t worry about ToyTec shackles being weaker or not as heavy duty. They just use different material than CB. They make a quality product at a great price. :thumbsup:
     
    This site contains affiliate links for which the site may be compensated.
    #4
  5. Nov 19, 2017 at 8:59 AM
    #5
    831Tun

    831Tun heartless Bastrd

    Joined:
    Jun 7, 2016
    Member:
    #3549
    Messages:
    11,597
    Gender:
    Male
    First Name:
    Warren
    Santa Cruz
    Vehicle:
    '16 CM limited
    TC long travel. Deaver 420 SU leaf packs.
    LOL. Same setup that I've got and same reason. I couldn't pass up the deal I found on Fox 2.5 rears. I opted for Toytec as well. Recently I added the Icon expansion pack too with the shackles in the middle. Then I had to replace the dual tail pipes with some dumped pipes 'cause they were hitting the leafs.
     
    UTTundra[OP] likes this.
  6. Nov 19, 2017 at 9:12 AM
    #6
    UTTundra

    UTTundra [OP] New Member

    Joined:
    Aug 4, 2017
    Member:
    #8898
    Messages:
    655
    Gender:
    Male
    First Name:
    Lou
    Utah
    I'm really impressed with the ToyTec shackles. They are monsters next to the old ones. All Grade 8 hardware. Top notch product.

    How's the expansion pack working out? I was considering it instead of the shackles to get the lift I wanted, but the shackles seemed the easier and cheaper route. How much lift do you have with the expansion pack + shackles?
     
    This site contains affiliate links for which the site may be compensated.
    #6
    831Tun[QUOTED] likes this.
  7. Nov 19, 2017 at 9:18 AM
    #7
    Black Wolf

    Black Wolf Chillin' in Alamosa

    Joined:
    Apr 20, 2014
    Member:
    #378
    Messages:
    42,442
    Gender:
    Male
    First Name:
    Matt
    Alamosa, CO
    Vehicle:
    2022 Nissan Frontier SV 4X4
    TuwaPro rack, Z1 Offroad stuff, NISMO suspension stuff, FlowmasterFX Extreme exhaust, AIS, OVS, J&L can, other goodies on the way
    Very nice setup.
     
    UTTundra[OP] likes this.
  8. Nov 19, 2017 at 10:55 AM
    #8
    831Tun

    831Tun heartless Bastrd

    Joined:
    Jun 7, 2016
    Member:
    #3549
    Messages:
    11,597
    Gender:
    Male
    First Name:
    Warren
    Santa Cruz
    Vehicle:
    '16 CM limited
    TC long travel. Deaver 420 SU leaf packs.
    With the ADS up front and Toytec shackles set at 1" the truck didn't have any rake and sometimes looked like the front was higher. I put the expansion pack in and left the shackles at 1". Rear: 26" from center of wheel to fender. Front: 25.5" from center to fender.
     
    UTTundra[OP] likes this.
  9. Nov 19, 2017 at 10:55 AM
    #9
    TheBeast

    TheBeast The Beach

    Joined:
    Apr 27, 2016
    Member:
    #3246
    Messages:
    12,515
    Gender:
    Male
    SoCal
    Vehicle:
    2012
    looks great.
     
    UTTundra[OP] likes this.
  10. Nov 22, 2017 at 3:44 PM
    #10
    vol375

    vol375 New Member

    Joined:
    Oct 24, 2017
    Member:
    #10491
    Messages:
    25
    Gender:
    Male
    Vehicle:
    2011 CrewMax
    Sway Away Coilovers
    Nice write up. Looks like a solid set up.
     

Products Discussed in

To Top