1. Welcome to Tundras.com!

    You are currently viewing as a guest! To get full-access, you need to register for a FREE account.

    As a registered member, you’ll be able to:
    • Participate in all Tundra discussion topics
    • Transfer over your build thread from a different forum to this one
    • Communicate privately with other Tundra owners from around the world
    • Post your own photos in our Members Gallery
    • Access all special features of the site

Wireless Charger In center Console DIY. 2014+ Tundra

Discussion in '2.5 Gen Tundras (2014-2021)' started by trdlife, Nov 12, 2017.

  1. Nov 12, 2017 at 12:41 PM
    #1
    trdlife

    trdlife [OP] Toyota Master Technician

    Joined:
    Nov 22, 2016
    Member:
    #5305
    Messages:
    342
    Gender:
    Male
    First Name:
    Tim
    ICT
    Vehicle:
    2015 Tundra TRD PRO
    'TRD REX'
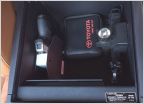
    Ok well wireless charging has been upon us for a couple years and now with IPhone joining the wireless game. And our current Tundra lacking the factory wireless charger and then center console being a perfect spot for one. Here we go.
    I have now edited this with more helpful information. Thanks out to @smooosh for provided some good pointers.
    Time: 30 minutes

    Tools/supplies: magnetic Phillips screwdriver
    Side cutters
    Sanding block
    Die grinder or soft angle grinder
    Electrical tape(scotch super 33)
    Plastic epoxy(gorilla glue)

    Powering the charger: There are a couple ways to do this.
    1 way is to plug in in to the power outlet in the center console. I have a splitter that mine plugs into.
    2nd way thanks to @smooosh you can hardwire it in following his link here: https://www.tundras.com/threads/usb-port-for-rear-seat-and-hardwiring-your-wireless-charger.19248/

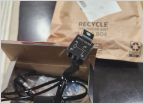
    Choosing your charger: I picked up several chargers from Amazon over the last week since getting my IPhone X to see which one charged not just fast but also can charge through the plastic console top. I settled one a charger pad to best fill the space(pic below). Now having played with it since install it does charge very well most thinner cases work at an instant but an otter box will depend on placement being a thick case. Like I said it does charge but placement is key so if you run an otter box all the time don’t worry there is still an option I will give you. In this DIY I am installing under the console lid but you can take the same steps and mount it on the top in the cut out and still hide the wires.
    (edit: after input from a few helpful members the charger will work best if you split the charger case so the coils can mount directly to the console lid. Allowing to charge better and charging thru thicker cases)
    EDIT: I have added a new charger option and method for attaching the charger to console lid.

    Charger links:
    Fast charge capable charger
    https://www.amazon.com/gp/aw/d/B01H76NIAS?psc=1&ref=yo_pop_mb_pd


    https://www.amazon.com/Choetech-T51...id=1510576578&ref_=mp_s_a_1_sc_3&sr=8-3-spell (courtesy of @smooosh) I would recc this charger.

    https://www.amazon.com/gp/product/B01FMDQK80/ref=oh_aui_detailpage_o00_s01?ie=UTF8&psc=1

    Also look into getting a usb 3.0 fast charge outlet adapter it will help enable the fast charge of your charger:
    https://www.amazon.com/Spigen-Charg...d=1521723453&sr=8-6&keywords=car+fast+charger


    CADB4551-5BAD-489F-825D-735D5B6C0C60.jpg

    *For hidden install follow steps 1-8
    *For top mount charger follow steps 1-3 then proceed to bottom for further steps.

    Step 1: open console lid and remove the 2 screws that hold the latch in place and sit off to the side.
    C52EE343-148A-4249-B654-81E20461197D.jpg

    Step 2: You will see the little screws around the edges and middle they are tiny(why I recommend magnetic screwdriver). There are 18 of these little guys, remove all of them. And place safely to the side(or cup holder). Now with all of them remove you simply pull on the panel and it will come right off or fall off as you take the last screw out.
    CBE9CD20-1836-41CF-A93A-1522BA8A4E73.jpg

    Step 3: You will now see 6 silver screws around the cut out. Remove all six and pull the panel out. (I forgot to take pic as I took it out)
    CDB9085D-2CF3-46E1-BA23-CD5D6BCB7E80.jpg

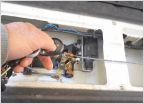
    Step 4: Now You will see it has plastic fins on the bottom right where you want to put the charger. Now you will want to cut them off I used side cutters. You can cut into them and do a little twist and pull and they will come off with easy. Or if you have a small hand saw it will work too. After you get them off off you will want to smooth it out some with sanding block,paper or a die grinder.
    6B6549D8-0CEF-47DB-90B6-2F98C4093B17.jpg

    Step 5: Place the charger you choose flat against the panel(Edit: This is where you would now split the charger case by taking the top off and putting the coils directly against the console lid) and using electrical tape secure it to the lid and make sure the charging port is pointed down so you can run the charge cable thru.
    I did use a hot glue gun to attach mine but after a nice winter it did not hold up, so I and redoing it with a plastic epoxy mixture.
    F3EB9E3C-C5F2-41CE-A746-D7235ECDDFFB.jpg CDB9085D-2CF3-46E1-BA23-CD5D6BCB7E80.jpg 039B455A-5652-411F-AD21-61B06FFF2396.jpg

    Step 7: reinstall the panel now holding charger with he 6 screws and plug in the charge cable. And place the large bottom cover over it and pure the cable their it you will come out and the bottom square holder.
    F7341BDA-9B1B-4C8B-ABB5-01D650BECBCF.jpg 039B455A-5652-411F-AD21-61B06FFF2396.jpg

    Step 8: Re-install the 18 small screws for the large panel and then install the lid latch and 2 screws. Now plug in charger cable however you prefer. Close console lid and ta-da.
    0DE5F334-CC17-4D33-90F8-BAC42C48402B.jpg


    Step 4b: Now we are ready to route your charging cable steps 1-3 were to hide your wire inside the console lid. Here you have 2 options to route your charging cable.
    1- you can drill a small hole thru the lid and run the cable thru.
    2-You can remove the 6 screws that hole the cut out panel in pull it out and run the wire over the top and between the lid and cut out.

    Step 5b: secure your charger to the console lid. 3m double side tape will work best and hold up well.

    Step 6b: Re-install under lid panel with the 18 screws and then the latch with the 2 screws.


    All done now your wireless charger is installed and hidden.
    Any questions or comments below and I’ll be happy to answer.


    FEDBBE06-6F03-4DEC-8FE3-D44B287D96D3.jpg
    EC80A669-BCEA-4317-81F2-FF82EE82769C.jpg
     
    Last edited: Mar 22, 2018
    bulldog93, YotaBro, sigkid and 10 others like this.
  2. Nov 12, 2017 at 1:35 PM
    #2
    Berdine

    Berdine Voodoo Sport

    Joined:
    Aug 2, 2017
    Member:
    #8877
    Messages:
    1,901
    Gender:
    Male
    First Name:
    Frank
    Binghamton, NY
    Vehicle:
    2020 VooDoo Blue Trd Sport
    Great job!
     
    trdlife[OP] likes this.
  3. Nov 12, 2017 at 1:46 PM
    #3
    smooosh

    smooosh This place costs me too much $

    Joined:
    Oct 23, 2017
    Member:
    #10461
    Messages:
    430
    Gender:
    Male
    Vehicle:
    2018 TRD Offroad Limited Crewmax.
    Ongoing project
    Hey man. Great Write up. A couple notes on it that might help you with your otterbox also.

    You can take the "guts" out of the case which will bring the coils closer to the your phone. Just take them out of the case and attach them to the bottom panel.

    Also i used a glue gun to attach it to the to the bottom of the panel.

    I also ran the cable to the cigarette lighter in the center console but plan on splicing into the back cigarette lighter sometime to have everything hidden. Until then i used these to hold the wire in the box. I know the wire is hidden when the box is closed but i wanted it a clean as possible with a wire exposed. https://www.command.com/3M/en_US/co...-Clips?N=5924736+3294529207+3294737326&rt=rud
     
    B737, Pudge and trdlife[OP] like this.
  4. Nov 12, 2017 at 2:13 PM
    #4
    trdlife

    trdlife [OP] Toyota Master Technician

    Joined:
    Nov 22, 2016
    Member:
    #5305
    Messages:
    342
    Gender:
    Male
    First Name:
    Tim
    ICT
    Vehicle:
    2015 Tundra TRD PRO
    'TRD REX'
    I hear ya, I’m not to worried about the otter box. It’s the case I use at work then st home and weekends it’s in a thin case. And mine does work but I know some will get another charger. And the hot glue is a good idea I was thinking about it but couldn’t find my glue gun to save my life lol.

    And yea I’m going back in and hardwiring a couple of my power outlets, I run radar, dash cam, CB and ham radio. Plus the phone charger and a stream light in there as well, only so much hiding I can do lol, but I will lean this up at some point. All my other power sources are hidden
     
    smooosh[QUOTED] likes this.
  5. Nov 12, 2017 at 2:19 PM
    #5
    smooosh

    smooosh This place costs me too much $

    Joined:
    Oct 23, 2017
    Member:
    #10461
    Messages:
    430
    Gender:
    Male
    Vehicle:
    2018 TRD Offroad Limited Crewmax.
    Ongoing project
    The closer you get to the source the faster it charges too. If its working great then no worries but if you go back in to change other things might as well take it out of the case. It will be using your center console as a case so you cant touch it and get shocked anyway.
     
    trdlife[QUOTED][OP] likes this.
  6. Nov 12, 2017 at 2:21 PM
    #6
    trdlife

    trdlife [OP] Toyota Master Technician

    Joined:
    Nov 22, 2016
    Member:
    #5305
    Messages:
    342
    Gender:
    Male
    First Name:
    Tim
    ICT
    Vehicle:
    2015 Tundra TRD PRO
    'TRD REX'
    This is very true. And definitely something I’ll look into.
     
  7. Nov 12, 2017 at 4:26 PM
    #7
    MotoTundra

    MotoTundra The Ocho

    Joined:
    Jan 6, 2014
    Member:
    #8
    Messages:
    7,645
    Gender:
    Male
    First Name:
    Don
    -TRS Mini D2S Retrofit on TRD Pro Headlights (Apollo 2.0 Shrouds, 35w XB Ballasts, 5500k Bulbs) -Baja Designs Squadron R Sport Aux lights. -TRD Pro Grill -TRD Rear Sway Bar -BakFlip VP Tonneau w/BakBox -Dipped wheels & bumpers -Iron Cross HD steps -Undercover Swingcase -SunTek Paint Protection film -Tinted glass -Bedmat -OEM Towing Mirrors
    Nice DIY!
     
    trdlife[OP] likes this.
  8. Nov 12, 2017 at 4:35 PM
    #8
    Jsena

    Jsena Trend setter, not a follower!!

    Joined:
    Mar 20, 2017
    Member:
    #6889
    Messages:
    8,206
    Gender:
    Male
    First Name:
    Jay
    Las Vegas, NV
    Vehicle:
    A Bad Bissshhhh
    7 inch BDS LIFT, 22x10 RBP wheels 37 inch Atturo MT Tires, Flowmaster, Bullydog Tuner
    Eye want to do this but wth? The charger is plugged into the center console , right? And it sits on top and charges wireless to phone???
     
  9. Nov 12, 2017 at 4:54 PM
    #9
    trdlife

    trdlife [OP] Toyota Master Technician

    Joined:
    Nov 22, 2016
    Member:
    #5305
    Messages:
    342
    Gender:
    Male
    First Name:
    Tim
    ICT
    Vehicle:
    2015 Tundra TRD PRO
    'TRD REX'
    I did mine hidden as so you don’t actually see the charging device, just the cable inside. I’ve seen a lot of people ask about it. And I’ve seen some the just want the charger on top and the cable ran thru so I did as good to try and address both options.
     
    Jsena[QUOTED] likes this.
  10. Nov 12, 2017 at 7:19 PM
    #10
    Jsena

    Jsena Trend setter, not a follower!!

    Joined:
    Mar 20, 2017
    Member:
    #6889
    Messages:
    8,206
    Gender:
    Male
    First Name:
    Jay
    Las Vegas, NV
    Vehicle:
    A Bad Bissshhhh
    7 inch BDS LIFT, 22x10 RBP wheels 37 inch Atturo MT Tires, Flowmaster, Bullydog Tuner
    So yours is under all the stuff you unbolt.. so you just screw all that stuff back together and then put your phone down on top of the console and it charges thru the plastic??
     
    trdlife[QUOTED][OP] likes this.
  11. Nov 12, 2017 at 7:25 PM
    #11
    Chief_Will

    Chief_Will New Member

    Joined:
    Jul 20, 2017
    Member:
    #8652
    Messages:
    53
    Gender:
    Male
    First Name:
    James
    Colorado Springs, CO
    Vehicle:
    2015 MGM CM
    Can you provide a link to the charger you are using? Seems like you already did the trial and error with a few different ones.
     
  12. Nov 12, 2017 at 7:42 PM
    #12
    trdlife

    trdlife [OP] Toyota Master Technician

    Joined:
    Nov 22, 2016
    Member:
    #5305
    Messages:
    342
    Gender:
    Male
    First Name:
    Tim
    ICT
    Vehicle:
    2015 Tundra TRD PRO
    'TRD REX'
    That is correct.
     
    CJ21 and Jsena[QUOTED] like this.
  13. Nov 12, 2017 at 7:42 PM
    #13
    BlueBottle

    BlueBottle not a PRO

    Joined:
    Sep 17, 2016
    Member:
    #4572
    Messages:
    5,084
    Vehicle:
    '16 Platinum 4x4
    See fine print
    Thanks for sharing. Is it easy to remove the entire lid from the truck or did you do all their while in the vehicle?
     
    Jsena and trdlife[OP] like this.
  14. Nov 12, 2017 at 7:43 PM
    #14
    trdlife

    trdlife [OP] Toyota Master Technician

    Joined:
    Nov 22, 2016
    Member:
    #5305
    Messages:
    342
    Gender:
    Male
    First Name:
    Tim
    ICT
    Vehicle:
    2015 Tundra TRD PRO
    'TRD REX'
    Here ya go.
    Wireless Charger, Qi Wireless Fast Charging Pad Station Mat 10W for Samsung Galaxy S8, S7, S6, Edge, Note 5, iPhone 8, 8 Plus, iPhone X, Nexus, HTC, Nokia, LG G6 -2A AC Wall Charger INCLUDED (Black) https://www.amazon.com/dp/B01FMDQK80/ref=cm_sw_r_cp_api_YsrcAbW7PRBCS
     
    darkknight2014, Jsena and BlueBottle like this.
  15. Nov 12, 2017 at 7:45 PM
    #15
    trdlife

    trdlife [OP] Toyota Master Technician

    Joined:
    Nov 22, 2016
    Member:
    #5305
    Messages:
    342
    Gender:
    Male
    First Name:
    Tim
    ICT
    Vehicle:
    2015 Tundra TRD PRO
    'TRD REX'
    Yea it’s pretty easy. I did it all right there in the truck.
     
    Jsena and BlueBottle[QUOTED] like this.
  16. Nov 12, 2017 at 8:07 PM
    #16
    Pudge

    Pudge Super Secret Elite Member #7

    Joined:
    Nov 8, 2016
    Member:
    #5136
    Messages:
    9,498
    Gender:
    Male
    First Name:
    Sean
    CT
    Vehicle:
    2015 Blue Ribbon Platinum
    TRD PRO grille, OCD consol organizers, DIY wireless phone charger, 33" Michelin Defender LTX MS, Bak revolver X2 tonneau, weathertech liners, 20% tints. DIY pop n lock, 2018 LED headlights, morimoto fogs, TRD shift knob, DirtyDeeds 8"BAM exhaust, kenwood HU,JL amp, Tech12volts Tundra full speaker upgrade w/sub, Swing case, and lots of fluid film
    I did this too. I took the pieces out and did the work inside. It wasn't bad at all. I used a cheap charger and I think I'll upgrade it soon. I have a spigen case on my S7 and it does charge through that but I did have to take the cover off the charger to make it work. I also put some non skid drawer liner between the little ribs on the console. Helps to keep the phone from sliding. I'd highly recommend this mod.
     
    Jsena and trdlife[OP] like this.
  17. Nov 13, 2017 at 4:38 AM
    #17
    smooosh

    smooosh This place costs me too much $

    Joined:
    Oct 23, 2017
    Member:
    #10461
    Messages:
    430
    Gender:
    Male
    Vehicle:
    2018 TRD Offroad Limited Crewmax.
    Ongoing project
    darkknight2014 and trdlife[OP] like this.
  18. Nov 13, 2017 at 8:49 AM
    #18
    Jsena

    Jsena Trend setter, not a follower!!

    Joined:
    Mar 20, 2017
    Member:
    #6889
    Messages:
    8,206
    Gender:
    Male
    First Name:
    Jay
    Las Vegas, NV
    Vehicle:
    A Bad Bissshhhh
    7 inch BDS LIFT, 22x10 RBP wheels 37 inch Atturo MT Tires, Flowmaster, Bullydog Tuner
    I think I might got the route that @boardude did.. clean and simple
     
    boardude and trdlife[OP] like this.
  19. Nov 13, 2017 at 9:05 AM
    #19
    trdlife

    trdlife [OP] Toyota Master Technician

    Joined:
    Nov 22, 2016
    Member:
    #5305
    Messages:
    342
    Gender:
    Male
    First Name:
    Tim
    ICT
    Vehicle:
    2015 Tundra TRD PRO
    'TRD REX'
    Yea just simple and put it on the top, works too, there are plenty of ways to do it how you feel best.
     
    CJ21 and Jsena[QUOTED] like this.
  20. Nov 13, 2017 at 9:20 AM
    #20
    k3vinryl3

    k3vinryl3 New Member

    Joined:
    Oct 23, 2017
    Member:
    #10465
    Messages:
    22
    Gender:
    Male
    Could you send me the link for that setup. Thanks
     
    Jsena[QUOTED] likes this.
  21. Nov 13, 2017 at 9:35 AM
    #21
    Jsena

    Jsena Trend setter, not a follower!!

    Joined:
    Mar 20, 2017
    Member:
    #6889
    Messages:
    8,206
    Gender:
    Male
    First Name:
    Jay
    Las Vegas, NV
    Vehicle:
    A Bad Bissshhhh
    7 inch BDS LIFT, 22x10 RBP wheels 37 inch Atturo MT Tires, Flowmaster, Bullydog Tuner
    Its under his build page.. 3rd gen builds. I think it’s Fuego Build..
     
    boardude and k3vinryl3[QUOTED] like this.
  22. Nov 13, 2017 at 9:46 AM
    #22
    boardude

    boardude I am Batman

    Joined:
    May 30, 2015
    Member:
    #1353
    Messages:
    4,970
    Gender:
    Male
    First Name:
    Kris
    Tucson, AZ
    Vehicle:
    [YODAGAN]
    2015 Inferno Ex-Pro
  23. Nov 13, 2017 at 9:49 AM
    #23
    trdlife

    trdlife [OP] Toyota Master Technician

    Joined:
    Nov 22, 2016
    Member:
    #5305
    Messages:
    342
    Gender:
    Male
    First Name:
    Tim
    ICT
    Vehicle:
    2015 Tundra TRD PRO
    'TRD REX'
    @boardude beat me to it. Looking at his build always make me wanna do stuff to mine.
     
    boardude likes this.
  24. Nov 13, 2017 at 9:50 AM
    #24
    k3vinryl3

    k3vinryl3 New Member

    Joined:
    Oct 23, 2017
    Member:
    #10465
    Messages:
    22
    Gender:
    Male
  25. Nov 13, 2017 at 9:54 AM
    #25
    trdlife

    trdlife [OP] Toyota Master Technician

    Joined:
    Nov 22, 2016
    Member:
    #5305
    Messages:
    342
    Gender:
    Male
    First Name:
    Tim
    ICT
    Vehicle:
    2015 Tundra TRD PRO
    'TRD REX'
    Look at page 5 of the build.
     
    k3vinryl3[QUOTED] and boardude like this.
  26. Nov 13, 2017 at 9:57 AM
    #26
    k3vinryl3

    k3vinryl3 New Member

    Joined:
    Oct 23, 2017
    Member:
    #10465
    Messages:
    22
    Gender:
    Male
    Btw where did you plug in the usb of your setup?
     
  27. Nov 13, 2017 at 9:59 AM
    #27
    trdlife

    trdlife [OP] Toyota Master Technician

    Joined:
    Nov 22, 2016
    Member:
    #5305
    Messages:
    342
    Gender:
    Male
    First Name:
    Tim
    ICT
    Vehicle:
    2015 Tundra TRD PRO
    'TRD REX'
    i have a multi outlet plug in in the console and it has a build it usb port so that's where i plugged it in for now. At some point i may run some new power lines or hardwire them in but this works so I'm happy.
     
  28. Nov 13, 2017 at 10:05 AM
    #28
    boardude

    boardude I am Batman

    Joined:
    May 30, 2015
    Member:
    #1353
    Messages:
    4,970
    Gender:
    Male
    First Name:
    Kris
    Tucson, AZ
    Vehicle:
    [YODAGAN]
    2015 Inferno Ex-Pro
    You can get a usb adapter pretty cheap on Amazon. Get a 2.4A and it will fast charge
     
    Jsena and trdlife[OP] like this.
  29. Nov 13, 2017 at 10:11 AM
    #29
    Jsena

    Jsena Trend setter, not a follower!!

    Joined:
    Mar 20, 2017
    Member:
    #6889
    Messages:
    8,206
    Gender:
    Male
    First Name:
    Jay
    Las Vegas, NV
    Vehicle:
    A Bad Bissshhhh
    7 inch BDS LIFT, 22x10 RBP wheels 37 inch Atturo MT Tires, Flowmaster, Bullydog Tuner
  30. Nov 13, 2017 at 10:15 AM
    #30
    boardude

    boardude I am Batman

    Joined:
    May 30, 2015
    Member:
    #1353
    Messages:
    4,970
    Gender:
    Male
    First Name:
    Kris
    Tucson, AZ
    Vehicle:
    [YODAGAN]
    2015 Inferno Ex-Pro
    You can get a car charger, that will work. I just used a usb adapter that I had laying around and juts plugged the cord into it
     
    Jsena[QUOTED] likes this.

Products Discussed in

To Top