

-
Welcome to Tundras.com!
You are currently viewing as a guest! To get full-access, you need to register for a FREE account.
As a registered member, you’ll be able to:- Participate in all Tundra discussion topics
- Transfer over your build thread from a different forum to this one
- Communicate privately with other Tundra owners from around the world
- Post your own photos in our Members Gallery
- Access all special features of the site
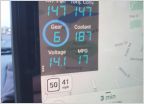 Best Way to Read Coolant/Trans Temps Real Time?
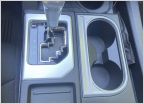 Chrome Cup Holder fix help
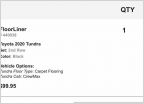 2020 Tundra rear floor mats
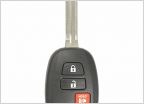 Anyone have issues with their spare key?
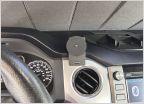 Awesome Minimalistic phone mount (MagSafe)
 Help on removing these to wrap
2018 LED Fog Light Installation Instructions w/Pics
Discussion in '2.5 Gen Tundras (2014-2021)' started by BayRunner, Nov 11, 2017.
Page 1 of 4
Page 1 of 4

