1. Welcome to Tundras.com!

    You are currently viewing as a guest! To get full-access, you need to register for a FREE account.

    As a registered member, you’ll be able to:
    • Participate in all Tundra discussion topics
    • Transfer over your build thread from a different forum to this one
    • Communicate privately with other Tundra owners from around the world
    • Post your own photos in our Members Gallery
    • Access all special features of the site

Snert’s Audio Build

Discussion in 'Audio & Video' started by Snert, Sep 8, 2025 at 2:15 PM.

  1. Sep 8, 2025 at 2:15 PM
    #1
    Snert

    Snert [OP] New Member

    Joined:
    Jan 31, 2024
    Member:
    #111218
    Messages:
    749
    Vehicle:
    2021 SR5
    I wanted to start a new thread to compile the many posts/pictures I’ve made across other threads/posts about my previous audio build and current rebuild. This’ll basically be a photo dump and as I’m finishing up the rebuild and more posts/pictures will be added in the coming months. For any of the new stuff I’ll provide details, but for all these old pics the details are in existing threads and I don’t want to bog this post down with text. Anyways, enough blabbing, here’s a bunch of pics from the builds with minimal descriptions:

    New head unit from Trail Grid Pro, pre-wired and Maestro programmed ready to drop in:
    upload_2025-9-8_15-24-57.jpgupload_2025-9-8_15-24-57.jpgupload_2025-9-8_15-24-57.jpgupload_2025-9-8_15-24-57.jpg

    Originally had Focal K2’s with the Frak tweeter for front stage, modified JBL sail panels to fit them:
    upload_2025-9-8_15-26-49.jpgupload_2025-9-8_15-26-49.jpgupload_2025-9-8_15-26-49.jpgupload_2025-9-8_15-26-49.jpgupload_2025-9-8_15-26-49.jpgupload_2025-9-8_15-26-49.jpg

    Fit was decent, but no way to secure and there was a noticeable overhang/lip so I used stranded body filler, the Frak included cups, glazing putty, SEM texture coat and SEM trim black to build custom sails.

    upload_2025-9-8_15-28-39.jpgupload_2025-9-8_15-28-39.jpgupload_2025-9-8_15-28-39.jpgupload_2025-9-8_15-28-39.jpgupload_2025-9-8_15-28-39.jpgupload_2025-9-8_15-28-39.jpgupload_2025-9-8_15-28-39.jpgupload_2025-9-8_15-28-39.jpgupload_2025-9-8_15-28-39.jpgupload_2025-9-8_15-28-39.jpgupload_2025-9-8_15-28-39.jpgupload_2025-9-8_15-28-39.jpgupload_2025-9-8_15-28-39.jpgupload_2025-9-8_15-28-39.jpgupload_2025-9-8_15-28-39.jpgupload_2025-9-8_15-28-39.jpgupload_2025-9-8_15-28-39.jpgupload_2025-9-8_15-28-39.jpgupload_2025-9-8_15-28-39.jpgupload_2025-9-8_15-28-39.jpg

    Used Resonix CLD/sound deadener on all the doors and rear wall:
    upload_2025-9-8_15-37-1.jpgupload_2025-9-8_15-37-1.jpgupload_2025-9-8_15-37-1.jpgupload_2025-9-8_15-37-1.jpg

    DIY’d block off plates using HDPE and rivet nuts/machine screws to attach them:
    upload_2025-9-8_15-39-6.jpgupload_2025-9-8_15-39-6.jpgupload_2025-9-8_15-39-6.jpgupload_2025-9-8_15-39-6.jpg

    Ran new wiring to each door, fronts were the usual grommet to door, but the rear doors/drilling out connectors was both nerve wracking and a pain.
    upload_2025-9-8_15-41-34.jpgupload_2025-9-8_15-41-34.jpgupload_2025-9-8_15-41-34.jpg

    For power, I originally had a single fuse holder on a janky diy hdpe bracket. I’ve since added another power cable going to my center console for 4 heated seat circuits.

    upload_2025-9-8_15-43-1.jpg
    upload_2025-9-8_15-44-16.jpg

    This was my original amp rack, grounded to a factory ground point behind the driver’s side c-pillar trim. I’ve since tested and moved to a frame ground for less resistance (pics further on)
    upload_2025-9-8_15-46-6.jpgupload_2025-9-8_15-46-6.jpgupload_2025-9-8_15-46-6.jpgupload_2025-9-8_15-46-6.jpg

    I wanted to re-use a JL 8W7 I’ve had for a few years as the sub, so I built a center console extension box, mocked up using foam board from the dollar store, big fan/proponent of that stuff.

    upload_2025-9-8_15-50-37.jpgupload_2025-9-8_15-50-37.jpgupload_2025-9-8_15-50-37.jpgupload_2025-9-8_15-50-37.jpgupload_2025-9-8_15-50-37.jpgupload_2025-9-8_15-50-37.jpgupload_2025-9-8_15-50-37.jpgupload_2025-9-8_15-50-37.jpg

    Semi-related center console heated seat stuff, but also going to be mounting a digital audio converter here. HDPE panel that sits on rubber feet in bottom of the center console with a sandwich lid, essentially lose a couple inches of depth to do this.
    upload_2025-9-8_15-52-52.jpgupload_2025-9-8_15-52-52.jpgupload_2025-9-8_15-52-52.jpgupload_2025-9-8_15-52-52.jpgupload_2025-9-8_15-52-52.jpgupload_2025-9-8_15-52-52.jpg

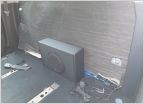
    Really wanted to fit an Audiomobile Encore sub and removed the rear seats, threw some leftover deadener from other projects down, mocked up the sub and couldn’t find a way to make it fit. Opted to go with a Wavetech thinPRO 12 rear firing similar to the JL stealth box.

    upload_2025-9-8_15-53-39.jpg
    upload_2025-9-8_15-56-43.jpgupload_2025-9-8_15-56-43.jpg

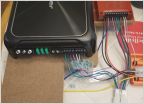
    For the new amp rack since I’ve got 3 amps going in, I opted to get the ESP Truck Accessories underseat locking storage box. Holes drilled in the box and hdpe panels with grommets for wire pass throughs. Amps etc. are mounted with heat inserts in the hdpe.
    upload_2025-9-8_16-1-37.jpg

    Did a frame ground for less resistance than anywhere inside the cab after multimeter testing multiple locations.

    upload_2025-9-8_16-3-6.jpgupload_2025-9-8_16-3-6.jpg

    Helix conductor switch with a 3D printed top panel glued onto @RainMan_PNW’s switch panel for the shifter area, waiting on DAP la day delivery to finish wrapping it in vinyl pleather
    upload_2025-9-8_16-5-6.jpgupload_2025-9-8_16-5-6.jpg

    Added fiber mat to the front doors along with more CLD and butyl rope while I had the door panels off to mount the new front midbasses.
    upload_2025-9-8_16-6-27.jpg

    Ordered 8” brackets from the awesome guys at Sounds Good Stereo and added heat inserts for mounting. CCF rings to help channel sound into the cabin.
    upload_2025-9-8_16-7-43.jpgupload_2025-9-8_16-7-43.jpgupload_2025-9-8_16-7-43.jpg

    Added Knu Conceptz battery post terminals and an SMD fuse holder, along with a HDPE panel mounted to the top of the OEM fuse cover.
    upload_2025-9-8_16-9-42.jpg

    Some random diy custom cables, big fan of Deutsch connectors for ease of use and quick waterproof connections especially for inside the doors.
    upload_2025-9-8_16-10-50.jpgupload_2025-9-8_16-10-50.jpgupload_2025-9-8_16-10-50.jpg

    That’s all for now. Will have more to post in the coming weeks/months as I finish custom mounts/panels for the midranges going into the dash corners and tweeters in the a-pillars.

    Happy to answer any questions, if you scrolled through all that, thanks for looking!

    upload_2025-9-8_15-39-6.jpg
    upload_2025-9-8_15-39-6.jpg
    upload_2025-9-8_16-6-27.jpg
     
  2. Sep 8, 2025 at 2:50 PM
    #2
    littlebus01

    littlebus01 New Member

    Joined:
    Sep 2, 2024
    Member:
    #122280
    Messages:
    62
    Gender:
    Male
    First Name:
    Tobias
    Vehicle:
    21 trd off-road
    Iron Man lift, still-cai, list goes on
    Wow :101010::101010: that looks great I will definitely be following your build.
     
    Snert[OP] likes this.
  3. Sep 8, 2025 at 3:09 PM
    #3
    blenton

    blenton New Member

    Joined:
    Jul 15, 2022
    Member:
    #80740
    Messages:
    3,416
    Love it!

    What do you think about the block off plates - worth it? I have a large piece of HDPE just begging to be used to build some block off plates.

    Did the WaveTech ThinPro 12 work out as expected?

    ..and because I'm lazy, would you mind adding a component list somewhere? I don't recall what mids you went with in the doors.
     
    Snert[OP] likes this.
  4. Sep 8, 2025 at 3:33 PM
    #4
    Snert

    Snert [OP] New Member

    Joined:
    Jan 31, 2024
    Member:
    #111218
    Messages:
    749
    Vehicle:
    2021 SR5
    I havent gotten a chance to listen to the Wavetech yet, next step is installing the main amp and sub amp this week at some point.

    Happy to drop the components! Component list going in is:

    BLAM MB8D midbass in front doors
    BLAM MB3 midrange in dash corners
    BLAM T28S in the a-pillars

    Focal K2 midbass in rear doors
    Focal K2 (non-Frak) tweeters in the rear doors

    Wavetech thinPRO 12 for sub duty, maybe a second in the future and/or a front sub

    Helix P6 Ultimate for front stage
    Helix 204 Direct for rear stage
    Helix P1 for sub(s)

    Edit: @blenton forgot to answer your question about the block off plates, I don’t have an A/B before/after comparison so I can’t say wholeheartedly exactly how much of a difference they make, but IMO they’re worth it. The midbass I got out of the K2 6.5’s was honestly pretty impressive, obviously they’re midbasses so they didn’t play super low but I was getting pretty impressive output from them, definitely the best midbass I’ve had in a personal vehicle and I attribute a lot of that to the block off plates tbh. I know Sounds Good Stereo makes/sells them as well, but they were a fun project to DIY and learn to use a rivet nut tool. Only thing I’ll say is that be careful how thick you make them and/or the thickness of foam you use to decouple them. I used CCF around their perimeter to decouple them from the doors and create a better seal which worked well but my door panels are exceedingly tight to get back on, to the point I used a heat gun to soften/bend the top ones in a bit. Overall if you want a somewhat time consuming project that’s not too expensive, I’d say go for it!
     
    Last edited: Sep 8, 2025 at 5:24 PM
    blenton[QUOTED] likes this.

Products Discussed in

To Top