

-
Welcome to Tundras.com!
You are currently viewing as a guest! To get full-access, you need to register for a FREE account.
As a registered member, you’ll be able to:- Participate in all Tundra discussion topics
- Transfer over your build thread from a different forum to this one
- Communicate privately with other Tundra owners from around the world
- Post your own photos in our Members Gallery
- Access all special features of the site
 Console tray
 Installing power inside cab
 Wi-Fi extender/booster?
 Tundras Book Club
 Time to replace my gas grill, need some recommendations!
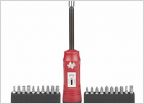 Torque Wrench/Screwdriver
Travel Trailer Hot Water Heater Replacement. 2022 Grand Surveyor Legend 19BHLE
Discussion in 'Off-Topic Discussion' started by TRDGoodness, May 21, 2025.


