

-
Welcome to Tundras.com!
You are currently viewing as a guest! To get full-access, you need to register for a FREE account.
As a registered member, you’ll be able to:- Participate in all Tundra discussion topics
- Transfer over your build thread from a different forum to this one
- Communicate privately with other Tundra owners from around the world
- Post your own photos in our Members Gallery
- Access all special features of the site
 Bmf's big bumpin bonanza
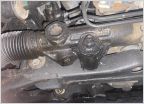 Steering rack needing replacement?
 Replacement catalytic converter for 2000 Tundra V6 manual 4WD SR5
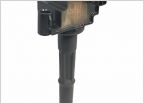 Hesitating and Missing but computer says not misfiring
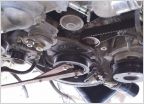 2004 4.7L Timing belt replacement
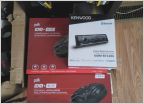
 Easy to install carplay radio
Bump Stops
Discussion in '1st Gen Tundras (2000-2006)' started by bhb983, Feb 8, 2025.


