1. Welcome to Tundras.com!

    You are currently viewing as a guest! To get full-access, you need to register for a FREE account.

    As a registered member, you’ll be able to:
    • Participate in all Tundra discussion topics
    • Transfer over your build thread from a different forum to this one
    • Communicate privately with other Tundra owners from around the world
    • Post your own photos in our Members Gallery
    • Access all special features of the site

Tacoed Tundra project

Discussion in '1st Gen Builds (2000-2006)' started by whodatschrome, Sep 14, 2023.

  1. Dec 22, 2024 at 8:38 PM
    #331
    whodatschrome

    whodatschrome [OP] New Member

    Joined:
    Sep 13, 2023
    Member:
    #103882
    Messages:
    1,776
    Gender:
    Male
    North of North Plains, Oregon
    Vehicle:
    2000 Tundra 4wd AC, 2004 Tundra AC 2wd to 4wd conversion ABS delete
    lots of dents
    It’s pretty obvious that i’m only doing modifications to this truck that are work related. I almost, almost bought a Tommy Gate hydraulic lift gate last week. There was a used one on faceplace marketbook for $700. It was still more than i wanted to pay for one, but it was specifically for a 1st gen tundra. The only downside was that it was mounted on a double cab and not an access cab. Tommy Gate sells different mounting brackets for both of those models. The other downside is that i would have to remove my plastic drop in bed liner in order to fit the hydro gate. The seller sold the gate fairly quickly at his full asking price, so i’m not dwelling on loosing out on it. It would have been REAL nice to load up huge rounds of firewood, 55 gallon drums of oil (or nuclear waste), pressure washer, generator, welders, log splitter, ect, ect with a flip of a switch.
     
  2. Dec 22, 2024 at 9:34 PM
    #332
    455h0le_dachshund

    455h0le_dachshund Tesler Thought Experiment

    Joined:
    Nov 21, 2023
    Member:
    #107257
    Messages:
    7,171
    First Name:
    Reverend Hotdog
    TX...big surprise
    Vehicle:
    Dragstrip Rocketship, Death Machine
    I don't know what most people do with the power steering cooler loop. There was no mounting place for it on my Coastal bumper, so I zip tied it...so far so good though. Haha
     
  3. Dec 22, 2024 at 10:50 PM
    #333
    whodatschrome

    whodatschrome [OP] New Member

    Joined:
    Sep 13, 2023
    Member:
    #103882
    Messages:
    1,776
    Gender:
    Male
    North of North Plains, Oregon
    Vehicle:
    2000 Tundra 4wd AC, 2004 Tundra AC 2wd to 4wd conversion ABS delete
    lots of dents
    My plan is to weld some mounting tabs on the frame for attaching that loop. My other thought was to install an actual power steering cooler instead, but i don’t foresee needing one with the smaller tires that i run on my truck. We shall see though. It all depends upon what all fits for coolers.
     
  4. Dec 24, 2024 at 5:56 PM
    #334
    whodatschrome

    whodatschrome [OP] New Member

    Joined:
    Sep 13, 2023
    Member:
    #103882
    Messages:
    1,776
    Gender:
    Male
    North of North Plains, Oregon
    Vehicle:
    2000 Tundra 4wd AC, 2004 Tundra AC 2wd to 4wd conversion ABS delete
    lots of dents
    Right then. I finally got far enough on the Tacoma ARB bumper install that i feel confident in posting up the steps i did to make it possible.

    Pics will save me a thousand words, so if you have questions, feel free to ask away.

    I did cut back 1.5” of the frame horns in order to weld in a 3/16” wall 2x4 crossmember. That’s the key part of strengthening the front of the frame. It also provides a flat surface to attach the mounting brackets. And speaking of mounting brackets, normally most sane people would probably make the mounting brackets removable from the frame. I simply welded them directly to the frame. It’s going to be waaay stronger doing it that way.

    Make sure to drill drain holes into the frame so that water can drain out at the lowest point.

    I added in quite a bit of gussets to the brackets. The lowest portion of the bumper’s bottom attachment point had to be cut off, but i lucked out and reused that triangle shaped piece as reinforcement gusset on the top side of the frame.

    IMG_1357.jpg IMG_1359.jpg IMG_1358.jpg IMG_1360.jpg IMG_1361.jpg IMG_1364.jpg IMG_1365.jpg IMG_1366.jpg
     
  5. Dec 24, 2024 at 6:05 PM
    #335
    whodatschrome

    whodatschrome [OP] New Member

    Joined:
    Sep 13, 2023
    Member:
    #103882
    Messages:
    1,776
    Gender:
    Male
    North of North Plains, Oregon
    Vehicle:
    2000 Tundra 4wd AC, 2004 Tundra AC 2wd to 4wd conversion ABS delete
    lots of dents
    More pics…

    The frame is about 1/8” thick. My welded in 2x4 is 3/16” thick.
    IMG_1389.jpg IMG_1390.jpg IMG_1391.jpg IMG_1394.jpg IMG_1395.jpg IMG_1396.jpg IMG_1397.jpg
     
  6. Dec 24, 2024 at 7:19 PM
    #336
    whodatschrome

    whodatschrome [OP] New Member

    Joined:
    Sep 13, 2023
    Member:
    #103882
    Messages:
    1,776
    Gender:
    Male
    North of North Plains, Oregon
    Vehicle:
    2000 Tundra 4wd AC, 2004 Tundra AC 2wd to 4wd conversion ABS delete
    lots of dents
    In this pic you can see where i stitch welded the ARB frame bracket to my frame crossmember. The only problem is that now there’s a trough where water will collect.
    IMG_1407.jpg


    It’s difficult to see what’s going on here, but there’s a long strip of 3/16” x 3” strip in my hand. I’m welded that in order to box over the top of the trough. I also made it slope so that water is sure to shed down it.
    IMG_1408.jpg


    Last pic in the series of of that 3” wide metal strip. It got 100% welded to both the ARB bracket and the frame crossmember.
    IMG_1409.jpg


    I forgot to take a final pic of this here. I wanted to keep my factory splash/skid plate, so i needed to figure out a way to attach it to the front of the frame. I had to torch out a smidge bit of my frame crossmember in order to get the attachment point in the exact spot that it needed to be. In that little cut out spot in the pic, i welded in a 3/4” long M8 extended nut. I’ll have to go back and get some pics of it.
    IMG_1417.jpg
     
    BroHon, The Black Mamba and Sirfive like this.
  7. Dec 24, 2024 at 7:24 PM
    #337
    455h0le_dachshund

    455h0le_dachshund Tesler Thought Experiment

    Joined:
    Nov 21, 2023
    Member:
    #107257
    Messages:
    7,171
    First Name:
    Reverend Hotdog
    TX...big surprise
    Vehicle:
    Dragstrip Rocketship, Death Machine
    Sirfive likes this.
  8. Dec 24, 2024 at 7:34 PM
    #338
    whodatschrome

    whodatschrome [OP] New Member

    Joined:
    Sep 13, 2023
    Member:
    #103882
    Messages:
    1,776
    Gender:
    Male
    North of North Plains, Oregon
    Vehicle:
    2000 Tundra 4wd AC, 2004 Tundra AC 2wd to 4wd conversion ABS delete
    lots of dents
    I found an elegant way to reattach the metal power steering cooler loop. I simply unbolted the PS bracket mounting clamps (there are two of them) and rotated them around 180 degrees and facing the mounting tabs up (instead of down). I then rerouted the rubber hoses behind the transmission cooler’s rubber hoses. The factory preformed rubber PS hoses were now at the wrong angle, so i found some Aeroquip Push Lock rubber hose in my shop and used that instead. I had to bend the PS metal hard lines just a smidge to make it so that the PS hoses wouldn’t rub against the transmission hoses. It bolts directly under the core support. All that is required is to drill two holes. It all fits pretty darn slick.
    IMG_1418.jpg IMG_1421.jpg IMG_1422.jpg IMG_1420.jpg IMG_1423.jpg IMG_1424.jpg
     
  9. Dec 24, 2024 at 7:48 PM
    #339
    455h0le_dachshund

    455h0le_dachshund Tesler Thought Experiment

    Joined:
    Nov 21, 2023
    Member:
    #107257
    Messages:
    7,171
    First Name:
    Reverend Hotdog
    TX...big surprise
    Vehicle:
    Dragstrip Rocketship, Death Machine
    Awesome! When I get around to buying a winch and removing my bumper for install/repaint, I'll need to do this. I hate how mine is just ziptied in place right now. Definitely a solid way here.
     
  10. Dec 24, 2024 at 8:05 PM
    #340
    whodatschrome

    whodatschrome [OP] New Member

    Joined:
    Sep 13, 2023
    Member:
    #103882
    Messages:
    1,776
    Gender:
    Male
    North of North Plains, Oregon
    Vehicle:
    2000 Tundra 4wd AC, 2004 Tundra AC 2wd to 4wd conversion ABS delete
    lots of dents
    I rattle can spray bombed the bracket. My favorite paint for that is rustoleum high performance quick dry primer. I squirted on 3 heavy coats today. I’ll follow up with black paint over the top of it all.
    IMG_1427.jpg IMG_1429.jpg IMG_1430.jpg IMG_1431.jpg IMG_1432.jpg IMG_1433.jpg
     
  11. Dec 24, 2024 at 8:17 PM
    #341
    whodatschrome

    whodatschrome [OP] New Member

    Joined:
    Sep 13, 2023
    Member:
    #103882
    Messages:
    1,776
    Gender:
    Male
    North of North Plains, Oregon
    Vehicle:
    2000 Tundra 4wd AC, 2004 Tundra AC 2wd to 4wd conversion ABS delete
    lots of dents
    You guys are going to have to wait a bit for any more pics of the actual bumper when it’s installed. The reason being is that i want to mount the winch on the bumper before it gets bolted to the frame brackets. I was going to try to find an old used Warn M10000 winch on craigslist, but i haven’t found one that i like the looks of just yet. I currently have a few winches that could be made to work, but two of them are the Warn “integrated” style (warn XD9000i and HS9500i) Which means that its solenoids are located in the top of the winch. Those type of winches are too tall to fit. I decided to use my XD9i in the ARB bumper. I ordered up both sides of the “drum support plates” that will effectively transform my 9000i into a standard 9000. Parts probably won’t arrive until next year. No problem, it will allow my rattle can paint more time to harden up a bit. Of course i’ll have to buy battery cables and a power cutoff relay. I’ll also have to wire in my Albright contactor (i’m using instead of the problematic solenoids) switch as well.
     
  12. Dec 24, 2024 at 8:40 PM
    #342
    455h0le_dachshund

    455h0le_dachshund Tesler Thought Experiment

    Joined:
    Nov 21, 2023
    Member:
    #107257
    Messages:
    7,171
    First Name:
    Reverend Hotdog
    TX...big surprise
    Vehicle:
    Dragstrip Rocketship, Death Machine
    I know for my Coastal front bumper it says I can fit most 10k lb winches and a few 12k lb winches, as long as the solenoid is relocatable. When the time comes for me to put my money where my mouth is, I'll start doing more research. I predict you will be a wealth of knowledge.
     
  13. Dec 25, 2024 at 3:02 PM
    #343
    whodatschrome

    whodatschrome [OP] New Member

    Joined:
    Sep 13, 2023
    Member:
    #103882
    Messages:
    1,776
    Gender:
    Male
    North of North Plains, Oregon
    Vehicle:
    2000 Tundra 4wd AC, 2004 Tundra AC 2wd to 4wd conversion ABS delete
    lots of dents
    A couple more pics-

    This pic you can see where i sank in and welded a M8 extended nut into my crossmember. It’s where the front of the splash/skid plate attaches.
    IMG_1434.jpg


    Here’s a critical measurement for installing the ARB frame bracket. The ARB bracket is located exact 3/4” up from the bottom of my 2x4 crossmember (which is also flush with the bottom of the truck frame). I forgot to takes pics, but i temporarily tack welded in two flat pieces of steel plate to the bottom side of my 2x4 crossmember. I then set (without welding) a piece of 3/4” thick square steel (you can use whatever you have that’s 3/4” thick) on top of the tack welded in steel plates. Those plates stuck out just far enough that i could rest the ARB bracket on top of them, and letting me be able to move the ARB bracket to the left or right a smidge to get it dead centered…all the while it stays at the exact height that i wanted it (which was 3/4” above my 2x4 crossmember). I then used a bar clamp to hold it into position while i made the tack welds.
    IMG_1437.jpg

    Once the ARB bracket was tack welded to the frame, i then fitted the ARB bumper itself to the ARB bracket. I had to install and remove the bumper about 10 times. Each time i would have to cut down the height of the ARB bracket a little bit more and more until i got my ARB bumper to line up with the fenders on the truck. When i got the bumper positioned exactly where i wanted it, i then tack welded the bumper to the ARB frame bracket. I then cut out the temporary tack welds that held the ARB bracket to the truck’s 2x4 crossmember. I removed the ARB bumper and ARB bracket as one until. The reason being is that i wanted to drill all my attaching holes NOT while i’m laying on my back. Plus when the ARB bracket and bumper are tack welded together, it’s impossible for anything to shift while drilling the holes. Once the holes were drilled, i then remounted the ARB bumper and bracket all as one unit. Next i double checked my reveals and then welded the ARB bracket to the truck’s 2x4 crossmember. I then cut out the temporary tack welds that held the ARB bumper to the ARB bracket. By doing all of that, it made a sure fire way of keeping everything in alignment. It took a bit more time to do it that way, but it was a bit less labor intensive and the overall results will be exact. Hopefully that all made sense and not a bunch of rambling.
     
    BroHon, Dracko and The Black Mamba like this.
  14. Dec 26, 2024 at 4:20 PM
    #344
    whodatschrome

    whodatschrome [OP] New Member

    Joined:
    Sep 13, 2023
    Member:
    #103882
    Messages:
    1,776
    Gender:
    Male
    North of North Plains, Oregon
    Vehicle:
    2000 Tundra 4wd AC, 2004 Tundra AC 2wd to 4wd conversion ABS delete
    lots of dents
    I rattle can blasted the frame and ARB bracket with rustoleum quick dry gloss black. Over time it should fade out to a semi-gloss (which will match the color of the frame better).

    I also fashioned up some brackets that the front edge of the plastic wheel wells liners will attach to. It’s super simple. I found a long piece of 4x4 aluminum angle. It’s not very thick though, maybe a pinch over 1/16”? It’s not like it supports much of any weight though. I cut the aluminum angle to be 2” long. It attaches to the already threaded holes in the front body mounts. A couple large fender washers and the liners were securely attached. Luckily i found all the fasteners in my shop, and that they were all stainless steel. I can only assume that i’ll have to trim down more the fender liners one the ARB bumper is installed.

    IMG_1440.jpg IMG_1441.jpg IMG_1442.jpg IMG_1439.jpg IMG_1444.jpg
     
    BroHon, Lundy, des2mtn and 2 others like this.
  15. Dec 30, 2024 at 10:23 PM
    #345
    whodatschrome

    whodatschrome [OP] New Member

    Joined:
    Sep 13, 2023
    Member:
    #103882
    Messages:
    1,776
    Gender:
    Male
    North of North Plains, Oregon
    Vehicle:
    2000 Tundra 4wd AC, 2004 Tundra AC 2wd to 4wd conversion ABS delete
    lots of dents
    I have been steadily working on installing my Warn XD9000i winch (the “i” means that the solenoids are located on top of the winch housing). I had planned on converting my “i” winch into a “non i” winch by buying a pair of the “non i” drum supports…which i did end up buying. But with all my research on the compatibility of the two different style winches, i overlooked the obvious…the XD9i holds 125’ of cable and the XD9 holds only 100’. I really wanted a full 125’ of cable on my drum, so i decided to cut down the drum supports on my XD9i. I wasn’t keen on the idea, but it was the only way to fit the winch with 125’ of cable.

    A short history on this winch. My parents bought me the winch for christmas waaay back in 1996, so it does have sentimental value. I did have the warn service department go through the whole winch about 10 years ago, and it’s been sitting on my shelf ever since.IMG_1445.jpg IMG_1446.jpg IMG_1447.jpg


    The winch fits, but there’s only about a 1/2” gap between the winch and the welded on ARB bumper bracket. I’d much prefer to have at least an inch of space, just in case if there’s an unforeseen circumstance where the bumper gets pushed back (such as a mild front end collision). One fix for that would be to notch out the welded on ARB bracket. It wouldn’t affect the strength of the crossbar at all, but it would be a big mess to cut out that proposed notch. I’m not interested in doing that this winter. If it’s still a big deal to me in another 6 months, i’d perform that surgery this coming summer.
    IMG_1450.jpg
     
  16. Dec 30, 2024 at 10:41 PM
    #346
    whodatschrome

    whodatschrome [OP] New Member

    Joined:
    Sep 13, 2023
    Member:
    #103882
    Messages:
    1,776
    Gender:
    Male
    North of North Plains, Oregon
    Vehicle:
    2000 Tundra 4wd AC, 2004 Tundra AC 2wd to 4wd conversion ABS delete
    lots of dents
    The solenoids on the warn winches aren’t the most reliable relays (and warn uses 4 separate solenoids). A couple years ago i bought a box of Albright contactor switches and i’m slowly modifying all my winches over to an Albright (only need 1 per winch).

    It took me a while to figure out where a good place was to fit the Albright switch. I decided to mount it on the inside of the passenger side core support. I welded up an aluminum bracket in order to get the switch exactly where i wanted it. The flat piece of aluminum wasn’t wide enough so i welded on an additional scrap piece that’s about 3/4” wide. I could only find 1/4” thick aluminum in my shop, so the bracket is a bit overkill. IMG_1456.jpg IMG_1457.jpg IMG_1458.jpg IMG_1459.jpg IMG_1462.jpg IMG_1465.jpg IMG_1469.jpg
     
  17. Dec 31, 2024 at 8:21 PM
    #347
    whodatschrome

    whodatschrome [OP] New Member

    Joined:
    Sep 13, 2023
    Member:
    #103882
    Messages:
    1,776
    Gender:
    Male
    North of North Plains, Oregon
    Vehicle:
    2000 Tundra 4wd AC, 2004 Tundra AC 2wd to 4wd conversion ABS delete
    lots of dents
    A few pics of the winch reassembled. The XD9i was designed to be mounted “feet down” (just like it sounds). With the ARB bumper design, the winch must be mounted “feet forward”. That required a little bit of modifications to do that. I had to clock both the motor side support plate and the clutch side support plate. The motor side plate required that i drill and tap two new holes (for the two long 1/4” screws that attach the motor to the drum support). If that isn’t done, then the threaded battery studs on the motor won’t be oriented correctly. The same thing for the clutch side. If that isn’t located correctly, you won’t be able to access the clutch lever with your hand. These are all things that i knew beforehand. Though it was all fairly straightforward, it was a bigger hassle than i thought it would be.


    FYI, the large oval access hole that ARB created to stick your hand through to rotate the clutch handle is totally useless…especially if you’re wearing any kind of gloves. The hole is not nearly large enough or even in the correct position. If the bumper wasn’t already powdercoated, i’d totally cut out a metal patch and weld that hole completely closed.

    IMG_1471.jpg IMG_1472.jpg IMG_1474.jpg
     
    Last edited: Dec 31, 2024
  18. Jan 2, 2025 at 12:26 AM
    #348
    whodatschrome

    whodatschrome [OP] New Member

    Joined:
    Sep 13, 2023
    Member:
    #103882
    Messages:
    1,776
    Gender:
    Male
    North of North Plains, Oregon
    Vehicle:
    2000 Tundra 4wd AC, 2004 Tundra AC 2wd to 4wd conversion ABS delete
    lots of dents
    I’m also adding in a battery disconnect switch for safety sake (Blue Sea 7700). The reason being is that the battery wire that goes from the winch solenoids to the battery can easily get smooshed and grounded out to the frame in the event of a front end collision. It would be very challenging to put out an electrical fire on the side of the road. For a dedicated off road rig i wouldn’t ever install this switch, but from first hand experience of getting into a collision and getting the battery cable (luckily it was only the ground cable and not the positive cable) sheared 1/3 of the way through it, i don’t feel comfortable anymore on not having a disconnect switch. https://www.bluesea.com/products/7700/ML-RBS_Remote_Battery_Switch_with_Manual_Control_-_12V_DC_500A

    I measured up all the battery cables that i need for the winch and then placed my order. Hopefully i’ll get all the rest of the parts in a week so that i can get everything wired up.


    It took me a few hours to make a final decision on where to fit the disconnect switch, but once i found a place that i liked, then the rest of the process went pretty quickly.


    The spot i wanted to place the switch was uneven so i had to make some ugly tack welds of various heights of aluminum spacers to my 1/4” thick mounting plate.
    IMG_1475.jpg IMG_1476.jpg IMG_1477.jpg IMG_1478.jpg IMG_1479.jpg


    Four M5 stainless screws hold the switch to the top of the inner fender.
    IMG_1480.jpg
     
    BroHon, JasonC., des2mtn and 4 others like this.
  19. Jan 2, 2025 at 9:46 PM
    #349
    whodatschrome

    whodatschrome [OP] New Member

    Joined:
    Sep 13, 2023
    Member:
    #103882
    Messages:
    1,776
    Gender:
    Male
    North of North Plains, Oregon
    Vehicle:
    2000 Tundra 4wd AC, 2004 Tundra AC 2wd to 4wd conversion ABS delete
    lots of dents
    Not a spectacular mod, but definitely noteworthy and something needed to be done. The plastic wheel well liners don’t really work with the ARB bumper…whatsoever. Being in the muddy wet Pac NW, removing the liners completely is not an option for me. I used a heat gun to remold the plastic. I managed to tuck the plastic behind the lip on the bumper’s wings, and it’s pretty solid. It’s not factory perfect, but it’s plenty good enough.


    Passenger side before-
    IMG_1484.jpg


    Passenger side after-
    IMG_1485.jpg

    Driver side after-
    IMG_1486.jpg
     
    BroHon, KNABORES, JasonC. and 3 others like this.
  20. Jan 3, 2025 at 11:11 AM
    #350
    The Black Mamba

    The Black Mamba He must increase, but I must decrease - John 3:30

    Joined:
    Sep 6, 2023
    Member:
    #103472
    Messages:
    4,153
    First Name:
    Ryan
    DFW
    Vehicle:
    Black 00 SR5 AC 5VZ PreRunner
    Imma keep it stock
    You're such a tease. We can't even get a bumper shot yet. We only get side boob :(
     
  21. Jan 11, 2025 at 10:19 PM
    #351
    whodatschrome

    whodatschrome [OP] New Member

    Joined:
    Sep 13, 2023
    Member:
    #103882
    Messages:
    1,776
    Gender:
    Male
    North of North Plains, Oregon
    Vehicle:
    2000 Tundra 4wd AC, 2004 Tundra AC 2wd to 4wd conversion ABS delete
    lots of dents
    LOL…i’ll get the money shot pretty soon
     
  22. Jan 11, 2025 at 10:47 PM
    #352
    whodatschrome

    whodatschrome [OP] New Member

    Joined:
    Sep 13, 2023
    Member:
    #103882
    Messages:
    1,776
    Gender:
    Male
    North of North Plains, Oregon
    Vehicle:
    2000 Tundra 4wd AC, 2004 Tundra AC 2wd to 4wd conversion ABS delete
    lots of dents
    I order up a bunch of battery cables for the winch. I went a little bit overkill with some 1/0 gauge wire (aka, 0 AWG).
    For comparison, Warn includes 2 gauge wires with their winches. I’m thinking that our tundras also use 2 gauge wire for the battery cables (starter and ground).
    https://www.batterycablesusa.com/assets/images/battery_cable_compare.pdf


    I went with their “extreme” battery cable option. https://www.batterycablesusa.com/0-gauge-1-0-awg-extreme-battery-cable-with-ends

    IMG_1506.jpg


    I bought Moroso battery post clamps. It makes it super easy to add in multiple wires to the battery posts. The only thing i don’t like about them is that you have to clamp them down REAL tight so that they don’t rotate on the battery posts. I was just thinking that i might try threading in a tiny set screw into the Moroso clamp so that it would rotate on the battery post?
    IMG_1502.jpg IMG_1501.jpg


    Since i relocated the winch solenoid/contactor switch much further away from the winch, i had to modify and extend the wires that go from the socket to the contactor switch.
    IMG_1491.jpg


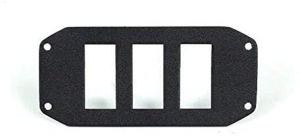
    I decided to drill holes in the bumper to mount the socket for the winch controller switch.
    IMG_1499.jpg
     
    des2mtn, BroHon and The Black Mamba like this.
  23. Jan 11, 2025 at 10:59 PM
    #353
    whodatschrome

    whodatschrome [OP] New Member

    Joined:
    Sep 13, 2023
    Member:
    #103882
    Messages:
    1,776
    Gender:
    Male
    North of North Plains, Oregon
    Vehicle:
    2000 Tundra 4wd AC, 2004 Tundra AC 2wd to 4wd conversion ABS delete
    lots of dents
    Albright contactor switch all wires up.
    IMG_1510.jpg


    Blue sea battery shut off switch is mounted. I have yet to wire in the optional remote rocker switch inside the cab. I first have to find a good spot that i like for that switch first though. There’s no rush since i can manually turn the switch on and off by hand. It’s the yellow knob thing on the switch that gets manually rotated to turn it on and off.
    IMG_1514.jpg


    NOTE: i have baking soda sprinkled on my battery since it was oozing battery acid. I didn’t bother cleaning it off just yet.

    My battery ground cable looked a bit iffy from corrosion, and there was no way that the negative battery clamp would work with my battery terminal clamps, so i ended up cutting off the clamp and soldered on a terminal lug on the end of it. I also had a new short 4 AWG wire that goes from the negative battery post to the fender ground.
    IMG_1512.jpg


    I accidentally ordered up one of my cables about 17” too long, so there’s a large loop that you can see in the pic. At some point i’ll get a shorter cable made up, but there’s currently no rush.
    IMG_1511.jpg
     
  24. Jan 11, 2025 at 11:04 PM
    #354
    455h0le_dachshund

    455h0le_dachshund Tesler Thought Experiment

    Joined:
    Nov 21, 2023
    Member:
    #107257
    Messages:
    7,171
    First Name:
    Reverend Hotdog
    TX...big surprise
    Vehicle:
    Dragstrip Rocketship, Death Machine
    Ooh you tease
     
  25. Jan 15, 2025 at 9:37 PM
    #355
    whodatschrome

    whodatschrome [OP] New Member

    Joined:
    Sep 13, 2023
    Member:
    #103882
    Messages:
    1,776
    Gender:
    Male
    North of North Plains, Oregon
    Vehicle:
    2000 Tundra 4wd AC, 2004 Tundra AC 2wd to 4wd conversion ABS delete
    lots of dents
    Going back to the Moroso battery post clamps…they turned out to be a big fail. And here’s the reason why-

    The Moroso aluminum battery post clamps are well made and have the perfect shape to fit our tundra trucks. The problem is with them is that no matter how tight you torque down the clamping bolt, the clamp can fairly easily be rotated on the post. just trying to tighten up the bolts that attach the battery cable lug to the clamp will cause the clamp to rotate…which sucks big time. My solution was to drill and tap the moroso clamp with a tiny M4 set screw. It works just OK. I might add in a second set screw so that it’s more solid of a connection.


    The other problem is that the bolts that hold the battery terminals to the clamp is that they are prone to loosen up VERY easily. The included bolts don’t come with washers so that could be one of the reasons. I did install lock washers under the bolts during my install. We’ll see how it works. If not well, then i’ll try using some Nord-Lock washers instead.


    I would think that Moroso would have found out through testing that this is a problem? But it turns out that any brand of aluminum clamps don’t work very well whatsoever in clamping to lead battery posts.


    The hex wrench is pointing at the M4 hole that i drilled and tapped.
    IMG_1539.jpg IMG_1540.jpg
     
    BroHon and The Black Mamba like this.
  26. Jan 16, 2025 at 5:22 AM
    #356
    The Black Mamba

    The Black Mamba He must increase, but I must decrease - John 3:30

    Joined:
    Sep 6, 2023
    Member:
    #103472
    Messages:
    4,153
    First Name:
    Ryan
    DFW
    Vehicle:
    Black 00 SR5 AC 5VZ PreRunner
    Imma keep it stock
    That's good to know. I'm now invested in watching this to see your set up so that I can follow along once I mount and wire up my winch :cool:
     
    Last edited: Jan 16, 2025
  27. Jan 17, 2025 at 1:05 PM
    #357
    JasonC.

    JasonC. ¯\_(ツ)_/¯

    Joined:
    Jan 23, 2023
    Member:
    #90779
    Messages:
    1,116
    TX
    Vehicle:
    2001 4x4 4.7L “Best Cab”/AC Limited 50k mi
    Neat. So then could you hide it in the cab somewhere and it function like a kill switch?
     
  28. Jan 20, 2025 at 7:25 PM
    #358
    whodatschrome

    whodatschrome [OP] New Member

    Joined:
    Sep 13, 2023
    Member:
    #103882
    Messages:
    1,776
    Gender:
    Male
    North of North Plains, Oregon
    Vehicle:
    2000 Tundra 4wd AC, 2004 Tundra AC 2wd to 4wd conversion ABS delete
    lots of dents
    Here’s another look at the Moroso battery clamp. The shape of it is literally perfect for attaching the OEM 90 degree battery terminal it. Other than that, the aluminum is just too hard of a material to use for a battery clamps, so it’s prone to just spin and rotate around the battery post. Maybe making a whole bunch of dimples (like 20 or so) with a center punch on the inside of the moroso clamp might be a solution? I can’t say for sure, but it was an idea that popped into my head.
    IMG_1602.jpg
     
  29. Jan 20, 2025 at 7:36 PM
    #359
    whodatschrome

    whodatschrome [OP] New Member

    Joined:
    Sep 13, 2023
    Member:
    #103882
    Messages:
    1,776
    Gender:
    Male
    North of North Plains, Oregon
    Vehicle:
    2000 Tundra 4wd AC, 2004 Tundra AC 2wd to 4wd conversion ABS delete
    lots of dents
    Well, the Bluesea battery shut off is wired in between the battery and the winch, so it’s not like some sort of theft deterrent (if that’s what you’re thinking it’s for), so there’s no need to hide the remote mounted battery/winch shutoff switch in the cab. Ideally the switch would be mounted in a location that’s readily accessible from the driver’s seat. The switch a standard sized Contura rocker switch, but it has an additional facade (which can be removed) on the face of it so that it can’t accidentally be turned on or off.
    IMG_1623.png
     
    BroHon and The Black Mamba like this.
  30. Jan 20, 2025 at 7:42 PM
    #360
    whodatschrome

    whodatschrome [OP] New Member

    Joined:
    Sep 13, 2023
    Member:
    #103882
    Messages:
    1,776
    Gender:
    Male
    North of North Plains, Oregon
    Vehicle:
    2000 Tundra 4wd AC, 2004 Tundra AC 2wd to 4wd conversion ABS delete
    lots of dents
    Since i did some cutting and welding to the frame, i ended up squirting rattle can paint and primer to the inside of the front frame rails. That’s plenty of protection from rust here in the pacific NW, but since i had a couple cans of NOX-Rust, i figured i’d spray that inside the frame rails as well. It was left over from some frame repairs that i did on a friend’s 2023 suburban that he bought at an auction. The spray is some pretty nasty stuff…in a good way.
    IMG_1568.jpg IMG_1569.jpg
     
    BroHon and The Black Mamba like this.

Products Discussed in

To Top