1. Welcome to Tundras.com!

    You are currently viewing as a guest! To get full-access, you need to register for a FREE account.

    As a registered member, you’ll be able to:
    • Participate in all Tundra discussion topics
    • Transfer over your build thread from a different forum to this one
    • Communicate privately with other Tundra owners from around the world
    • Post your own photos in our Members Gallery
    • Access all special features of the site

2004 DC 4.7 4WD Build Log

Discussion in '1st Gen Builds (2000-2006)' started by TXTundraGuy23, Aug 13, 2023.

  1. Aug 13, 2023 at 5:48 PM
    #1
    TXTundraGuy23

    TXTundraGuy23 [OP] One piece at a time

    Joined:
    Apr 7, 2023
    Member:
    #95139
    Messages:
    381
    Gender:
    Male
    Dallas
    Vehicle:
    2004 DC 4.7L 4WD
    6112s up front w/ 650 lb springs, 5160s in the rear, JBA UCAs, Suspension Maxx Links, ATS leafs w/ Wheeler's AAL and overload spring, Toyota Gloss Gunmetal TRD Wheels, Toyo Open Country AT3s 275/70/17
    Hey guys,

    Been posting a bit since I bought the truck a few months ago and thought I’d go ahead and start a build log just to track the change over time. Already did the head unit and backup cam, but we can pickup from there. Hopefully exciting stuff like lift, exhaust, tires to come…

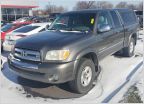
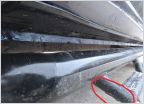
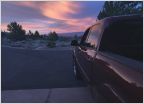
    But today just posting on the chrome delete I did. https://www.amazon.com/dp/B078X41NL1?ref=ppx_pop_dt_b_product_details. Bought this 5’x1’ vinyl wrap and did the mirrors and chrome parts of the grille. Lots of guidance from this thread - https://www.tundras.com/threads/2005-double-cab-4x4-daily-driver-warning-pic-heavy-little-ot.75017/. Pics below. Turned out pretty good, maybe 7/10.

    Takeaways for anyone who wants to give this a shot:

    • color listed above was a pretty good match for the phantom grey pearl.
    • The stuff was semi finicky to apply, as expected. I did mine in 105 degrees in the sun so that may not have helped, but I barely had to use the heat gun!
    • I bet this would work much better if you wrapped all the way over the edges of the pieces you were doing. I didn’t do that for the mirrors or grille. Grille looked pretty permanently attached from the back and I didn’t want to risk breaking a mirror.
    • Had a little left so I patched together some on the black trim piece just in front of the rear window to see what it’d look like. Not bad, what do y’all think? Could buy another piece and do that later. Thinking about the rear bumper…
    F6E96BFD-7EE9-47E3-A63C-640385F6C239.jpg A3CD7AD5-7C18-4AC5-9BA4-3E2B7EC40F38.jpg 3962C665-9F2D-4850-A5E6-108975BA6ED2.jpg E4A1982D-8C89-4A88-86B2-3E43DBEC4447.jpg 3E466A0D-1A20-40DE-8915-BDE464C69127.jpg 4258967D-C39C-4A33-BC24-FF09AB18A9A7.jpg
     
  2. Aug 14, 2023 at 4:54 AM
    #2
    JasonC.

    JasonC. ¯\_(ツ)_/¯

    Joined:
    Jan 23, 2023
    Member:
    #90779
    Messages:
    1,116
    TX
    Vehicle:
    2001 4x4 4.7L “Best Cab”/AC Limited 50k mi
    That turned out pretty good! That’s interesting on the B-pillar window trim. Would probably look good if you’ve got the time/interest to mess with it and do the rest of them.
     
  3. Aug 14, 2023 at 9:02 AM
    #3
    TXTundraGuy23

    TXTundraGuy23 [OP] One piece at a time

    Joined:
    Apr 7, 2023
    Member:
    #95139
    Messages:
    381
    Gender:
    Male
    Dallas
    Vehicle:
    2004 DC 4.7L 4WD
    6112s up front w/ 650 lb springs, 5160s in the rear, JBA UCAs, Suspension Maxx Links, ATS leafs w/ Wheeler's AAL and overload spring, Toyota Gloss Gunmetal TRD Wheels, Toyo Open Country AT3s 275/70/17
    Yeah. We'll see. @912 did his rear bumper too and I'm trying to decide if I want to try that.
     
    912 likes this.
  4. Aug 14, 2023 at 9:35 AM
    #4
    Tundra1986

    Tundra1986 New Member

    Joined:
    Jul 2, 2023
    Member:
    #99616
    Messages:
    51
    Gender:
    Male
    Vehicle:
    2003 Tundra SR5 4x4
    Looks like you’re starting off with a fantastic canvas ! Enjoy your build
     
  5. Aug 14, 2023 at 9:20 PM
    #5
    912

    912 @best_gen_tundra

    Joined:
    Feb 15, 2017
    Member:
    #6393
    Messages:
    469
    Gender:
    Male
    First Name:
    Brian
    Fulltime RV traveler
    Vehicle:
    2005 DC 4x4
    Nice work on a nice truck!
     
  6. Aug 16, 2023 at 8:28 AM
    #6
    kentuckyMarksman

    kentuckyMarksman New Member

    Joined:
    Jul 24, 2023
    Member:
    #100837
    Messages:
    511
    Gender:
    Male
    Vehicle:
    2006 Tundra SR5 Double Cab - 4.7L V8 4x4
    Saw your post on Reddit. Looks good to me!
     
  7. Jan 6, 2025 at 10:46 AM
    #7
    TXTundraGuy23

    TXTundraGuy23 [OP] One piece at a time

    Joined:
    Apr 7, 2023
    Member:
    #95139
    Messages:
    381
    Gender:
    Male
    Dallas
    Vehicle:
    2004 DC 4.7L 4WD
    6112s up front w/ 650 lb springs, 5160s in the rear, JBA UCAs, Suspension Maxx Links, ATS leafs w/ Wheeler's AAL and overload spring, Toyota Gloss Gunmetal TRD Wheels, Toyo Open Country AT3s 275/70/17
    Alright - first big post on the build log. Over the last week, I’ve added the front bilstein 6112s on 8/6 notches (preassembled), JBA upper control arms, new oem lower ball joints, suspension maxx extended sway bar links, new rear leafs from ATS with progressive wheeler add a leafs, gloss gunmetal TRD wheels, and 275/70/17 Toyo open country AT3s. Still pending are the 5160s for the rear, but they have proven to be very hard to track down. I’d like to share what I learned and stuff for anyone who is attempting this. Hopefully this helps someone out there!

    Some tips before you start
    1. Do the front end with a buddy if you can. I did mine with a friend who is relatively well versed in truck maintenance and knows how to work. The front end took me and him 7 hours and we were both working full speed the whole time.
    2. Rent a bunch of tools and kits from the LAP. I hit up both o’reilly and auto zone. I ended up renting a nice torque wrench, axle nut removal socket (35mm), and 4 different ball joint presses - c clamp style, pitman arm style, and clothespin style. And we had an air impact, air ratchet, pickle fork, and tons of sockets and wrenches with converters and flexible heads. Round up all the tools you can.
    3. If you have access to the Toyota manual for the truck it helps. The big dictionary one. We had it and referred to it quite a bit for torque specs and other things. There’s a great summary page with nearly all the torque specs for both the front and rear end suspension components.
    4. PB Blast all the bolts a couple times during the week leading up to the job. I have a pretty rust free truck and even so, I was happy I did it.
    5. Watch some youtubes. I got on 1stgenoffroad.com and watched a full install. It doesn't have to be brand specific to what you are doing, but it helps you get familiar with the whole process and general hiccups to expect.
    So to start, we had trouble taking off the axle nut due to a compressor problem and the air wrench not working. So we progressed thinking we’d leave the knuckle on. Well we got about halfway in and were like there’s just no way we can do this with the knuckle on. Mainly because getting the upper ball joint pressed out would be dang near impossible. The c clamp style press we had wouldn’t fit in the wheel well. So we figured out the compressor problem and got the axle nut taken off. I don’t how you would do this without a 1/2” air impact. Maybe you could get it off with huge breaker bar. Breaking them loose (and torquing them down) by hand with the truck on stands and the spindle moving around on you is pretty hard. So be ready. But in my opinion, you gotta take that knuckle off if at all possible.

    The other difficulty during the disassembly portion is pressing out the ball joints. We got the tie rod to ball joint connection popped out pretty easy. I think we used a pitman arm puller and it came out pretty easy. The LBJ connection to the lower control arm was more stubborn. We used a hammer and I think the pitman arm puller there as well. Those things are sweet if they fit right. I'd rent as many sizes of those as you can. The big problem child was pressing the upper ball joint out of the knuckle. Once we got the nut on top of the upper control arm off it was seized up a bit, but it banged out fine with a 3 lb sledge. Then with the knuckle out and sitting on the ground, we got to work on pressing the UBJ out. First off, with all the adapters we had on the c clamp, even with it backed out as far as it would go, there wasn't clearance for everything to fit in the squeeze zone. Also, the top end of the ball joint where it is threaded to go thru the upper control joint pivots all over the place as soon as you put any pressure on it. So we used a grinder and cut off the upper section of the ball joint til it was basically just the ball and a little bit of the post protruding up from there. Then it fit just fine and didn't pivot around. Obviously, you can only do this if you have a new UBJ to replace it. So we knew going in to make sure you get the snap ring off before you try to press the UBJ out. Well, only idiots forget that, right? So we cut the boot off the UBJ to have clear view and when we cut it off, we pulled of a snap ringish looking metal piece that sort of resembled a short section of slinky. We thought it was the snap ring, but it wasn't. I think it was actually just part of the boot. So then we tried to press the UBJ out and it wouldn't go. Then we saw the snap ring and got it off. Then it pressed out but not without some uggas. We had to use the huge c-clamp style press with an air impact. We also had a set of 10 or 12 adapter rings that was necessary to fit on the cast portion of the knuckle but left the exit clear for the UBJ to come out. It's pretty tight tolerance there, so the specific adapter was really helpful.

    The rest of everything really came out fine. We hung the caliper up to keep it out of the way. The shock dropped out super easy. One little snafu that @shifty` called was that on the driver side, the long thru bolt that holds the UCA in runs into a clip that holds a few rigid brake lines (I think that's what it was). We had to unbolt that clip and gently press it out of the way to get that bolt all the way out.

    The reinstall was smoother. The one challenge was pressing the JBA upper ball joint in. We didn't put it in the freezer and I wish we had. The driver side went in pretty smooth using the big c clamp press and adapters. The passenger side got a little crooked when we started and it was tough to straighten it up. I was cringing a little bit as we pressed it in because I could see a hair size metal shaving come off due to it going in a little bit crooked but once it got to the end it seated solid and even. Not optimal, but that thing seats so tight that as long as the final seat location is straight and solid, which it was, I'm personally good with it. Just a heads up to make sure when you do that, try to start super straight and keep it pressing in evenly the whole time if possible.

    MAKE SURE YOU HAVE THE BRAKE LINES IN THE RIGHT SPOT WHEN YOU BOLT THE KNUCKLE BACK ON. DON'T ASK HOW I KNOW THAT.

    And last, when you go to torque the axle nut back on, it's gonna be tough. My torque was 173 ft lbs. We got them to 173 with a torque wrench. Not sure how kosher it is, but we put the lugs on two of the studs and jacked it up on those then torqued it and it helped. It sucks, that's all the advice I got there.

    For the rear, I decided to go ahead put new leafs on. The guy I bought it from did some heavier towing and I just figured if I was gonna put add-a-leafs, I might as well just go full on and get new leafs too. I did this job alone in about 3.5 or 4 hours. I jacked up the truck on the read diff pretty high and put stands under the frame then got to work. It all came off pretty smoothly. You have to take the shackle off with the leaf because I think the bolt from the leaf to the shackle just wouldn't pop out all the way before it bumped into something. Use the c clamps to hold all the leafs together when you are assembling everything. So, as I was putting everything together, I just had a gut feel that I should leave the overload in. The catch was the clip would pinch between the add a leaf and the overload. So I cut the overload to clear the clip, which you can see in the picture below. One little thing that came up was that the washers provided with the u bolts from wheelers didn't seat nicely in the bottom of the spring seat piece that the u bolts bolt thru. So I just reused the oem washers at that spot and it fixed it. A takeaway I had from doing the leafs is that you gotta kinda use the jack and stands to your advantage. I just would go step by step and move the jack around to different spots, up and down, to the axle, back to the diff and what not. Got everything back on and torqued to spec and gave it a test drive. I just left the shocks on for now while I wait for the 5160's. I did not get much lift at all from the AAL, so I'm real glad I left the overload. I saved my old leafs and I may make a bastard pack in the future. If I could snap my fingers and get about 1/2" more rake, I would.

    So when it comes to wheels and tires, I deliberated forever on what to put on. I love these TRD wheels and wanted them pretty bad. Got em on black friday at less that $200 each, so a great deal in my book for some sweet wheels. They are 7" wide, so it limits you to a little bit skinnier tires, but I really didn't want to go any wider than it allowed anyway. I had considered 285/70/17, but I just really didn't want to deal with a lot of rubbing or spacers and I think those would have been more trouble in those arenas. I also like the high and tight look without any poke. I looked into 255/80/17, but after reading other guys on here, I just felt that was probably a little tall for what is realistically a road queen with some light off road adventures a few times a year. So I originally settled on 255/75/17. When discount tire mounted them, I just felt like they were a little skinnier than what I was looking for and I wanted them to be a little more flush with the fender instead of inset. So, I upped it to 275/70/17s. The only con is that the open country AT3s in that size are only E rated. I can tell on the road it is a little rougher, but nothing life changing. I still need to air down a bit and see if that softens up the ride. I think the ride is about break even between stock suspension and SL tires and 6112s on the E-rated. It rode super nice when I had the 6112s on and still had my SLs on last week, but I'm still really happy with what I got. These open countrys looks freakin sweet.

    The main thing is that I am really pleased with the proportion of the overall lift and tires. Proportion, imho, is the hardest thing to get right with lifts and tires and I am really happy with where I landed. The look I got is nearly exactly what I was shooting for. I'll post exact measurements on the measure up thread, but I basically got average of 2 1/4" lift in the front and 1" in the rear (hub to fender). I now have about a 1" rake from front to back. Again, I'd take a little more rake if I could, but it's really close. A lot depends on how much sag I get with 500 lbs in the back and the 5160s in. I'll make the call then if I think it is worth making a bastard pack and building some more rake back in.

    Pics below. Sorry I didn't take more, but you know how it is.

    Before:

    IMG_1778.jpg
    IMG_1793.jpg
    After:

    IMG_1802.jpg
    IMG_1804.jpg

    Just some other pics:
    IMG_1781.jpg

    IMG_1796.jpg

    IMG_1797.jpg
     
  8. Jan 6, 2025 at 10:57 AM
    #8
    shifty`

    shifty` Just like witches at black masses

    Joined:
    Jun 20, 2020
    Member:
    #48239
    Messages:
    28,344
    ATL
    Vehicle:
    '06 AC Limited V8/4WD
    (see signature for truck info)
    Damn! You went whole-hog and just took every-damn-thing out, eh? :rofl:

    Looks familiar (mine below)

    Good work. Piece of advice: Check your brake dust shields up front to make sure you didn't accidentally bend them the slightest bit while you had the knuckle out. I failed to do this and went nuts trying to find my "brake squeal" for months after. And in the process of finding I bent the f'n things, have helped a few other members track down their brake squeal too. The bend was almost imperceptable and I still have NFC how in the hell I did it: https://www.tundras.com/posts/3576977/

    upload_2025-1-6_13-59-39.png
     
    G_unit3000 likes this.
  9. Jan 6, 2025 at 11:02 AM
    #9
    shifty`

    shifty` Just like witches at black masses

    Joined:
    Jun 20, 2020
    Member:
    #48239
    Messages:
    28,344
    ATL
    Vehicle:
    '06 AC Limited V8/4WD
    (see signature for truck info)
    PS - since you lifted the rear, if you have the LSPV don't forget to relocate/raise the LSPV armature mount (bottom box) so the LSPV continues to function as it did before lifting, and you may also want to adjust up the LSPV fasteners (top box) to engage the rears a little faster which will give you a firmer braking feeling. If you find the brakes locking up after the latter, back it down exactly 2 threads and you should get the best of both worlds without the lockup.

    upload_2025-1-6_14-3-6.png
     
    G_unit3000 likes this.
  10. Jan 6, 2025 at 11:09 AM
    #10
    kentuckyMarksman

    kentuckyMarksman New Member

    Joined:
    Jul 24, 2023
    Member:
    #100837
    Messages:
    511
    Gender:
    Male
    Vehicle:
    2006 Tundra SR5 Double Cab - 4.7L V8 4x4
    Nice work! Did you swap your wheel bearings while you had your steering knuckles out?

    I agree, getting the axle nut back on and torqued correctly was a little tricky, but not impossible to do with hand tools. When I did mine, I used a Milwaukee electric impact wrench to take it off, but to get it back on I placed a long pry bar through the studs on the axle while I tightened down the axle nut and torqued it to the correct spec. Might not be the best way to do it, but it worked for me.

    Your truck looks great BTW.
     
    G_unit3000 likes this.
  11. Jan 6, 2025 at 1:45 PM
    #11
    TXTundraGuy23

    TXTundraGuy23 [OP] One piece at a time

    Joined:
    Apr 7, 2023
    Member:
    #95139
    Messages:
    381
    Gender:
    Male
    Dallas
    Vehicle:
    2004 DC 4.7L 4WD
    6112s up front w/ 650 lb springs, 5160s in the rear, JBA UCAs, Suspension Maxx Links, ATS leafs w/ Wheeler's AAL and overload spring, Toyota Gloss Gunmetal TRD Wheels, Toyo Open Country AT3s 275/70/17
    Cool. No squeal yet, so that's a good sign, but I'll keep an ear out!
    I don't think I have one, but I'll check to make sure
     
  12. Jan 6, 2025 at 1:46 PM
    #12
    TXTundraGuy23

    TXTundraGuy23 [OP] One piece at a time

    Joined:
    Apr 7, 2023
    Member:
    #95139
    Messages:
    381
    Gender:
    Male
    Dallas
    Vehicle:
    2004 DC 4.7L 4WD
    6112s up front w/ 650 lb springs, 5160s in the rear, JBA UCAs, Suspension Maxx Links, ATS leafs w/ Wheeler's AAL and overload spring, Toyota Gloss Gunmetal TRD Wheels, Toyo Open Country AT3s 275/70/17
    Thanks man!

    Yeah we tried the crowbar, but it wouldn't reach the ground!

    I didn't do the wheel bearings. Or the CV boots. I've got the boots sitting on a shelf so if I need to do them in the next month or two, I've got it all.
     

Products Discussed in

To Top