

-
Welcome to Tundras.com!
You are currently viewing as a guest! To get full-access, you need to register for a FREE account.
As a registered member, you’ll be able to:- Participate in all Tundra discussion topics
- Transfer over your build thread from a different forum to this one
- Communicate privately with other Tundra owners from around the world
- Post your own photos in our Members Gallery
- Access all special features of the site
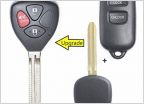 2006 Keyless entry - lost both FOBs
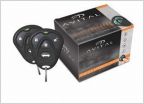 Remote starters. Any real difference?
 Normal brakes are possible!
 Liftgate won’t lock
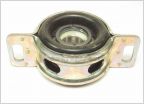 Greasing the drive shaft for 4WD
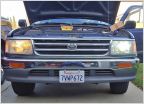 2006 Tundra Limited Double-Cab LED Headlight Problem
JAKEJAKE'S Big Thanksgiving Week Bumper Build Extravaganza (Pic Heavy)
Discussion in '1st Gen Tundras (2000-2006)' started by JakeJake, Nov 20, 2023.
Page 2 of 2
Page 2 of 2


