

-
Welcome to Tundras.com!
You are currently viewing as a guest! To get full-access, you need to register for a FREE account.
As a registered member, you’ll be able to:- Participate in all Tundra discussion topics
- Transfer over your build thread from a different forum to this one
- Communicate privately with other Tundra owners from around the world
- Post your own photos in our Members Gallery
- Access all special features of the site
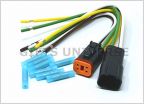 OEM backup camera plug busted
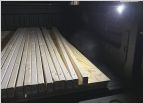 COOL cheap LED bed light option! $28
 2015 Tundra SR5 The Only Model No Factory Bed Rails?
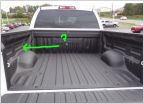 2017 bed question
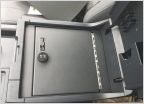 Locker Down Center Console Vault
 Brake Pad Shims
DIY: Baja Designs Squadron-R Sport, 14+ Mount Kit & Bezel
Discussion in '2.5 Gen Tundras (2014-2021)' started by MotoTundra, Aug 29, 2017.
Page 1 of 10
Page 1 of 10


