1. Welcome to Tundras.com!

    You are currently viewing as a guest! To get full-access, you need to register for a FREE account.

    As a registered member, you’ll be able to:
    • Participate in all Tundra discussion topics
    • Transfer over your build thread from a different forum to this one
    • Communicate privately with other Tundra owners from around the world
    • Post your own photos in our Members Gallery
    • Access all special features of the site

2019 Crewmax All New Custom Sound System DIY Build Thread

Discussion in 'Audio & Video' started by Jack_A_Lope, Apr 6, 2023.

  1. Apr 6, 2023 at 5:00 AM
    #1
    Jack_A_Lope

    Jack_A_Lope [OP] New Member

    Joined:
    Nov 22, 2022
    Member:
    #87120
    Messages:
    207
    Gender:
    Male
    First Name:
    Aaron
    Santa Barbara County, CA.
    Vehicle:
    2019 Tundra 4X4 SR5 TRD Sport
    Pro Comp Lift, Tires & Wheels, Steel front bumper with LED lighting, Cross bed tool box, bed rails, custom aftermarket sound system
    IMG_1027.jpg

    This is my 2019 Crewmax and I really didn't like the stock sound system at all. It came with the non JBL Radio with an external amp under the front passenger seat. The sound quality was sub par and I listen to a lot of music so it had to go. So this thread is dedicated to showing off the sound system that I installed in it's place. The system is already finished so this won't be a real time as I do it type of build thread. Although I will show some of my thought processes as I worked through the design phase. I have put custom sound systems in pretty much every vehicle I have ever owned going back to when I was in high school in the 1980's. Back then I really couldn't afford to buy all of the gear that I would like to of had so I was forced to figure out ways to build systems working with what I could and that meant getting pretty creative. That didn't stop me from building some real over the top systems though. It had been a few years since my last car audio install so I had to update my knowledge base on the latest products to make good choices in component selection. I did make a couple of changes along the way but in the end I built something that I can really enjoy.

    For this truck my goals where to completely remove the entire stock sound system and replace it with a very high quality after market head unit, external amps, subs, DSP and high quality component speakers. Unlike in past installs where I would completely remake door panels to accommodate speakers this install would be utilizing the factory speaker locations and I would be avoiding any cutting of the door panels as I am concerned about maintaining it's resale value. Plus these new vehicles have so many air bags in them that I didn't want to do anything that would interfere with them. I wanted a system that was built for sound quality but could still get loud. I wanted it to have plenty of boom but it wasn't important that you hear me 6 blocks away. The interior was going to have to be completely damped and rattle free. The head unit was going to have to retain all off the trucks features and everything was going to have look OEM. I wanted a good amount of power but it had to be able to run off the stock charging system using the stock alternator and without the need for additional batteries.

    So I started with the design process. I needed to decide what subs I was going to use. Since I hadn't been active in the community recently I had very little experience with any of the current offerings and since there aren't very many brick and mortar stereo shops you can walk into and audition equipment anymore this made deciding on which subs to use difficult. I knew I was going to be tight on space so I needed to choose wisely. 10's would be easier to fit but I wanted 12's and I wanted two of them so I decided I would go with a couple of 12" shallow mounts but I didn't know which ones because I had never heard any of them before. So I figured I would go with JL Audio's 12TW3-04 because even though I hadn't ever heard these particular subs before so I didn't know what they sounded like but I do know what JL Audio subs in general sound like and I like them so I bought two of them and got to making a box for them and installing them.

    This starts by removing the rear seats, pulling the stock sound treatment down and removing the sheet metal panel off the rear wall to apply sound deadener.

    IMG_1076.jpg

    IMG_1083.jpg

    IMG_1085.jpg


    IMG_1078.jpg

    IMG_1082.jpg

    I picked up several boxes of sound deadener off of Amazon. I got two different types. The killmat which is your basic 80 mil you apply to the panels and Siless which is more for sound proofing. I used this on top of the killmat for the floors to stop road noise from getting in. The picture above shows the removable panel with the sound deadener on the inside surface so it wouldn't take away any of the very limited space for the box.

    IMG_1090.jpg

    IMG_1094.jpg

    Here is a cardboard mock up of the box I made to assure it would fit and it does.

    IMG_1096.jpg IMG_1097.jpg

    IMG_1098.jpg IMG_1101.jpg IMG_1103.jpg IMG_1104.jpg IMG_1105.jpg

    I wrapped the box in fiberglass.

    IMG_1107.jpg IMG_1109.jpg IMG_1111.jpg IMG_1112.jpg

    IMG_1095.jpg

    Under the rear seat there is a raised platform that the seats are mounted to. It is made of hardened steal rails where the seats bolt to and some formed foam inserts that fit between them. Here I remove the foam and apply deadener to the metal floor before reinstalling them and applying deadener to the foam as well.

    IMG_1116.jpg

    Here is the finish box installed. No sense in dressing it up any more then this as you can't hardly see any of it once the seats are put back in. The next step is to cut some compartments out of the foam under the seat to use for places for mounting the amps and electrical hookups. Below I have cut out the compartments and applied killmat to everything.

    IMG_1119.jpg

    IMG_1120.jpg

    IMG_1121.jpg

    IMG_1136.jpg
    Above you see what it looks like with the carpet cut out and the seats put back in. Below is you see the bolts for the seats. I include them here to show that Toyota decided to use 7 fine thread bolts and 1 course thread bolt. Why Toyota? I'm sure there is a reason but I don't know what it is.

    IMG_1122.jpg

    IMG_1123.jpg

    IMG_1126.jpg

    After the seats where put back in the seat frame was resting against the speaker grill and I wanted at least a little bit of gap between the two so I got some 1/4" plate washers to put under the back of the seat frame to lift the rear of the seat up and slightly forward and away from the speaker. Worked like a charm.

    IMG_1220.jpg

    Next I needed to make the frame for the amp compartments. I used an old method that is used by tradesmen that make granite counter tops to make a templet.

    IMG_1135.jpg

    From this I transferred it to some 3/4" MDF to make this below.

    IMG_1138.jpg

    IMG_1139.jpg

    IMG_1140.jpg

    IMG_1141.jpg


    So next it is time to start the speakers in the doors. For the rest of the speakers I decided to go with a company called CDT Audio. I have used their stuff before and I liked them. They have a lot of different drivers to choose from and their focus is and has always been on sound quality. They are on par with Focal and Morel as far as their fit and finish but aren't nearly as pricey. They have sales all of the time so all you need to do is wait for them to go on sale if the speakers you are looking at are priced a little to high.

    What I went with:
    Rear doors- ES6CX 6.5" carbon fiber coaxial
    Front doors- ES6CV 6.5" carbon fiber woofer
    Dashboard- Unity 8.0 Plus 2" Aluminum Wideband mid/tweeters
    Center channel (Dash)- CF-3 3" DVC center fill

    additionally

    I have two Dayton Audio ND25FN-4 1" neo silk dome tweeters in the rear door panels and
    two Tang Band tweeters that I harvested from a previous installation in my Ford Explorer That I sold recently that are mounted in the front sail panels but are not hooked up at this time.

    I will be showing their installation in the next posting.
     
  2. Apr 6, 2023 at 7:17 AM
    #2
    TucsonTundra1794

    TucsonTundra1794 ASCM #6-11 I'll buy if you're willing to ship

    Joined:
    Mar 8, 2021
    Member:
    #60155
    Messages:
    2,941
    Gender:
    Male
    First Name:
    Anthony
    Tucson, AZ
    Vehicle:
    2023 1794 Edition TRD Package
    Looks great so far, I'm leaning towards pulling everything out and putting sound deadening down because I didn't during the initial install.
     
    Jack_A_Lope[OP] likes this.
  3. Apr 6, 2023 at 11:33 AM
    #3
    b182

    b182 New Member

    Joined:
    Nov 28, 2022
    Member:
    #87500
    Messages:
    6
    Gender:
    Male
    nice set up and awesome wood working!!
     
    Jack_A_Lope[OP] likes this.
  4. Apr 6, 2023 at 12:09 PM
    #4
    dkrou

    dkrou New Member

    Joined:
    Dec 13, 2020
    Member:
    #56121
    Messages:
    434
    Gender:
    Male
    First Name:
    dan
    Vehicle:
    2019 tundra
    Great job...
     
    Jack_A_Lope[OP] likes this.
  5. Apr 6, 2023 at 9:26 PM
    #5
    Jack_A_Lope

    Jack_A_Lope [OP] New Member

    Joined:
    Nov 22, 2022
    Member:
    #87120
    Messages:
    207
    Gender:
    Male
    First Name:
    Aaron
    Santa Barbara County, CA.
    Vehicle:
    2019 Tundra 4X4 SR5 TRD Sport
    Pro Comp Lift, Tires & Wheels, Steel front bumper with LED lighting, Cross bed tool box, bed rails, custom aftermarket sound system
    It is one of the most dramatic improvements you can make as far as improving sound quality and highly recommend doing it. I wouldn't think of doing a sound system install without doing it, and thanks.

    Thanks man.

    Thanks.
     
  6. Apr 6, 2023 at 9:32 PM
    #6
    TucsonTundra1794

    TucsonTundra1794 ASCM #6-11 I'll buy if you're willing to ship

    Joined:
    Mar 8, 2021
    Member:
    #60155
    Messages:
    2,941
    Gender:
    Male
    First Name:
    Anthony
    Tucson, AZ
    Vehicle:
    2023 1794 Edition TRD Package
  7. Apr 7, 2023 at 12:09 AM
    #7
    Jack_A_Lope

    Jack_A_Lope [OP] New Member

    Joined:
    Nov 22, 2022
    Member:
    #87120
    Messages:
    207
    Gender:
    Male
    First Name:
    Aaron
    Santa Barbara County, CA.
    Vehicle:
    2019 Tundra 4X4 SR5 TRD Sport
    Pro Comp Lift, Tires & Wheels, Steel front bumper with LED lighting, Cross bed tool box, bed rails, custom aftermarket sound system
    Part 2- Door Speakers

    So the stock speakers in the Tundra really suck. Badddly. From the rear door below.

    IMG_1168.jpg

    IMG_1172.jpg

    So these are the replacements. They are mounted in an adaptor made by Metra but before they get mounted in the doors they will be an additional silicone rubber baffle that helps keep the rain water from getting to the speaker in the rear and helps form a seal between the speaker and the door card or door panel. You will see what I'm talking about shortly.

    IMG_1169.jpg

    IMG_1170.jpg

    So after removing the rear door card and shitcanning the stock atrocities, I start applying the killmat. First to the inside of the outer skin then to the inner skin. There are two large access holes in the inner skin that are normally only covered by some plastic stuck to the door with some sticky mastic. In order to make the air volume inside of the door a little less leaky I cut some ridged covers from some 1/4" mahogany plywood to close the holes. I then use the killmat to secure them to the doors.


    Left side
    IMG_1166.jpg

    Right side
    IMG_1174.jpg


    You can see here where I wrap the killmat around the edge of the speaker opening. This helps to keep you from cutting your self on sharp edges. When doing the killmat you must pay attention not to cover the holes for the plastic clippie things that hold the door card on. You want to cover pretty much the whole surface as long as doing so won't interfere with normal operations. You need to take care when applying dampening inside the doors as not get any on the tracks for the windows. Make sure the surfaces are clean before applying the deadening and use rollers to make a strong bond. Keep all deadening under the door card so you won't see it. Make sure to cut around any bolt heads so you can do service on the windows if needed at a later date.

    IMG_1175.jpg

    For this installation I am reusing the speaker wire from the stock speakers. It is more then sufficient and running new wire through the door boots is a royal pain in the booty. Here are the rear speakers mounted with the silicone rubber baffle I spoke about a bit a go.

    IMG_1176.jpg


    IMG_1177.jpg


    I will talk about the stock wiring when we get to the part about installing the amp under the front passenger seat. Next is the rear door cards. You will notice in the pics below there is a Styrofoam block attached to the door cards. This is for giving the door card some rigidity and it normally protrudes into that service hole that I just covered up with plywood so this Styrofoam block needs to be cut down or the door cards won't go back on. It's easy to do with a regular old hand saw.


    Before
    IMG_1178.jpg


    After
    IMG_1181.jpg


    There is a tweeter in the top of the door card that I will be replacing with the Dayton Audio soft dome. Doing this is optional and some people choose not to. I choose the Dayton Audio mainly because it fit and I was familiar with how it sounds. I have used it before in previous installs. It has been around for years and is reliable. It sounds good but I wouldn't use it as the main tweeter but works good as a fill or supplemental tweeter.

    IMG_1192.jpg


    IMG_1193.jpg


    IMG_1228.jpg


    IMG_1231.jpg


    After making a pig tail for the tweeter I needed to modify the door card slightly to accommodate the new and slightly larger tweeter. That required me to do a little trimming of the stock tweeter mount. Nothing major like cutting new holes in the cards like I have done in the past.

    IMG_1225.jpg


    IMG_1227.jpg


    And some hot glue to mount the new tweeter to the card ands we are good to go. Not the prettiest to look at but it works well and you don't see it. So who cares.
    IMG_1230.jpg


    When using the stock speaker wire for the tweeter it will rout the tweeter to the back of the head unit and will be powered by the head unit if the head unit is plug and play. They will be on the rear channels. You can also choose to wire it in parallel with the door speaker but this will require a passive x-over. This is how I did it. I can't remember exactly what the specs on the capacitor where but I think it was around 6uf 400v metalized polypropylene with a 4 or 8 ohm resister wired in series before the cap. Just a simple 1st order x-over with some padding to keep it from blaring. 6uf for the x-over is pretty high so it is only going to play the highest parts which is what I wanted seeing that there is a tweeter attached to the door speaker already playing a wider range. Having the tweeter up higher in the door will help fill in the top part of the range that gets partially lost with the door speakers being that low in the doors and that part of the frequency spectrum being quite directional.


    Next comes the damping of the door cards themselves. This is important because there is a lot of plastic in these interiors and you have to make sure that it won't start rattling. The door cards are made from several pieces of molded plastic that are spot welded together. Yes you can spot weld plastic as you can plainly see in the above pic. There are a couple different types of plastic used as well. You need to go along all of the seams and apply, in my case, killmat. This will glue the whole seam together assuring that it won't rattle. I go along and tap my finger on the card and listen to it. I apply killmat to anything that rattles. I cut smaller pieces that fit in between the various plastic ridges so that the killmat makes full contact with the plastic instead of running it over the tops of the ridges that create air pockets where the killmat isn't in contact with the plastic. It is a small detail but one that I pay attention to.

    IMG_1235.jpg


    IMG_1236.jpg


    IMG_1237.jpg

    The above pic shows that Styrofoam block that I cut down. I covered it and attached it to the card with the killmat by rolling the killmat from the plastic door card up onto the Styrofoam block preventing any rattles.

    So on to the front doors.

    Pretty much the same thing. Open it up, ditch the old speakers, cover the service holes, apply the killmat wire the speakers and attach them. Done. Up front the factory system uses 6x9's in the doors. You can replace them with 6x9's if you like but I chose to use 6-1/2" component speakers instead. This requires an adaptor plate to mount the speaker I used one from Metra.


    IMG_1249.jpg


    IMG_1291.jpg


    IMG_1292.jpg


    I had a little trouble getting the door card to go back on because it was hitting the speaker. As you can see the door card kept pushing the silicone baffle down indicating that it was making contact with it. By the way the silicone baffles are made by NVX and are very high quality and I recommend them. You can find them on Amazon. So to remedy the problem I needed to do a little trimming of the door card around the speaker grill as shown in the pics below.


    IMG_1288.jpg


    IMG_1290.jpg


    Trimming the cards like that solved the problem and they fit fine after that.

    And just incase you doubt the need for using silicone baffles to protect your door speakers from getting wet when it rains take a look at the pics below. That is pretty much what you can expect it to look like after sitting in a rain storm. My truck is a 2019 with like new rubber and that is how much water actually runs through all Tundra doors so use them or take the chance of shorting out your expensive new speakers.


    IMG_1332.jpg


    IMG_1333.jpg


    Anyways that about does it for installing the door speakers. Come back in a day or two and I will show you what I did up in my dash. Then we can move on to the amps and DSP and some other things like wiring and then the head unit and why I decided to ditch the head unit and DSP for something different and quite a bit more expensive. The problems I was having and how the switch in head unit and DSP solved them and in the end the final product and whether or not it is ultimately finished or not. Stay tuned.

    See you all in part 3.


    Attached Files:

    Nbab23 likes this.
  8. Apr 7, 2023 at 12:14 AM
    #8
    Jack_A_Lope

    Jack_A_Lope [OP] New Member

    Joined:
    Nov 22, 2022
    Member:
    #87120
    Messages:
    207
    Gender:
    Male
    First Name:
    Aaron
    Santa Barbara County, CA.
    Vehicle:
    2019 Tundra 4X4 SR5 TRD Sport
    Pro Comp Lift, Tires & Wheels, Steel front bumper with LED lighting, Cross bed tool box, bed rails, custom aftermarket sound system
    Those look nice. In my new posting I talk about blocking off those service holes and what I did.
     
  9. Apr 8, 2023 at 5:16 AM
    #9
    Jack_A_Lope

    Jack_A_Lope [OP] New Member

    Joined:
    Nov 22, 2022
    Member:
    #87120
    Messages:
    207
    Gender:
    Male
    First Name:
    Aaron
    Santa Barbara County, CA.
    Vehicle:
    2019 Tundra 4X4 SR5 TRD Sport
    Pro Comp Lift, Tires & Wheels, Steel front bumper with LED lighting, Cross bed tool box, bed rails, custom aftermarket sound system
    Part 3. Dash speakers.

    Ok this update will be short because it is late and I'm tired but I wanted to do a small update before I go to bed.

    My original choice of speakers to use up in the dash I wasn't overly impressed with them so I changed them out for something a little different and I am glad I did. The originals weren't half bad but they weren't what I was looking for. They where CDT ES-02EX 2" wideband coaxial drivers pictured in the first pic below.

    IMG_1282.jpg


    IMG_1283.jpg


    IMG_1284.jpg


    I replaced these with CDT Unity 8.0 Plus 2" aluminum cone wideband point-source drivers pictured below. These things are just about perfect for this application. I have no regrets here.

    IMG_1310.jpg


    IMG_1311.jpg


    Most installers replacing the dash speakers will chose a tweeter mounted in a custom mount and installed down inside the well on the dash. I went a different rout. I like my way of doing this better then anything I have seen so far.


    IMG_1323.jpg


    IMG_1324.jpg


    IMG_1325.jpg


    IMG_1330.jpg


    Almost looks OEM but nicer. This way of mounting the drivers brings them up on top of the dash as opposed to being down in a well and having to play trough both of the speaker grills. The speaker has a wider dispersion this way. This way also gives you more depth to work with allowing for larger drivers.

    Next I will show you the Tang Band drivers I put in my sail panels. I forget the model number on these drivers but it doesn't matter as I don't think Tang Band offers them anymore. At the time of writing this they are installed but aren't hooked up. I don't know if I will bother hooking them up at this point. I put them in originally to compensate for what the original dash speakers where lacking but then I went the way of the Unity's and realized I probably don't need them.

    IMG_1279.jpg

    Like I said earlier these drivers came out of my last vehicle and have some light abrasions as you can see in the above pic.


    IMG_1280.jpg


    IMG_1281.jpg

    All mounted up.
    IMG_1328.jpg


    One last speaker to go and that is the center channel speaker in the center of the dash. It's a CDT CF-3 3" DVC mid-woofer that blends the left and right channels by wiring both channels to the driver one channel to one voice coil and the other channel to the other voice coil. Each voice coil is 4ohm's and is currently wired into the stock wiring and is driven straight off the head unit. Since the Unity 8.0 drivers have new speaker wire running to them and don't use the stock wires, so in order to get signal to the center channel I had to jumper the stock plugs.

    This driver uses a fiberglass Kevlar blend and is nicely built.
    IMG_1312.jpg


    The flip side.
    IMG_1313.jpg


    It comes with an optional grill seen here but did not use it.
    IMG_1315.jpg


    It also came with this stereo L-pad dual pot to help blend the levels in with the right/left speakers. Not using this.
    IMG_1314.jpg


    Below. Stock speaker and a 1/4" mahogany plywood mounting bracket.
    IMG_1334.jpg


    All mounted up and ready to be played. Some people may ask why I used plywood instead of ABS plastic sheeting and I would answer because that is what I had to use. I prefer ABS plastic but it is a bit pricey for what it is and I just didn't have any so I make do with what is available to me and it works just fine.
    IMG_1335.jpg


    That's it for now. That covers all of my speakers. In the next installment I will cover the amps and DSP. I have 2- 4 channel amps and one larger mono amp for my subs. Here is where we will get more into the wiring and I finish the amp compartments.

    Part 4 comes next. So stay tuned.


    Black@Blue19 and panicman like this.
  10. Apr 9, 2023 at 2:49 AM
    #10
    Jack_A_Lope

    Jack_A_Lope [OP] New Member

    Joined:
    Nov 22, 2022
    Member:
    #87120
    Messages:
    207
    Gender:
    Male
    First Name:
    Aaron
    Santa Barbara County, CA.
    Vehicle:
    2019 Tundra 4X4 SR5 TRD Sport
    Pro Comp Lift, Tires & Wheels, Steel front bumper with LED lighting, Cross bed tool box, bed rails, custom aftermarket sound system
    Part 4. Amps & DSP and Some Wire and Fuse's Thrown In For Fun.

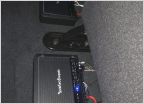
    Over the years I have installed many different amplifiers. I use to install systems in my friends vehicles a lot so back then I had the opportunity to work with some of the top names in car audio. One of my personal favorite amps to install was Orion amps and they have made their way into pretty much all of my vehicles over the past twenty years or so. So when I decided that I was going to put a system in my Tundra I went straight to Orion to see what they where offering. I still have the amp that was in my last ride a 1996 Ford Explorer but it is way to big for what I was planning so I knew I wouldn't be using it but I will let you all see it below.

    The Orion XTR PRO 2400 Mono Class D. The pounding heart of my last system. Operational from 2004 till last year 2022 when I got rid of the truck. The amp still pounds.
    It's got a few cosmetic blemishes but the guts are pristine. I will probably be selling this amp along with some other audio gear that I have accumulated over years in the near future so if anybody is
    interested make me an offer and it could be yours. Any ways where were we? Oh yea...

    IMG_1144.jpg


    So I looked at the Orion web site and as much as I wanted to use Orion amps they just didn't offer anything that was going to work. They had quite a few very high power amps that I to be honest would never find any use for. I'm just not into "burping" my stereo. SPL competitions have always sort of perplexed me. All of that money spent on being the loudest and for what. I like to listen to music and cracking my windshield is never a good day. Orion has always been a major player in SPL competitions but that didn't mean you couldn't use their amps in SQ installs. Back then this was their flagship model. Even though 2400 watts is quite a bit it still was with in reason. Today Orion has amps that can top out at over 20,000 watts RMS. That's just ridiculous. Anyways it became apparent that Orion didn't have any amps with in the power ranges I was looking for and I was going to be looking somewhere else. Now I was facing the same dilemma I had with the subs. I just had no experience with any of the stuff available to the current market and I hate shopping for things like this without having hands on knowledge about the products or at least the brand.


    So began my on line search for amps that would work with what I had planed. My requirements where.

    I was going to need 9 channels and that meant likely 2- 4 channel amps and 1 mono amp.

    All of the amps needed to be matching in basic design and made by the same company.

    The brand had to have a good reputation.

    Had to be well made and met their stated specifications in wattage RMS and low distortion figures.

    High efficiency Class D circuitry with protection circuits in a compact design.

    Mono amp had to be 1 ohm stable between 800 to 1,000 watts RMS.

    The 4 channel amps needed to be 2 ohm stable and around 100 watts RMS per channel.

    Reasonably priced.

    Non DSP as I was planning on using external DSP.

    A remote base controller for the mono amp.

    A signal to noise ratio of over 90db

    Use quality internal components from well known brands and 105 degree capacitors.


    Not asking to much...Right?

    A man has to have standards. And so the search began. This actually took longer then I thought it would. I was looking at Sun Down Audio, SKAR Audio, JL Audio and some others but wasn't ready to pull the trigger on any of them yet. Then I was watching some videos from Williston Audio Labs on you tube. The guy does "amp dynos" of various amplifiers to verify that they make their advertised or stated power values. He had a series of videos testing amps from Down4Sound. Down4Sound is an online car audio store ran by John Price who is well known in the world of over the top SPL competitions. Apparently he started selling a "house branded" series of amplifiers at his store and was sending them to Williston to be independently tested. They where consistently making their rated power and from what I could see they where well made and met all my goals. So I decided to do a little research. I went to Down4Sound's web site and took a look around. He had quite a few different amps that he was offering. A wide range of very useable power out puts. Things looked good. The only thing that gave me pause was the simple fact that these where brand new to the market and were not actually made by John Price as he was just a store owner and not a manufacturer. But the prices where very reasonable and they met my needs perfectly so I decided to take a chance. I pulled the trigger on,

    1 JP8 Mono block rated at 800+ watts but dyno tested at 1256 watts 1 ohm at 14.4 volts available here


    2 JP84 400 watts x 4 Dyno tested at 163 watts per channel 2 ohm at 14.4 volts available here


    So far I have no regrets. Anyone considering these amps for their own install should not hesitate to get them. Price has done a good job with them and I have no doubts they will do the job nicely.


    Now I have my amps but need a DSP unit. Without to much research I bought the Dayton Audio DSP-408 for around $200.00. It fit my needs and it was cheep. I figured if it turned out to be a lemon I was only out $200.00. No big deal. Yea I should have bought the Sound Control DSP that I knew was a good performer. I just didn't want to pay $500.00 for it. I would end up with a Sound Control DSP in the end but I will get to that later on in part 5.


    So enough with my design choices and on with the install.


    We will begin where we left off and that is with the amp compartments that I showed briefly in part 1.


    Remember this thing.
    IMG_1139.jpg


    Well I finished it up by putting bottoms in each compartment and coating it with some spray on truck bed liner. In this case I used what my local auto parts store carries and that was Dupi Color brand but any will do. Helpful hint. Wait for the bed liner to completely cure before installing it in the truck. That will probably be several days. Cause it stank.


    IMG_1198.jpg


    IMG_1206.jpg


    IMG_1208.jpg


    So let's put the sucker in and get some amps hooked up. Shall we? Yes.


    IMG_1212.jpg


    IMG_1214.jpg


    IMG_1216.jpg


    IMG_1218.jpg


    Oh I should probably show some of that wiring right around now. Unfortunately I didn't take many pics of this part of the install but I will touch on it briefly. I made all of my own RCA cables as I like to do. I want the cables to be exactly the size I need with no extra cable that needs to be rolled up and stuffed somewhere you don't see it like is commonly the case when buying pre-made cables. I run a good over sized power wire to a distro block near where I mount the amps to make hook up easy. When ever I can I run the power wires under the vehicle. I will route them in such a way as they won't be ripped out by brush or other such things one may encounter while driving. Most installers will come through the fire wall and run the wires inside the vehicle but I don't like power wires of that size carrying that many amps running inside the car if I don't have to. I know the wire will be fused at the battery but I would still rather have redundancy in this case. If you have ever experienced how quickly the cab of a vehicle fills up with chocking smoke when there is a direct short of a power wire you would know why I do this. Don't ask. I've only got a few pics but here they are.


    The most important part of any electrical installation is the FUSE.
    IMG_1197.jpg

    IMG_1196.jpg


    IMG_1189.jpg


    Here is another tip. Label all of your wires.

    If your hand writing is as bad as mine and you want to be able to read the labels when the time comes get yourself one of these. I picked this one up brand new from shopgoodwill.com for $15.00.

    IMG_1299.jpg


    Anyway lets finish up in the rear and move to the amp under the front passenger seat. But first the back seat finish.

    IMG_1273.jpg


    IMG_1274.jpg


    Now we will move to the front of the truck but on the way we will put some Killmat on the floor of the truck and on top of that a layer of the Siless sound deadener.

    IMG_1257.jpg


    With the front seat out and the factory amp removed we can get to making an amp rack for one of the 4 channel amps and the DSP to mount to.

    IMG_1254.jpg


    IMG_1255.jpg


    Sizing up the RCA's below. Prefect example why I got the labeler.
    IMG_1256.jpg


    Convention tells us not to cut the factory wiring harness but sometimes I break from convention....and cut the factory harness.
    Notice the labels.
    IMG_1258.jpg


    This is probably a good time to talk about the way Toyota factory sound systems are wired. The external amp, be it JBL or non/JBL only power the 4 speakers in the doors. The remaining speakers are powered by the head unit. So the wires running to the factory amp are going to be 4 twisted pairs that are your door speaker wires and these are used in my case to power the speakers and will be routed to the rear of the truck to that 4 channel amp I mounted back there. The remaining wires are a ground wire, B+, 12v turn on wire and 4 more twisted pairs that are the high level inputs that feed the factory amp the signal. Front right and left and Rear right and left. These twisted pairs are also hooked up to the tweeters in the rear doors and all of the speakers in the dash. Be aware of this incase you are tempted to use these twisted pairs as speaker wires. Yes it is possible under certain conditions to do so but not all. If you are replacing both the amp and the head unit and you will be using the low level RCA's then you can use these as speaker wires but you will need to chase them back through the harness and disconnect them from the plug that plugs into the head unit so you don't end up back feeding the power from your amp back into the speaker outs of the head unit. If you want to use the head units internal amp to power say the center channel like I do in my set up then you just cap those wires off at the amp and don't hook them up to any thing. this way they are only fed power by the head unit.

    In my case I am running the front speakers in the dash off the amp under the front seat and the center channel off the head unit. Currently I am only using two of the four channels on the amp under the front seat.

    I use the remaining wires as such. I use the B+ wire that is un-switched meaning that it is hot all of the time to power the DSP and a relay I have mounted on the amp rack. I don't use the factory amp turn on wire for anything. Instead I choose to use the amp turn on coming from the new head unit and that wire goes first to the REM of the DSP and once that has booted it sends a 12v REM onto the relay which I can now use for anything I need to switch with the head unit coming on such as the amps. Doing it this way gives the DSP time to boot before turning on the amps avoiding popping. Power for the amp is coming from the power distro in the rear. This is the only large power wire I have running through the interior of the truck but it is double fused once at the distro and again at the battery so it is pretty safe. So here are some more pics in no certain order.


    IMG_1259.jpg


    IMG_1260.jpg

    Notice in the picture below the orientation of the amp. I have seen many different installs for the Tundra on the web where they install the amp in such
    away that once installed the end of the amp with the RCA's and or the speaker wires is facing the rear (or the front for that matter) where anyone can kick
    them with their feet. I have mine installed where the person sitting in the back seat unaware of the amp mounted under the seat in front of them can't
    accidently kick the wires potentially damaging the amp.
    IMG_1264.jpg

    Yep. When I do an install I go deep. Having ones dash pulled apart like this can make a lot of people feel nervous or intimidated. But not me.
    Just another day in the park.
    IMG_1268.jpg


    IMG_1272.jpg

    Done. Wired up and ready to go. Well sort of. I should have suspected the DSP was going to be a problem when I opened it up because something was
    rattling around inside the unit and this fell out. Come on Dayton Audio. Really?


    IMG_1239.jpg


    More on that in the next installment where I will be discussing all things head unit and what to do when unwanted noise gets into the system and what I did to get rid of it when it showed it's ugly mug in this install. I will also show you the forward facing camera I installed. I will be expressing my feelings towards "T" style Android head units, there pros and cons as well as my feelings towards the Sony XAV9500ES head unit that now resides in my Tundra. I will be talking about the DSP as well. I will also be including some dimensions for the sub box and the rear amp rack as I have gotten requests for them in my DM's.

    So stay tuned.


    Black@Blue19, BillyB and Nbab23 like this.
  11. Apr 9, 2023 at 6:43 AM
    #11
    FLG8R71

    FLG8R71 New Member

    Joined:
    Dec 20, 2019
    Member:
    #40106
    Messages:
    23
    Gender:
    Male
    First Name:
    Matt
    Jax FL
    Vehicle:
    2019 Voodoo Blue TRD Pro
    Amazing write up! Thanks so much for posting. Can't wait to see the rest
     
    Jack_A_Lope[OP] likes this.
  12. Apr 10, 2023 at 12:40 AM
    #12
    Jack_A_Lope

    Jack_A_Lope [OP] New Member

    Joined:
    Nov 22, 2022
    Member:
    #87120
    Messages:
    207
    Gender:
    Male
    First Name:
    Aaron
    Santa Barbara County, CA.
    Vehicle:
    2019 Tundra 4X4 SR5 TRD Sport
    Pro Comp Lift, Tires & Wheels, Steel front bumper with LED lighting, Cross bed tool box, bed rails, custom aftermarket sound system
    Thanks. I'm about to put together the next installment. This should be good.
     
  13. Apr 10, 2023 at 3:31 AM
    #13
    Jack_A_Lope

    Jack_A_Lope [OP] New Member

    Joined:
    Nov 22, 2022
    Member:
    #87120
    Messages:
    207
    Gender:
    Male
    First Name:
    Aaron
    Santa Barbara County, CA.
    Vehicle:
    2019 Tundra 4X4 SR5 TRD Sport
    Pro Comp Lift, Tires & Wheels, Steel front bumper with LED lighting, Cross bed tool box, bed rails, custom aftermarket sound system
    Part 5. Head Units and Noize.


    So what's left? The head unit of course. After seeing these "T" style or Tesla style radios on the interwebs I thought man those look pretty nice. So I started looking into them and ended up at Phoenix Automotive. They had this really nice looking vehicle specific factory replacement radio for the 2019 non/JBL Tundra and the reviews where good and it was plug and play. It is an Android based radio that is basically a smart phone. You can surf the web on it and load apps on to it just like you do your phone. It replaces the stock radio and the stock climate control knobs with this gimungus screen that looks fantastic. The one from Phoenix Automotive was on it's 6th or 7th generation and running Android 10 so I figured it would have the bugs worked out of it. So I said what the hell. Let's give it a try.
    So I pulled the trigger. Took about a month to get it. COVID and all and coming from China, but I did finally get it. So the first thing I did was go through the harnesses and various adaptors supplied with the radio and figured out what they where all for. I then plugged everything in and did some cable management. I wrapped every thing in Tesa tape to keep it all tight and organized so it wouldn't be a rats nest of wires behind the radio and prepared to install it. There was no documentation that came with it and there was none available. Phoenix Automotive had two basic videos available on youtube that covered a very basic plug and play type of install but for the most part you where stuck having to figure everything out. The install was pretty much straight forward but that wasn't the case with the setup. Anyways here area few pics of the process.

    IMG_1221.jpg


    IMG_1222.jpg


    IMG_1223.jpg

    I had the dash apart more then once.
    IMG_1266.jpg


    IMG_1268.jpg


    IMG_1270.jpg

    And just like that the unit was in the truck. The pic below is a bit smudged and the light is reflecting off it amplifying the smudges but over all it's a real nice
    looking unit. It almost looks like it came with the truck. There is one small problem though and that is when I peeled the protective plastic covering off the
    screen there was a small defect in the screen. You can see it in this pic. It's the small round dot in the upper right corner of the screen. It looked as if
    something had gotten between the two layers that make up the screen during manufacturing when the two layers where bonded together. It was very
    small and when the screen was on you couldn't even see it so I let it go. It didn't effect anything so no big deal.
    IMG_1326.jpg


    So now comes the time to turn it on for the first time and run through the set up and then set the DSP up with all of the x-overs and tune the system. So I turn it on and it sounds like a thousand pieces of shit. There are so many problems at this point I was like, say what. To start with the setup on the Android radio was anything but intuitive. There are settings tucked away in several different menus, some of which are behind a password that I had no way of knowing and E-mails to Phoenix Automotive were not very helpful. For some reason the subs weren't getting a signal and I was starting to think maybe my RCA cable going to the amp was no good and I was going to have to tear the dash and everything apart again and replace it when I stumbled upon a setting hiding away in one of the menus that turned the signal to the subs on or off and it comes off as default from the factory. Ok one problem fixed. I managed to get through the radio setup when I found a password for the radio online in a forum dedicated to all things Android. It was for a different brand radio but used the same version of Android and used the same processor as mine so I tried it and it worked. I then hooked up my lap top to the DSP unit and set the x-overs. Two things I noticed. There was god awful amount of noise coming out of the speakers and I didn't care for the sound of the dash speakers and that is when I made the choice to swap them out with the Unity 8.0+ wideband drivers that I showed in the previous installment. You might notice at this point that the order that I'm choosing to show here isn't necessarily the order that things where installed in. The way I am laying things out is to make everything easy to understand and is not necessarily the order that I did things in. So I traded out the dash speakers for the unity's and that problem was solved but for the life of me I just couldn't get rid of the noise. So I figured it can only be two things. The radio or the DSP so I decided to trade out the radio with something different and upgrade The DSP with one from Audio Control. I had a Sony head unit in my Exploder and was very happy with it. I also had experience with Kenwood's, JVC's and Pioneers. I used Pioneers for many years but wasn't real excited with them. The last time I had a Pioneer unit I wasn't to happy with it so I excluded them from my possible choices. Kenwood and JVC are the same company and share much of their tech. Kenwood has always made great head units and they where definitely on my list but the model that I would have chosen if I where to go that rout was out of stock everywhere I looked so that kind of shot that down so I landed on the Sony XAV-9500ES. This is Sony's flag ship head unit and it was a lot of money but I knew I could rely on it to deliver the top quality that I wanted so that is what I got. The thing is that unlike the Android that was all self contained and completely plug and play the Sony required an factory integration module that interfaces with the trucks can bus and retains pretty much all of the features and functions that the truck came with. I personally have never installed any system using this type of set up before. My last system was in a 1996 Exploder and it didn't have can bus to interface with so this was something new to me. I needed to educate myself on what was needed to make this Sony radio work in my truck so for the next couple of weeks I watched as many youtube video's as I could find that where relevant to my install and read a lot of stuff online in forums and what not. After that I had a good idea of what I was doing and decided to order the Sony, the Audio Control DSP, the idatalink Maestro RR2 interface and all of the associated "T" harnesses and adaptors to complete the install. I then waited for them to arrive. And guess what? They did. But while I was waiting I finished up the rear amp compartments with some matching covers.

    They looked something like this.

    IMG_1357.jpg


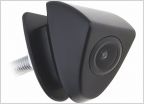
    Oh and I almost forgot to show you the front facing camera I said I would show you. So here you go.


    IMG_1293.jpg

    IMG_1293.jpg


    I still need to play around with it because it doesn't show enough out ahead of me and shows to much of the bumper. But this hasn't been a high priority so I haven't done anything with it yet. But I will.

    So let's look at what came in the mail shall we.


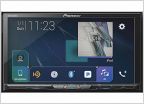
    The SonyXAV-9500ES Sony's flag ship model complete with all of the extra sauce Sony could stuff into a head unit. The focus is on sound quality here.
    IMG_1370.jpg

    The Audio Control DM-608 DSP. This is a very well regarded DSP unit that I should have bought in the first place. I just wish it wasn't so pricy.
    IMG_1369.jpg

    The Maestro RR2. This is the interface for the can bus that will alow me to retain the trucks factory features such as steering wheel controls.
    IMG_1372.jpg

    Here are all of the different adaptors and "T" harnesses that it took to integrate everything into the truck.
    IMG_1368.jpg

    Here is a dash kit for my truck. It is a pretty decent match but not perfect. It will do. Here it has the head unit installed minus the screen.
    IMG_1366.jpg


    The dash kit is very plasticy. It needed some help.
    IMG_1367.jpg


    So I gave it some. A Killmat wrap.

    IMG_1373.jpg


    IMG_1374.jpg


    IMG_1375.jpg


    That damped it down real well. So lets see what it looks like installed.

    IMG_1386.jpg

    Not bad hun? It was a good thing I didn't toss those AC control knobs out when I installed the Android. You can see a little misalignment with the dash kit
    and the dash but all in all it looks good. The screen is very stout and feels very well made.

    This setup can't use the stock factory mic and requires you install their mic that comes with the radio. I chose to mount it here. It works fine.
    IMG_1387.jpg


    So you are all probably wanting to know how it sounds. It all looks great but do you still have the noise coming out your speakers? Yes, the noise is still there
    but all is not lost as I still have to install the DSP. By now I have figured out where the noise is actually coming from but was still working on how it was
    getting in to my system. As it turns out there is a component of the emissions apparatus called The Secondary Air Injection Pumps that operate for a few minutes
    at startup and inject air into the exhaust to aid the catalytic converters in doing what they do until they warm up. After the truck warms up the pumps shut down
    and remain off until you shut it off and the pumps come back on again for about 3 or 4 seconds then shut off again. It was during this time that the noise was the
    loudest. The rest of the time was just alternator noise.

    So next up, The DSP swap. This required that I make all new RCA's coming from the head unit and the ones from the DSP to the amp mounted next to it. The ones
    going to the amp in the rear were fine as they where.

    The new DSP all mounted up.
    IMG_1380.jpg


    Remember how I was saying about orientation of the amp so the connections can't be accidently kicked by backseat passengers?
    IMG_1383.jpg

    The side view facing the door.
    IMG_1384.jpg


    So did this do the trick? Check out the video I put together and find out for yourself.


    I will rap everything up in one last installment.

    Stay tuned part 6 is next.


    Black@Blue19 likes this.
  14. Apr 10, 2023 at 6:29 AM
    #14
    dkrou

    dkrou New Member

    Joined:
    Dec 13, 2020
    Member:
    #56121
    Messages:
    434
    Gender:
    Male
    First Name:
    dan
    Vehicle:
    2019 tundra
    I'm curious as to the need for a dsp when you put in a new headunit...I never considered it after ditching everything in my 19 and adding a Kenwood HU....amp two subs all new speakers including dash...
     
  15. Apr 10, 2023 at 8:08 AM
    #15
    Jack_A_Lope

    Jack_A_Lope [OP] New Member

    Joined:
    Nov 22, 2022
    Member:
    #87120
    Messages:
    207
    Gender:
    Male
    First Name:
    Aaron
    Santa Barbara County, CA.
    Vehicle:
    2019 Tundra 4X4 SR5 TRD Sport
    Pro Comp Lift, Tires & Wheels, Steel front bumper with LED lighting, Cross bed tool box, bed rails, custom aftermarket sound system
    My system is almost completely active. The speakers in the rear doors have a passive x-over on them because they are coaxial and running on one channel but it is basically only for the tweeters. I could have used the DSP functions in the head unit it's self but there aren't enough separate channels to do it with. There are only 5 or 6 channels. Plus a dedicated DSP has more functionality. You can do more with it. Of course there are other ways of doing it but this gives me the most control over the every aspect of the system and how it sounds. I just hook up my laptop to the DSP unit and I can change everything on the fly, compare any number of different x-over points right there real time. DSP is the only way of doing that. Then you have both graphic and parametric EQ's on each channel as well as for the whole system both on the input and the output. Back in the day we didn't have DSP. The closest we had was electronic x-overs and most weren't very good. I used primarily passive x-overs in my systems with the exception of the subs which always had electronic x-overs. Things sure have changed a lot since those days. It is so much easier now.

    What are you using for x-overs?

    I have all of the x-overs on my amps defeated.
     
  16. Apr 10, 2023 at 9:31 AM
    #16
    dkrou

    dkrou New Member

    Joined:
    Dec 13, 2020
    Member:
    #56121
    Messages:
    434
    Gender:
    Male
    First Name:
    dan
    Vehicle:
    2019 tundra
    I have no clue...sounds cool though to max out the system. Mine was 1000 percent better when I got done so didn't look beyond it frankly.
     
  17. Apr 11, 2023 at 9:51 AM
    #17
    SwitchThrottle

    SwitchThrottle Living in Idiocracy

    Joined:
    Jan 5, 2022
    Member:
    #72688
    Messages:
    1,302
    Gender:
    Male
    Vehicle:
    2021 Barcelona CrewMax
    Great write up! On the Sony install, how low can you mount it? All the pictures I see have it mounted up high. I realize its not going to get flush, but is there any way to bring it down tighter to the hvac, closer to flush?
     
    Jack_A_Lope[OP] likes this.
  18. Apr 11, 2023 at 11:55 AM
    #18
    Jack_A_Lope

    Jack_A_Lope [OP] New Member

    Joined:
    Nov 22, 2022
    Member:
    #87120
    Messages:
    207
    Gender:
    Male
    First Name:
    Aaron
    Santa Barbara County, CA.
    Vehicle:
    2019 Tundra 4X4 SR5 TRD Sport
    Pro Comp Lift, Tires & Wheels, Steel front bumper with LED lighting, Cross bed tool box, bed rails, custom aftermarket sound system
    Thanks and yes. The unit has a surprising amount of adjustability. I have mine set towards the middle of the range so it can be adjusted up or down still. There is also side to side, in and out, plus you can adjust the tilt angle of the screen. Once mounted the screen is rock solid. There is nothing about this unit that makes you think it cheaply made. This is a fantastic piece of kit. That is a good thing because it rather expensive, but as the saying goes, you get what you pay for.
     
  19. Apr 28, 2023 at 11:45 AM
    #19
    Major

    Major TTC #0181

    Joined:
    Dec 23, 2018
    Member:
    #23409
    Messages:
    904
    Gender:
    Male
    First Name:
    Josh
    NC
    Vehicle:
    2017 CM Attitude Black Platinum
    Stock.
    Love the setup and write-up as much as I could follow! You sound like a car audio installer that moonlights as an author. LOL.

    Were you going to post the specs, and measurements of the amp rack that you built? I love the design and wanted to do similar and had contemplated altering my plastic ESP storage that I currently have to accomplish this but I really like the space of yours.

    Out of curiosity and my attempt at learning, is there a reason that you just didn't mount all of the amps and the DSP in the rack in the back?

    I'm intrigued with the external run of the power, did you just zip-tie it to the frame for your run? The location that you brought it into the cab in the back, is there already an opening there where you have it coming in?

    My build sheet I'm working on has both the same JLs, JP8 and JP84 as well so I appreciate all the information, guess I'm adding the DSP now, LOL.

    Sorry for the overload of questions.
     
    Jack_A_Lope[OP] likes this.
  20. Apr 29, 2023 at 6:35 PM
    #20
    Jack_A_Lope

    Jack_A_Lope [OP] New Member

    Joined:
    Nov 22, 2022
    Member:
    #87120
    Messages:
    207
    Gender:
    Male
    First Name:
    Aaron
    Santa Barbara County, CA.
    Vehicle:
    2019 Tundra 4X4 SR5 TRD Sport
    Pro Comp Lift, Tires & Wheels, Steel front bumper with LED lighting, Cross bed tool box, bed rails, custom aftermarket sound system
    No. I am not an installer at least not professionally. I have installed a lot of systems though. Back in the late 80's all of my friends where in mini truck clubs and drove lowered mini trucks and I was the one doing much of their audio installs. It just sort of progressed from there.

    I am probably going to post some test results when I get around to doing them. Maybe there will be an improvement in the sound quality after I stick a mic in the cab and do an official tuning but I doubt much will change. It's already sounding pretty amazing with just an ear tune. But it would be nice to see what it looks like so you can expect that to come I just haven't had the time to do it. Work overload has me running ragged right now. I've got about five different job bids I'm trying to put together plus what I've got going already.

    The power cable runs down from the battery in front of the radiator under the truck and against the passenger side (right) frame rail to the back where it comes through a grommet that is already there. No new holes have to be made in the body.

    As for mounting locations it was all about space. Maybe I could have jammed everything back under the rear seat but that would have made adjustments to the amps very hard and would of required some pretty sharp bends in the RCA connectors as well as other wired connections that always lead to later problems down the road. The way I did it just makes things easier and nothing is cramped. Well that is except the box. That is going to be pretty cramped no matter what. Those JL subs are definitely doing their duty back there. They are the biggest surprise in all of this. I kind of kept my expectations down due to the size of the box and because these are low profile subs but man these things hit. They are very musical too. They are playing the full range they are intended to play and not just peaking at the tuning frequency which I never bothered to calculate because the box was going to be what it was regardless. So yea those two 12's are more then enough base for any one over the age of 19.

    You won't be disappointed with those components at all. I would highly recommend all of the various components that I used. The Sony head unit is just amazing. Kenwood also makes a great unit and has a bit more in the video playback functionality if that is something you want. For me it was all about audio playback as I don't watch videos in my truck. It will play them if loaded on a thumb drive and maybe if streamed through your phone but honestly I've not checked. The Sony's screen is built solid and has very high visibility during the day and doesn't blind you at night so if you can afford it it's a great way to go. They are on the pricy side. About $1500.00 here in the US. The CDT speakers I used are also performing stellar. There are plenty of great brands over there in Europe to choose from but man do they want a pretty penny for them. The CDT's I would say are on par with many of those offerings and won't cause you to have to take out a second mortgage on your home. With the exception of the head unit and DSP most of the rest of my system isn't that unreasonable price wise. Even the JL subs where around $400.00 a piece. Considering how pricy JL Audio equipment can be that's really not that bad. Both subs where less then a single W7. I bought mine from Crutchfield. One was an open box and the other was a scratch and dent although I could not find a scratch nor a dent on either one of them so you might want to look and see if they have any before paying full price.

    The DSP isn't expressly needed but it gives you much greater control over the sound. If you are keeping the stock head unit (although I wouldn't suggest it) having a DSP becomes more necessary to tailor the input signal and remove any alterations that the stock unit has made to protect the rather anemic stock speakers. This way you have a full spectrum input signal to work with. A DSP also gives you both parametric and graphical EQ's to tailor the signal going to each channel as well as to the overall system. The DSP adds to the price and complexity of the system but the flexibility and adjustability it provides is well worth it if you ask me. One of the major advantages that DSP gives you is the ability to tame down certain frequencies that excite the interior of the truck and cause things to sound wonky. By using a mic and a spectrum analyzer you can determine the offending frequency and pull it down in the DSP to fix the problem. Doing this without a DSP is very time consuming and can get expensive. Things these days are so much easier then they where back when I first started getting into this.

    Not all vehicles are very conducive to audio playback. There are some vehicles that just never sound good no matter what you do to them. The Tundra thankfully isn't one of them. Once you damp down all of the panels and metal skins of the body the Tundra's are actually pretty easy to work with. But you do need to damp things down if you want things to sound their best. This is especially true when using a sub woofer or even any amplified system really. If you ask me it isn't even worth going through the trouble of putting an upgraded sound system in the truck with out damping the truck as part of the install. The damping is the single largest improvement to sound quality you can make in my opinion.

    Anyways I hope my efforts here have helped make your efforts there a little easier and better informed. And thanks for taking the time to read through it.
    Good luck.
     
    Major[QUOTED] likes this.
  21. May 2, 2023 at 9:10 AM
    #21
    SwitchThrottle

    SwitchThrottle Living in Idiocracy

    Joined:
    Jan 5, 2022
    Member:
    #72688
    Messages:
    1,302
    Gender:
    Male
    Vehicle:
    2021 Barcelona CrewMax
    Funny how the mind works. I read your thread, but as per usual in the internet days, didn't retain much as it was a passive read with the exception of the head unit. I've been researching stuff like crazy, and came back to your build to look at the sub box as I am on the build or buy fence, then re-read the whole thread and realized I am looking at essentially the same CDT build. The CF-3 was something I hadn't seen. I was gonna stuff directional tweeters in there to pair with the same Unity 8's in the dash corners, but like the lower frequency center fill idea.

    I've been all over the board on amps. I have narrowed it down to a AudioControl D-6.1200 and a LC-1.800.

    Im solidly in the sealed box crowd and probably going with 10s instead.
     
    Jack_A_Lope[OP] likes this.
  22. May 3, 2023 at 6:48 AM
    #22
    Jack_A_Lope

    Jack_A_Lope [OP] New Member

    Joined:
    Nov 22, 2022
    Member:
    #87120
    Messages:
    207
    Gender:
    Male
    First Name:
    Aaron
    Santa Barbara County, CA.
    Vehicle:
    2019 Tundra 4X4 SR5 TRD Sport
    Pro Comp Lift, Tires & Wheels, Steel front bumper with LED lighting, Cross bed tool box, bed rails, custom aftermarket sound system
    You won't be disappointed with the CDT speakers. They sound amazing. The Unity8+ wideband drivers are ideal for the Tundra's. They really don't need any additional tweeters if you mount them like I did. Cross them at 600Hz with a steep slope.

    Here is a sub box that I found for somebody else. It is for 12's but they also make a version for 10's as well. It looks well made and appears to have all of the necessary notches and what not. It is made specifically for the Tundra so I assume it fits. It's only $144.00 US.

    https://www.amazon.com/SoundBox-Cre...mzn1.fos.f5122f16-c3e8-4386-bf32-63e904010ad0


    CDT's main headquarters is only about 8 or 9 miles from my house. Makes it kind of nice that I can just go pick my speakers up and avoid the delivery fee. If you buy them directly from their site you can usually get them on sale. They have sales all of the time so if they aren't on sale now just wait a little bit and it may change.
     
  23. May 4, 2023 at 4:43 PM
    #23
    Iamsecond

    Iamsecond New Member

    Joined:
    Dec 13, 2021
    Member:
    #71749
    Messages:
    237
    Gender:
    Male
    First Name:
    Kevin
    Vehicle:
    2019 Limited Tundra
    audio control is ok for equipment but realize they have a nondefeatable subsonic filter at 24hz. Maybe ok for ported setups but for sealed it’s a no go.

    there are other small alternatives to audio control. The sundown sdx line is a step above in my opinion. I had considered the audio control line but noise issues and filters made me look a different direction. I literally stumbled onto these amps one day when I was at the Sundown warehouse in NC.
    I was there picking up some stereo integrity bm12s (shallow 12s that are now 11 inch size which should be high on the list for subs) and we were talking to Jake and he mentioned these new hifi small amps. Grabbed three and they have been stellar.
    Audio control is used by a lot of folks but there are other options especially for the tiny space for audio equipment in the tundra.
    My point is to be aware of the nondefeatable subsonic filter in audio control amps.
     
  24. May 4, 2023 at 4:50 PM
    #24
    SwitchThrottle

    SwitchThrottle Living in Idiocracy

    Joined:
    Jan 5, 2022
    Member:
    #72688
    Messages:
    1,302
    Gender:
    Male
    Vehicle:
    2021 Barcelona CrewMax
    Thanks for the info...I didn't know about the subsonic filter and sealed enclosures. I was hoping to kill two birds with one stone and not break the bank. I don't need a $5k system to be happy.
     
  25. May 4, 2023 at 5:23 PM
    #25
    Iamsecond

    Iamsecond New Member

    Joined:
    Dec 13, 2021
    Member:
    #71749
    Messages:
    237
    Gender:
    Male
    First Name:
    Kevin
    Vehicle:
    2019 Limited Tundra
    You don’t need to spend that to get a great system.
     
  26. May 4, 2023 at 10:06 PM
    #26
    Jack_A_Lope

    Jack_A_Lope [OP] New Member

    Joined:
    Nov 22, 2022
    Member:
    #87120
    Messages:
    207
    Gender:
    Male
    First Name:
    Aaron
    Santa Barbara County, CA.
    Vehicle:
    2019 Tundra 4X4 SR5 TRD Sport
    Pro Comp Lift, Tires & Wheels, Steel front bumper with LED lighting, Cross bed tool box, bed rails, custom aftermarket sound system
    I doubt that a 24HZ subsonic filter will matter much in this situation. Any install using 2 -10" or 2 -12" subs in a sealed box behind the rear seats just won't have the ability to get that low to start with. I don't think I'm getting much below 28 to 30Hz with cabin gain and that is just fine for music playback. Unless you are into watching Blue Rays in your truck there really isn't any need for your amps to put out any thing below 24Hz anyways. In my opinion at least.

    My concerns with those amps would be the cost. Your talking $2,100.00 in amplifiers.

    With the separate DSP unit DM-608 on sale $500.00 and the Down4Sound amps I used JP8 on sale now for $169.00 and JP84 $200.00 x2 total $1100.00 after tax and delivery. That is $1000.00 less and you have more to work with. And there is no subsonic filter to worry about if that concerns you.

    I think in total I kept it under $4000.00 ish, $4500.00 maybe. A lot of that is in the head unit though. You can definitely build a very good sound system with a head unit that cost a lot less then mine. Kenwood/JVC have some very nice units that run between $500.00 to $800.00. Any of these units will sound better then the factory unit.

    There would be one advantage to using those Audio Control amps and that would be you can easily mount both under the front passenger seat with out to much fuss and there wouldn't be any need for anything else. That makes for a rather simple install with minimum components. So there's that.
     
  27. May 5, 2023 at 4:51 AM
    #27
    SwitchThrottle

    SwitchThrottle Living in Idiocracy

    Joined:
    Jan 5, 2022
    Member:
    #72688
    Messages:
    1,302
    Gender:
    Male
    Vehicle:
    2021 Barcelona CrewMax
    I did a bunch of digging, and I agree on the subsonic filter. The smallish sealed box just wont get low enough to matter. I listen to all sorts of music, but like you said most everything isn't gonna play that low.

    As to the amps, yeah, they are more money than your build, but less overall hardware to achive basically the same end result. Everything is a trade off.

    I did look at the Sundown SDX, and they are impressive for the size and cost.
     
  28. May 5, 2023 at 5:15 AM
    #28
    Iamsecond

    Iamsecond New Member

    Joined:
    Dec 13, 2021
    Member:
    #71749
    Messages:
    237
    Gender:
    Male
    First Name:
    Kevin
    Vehicle:
    2019 Limited Tundra
    Be careful where your digging. Not all soil is good soil. Lol.

    But if your wanting to use audio control a suggestion would be to go to diyma or car audio junkies and look in the classified section. Lots of it being resold there. There is a reason. But at least your not paying retail and then trying to get rid of it at a loss. You can pick up the equipment for much less on there.
    I run the sundown sdx line amps. 2 four channel amps and a 1200 watt amp under the front seats with a minidsp 8x12dl.

    I bought the eps storage piece that goes under the seats. I don’t have time to do what the op did. His looks great and is built really well. Probably more storage as well.

    You can build a nice system around the Dayton audio 4x8 dsp. I have one in my daughters car and it sounds great. List of haters but in the right hands it can sound just as good as just about anything else out there.

    don’t get hung up on name brands. A dsp and decent amps and speakers can be awesome. The tune is more important than name on speakers.

    tech12volts has some great packages specifically for tundras.
     
  29. May 5, 2023 at 6:38 AM
    #29
    Danimal86

    Danimal86 Looks clean even when its dirty!

    Joined:
    Aug 29, 2017
    Member:
    #9321
    Messages:
    4,950
    Gender:
    Male
    First Name:
    Daniel
    Sacramento, CA
    Vehicle:
    2017 White Tundra SR5
    Super cool build! Nice construction of the amp holder under the rear seats! Looks really high quality.

    I went down the active speaker rabbit hole on my tundra for the first time. I'm amazed with how much different having a midrange driver does. I went with AudioFrog 6", 2.5" and 1" all connected to a Helix DSP Pro Mk2 and two JL HD900/5's, with some JL C5-650's (passive) in the rear doors and a pair of JL 10tw3-d4's. (there's a super long build log link in my signature).

    I'd be interested to see your tuning process and see your soundcurve graphs! I learned as i went with tuning along with some help from members here and diyma....a little scary as one messup can nuke a speaker easily. I did a write up on tuning with REW and using a osciliscope to set gains (i think the link is in my build to those two how-to's).
     
    Jack_A_Lope[OP] likes this.
  30. May 5, 2023 at 7:29 AM
    #30
    e30cabrio

    e30cabrio I'm e30cabrio, I'm a modaholic

    Joined:
    Oct 20, 2017
    Member:
    #10410
    Messages:
    6,120
    Gender:
    Male
    West Valley, Phoenix, Az.
    Vehicle:
    Boosted 2013 Sequoia TRD FAUX
    Maggy, Dobinsons, TRD PRO conversion, 18+ lights & cluster too much more to list
    Wow is too weak, you sir, are an artist! Amazing work & write up, I'm embarrassed by my wiring compared to yours.

    I hope it meets your obviously high expectations!
     
    Jack_A_Lope[OP] likes this.

Products Discussed in

To Top