1. Welcome to Tundras.com!

    You are currently viewing as a guest! To get full-access, you need to register for a FREE account.

    As a registered member, you’ll be able to:
    • Participate in all Tundra discussion topics
    • Transfer over your build thread from a different forum to this one
    • Communicate privately with other Tundra owners from around the world
    • Post your own photos in our Members Gallery
    • Access all special features of the site

Installed Dirty Deeds 10" BAM - My Newbie Thoughts

Discussion in 'Performance and Tuning' started by WarDamnTundra, Nov 3, 2022.

  1. Nov 3, 2022 at 8:00 AM
    #1
    WarDamnTundra

    WarDamnTundra [OP] New Member

    Joined:
    Aug 26, 2022
    Member:
    #82456
    Messages:
    217
    Vehicle:
    2014 Tundra TRD Limited CrewMax
    Icon Stage 2 w/ Icon Mini Leaf Pack - WildPeak A/T3W 35x12.5x20 - 20" Rock Star II - Retrax Bedcover
    I finally got around to installing the BAM from @dirtydeeds

    As many of you have stated it was not a difficult install and I can tell you that because I did it myself. If you are like me, I didn't have all the necessary tools for the install however the tools needed are very basic. I just didn't have them because I am new to the DIY world.;)

    My thoughts:

    1) 12MM and 14MM socket is all you need. 5 bolts total.:yes:
    2) The OEM muffler is not very heavy. If you are doing it by yourself let it gently down on your chest with no worries.
    3) A creeper is a MUST have, imo. Can it be done w/o a creeper? yes. But it sure was nice having it. :cheers:
    4) I am a safety freak, so I recommend wearing safety glasses while installing. When I removed the old exhaust, a lot of flaky residue fell off as well as some rust particles none of which you want in your eyes. :amen:
    5) Be patient when removing OEM muffler off the rubber hangers. The OEM has a knob on the end so it takes a little extra to push them through. I found it helpful to spray a wee bit of WD40 on the tips to allow them to slide more easily through the hanger.:curls:
    6) WD40(or something like it) is a MUST. I had to apply WD40 three times to the bolts to get them to loosen up. My first spray to the bolts sat on them for over 30m and I still had to spray them two more times.:benchpress:
    7) One of the best YouTube instructional videos I saw in prep was this one. https://www.youtube.com/watch?v=IwBlJZYRWFo&t=639s There are many others but for some reason this one was best for me. This is not me, its the dude I watched prior to installing. I think I watched it enough to do this with my eyes closed. haha
    8) Attaching the exhaust tip to the rear of the muffler was not so easy for me. DD sends a gasket with the BAM. Don't forget to install it however don't expect it to fit perfectly because mine didn't. I had to force it over the lip of the pipe and it took a few tries. The OEM clamp attaching them together was a bear for me to attach. Keith at dirty deeds states they make the fit pretty tight on purpose. I used channels locks to help clamp it down in order to get bolt back started in the threads.:benchpress:
    9) The job can be done by one person. The only thing I may redo is the orientation of the exhaust tip. It is now pointed slight down and I want it level. May just be my OCD though. Having an extra person tell you when to tighten it down when its in the right position would have been nice.:thumbsup:
    10) Total project time was about 1.5 - 2.0 hours for me however I was very meticulous with everything. If I did it again I am confident I could do it in less than 1.0 hours.
    11) I have not installed resonator yet. I am going to ride with it for a few hundred miles like it is and then install. There is drone no doubt about it.
    12) As Keith has stated before, this small gap is normal. No need to sweat it if you are tightening the bolts. It comes together nicely.030056D5-C334-475E-ACA3-C95FA31EB59D.jpg


    13) The sound is awesome especially when you let it eat. Sounds so much better than every exhaust I've owned on other trucks. No regrets here. Roll your windows down and enjoy.:headbang:

    I just wanted to add these thoughts in case another newbie like me is thinking about installing BAM on their own. I think it's important to share knowledge to this forum once gained, no matter skill level. Many who read this will chuckle because of their experience level and that is okay. We all start somewhere, right?

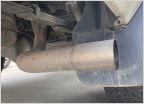
    Here is a comparison pic of BAM vs OEM.
    Exhaust Pics.jpg

    Thanks again to Keith and his excellent customer service.:hattip:

    Thank you to everyone here who shared their thoughts and advice with me too! :hattip::hattip:
     
    Last edited: Nov 3, 2022
    Tarsis, Msquare, kbark and 10 others like this.
  2. Nov 3, 2022 at 9:01 AM
    #2
    dirtydeeds

    dirtydeeds Exhaust Fabricator Vendor

    Joined:
    Dec 19, 2015
    Member:
    #2282
    Messages:
    3,270
    Gender:
    Male
    First Name:
    Keith
    USA
    Vehicle:
    2003, 2006, 2013, and 2023 tundra
    more than I can list here
    Awesome!! Thanks for the review. Please hit me up if I can help with anything else.
     
    Tarsis, Robster80, MTRock and 4 others like this.

Products Discussed in

To Top