1. Welcome to Tundras.com!

    You are currently viewing as a guest! To get full-access, you need to register for a FREE account.

    As a registered member, you’ll be able to:
    • Participate in all Tundra discussion topics
    • Transfer over your build thread from a different forum to this one
    • Communicate privately with other Tundra owners from around the world
    • Post your own photos in our Members Gallery
    • Access all special features of the site

PRO Fox suspension install question

Discussion in 'Suspension' started by Bergy24, Sep 18, 2022.

  1. Sep 18, 2022 at 6:47 PM
    #1
    Bergy24

    Bergy24 [OP] New Member

    Joined:
    Aug 18, 2021
    Member:
    #66925
    Messages:
    1,273
    Gender:
    Male
    Vehicle:
    2021 Cement Crewmax Limited TRD 4X4
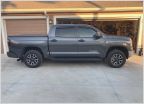
    I have a like new PRO FOX suspension that I want to install on my 21 limited. I can have one of the local dealers install the front and rear suspension, alignment and swap TPMS sensors for $700. I have about 6000 miles on my truck and Toyota replaced the steering rack due to the Recall. So to date, other than the oil change I’ve done, Toyota is the only one that’s touched my truck. Since my truck is so new, I’m thinking of just letting Toyota install everything so there’s no questions if something happens. My other option is installing everything with my son. He’s a tech at a local shop but not Toyota. He says he can handle this but I’m a little concerned something may go wrong.

    What’s everyone’s thoughts on this?
    Does anyone have a solid step by step for installing the suspension?

    Is this accurate or missing anything?
    https://www.dropbox.com/s/sxjguie9rkx4dti/PTR13-34140inst.pdf?dl=0&copy_to_dropbox=true
     
  2. Sep 18, 2022 at 7:18 PM
    #2
    xtyfighterx

    xtyfighterx New Member

    Joined:
    Aug 28, 2016
    Member:
    #4360
    Messages:
    2,355
    Gender:
    Male
    First Name:
    Ty
    North Idaho
    Vehicle:
    2015 Black Crewmax Mid Travel
    Mid travel fox 2.5 coilovers 2.0 real shocks shims 295 70 18 trail grapplers pro accessories 32in light bar blacked out bed cover sway bar Moto metal 970 18x9
    Save the $700 do it yourself it’s not hard just basically nuts and bolts.Take it in get an alignment done from a good shop. Call it a day.
     
  3. Sep 18, 2022 at 7:25 PM
    #3
    DoublePro

    DoublePro New Member

    Joined:
    Aug 11, 2021
    Member:
    #66646
    Messages:
    130
    Gender:
    Male
    Let your son handle it, help him and have some bonding time. It would be kinda insulting to your son, he might feel some type of way that u choose the factory over him. Trust in your son, if he mess something up, it can be fix and learn from it.
     
    snivilous likes this.
  4. Sep 18, 2022 at 7:32 PM
    #4
    APalmTree

    APalmTree Sometimes helpful

    Joined:
    Feb 23, 2020
    Member:
    #43054
    Messages:
    818
    Gender:
    Male
    First Name:
    Brandon
    SW Washington
    Vehicle:
    2012 TRD Offroad White Crewmax 5.7L
    A few... Definitely more than 2
    I just did my own suspension, it really is not that bad at all. I used this step-by-step video https://www.youtube.com/watch?v=NPG44UUAw2w, it is for a specific product that I bought but the process is exactly the same. Check the torque numbers because some of the numbers are specific to the kit in the video. The only problem that I had was the upper control arms because they have an insane torque spec and there is no room to work in there but you should not have to mess with them unless you are replacing the upper control arms.
     
    don3032 and doublethebass like this.
  5. Sep 18, 2022 at 7:45 PM
    #5
    Winning8

    Winning8 New Member

    Joined:
    Jul 4, 2019
    Member:
    #32819
    Messages:
    2,039
    Gender:
    Male
    Da Bay Area
    Vehicle:
    2019 MGM DC 4x4 SR5
    Mumba 18x9 ET 12, BFG KO2, FOX suspension, diamond back HD cover w/ rack, LED head & fog light bulb, TRD rear sway bar, timbren enhancement, RAS helper spring, avs auto shade, Carhartt front seat cover, bench seat cover
    it's only 4 fox trd pro shocks, it don't even need UCA...lol If a DYI could do it, you don't really need any kind of tech
     
  6. Sep 18, 2022 at 7:58 PM
    #6
    ZPhilip

    ZPhilip Custom title here

    Joined:
    Sep 20, 2019
    Member:
    #36383
    Messages:
    1,427
    Gender:
    Male
    First Name:
    Philip
    West Chester, PA
    Vehicle:
    2015 Platinum Super White Crewmax
    Harrop supercharger, TRD Pro Fox suspension, CB +1 shackles, 295/70-18 Toyo ATIII, TRD Pro forged rims
    Definitely do it with your son. Take it to a competent shop for the TPMS swap and alignment.

    If I can do this same job in my driveway with caveman tools, an auto tech should have no issue. The rear shocks will take 1 hour for both. One coilover up front will take about 2 hours and then the other will only be an hour since you now know how to do it.

    Please remember that the front TRD Pro Fox coilovers are side specific, one Right and one Left.
     
    doublethebass and Bergy24[OP] like this.
  7. Sep 19, 2022 at 8:08 AM
    #7
    Bergy24

    Bergy24 [OP] New Member

    Joined:
    Aug 18, 2021
    Member:
    #66925
    Messages:
    1,273
    Gender:
    Male
    Vehicle:
    2021 Cement Crewmax Limited TRD 4X4
    Thanks for the advise everyone. There seems to be a couple ways to attack the front coil over swap. One way is to loosen the sway bar and lower control arm, and the other per the video above is to leave them intact. Is one way better or easier? I’m assuming I’ll want to use the PRO specs for the alignment, correct?
     
  8. Sep 19, 2022 at 8:15 AM
    #8
    Terndrerrr

    Terndrerrr 925000 miles to go

    Joined:
    Jul 8, 2019
    Member:
    #32965
    Messages:
    6,126
    Gender:
    Male
    Music City
    Vehicle:
    6UR-FE
    RAS, 285/75 DTs, dual battery, SS3 Pro
    I installed mine in my driveway. It's very easy. You should invest in the time spent with your son doing this project together and save the dealership install fee.

    I loosened the LCA bolts and sway bar to drop the lower coilover mount. It's not a big deal. You're going to have to get it aligned afterward anyway. Any competent alignment tech is going to get you taken care of no problem.
     
    Bergy24[OP] likes this.
  9. Sep 19, 2022 at 8:22 AM
    #9
    xtyfighterx

    xtyfighterx New Member

    Joined:
    Aug 28, 2016
    Member:
    #4360
    Messages:
    2,355
    Gender:
    Male
    First Name:
    Ty
    North Idaho
    Vehicle:
    2015 Black Crewmax Mid Travel
    Mid travel fox 2.5 coilovers 2.0 real shocks shims 295 70 18 trail grapplers pro accessories 32in light bar blacked out bed cover sway bar Moto metal 970 18x9
    I’ve always done it that way loosen the sway bar bracket, loosen the inner cam bolts for the lca, loosen the shock mount bolt on the lca, remove the nuts on the top of the shock where it mounts, take out the two bolts holding the lower ball joint to the steering knuckle.then it all just drops free.
    If you have air tools 30 min a side. The rear shocks just two bolts.
    Find the torque specs for everything use some anti seize and you’re good to go.
     
    Bergy24[QUOTED][OP] likes this.
  10. Sep 19, 2022 at 8:55 AM
    #10
    Winning8

    Winning8 New Member

    Joined:
    Jul 4, 2019
    Member:
    #32819
    Messages:
    2,039
    Gender:
    Male
    Da Bay Area
    Vehicle:
    2019 MGM DC 4x4 SR5
    Mumba 18x9 ET 12, BFG KO2, FOX suspension, diamond back HD cover w/ rack, LED head & fog light bulb, TRD rear sway bar, timbren enhancement, RAS helper spring, avs auto shade, Carhartt front seat cover, bench seat cover
    Sway bar have to detach no matter which way you go, if you don’t want to hit the upper ball joint or don’t have a big ply bar, you have to go the lower control arm route…
     
  11. Sep 19, 2022 at 9:00 AM
    #11
    Bergy24

    Bergy24 [OP] New Member

    Joined:
    Aug 18, 2021
    Member:
    #66925
    Messages:
    1,273
    Gender:
    Male
    Vehicle:
    2021 Cement Crewmax Limited TRD 4X4
    Per the video above, he specifically points out that he didn’t detach the sway bar.
     
  12. Sep 19, 2022 at 9:11 AM
    #12
    Winning8

    Winning8 New Member

    Joined:
    Jul 4, 2019
    Member:
    #32819
    Messages:
    2,039
    Gender:
    Male
    Da Bay Area
    Vehicle:
    2019 MGM DC 4x4 SR5
    Mumba 18x9 ET 12, BFG KO2, FOX suspension, diamond back HD cover w/ rack, LED head & fog light bulb, TRD rear sway bar, timbren enhancement, RAS helper spring, avs auto shade, Carhartt front seat cover, bench seat cover
    He detached from body, rather than on the lower control arm. You have to detach it somewhere, if not you can’t move the lower control arm.
     
    Bergy24[OP] likes this.
  13. Sep 19, 2022 at 9:31 AM
    #13
    Bergy24

    Bergy24 [OP] New Member

    Joined:
    Aug 18, 2021
    Member:
    #66925
    Messages:
    1,273
    Gender:
    Male
    Vehicle:
    2021 Cement Crewmax Limited TRD 4X4
    Is one way better than the other?
     
  14. Sep 19, 2022 at 9:51 AM
    #14
    xtyfighterx

    xtyfighterx New Member

    Joined:
    Aug 28, 2016
    Member:
    #4360
    Messages:
    2,355
    Gender:
    Male
    First Name:
    Ty
    North Idaho
    Vehicle:
    2015 Black Crewmax Mid Travel
    Mid travel fox 2.5 coilovers 2.0 real shocks shims 295 70 18 trail grapplers pro accessories 32in light bar blacked out bed cover sway bar Moto metal 970 18x9
    Do it from the body. The end links can be a PITA.
     
  15. Mar 25, 2023 at 8:02 PM
    #15
    Cdunner

    Cdunner New Member

    Joined:
    Mar 20, 2023
    Member:
    #94171
    Messages:
    97
    Gender:
    Male
    First Name:
    Chris
    Vehicle:
    2023 White Sequoia SR5 TRD Off-road
    Did this require camber arms to align?
     

Products Discussed in

To Top