-
Welcome to Tundras.com!
You are currently viewing as a guest! To get full-access, you need to register for a FREE account.
As a registered member, you’ll be able to:- Participate in all Tundra discussion topics
- Transfer over your build thread from a different forum to this one
- Communicate privately with other Tundra owners from around the world
- Post your own photos in our Members Gallery
- Access all special features of the site
 Reverse light LED bulbs
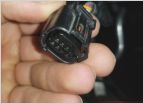 De-pinning radar cruise connecter
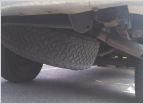 Addressing surface rust and undercoating
 Are TRD Pro wheels the same width as stock steel?
 Rough start, lacks power
 Need advice for pro grille on 2018 SR-5
Paint steering wheel trim panels on 14-15 tundra
Discussion in '2.5 Gen Tundras (2014-2021)' started by 15TRDPro, Jun 8, 2015.
Page 1 of 2
Page 1 of 2