1. Welcome to Tundras.com!

    You are currently viewing as a guest! To get full-access, you need to register for a FREE account.

    As a registered member, you’ll be able to:
    • Participate in all Tundra discussion topics
    • Transfer over your build thread from a different forum to this one
    • Communicate privately with other Tundra owners from around the world
    • Post your own photos in our Members Gallery
    • Access all special features of the site

To Prinsu or Not to Prinsu?

Discussion in '2.5 Gen Tundras (2014-2021)' started by Ron_Pro, Nov 17, 2021.

  1. Nov 26, 2021 at 11:03 AM
    #31
    Ron_Pro

    Ron_Pro [OP] New Member

    Joined:
    Jan 11, 2020
    Member:
    #41059
    Messages:
    174
    Gender:
    Male
    California
    Vehicle:
    2020 Tundra TRD Pro CrewMax
    What light bar do you have?
     
  2. Nov 29, 2021 at 9:45 AM
    #32
    HuntTruck

    HuntTruck New Member

    Joined:
    Feb 1, 2021
    Member:
    #58500
    Messages:
    146
    Gender:
    Male
    I had them install it because I dont trust myself to drill my roof and not explode the airbags. Godspeed!
     
    Ron_Pro[QUOTED][OP] likes this.
  3. Nov 29, 2021 at 4:04 PM
    #33
    Ron_Pro

    Ron_Pro [OP] New Member

    Joined:
    Jan 11, 2020
    Member:
    #41059
    Messages:
    174
    Gender:
    Male
    California
    Vehicle:
    2020 Tundra TRD Pro CrewMax
    I am going to do it myself. I’m going to use a step bit and tape off the 3/8 mark to ensure I don’t go past it. We’ll see how everything goes once I get it!
     
  4. Nov 29, 2021 at 4:13 PM
    #34
    Rodtheviking

    Rodtheviking New Member

    Joined:
    Jan 8, 2021
    Member:
    #57282
    Messages:
    709
    Gender:
    Male
    First Name:
    Chris
    Vancouver, WA
    2017 Limited Crew TRD, Ironman Pros with JBA uppers. Prinsu rack. RSI, RCI sliders
    Just be careful with the stepper bit, if you go too big you are screwed. I got the correct bit and a stopper set at 3/8" depth. I just pre-drilled all the holes per side then used the bit. It takes some effort too, the roof is kinda thick.
     
    Ron_Pro[OP] likes this.
  5. Nov 29, 2021 at 4:21 PM
    #35
    SAGE63

    SAGE63 Wannabe Go Fast Overlander Small Rock Crawler

    Joined:
    Dec 9, 2020
    Member:
    #55939
    Messages:
    2,847
    Gender:
    Male
    San Diego County
    Vehicle:
    2021 Super White Limited Crewmax TRD Offroad 4x4
    which Roam box is that
     
  6. Nov 29, 2021 at 4:22 PM
    #36
    Ron_Pro

    Ron_Pro [OP] New Member

    Joined:
    Jan 11, 2020
    Member:
    #41059
    Messages:
    174
    Gender:
    Male
    California
    Vehicle:
    2020 Tundra TRD Pro CrewMax
    Good call. Thanks for the tip!
     
  7. Nov 29, 2021 at 4:27 PM
    #37
    SAGE63

    SAGE63 Wannabe Go Fast Overlander Small Rock Crawler

    Joined:
    Dec 9, 2020
    Member:
    #55939
    Messages:
    2,847
    Gender:
    Male
    San Diego County
    Vehicle:
    2021 Super White Limited Crewmax TRD Offroad 4x4
    20211118_162111.jpg 20211119_065811.jpg 20211127_090233.jpg
    I have the Westcott designs roof rack for the Tundra. They did the install as well. checkbtheir website and video for the rack. it is this Tundra...
     
    Hightide and Ron_Pro[OP] like this.
  8. Nov 29, 2021 at 4:28 PM
    #38
    YotaBro

    YotaBro This forum will make me broke

    Joined:
    Sep 13, 2020
    Member:
    #52176
    Messages:
    1,257
    Gender:
    Male
    First Name:
    Calvin
    FL
    Vehicle:
    2017 Cement Grey Tundra TRD PRO
    Lots of shenanigans.
    I have the Leitner bed rack and decked system and seem to never have enough storage. I plan on running a prinsu rack for another light bar and additional storage room. I personally don’t care about drilling into my truck because I’ve already done it a bunch of times. Good thread though with lots of good info
     
    SAGE63 and Ron_Pro[OP] like this.
  9. Nov 29, 2021 at 5:01 PM
    #39
    alwzdfiant

    alwzdfiant New Member

    Joined:
    May 10, 2019
    Member:
    #30349
    Messages:
    663
    Gender:
    Male
    Vehicle:
    2013 Tundra Crew Max
    It’s the 95L. It is pretty bulky and might get the 83L since it’s more Low profile
     
    SAGE63[QUOTED] likes this.
  10. Nov 29, 2021 at 9:21 PM
    #40
    Rodtheviking

    Rodtheviking New Member

    Joined:
    Jan 8, 2021
    Member:
    #57282
    Messages:
    709
    Gender:
    Male
    First Name:
    Chris
    Vancouver, WA
    2017 Limited Crew TRD, Ironman Pros with JBA uppers. Prinsu rack. RSI, RCI sliders
    Also, I did my first hole at 9" from the window seal and the "scary" holes missed the side airbag just fine. I would also get a few extra bolts for doing the inserts, it can mess up the threads after a few uses and they will not thread back in without spinning the insert loose. Ask me how I know?

    I also used black Permatex Silicone Adhesive Sealant quite liberally, don't be shy with it.
     
    YotaBro and Ron_Pro[OP] like this.
  11. Nov 29, 2021 at 9:27 PM
    #41
    Ron_Pro

    Ron_Pro [OP] New Member

    Joined:
    Jan 11, 2020
    Member:
    #41059
    Messages:
    174
    Gender:
    Male
    California
    Vehicle:
    2020 Tundra TRD Pro CrewMax
    Good to know. Do you remember what size bolts they were? The install videos that I have seen said to measure 10 inches from the window seal. Did you go 9 inches just to avoid those “scary holes.” Thanks for the info!
     
  12. Nov 29, 2021 at 9:45 PM
    #42
    MadMaxCanon

    MadMaxCanon New Member

    Joined:
    May 27, 2021
    Member:
    #63566
    Messages:
    4,017
    Gender:
    Male
    SoCal
    Vehicle:
    '21 CM SR5 4x4 6 seater
    Too many, but not enough....
    Spider roof racks are a no drill option that can be removed.
     
    trevorklat likes this.
  13. Nov 29, 2021 at 10:17 PM
    #43
    TampaRD Pro

    TampaRD Pro Cunning Linguist

    Joined:
    Dec 23, 2019
    Member:
    #40248
    Messages:
    417
    Gender:
    Male
    First Name:
    Stanley
    Vehicle:
    2020 MGM CM TRD Pro
    Lots.
    I cautiously drilled my roof and installed a roof rack myself, it wasn't really that big of a deal with some forethought and preparation. Due to the good people who post on this forum I had read all the threads regarding inadvertently drilling into the side curtain airbags prior to purchasing and installing my rack. I didn't buy the Prinsu but went with the vilified Victory rack for a couple of reasons, but regardless the danger of (over)drilling the roof and into the airbags remains the same no matter which rack you install. For that reason and in the interest of self serving over-caution, before drilling I pulled down the edges of my headliner in the area about to be drilled (without actually disassembling the headliner) and felt around to judge the amount of clearance between the roof and the airbags. I gently pushed down on the airbags to flatten them and increase clearance as much as possible. I then took a piece of 1/2" inch thick x 2" wide aluminum flat bar and laid it on top of the airbags beneath the drilling locations as I drilled each set of holes just in case I accidentally over drilled a hole. I used drill stops set to around 5/8" inch depth on the drill bits and carefully drilled the holes. By going slow I was able to control the drill pretty well and the stops "bottomed out" the drill bit without slipping and prevented any over drilling.

    It's daunting to drill into the roof of an expensive new truck, for sure. But having the rack and the options it gives for hauling my kayaks, Maxtrax, WaterPort, etc. made it well worth the extra effort to do it safely and without incident.
    The process I followed is located on my "build" thread starting with post #15.

    Topper 04.jpg
    I measured and marked the hole locations, and installed drill depth stops on the drill bits to be used.

    Topper 03.jpg
    Dropped the sides of my headliner to inspect and have access to the side curtain airbags.

    Topper 02.jpg
    This is the 1/2" thick x 2" wide aluminum flat bar I laid over the top of the airbags prior to drilling the roof.

    Topper 05.jpg
    Astro Pneumatic Model 1442 RivNut Setting Tool and 3M marine grade sealant. Holes drilled and rivnuts set.

    .Topper 06.jpg
    Finished product.
     
    Last edited: Nov 29, 2021
  14. Nov 30, 2021 at 8:35 AM
    #44
    Rodtheviking

    Rodtheviking New Member

    Joined:
    Jan 8, 2021
    Member:
    #57282
    Messages:
    709
    Gender:
    Male
    First Name:
    Chris
    Vancouver, WA
    2017 Limited Crew TRD, Ironman Pros with JBA uppers. Prinsu rack. RSI, RCI sliders
    M6x1.0 55mm.

    I watched a few install videos, including their own and they all had different measurements. So I called and asked, was told that you can do anywhere from 7 to 10 inches, whatever looks best to you and it should be okay. I went at 9, I thought it looked best to my eye.
     
    Ron_Pro[QUOTED][OP] likes this.
  15. Dec 1, 2021 at 11:15 PM
    #45
    Ron_Pro

    Ron_Pro [OP] New Member

    Joined:
    Jan 11, 2020
    Member:
    #41059
    Messages:
    174
    Gender:
    Male
    California
    Vehicle:
    2020 Tundra TRD Pro CrewMax
    Thank you so much for this detailed response. I really appreciate it! Truck looks great!
     
    TampaRD Pro[QUOTED] likes this.
  16. Dec 1, 2021 at 11:15 PM
    #46
    Ron_Pro

    Ron_Pro [OP] New Member

    Joined:
    Jan 11, 2020
    Member:
    #41059
    Messages:
    174
    Gender:
    Male
    California
    Vehicle:
    2020 Tundra TRD Pro CrewMax
    Sounds good. Once everything arrives, I’ll see what I end up going with. Thanks for the info!
     
  17. Dec 14, 2021 at 7:32 PM
    #47
    Ron_Pro

    Ron_Pro [OP] New Member

    Joined:
    Jan 11, 2020
    Member:
    #41059
    Messages:
    174
    Gender:
    Male
    California
    Vehicle:
    2020 Tundra TRD Pro CrewMax
    Update: Installed the Prinsu Rack along with a 50” Diode Dynamics light bar.

    It was a very nerve racking installation, but the end product is definitely worth it.

    87B4F98B-C9DF-4E46-B8B5-43D290119897.jpg
    39866460-3FDD-495F-A27D-A8D276C39B2F.jpg
     
  18. Dec 14, 2021 at 7:50 PM
    #48
    TampaRD Pro

    TampaRD Pro Cunning Linguist

    Joined:
    Dec 23, 2019
    Member:
    #40248
    Messages:
    417
    Gender:
    Male
    First Name:
    Stanley
    Vehicle:
    2020 MGM CM TRD Pro
    Lots.
    Nice job, looks great!
     
    Ron_Pro[QUOTED][OP] likes this.
  19. Jan 10, 2022 at 2:57 PM
    #49
    xuy

    xuy New Member

    Joined:
    Dec 2, 2021
    Member:
    #71366
    Messages:
    46
    Gender:
    Male
    Vehicle:
    2021 TRD PRO Super White
    I installed prinstu on my taco pro and it looks sick. But now with my 21 tundra pro I definitely became a chicken sh*t when it comes to drilling.
     
  20. Jan 13, 2022 at 12:58 PM
    #50
    VTYOTER

    VTYOTER Rock

    Joined:
    Jun 7, 2021
    Member:
    #63993
    Messages:
    421
    Gender:
    Male
    First Name:
    Torrey
    Vermont
    Vehicle:
    2021 TRD Pro LR
    35" KO2, METHOD 701, WESTCOTT COLLAR, CB+3, BUMPER SHIMS, CALIRAISED ROCK SLIDERS STEP EDITION, DIAMONDBACK HD
    how many inches does this add to the top of the truck? I have about 6-7” clearance left in my garage. Want t Prinsu but also want to make sure I can still tuck her in at night. It looks like I should have room
     
  21. Jan 13, 2022 at 1:17 PM
    #51
    Punisher29073

    Punisher29073 New Member

    Joined:
    Oct 25, 2020
    Member:
    #54055
    Messages:
    375
    Gender:
    Male
    First Name:
    Ryan
    White Knoll, SC
    Vehicle:
    2019 Tundra TRD Pro
    Clearance lights, Light bar in front bumper, Ditch lights, CB Radio, AGM Battery, SLEE Sliders,
    How much height does it add to the cab? I have an AT Habitat camper with a similar hangover to the GFC.

    Also, do you think you could drill the holes with your camper installed? Or is there not wnough clearance for the back holes under the hangover???

     
  22. Feb 7, 2022 at 8:46 PM
    #52
    What the!?

    What the!? New Member

    Joined:
    Feb 24, 2018
    Member:
    #13121
    Messages:
    302
    Vehicle:
    2017 Pro
    I’m almost there. I used a set of collar drill bit stops but those stupid things kept sliding down the bit. I ended using a wooden dowel and drilled down the middle of it.

    I’ve got one side set with the rivnuts. I just need to drill 4 more holes on the other side.

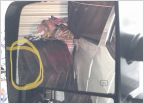
    Did anyone come close to the plastic weather channel clip on the rears? Mine were almost to the clips. I triple checked the measurements at the front by the windshield.

    68CD847C-B41A-4C9E-A5CC-E9B0166A941C.jpg
     
    Ron_Pro[OP] likes this.
  23. Feb 8, 2022 at 7:12 PM
    #53
    Ron_Pro

    Ron_Pro [OP] New Member

    Joined:
    Jan 11, 2020
    Member:
    #41059
    Messages:
    174
    Gender:
    Male
    California
    Vehicle:
    2020 Tundra TRD Pro CrewMax
    Yeah, the last hole is really close to the weather strip clip. I measured 9 1/8 for the first hole. Anything more than the last hole will definitely be where the clips are.
     
  24. Feb 8, 2022 at 8:19 PM
    #54
    What the!?

    What the!? New Member

    Joined:
    Feb 24, 2018
    Member:
    #13121
    Messages:
    302
    Vehicle:
    2017 Pro
    I measured the same per the instructions and video. It was a little too close for comfort so I ended up taking the clips off so the rivnuts could sit flush. I don’t want to take any chances with water leaks.

    I got the other side drilled tonight and will be able to get the rack on later this week. Hopefully I’ll be able to lay down the sealant properly the first time. I have to measure up the weather channel molding and cut it to length. I originally was just going to drill through them but they’re not rigid enough for the drill to pass through.
     
    Ron_Pro[QUOTED][OP] likes this.
  25. Feb 9, 2022 at 6:33 AM
    #55
    Ron_Pro

    Ron_Pro [OP] New Member

    Joined:
    Jan 11, 2020
    Member:
    #41059
    Messages:
    174
    Gender:
    Male
    California
    Vehicle:
    2020 Tundra TRD Pro CrewMax
    Nice! I didn’t remove the clips, but I know it was really close. No leaks at all with the rack. So as long as you seal it correctly you should be good. I cut the weather stripping to length around the spacers. It’s definitely a nerve racking install all the way around, but you’ll love it when it’s done.
     
  26. Feb 9, 2022 at 6:57 AM
    #56
    dkrou

    dkrou New Member

    Joined:
    Dec 13, 2020
    Member:
    #56121
    Messages:
    435
    Gender:
    Male
    First Name:
    dan
    Vehicle:
    2019 tundra
    I have the uptop overland rack on my cap...basically did it for more lights not for hauling...avoided over the cab because of drilling and I have plenty of forward facing lights. The uptop overland rack is built like a tank and well engineered.

    IMG_4729.jpg
    IMG_4731.jpg
    EC045048-7F06-4197-AD31-9468225DFE71.jpg
     
  27. Feb 9, 2022 at 7:00 AM
    #57
    Yotatrucks7

    Yotatrucks7 New Member

    Joined:
    Dec 21, 2019
    Member:
    #40141
    Messages:
    56
    Gender:
    Male
    Colorado
    Vehicle:
    2017 DC Tundra
    I’m also curious on the added height to the roof…anyone have a measurement?
     
  28. Feb 9, 2022 at 7:06 AM
    #58
    Yotatrucks7

    Yotatrucks7 New Member

    Joined:
    Dec 21, 2019
    Member:
    #40141
    Messages:
    56
    Gender:
    Male
    Colorado
    Vehicle:
    2017 DC Tundra
    I assume this was a Black Friday sale and not a coupon code…?
     
  29. Feb 11, 2022 at 9:07 PM
    #59
    What the!?

    What the!? New Member

    Joined:
    Feb 24, 2018
    Member:
    #13121
    Messages:
    302
    Vehicle:
    2017 Pro
    Finally finished the install on it. I took a lot of measurements before hand to make sure I would still be able to park inside the garage. After I finished it, I was a little nervous just from eyeballing it. I ended up having about 3” left. Whew!

    Love the way it turned out. The drilling was worth it. Like everyone said, take your time. Measure 10 times, drill once. I did what @TampaRD Pro did with a small plate to block the airbags. Ended up not needing it after all because I made my drill stop and checked underneath before drilling. Once you drill a couple, the rest are easy. I was a little paranoid about leaks so I used a lot of the silicone.

    Very happy with the quality of the rack.

    882F5A1A-ADB1-49B0-8A8A-CC6933580C54.jpg
     
    TampaRD Pro likes this.
  30. Feb 12, 2022 at 9:50 AM
    #60
    bjp

    bjp Hello, kitty……

    Joined:
    Sep 25, 2021
    Member:
    #68535
    Messages:
    52
    First Name:
    Ben
    Vehicle:
    White ‘21 Double-cab Tundra SR5 w/TRD off-road
    GoFast Camper, TRD skid plate, Valhalla cat plates, LT265/70r18 Nokian Rotiivas, buncha shit under the seat, you know how it is
    I’m really curious about what you plan to do with the rack - if you are okay since you still have 3” clearance to allow you to get into garage, what are you going to use the rack for? I mean they doesn’t exactly leave much room to put anything on there. Will it only be ‘day use’? (Meaning, something goes up there while you are out, but comes off once you get home?)
     

Products Discussed in

To Top