

-
Welcome to Tundras.com!
You are currently viewing as a guest! To get full-access, you need to register for a FREE account.
As a registered member, you’ll be able to:- Participate in all Tundra discussion topics
- Transfer over your build thread from a different forum to this one
- Communicate privately with other Tundra owners from around the world
- Post your own photos in our Members Gallery
- Access all special features of the site
Quick Links: FirstGenTundra.com's ashtray mount for phone/radio (wireless charging) mod
  REAR SWAY BAR 1st GEN
  Can anyone help me diagnose this leak under the drivers side axle?
  I'm trying to install a zero start 1500w coolant heater to my 05 tundra,
  Need Part Numbers for Two Wire Bundle Clips
 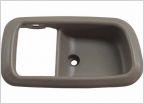 Stupid interior trim question (door handle trim replacement)
Broken tensioner bolt in block
Discussion in '1st Gen Tundras (2000-2006)' started by Dunk, Nov 29, 2021.

