1. Welcome to Tundras.com!

    You are currently viewing as a guest! To get full-access, you need to register for a FREE account.

    As a registered member, you’ll be able to:
    • Participate in all Tundra discussion topics
    • Transfer over your build thread from a different forum to this one
    • Communicate privately with other Tundra owners from around the world
    • Post your own photos in our Members Gallery
    • Access all special features of the site

06 DC Daily Driver / 2wd to 4wd Conversion

Discussion in '1st Gen Builds (2000-2006)' started by MrDirtjumper, Jun 26, 2019.

  1. Oct 24, 2020 at 9:34 PM
    #31
    MrDirtjumper

    MrDirtjumper [OP] Ol’ dickhead

    Joined:
    Jun 19, 2019
    Member:
    #32133
    Messages:
    1,053
    Gender:
    Male
    First Name:
    Josh
    Slam Angelo, Texas
    Vehicle:
    06 DC TRD, 2wd to 4wd Conv.
    Shoot, I’m lucky to avg 14mpg now. Maybe it’s my heavy foot, maybe it’s my heavy 10 plys. Regardless there ain’t no way it’s goin AWD.
     
    empty_lord[QUOTED] likes this.
  2. Jan 13, 2021 at 10:12 AM
    #32
    onesojourner

    onesojourner Here, let me derail that for you

    Joined:
    Sep 29, 2020
    Member:
    #52951
    Messages:
    1,524
    SW MO
    Vehicle:
    06 DBLcab LTD 4x4
    What setting do you have your 5100s at?
     
  3. Jan 13, 2021 at 3:58 PM
    #33
    MrDirtjumper

    MrDirtjumper [OP] Ol’ dickhead

    Joined:
    Jun 19, 2019
    Member:
    #32133
    Messages:
    1,053
    Gender:
    Male
    First Name:
    Josh
    Slam Angelo, Texas
    Vehicle:
    06 DC TRD, 2wd to 4wd Conv.
    I think mines kind of an anomaly. It had an unknown leveling kit when I bought it. This was a 1” puck stacked under what looks like a 1/2” top hat. So instead of buying new top hats when I did the 5100s, I just used the existing ones. So I have an additional 1/2” on top of 3rd notch.


    Here is a pic from when I was putting them in and wanted to try 1st notch with both the hat and the puck. I couldn’t get the bolt through the LCA because of how long it was. Figured it would ride smooth but it would risk bottoming out the shock. Either way, ended up removing the 1” puck.

     
    Last edited: Jan 13, 2021
  4. Jan 14, 2021 at 7:19 AM
    #34
    onesojourner

    onesojourner Here, let me derail that for you

    Joined:
    Sep 29, 2020
    Member:
    #52951
    Messages:
    1,524
    SW MO
    Vehicle:
    06 DBLcab LTD 4x4
    Understood. What is your hub to fender measurement? I am right at 21.5.
     
  5. Jan 16, 2021 at 12:40 AM
    #35
    MrDirtjumper

    MrDirtjumper [OP] Ol’ dickhead

    Joined:
    Jun 19, 2019
    Member:
    #32133
    Messages:
    1,053
    Gender:
    Male
    First Name:
    Josh
    Slam Angelo, Texas
    Vehicle:
    06 DC TRD, 2wd to 4wd Conv.
    If you look closely at my pictures, its a great guide on how to slowly landscape small portions of your yard in order to keep the wife happy.
     
    Darkness likes this.
  6. Jan 16, 2021 at 1:14 AM
    #36
    jwatt

    jwatt I heart men

    Joined:
    Jan 10, 2020
    Member:
    #40985
    Messages:
    1,301
    Gender:
    Male
    First Name:
    Jack
    Oregon
    Vehicle:
    Salsa Red 2007 Tundra DC @91k.
    7" BDS Coilover Suspension Lift/BDS UCAs/XB LED Headlights/Nitto trail Grappler tires on Black Rhyno Armory wheels
    I didn t know 06 s had steering wheel controls. It must be a trim option cause my 07 DC has none.
     
    This site contains affiliate links for which the site may be compensated.
    #36
  7. Jan 24, 2021 at 12:49 PM
    #37
    MrDirtjumper

    MrDirtjumper [OP] Ol’ dickhead

    Joined:
    Jun 19, 2019
    Member:
    #32133
    Messages:
    1,053
    Gender:
    Male
    First Name:
    Josh
    Slam Angelo, Texas
    Vehicle:
    06 DC TRD, 2wd to 4wd Conv.
    Camper build out:

    Been seeing a lot of things similar to this on YouTube recently so I decided to go for it. It’s really easy to remove the 4 main pieces and unplug the camper shell and I have a truck bed again for hauling anything that I need to.

    Sleeping mode:

    I have a wife that likes to join in on these adventures so I needed room for two. With this platform and place, and counting the wheel well storage, there is approx 50” of sleeping width. Essentially a full size bed. Still haven’t figured out the mattress situation yet but we have used an air mattress in the past and it worked out fine.


    Bike hauling mode:

    I have a hitch mount tray rack for every day use but for long/ overnight camping trips I wanted something that would get my bike out of the weather. The fork mount on the bottom of the bed platform makes it easy to slide my bike in and out and it keeps it upright.


    Drawer:


    The slides are made with 1x1x1/8 sq tubing and about 23 ball bearings per side. Slides smoothly in and out and will support a ton of weight. I still need to add some dividers and tops. I’ve been tossing around the idea of one of those fancy lifting coffee table hinges.


    Wheel well storage:

    Access to the rear storage is also available with the drawer pulled out. This allows me to slide long poles or anything else in and out.


    Lights:

    Any and all electronics in the cap go through the male/female harness shown below. I have an 8awg power wire ran to a fuse box behind the driver tail light that will power all accessories. A dual battery setup, possibly with solar is likely at some point.

    These are spdt on/off/on switches so that I can turn lights on or off from either the front or the back. Dimmer also up front if you want the light to be less intense at night. I see these lights mainly being used when parked at the local bike trailhead so I absolutely had to have a switch at the rear. The lack of side windows makes it extremely hard to see inside the shell, even in the middle of the day.


  8. Mar 7, 2021 at 7:26 PM
    #38
    MrDirtjumper

    MrDirtjumper [OP] Ol’ dickhead

    Joined:
    Jun 19, 2019
    Member:
    #32133
    Messages:
    1,053
    Gender:
    Male
    First Name:
    Josh
    Slam Angelo, Texas
    Vehicle:
    06 DC TRD, 2wd to 4wd Conv.
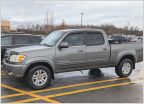
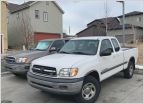
    Welp, 21 months from the date of that post... here she is. The 4wd donor truck that I promised myself I would find.


    I know the factory swap has been done on a DC before but I don’t think it’s ever been documented.

    Sit back and crack a beer folks. I’ve got two weeks to get this finished.
     
    Last edited: Mar 19, 2021
  9. Mar 7, 2021 at 10:18 PM
    #39
    hrv2017

    hrv2017 New Member

    Joined:
    Aug 12, 2019
    Member:
    #34516
    Messages:
    70
    Gender:
    Male
    First Name:
    Hector
    Vehicle:
    2017 Toyota Tundra Double Cab
    Very much enjoyed your write ups! Makes me want to work on my dad's truck. Also commenting for future posts!
     
    Tundra2 likes this.
  10. Mar 8, 2021 at 7:20 AM
    #40
    MrDirtjumper

    MrDirtjumper [OP] Ol’ dickhead

    Joined:
    Jun 19, 2019
    Member:
    #32133
    Messages:
    1,053
    Gender:
    Male
    First Name:
    Josh
    Slam Angelo, Texas
    Vehicle:
    06 DC TRD, 2wd to 4wd Conv.
    Beginning of 4wd Swap:

    First step for me was to figure out how this is going to work electronically. Overall this was the most intimidating step since I want this to seem just about as OEM as it can get. I’m not too worried mechanically since the trucks are identical and I’ve seen methheads change a transfer case.

    I know the engine harness between the 2wd model and the 4wd model are different based off of diagrams that I have and about two years worth of research so let’s dig in.

    4wd ECU:
    The 4wd ecu is located in the passenger kick panel. I can copy/paste from the wiring diagrams exactly what it does but for right now, all I care is that it works. This will need to go into my truck. Easier said than done. The bottom bolt for this is accessible by just removing the door sill plate and the kick panel. The top bolt for this was placed by satan himself.


    To get to this point I needed to remove the entire blower motor housing. Not just the fan, the entire housing. To get to that point, I had to remove the passenger air bag. Well as they say, when in Rome right? Let’s just take off the whole dash. I’m going to need to transfer the wiring that plugs into the 4wd ECU over to my truck right? Why not make it easily accessible right... right?


    WRONG. It was at this point where I started to feel a bit overwhelmed. That’s when I decided to reassess and have a look at my truck. Well what do you know? The harnesses that plug into the 4wd ECU are already there. Albeit both are white in my truck instead of one being black in the donor. It appears that the in cab harnesses are identical between the two trucks. All of this work was done for uhh, practice I guess.


    4wd ECU in my truck:

    Currently it appears that the only wiring that will need to move over to mine is a harness that runs through the engine harness and down to the driveline. This comes through the firewall on the passenger side with the rest of the engine harness and plugs into the empty gray plug to the right of the blue plug.

    Edit: See later posts. Just replace the engine wiring harness. It will save you so much time and headache. It is unbelievably easy to do. There aren’t too many things that scare me but this was one of them and it was totally unwarranted. It ended up that this was, without a doubt, the easiest part of this project. Each plug on the engine harness is unique to the sensor/component it plugs into. Its like connect the dots, except the end of each line is also numbered.

    My truck, Empty harness:

    Donor:

    Currently this is where I am with a half day of work. I’ve got that harness pulled back into the engine bay of the donor and am working on removing it. Update to come.
     
    Last edited: Dec 19, 2023
    mcharfauros, MS22 and Darkness like this.
  11. Mar 8, 2021 at 7:20 AM
    #41
    MrDirtjumper

    MrDirtjumper [OP] Ol’ dickhead

    Joined:
    Jun 19, 2019
    Member:
    #32133
    Messages:
    1,053
    Gender:
    Male
    First Name:
    Josh
    Slam Angelo, Texas
    Vehicle:
    06 DC TRD, 2wd to 4wd Conv.
    So it looks like there is a big difference in the A750E 2wd transmission and the 4wd A750F 4wd trans that makes them not exactly identical.

    My hope was that once I got both of the trans’ dropped, I could pull off the rear extension housing and swap it from the 4wd to the 2wd. Mainly because I know how well my trans has been cared for and I know nothing of the donor. Well... this isn’t the case. The 750E output shaft is considerably longer than the 750f which is absolutely bonkers to me. Why would Toyota’s assembly line go through the trouble of manufacturing two transmissions that are internally and externally abso-effin-lutely identical except for the output shaft? Regardless...

    Here are some pictures that will explain better than I can. I can’t take credit for all of these as some are from google and I’ve already shut up shop for the night.

    2wd A750E:


    4wd A750F:


    My thought was that I could remove this

    from the rear of the 2wd and replace it with this


    From the 4wd 750F but that’s not the case and here’s why.


    750E output shaft:


    750F output shaft:


    Here’s the 750F and the transfer case which clearly shows that the 750E output shaft would be far too long.


    The extension housing is what the transfer case bolts up to and is essentially it’s only support. Either way, I’ve got the parts that I need to make it work, thanks to buying an entire truck, but I’m just going to have to gamble on how reliable this other trans will be.
     
    Last edited: Dec 19, 2023
  12. Mar 8, 2021 at 7:21 AM
    #42
    MrDirtjumper

    MrDirtjumper [OP] Ol’ dickhead

    Joined:
    Jun 19, 2019
    Member:
    #32133
    Messages:
    1,053
    Gender:
    Male
    First Name:
    Josh
    Slam Angelo, Texas
    Vehicle:
    06 DC TRD, 2wd to 4wd Conv.
    Back to wiring and the electronics.

    Here is my suggestion. Unless you have access to a donor truck and can remove the entire engine wiring harness, just jump on eBay and buy a 4wd engine harness for like $150. In my opinion it’s worth the time you’ll save.

    Reason being is that the grey plug, that I pointed out a few posts above, runs through the firewall in that big boot on the passenger side. I thought that I could untangle this wiring from the donor and add it all over to my truck. Somehow snaking it back through the factory boot and loom. The reason I wanted to go this route was that I wanted to avoid pulling my entire engine wiring harness because I was scared to do so.

    Reasons not to go that route:
    1. Removing just that grey plug and its wiring is dumb unless you think that you can put the engine wiring harness back together better than Toyota can from the factory. (Hint: you cant)
    2. Toyota makes it an absolute no brainer to remove and install the engine wiring harness. It is like one giant puzzle piece with 25 unique cuts to it. It only fits one way. Just make sure that your rear injectors and coils are identified.
    To remove the engine wiring harness, first you need to remove the glove box. The three connectors on the driver side of the Main ECU need to be unplugged along with the blue, grey and white (left to right) connectors shown below. Ignore the blue harness up top.


    Then you can unbolt the boot from the firewall beneath the hood and pull these 6 connectors into the engine bay. At this point you had better figure out how good of a memory you have because you need to start removing all of the connectors on the top side of the engine. This includes coils, injectors, maf, throttle position, and eventually it ends with the crank position sensor that is barely accessible on the bottom of the driver side. I suggest that you mark your two rear coils and injectors with something to identify them as the rears because you can easily mix them up with the next bank of cylinders if you aren’t careful. The remaining connectors throughout the harness line up almost perfectly with whatever it is that it plugs into so it’s almost too easy.

    Once the top is disconnected, you need to get the harness out. This is assuming that you have already disconnected the lower half of the harness, meaning everything from the transfer case forward. At this point it is best if you already have the transmission out. The Number 3 air tube that is behind the intake overlaps the harness and pins it into place, so it must come out. I cant imagine having to remove this with the trans still in place. And it would be absolute hell trying to snake the whole engine harness out around this tube.


    Behind the intake are two multi pin connectors that plug into the main engine harness. One of these is a 6 pin and runs down to the front diff and the other runs down the driver side of the engine behind the exhaust manifold and disappears into oblivion. These two plugs merge together and are taped up in loom that makes its way down through a plastic housing behind the exhaust manifold.


    I did not want to remove and replace this portion of the harness on my truck so I was able to carefully cut the loom and tape off of it. Then I could unbutton the clips from the plastic housing, and fully remove the 6 pin front diff harness. It was not taped to anything else inside of the housing, just neatly tucked in there with other wiring.


    It is totally up to you if you want to just cut the end off up top and cut the end off down low and splice them together using a couple of feet of 6 conductor wire. You would still need to find a way to get it past the exhaust manifold and routed down to the front diff, but that’s on you whichever route you chose.

    Once both of these harnesses are removed you just need to reverse the process installing them on your 2wd vehicle.

    I noticed one little snag during the removal of entire engine harness from the donor. It seems as if at some point, the sub harness to the transmission was cut and spliced by someone who only had butt connectors.


    With me being, well me, I knew I couldn’t sleep at night if I let this fly. So I took a small little detour to solder and double heat shrink each conductor.


    I found it very odd that the entire connector had been replaced as you can see that each wire coming from it was white in color with no identifiable markings. That tells me that whoever did it either knew the pin out or had some schematics lying around. If that was the case, they were likely a tech, but they didn’t have the wherewithal to use weatherproof butts or own a proper crimping tool???
     
    Last edited: Mar 15, 2021
    This site contains affiliate links for which the site may be compensated.
    #42
    NUDRAT and MS22 like this.
  13. Mar 8, 2021 at 7:21 AM
    #43
    MrDirtjumper

    MrDirtjumper [OP] Ol’ dickhead

    Joined:
    Jun 19, 2019
    Member:
    #32133
    Messages:
    1,053
    Gender:
    Male
    First Name:
    Josh
    Slam Angelo, Texas
    Vehicle:
    06 DC TRD, 2wd to 4wd Conv.
    https://youtu.be/LXd49NR2kFA

    Pretty freaking snazzy how the lights and everything are all wired to work.

    I’m going to have to figure out something for this wood grain though. Can’t tell if I like it enough to move all of the wood from the donor over or not.
     
    Last edited: Mar 15, 2021
  14. Mar 8, 2021 at 7:22 AM
    #44
    MrDirtjumper

    MrDirtjumper [OP] Ol’ dickhead

    Joined:
    Jun 19, 2019
    Member:
    #32133
    Messages:
    1,053
    Gender:
    Male
    First Name:
    Josh
    Slam Angelo, Texas
    Vehicle:
    06 DC TRD, 2wd to 4wd Conv.
    Parts List needed for Factory Conversion:

    1. A750F Transmission with Extension housing
    2. Transmission crossmember (mount is different)
    3. 4wd transfer case
    4. Front Clamshell differential
    5. Driver and passenger 4wd hubs. Much easier to just get the entire spindle so make sure the bearings are good.
    6. Driver and passenger CV joints
    7. Front and rear driveshafts from 4wd vehicle
    8. 4wd engine wiring harness
    9. 6 pin harness that runs from behind intake to the front clamshell diff.
    10. 4wd ECU control box located in the passenger kick panel
    11. 4wd dash bezel that has the 4wd buttons. The whole bezel is molded different and the buttons cannot be transferred.
    12. 3 quarts of 75W-90 to split between the front diff and t-case.
    13. Approx 2 gallons of ATF. More or less depending on how you treat the trans during the swap.

    It is important to note that the main vehicle ECU located behind the glove box does not need to purchased. Literally the only two things I touched inside the cab were the 4wd kick panel ECU and the dash bezel.


    Optional but worth doing:
    1. If you’re putting on some used spindles, I would definitely not trust the old upper ball joints. Plus, what better time to do them?
    2. There is no better time than now to re-boot and grease the CV axles.
    3. My driver diff seal was bad so it needed replacing.
    4. Highly likely that the old carrier bearing will need replacing.
    5. Also highly likely that several of the f-ing 73 u-joints on either of the driveshafts will need to be replaced.
    6. The steering shaft seal is right in your face and the easiest it’s ever going to be to get to while you have the exhaust down.

    I may think of more in the following days so don't run off and attempt this next weekend.
     
    Last edited: Mar 15, 2021
    MS22 and FirstGenVol like this.
  15. Mar 8, 2021 at 7:23 AM
    #45
    slowpokepete

    slowpokepete New No More

    Joined:
    Jan 21, 2021
    Member:
    #57920
    Messages:
    584
    Gender:
    Male
    First Name:
    Peter
    Hillsdale, NY
    Vehicle:
    2007 Blue Tundra DC 4x4 SR5
    Yikes.

    SPP
     
  16. Mar 8, 2021 at 7:36 AM
    #46
    FirstGenVol

    FirstGenVol Brake Czar

    Joined:
    Dec 13, 2018
    Member:
    #22934
    Messages:
    12,915
    East TN
    Vehicle:
    2002 AC
    Neat stuff @MrDirtjumper It looks like that donor truck spent a lot of life on dusty Texas roads. Crazy how much grime is under that dash. Looking forward to your updates.
     
    MS22 and MrDirtjumper[OP] like this.
  17. Mar 9, 2021 at 8:12 PM
    #47
    MrDirtjumper

    MrDirtjumper [OP] Ol’ dickhead

    Joined:
    Jun 19, 2019
    Member:
    #32133
    Messages:
    1,053
    Gender:
    Male
    First Name:
    Josh
    Slam Angelo, Texas
    Vehicle:
    06 DC TRD, 2wd to 4wd Conv.
    The “keepers” table just keeps growing. At this rate, I’m gonna need to add another course of shelving.

     
  18. Mar 11, 2021 at 5:42 AM
    #48
    MrDirtjumper

    MrDirtjumper [OP] Ol’ dickhead

    Joined:
    Jun 19, 2019
    Member:
    #32133
    Messages:
    1,053
    Gender:
    Male
    First Name:
    Josh
    Slam Angelo, Texas
    Vehicle:
    06 DC TRD, 2wd to 4wd Conv.
    Paging @empty_lord

    Is there any kind of “must do” maintenance I need to do while I have this spare trans and t-case out?

    Ive already ordered a new pass output seal for the diff as that was leaking and torn.

    Isn’t there something about the ADD actuator not engaging and it’s fixed by cleaning the contacts?
     
  19. Mar 11, 2021 at 6:07 AM
    #49
    FirstGenVol

    FirstGenVol Brake Czar

    Joined:
    Dec 13, 2018
    Member:
    #22934
    Messages:
    12,915
    East TN
    Vehicle:
    2002 AC
    I was actually just about to ask if you were replacing both diff seals. I would. I saw you ask about the ECGS tool so I assume you are removing the needle bearing? When I replaced my CV axles last year I noticed both seals on the back of the spindle were full of boogers. I wish I had the parts on hand to replace them. That might be something you should replace.

    The ones I'm referring to were mentioned in this post recently,

    https://www.tundras.com/threads/wha...t-gen-tundra-today.2558/page-870#post-2128054
     
    Darkness likes this.
  20. Mar 11, 2021 at 6:48 AM
    #50
    MrDirtjumper

    MrDirtjumper [OP] Ol’ dickhead

    Joined:
    Jun 19, 2019
    Member:
    #32133
    Messages:
    1,053
    Gender:
    Male
    First Name:
    Josh
    Slam Angelo, Texas
    Vehicle:
    06 DC TRD, 2wd to 4wd Conv.
    I did consider the bushing but once I got the CV out, that needle bearing didn’t seem like it had any play. So I’m gonna roll the dice on that. Besides, it’s not THAT hard to get to it.

    Since I did determine last night that I do have to use the donor trans I was mainly curious if there was anything I could do to it or the transfer case while I have them down. The donor cranked and ran but clearly I couldn’t drive it and I have no idea what kind of abuse the trans has seen. Which is kind of worrisome knowing how well I’ve cared for mine.
     
    Last edited: Mar 11, 2021
  21. Mar 11, 2021 at 7:30 AM
    #51
    empty_lord

    empty_lord They see me rollin'

    Joined:
    Feb 1, 2019
    Member:
    #25441
    Messages:
    10,024
    Gender:
    Male
    First Name:
    Dan
    Indiana, Chicagoland
    Vehicle:
    05 rollover special
    custom body work, Billies with taco ARB springs, Icon AAL, TRD FJ trail team wheels, 2019 Toyota 86 radio, Blacked out interior, Added factory power everything, heater mirrors, ETC
    ECGS diff bushing. As for the t-case not really anything to do other than fluid.
     
  22. Mar 11, 2021 at 5:30 PM
    #52
    MrDirtjumper

    MrDirtjumper [OP] Ol’ dickhead

    Joined:
    Jun 19, 2019
    Member:
    #32133
    Messages:
    1,053
    Gender:
    Male
    First Name:
    Josh
    Slam Angelo, Texas
    Vehicle:
    06 DC TRD, 2wd to 4wd Conv.
    I think it was riiiight about here that my wife really started to question my sanity.

     
  23. Mar 14, 2021 at 7:30 AM
    #53
    KNABORES

    KNABORES Sarcasm incoming

    Joined:
    Jan 1, 2020
    Member:
    #40572
    Messages:
    8,923
    Gender:
    Male
    Arkansas
    Vehicle:
    2000 Limited TRD AC 4X4 Thunder Grey 270k miles. 2019 Limited TRD CM 4x4 Cement Grey 75k miles
    2000: Bilstein 5100's 16x8 589's with 265/75/16 and 1.25" spacers Flowmaster 50 series over the axle dump Pioneer touchscreen with backup camera Full interior and dash LED conversion Trailer brake controller with 7 pin Bedliner coat bumpers & trim ARE topper 2019: ARE topper with full Bedrug kit and Vortex rack TRD shifter 1.25" wheel spacers (I like to live dangerously) Red tow hooks for that +15 grip bonus
    I can appreciate this project as an opportunity to tinker and accomplish a difficult conversion. There's a sense of satisfaction at being able to pull off what few can. Kudos to you sir. But I've always told anyone who's asked about doing something like this, motor upgrade swap, 4wd swap, basically taking a vehicle and trying to change it to a different model of the same vehicle the same thing, sell the one you have and buy the one you want. It's cheaper, faster, and it's always done right. Especially as a daily driver. These are old enough, expensive enough, and getting rare enough that you can certainly make a case for going through with this. Enjoying the thread!
     
    MS22 likes this.
  24. Mar 14, 2021 at 9:20 PM
    #54
    MrDirtjumper

    MrDirtjumper [OP] Ol’ dickhead

    Joined:
    Jun 19, 2019
    Member:
    #32133
    Messages:
    1,053
    Gender:
    Male
    First Name:
    Josh
    Slam Angelo, Texas
    Vehicle:
    06 DC TRD, 2wd to 4wd Conv.
    Well boys, she’s done! She started right up and everything worked on the very first try. Took it for a spin around the block and noticed what felt like a little transmission slippage. Came back home and saw that I misinterpreted the FSM and was about 1/2 gallon low on fluid. Topped it off and she runs like a champ.

    I’ve been at it for 2 days at almost 16 hours straight so I’m gonna call it a night but I’ll do some updates up top later on this week.
     
  25. Mar 15, 2021 at 4:53 AM
    #55
    KNABORES

    KNABORES Sarcasm incoming

    Joined:
    Jan 1, 2020
    Member:
    #40572
    Messages:
    8,923
    Gender:
    Male
    Arkansas
    Vehicle:
    2000 Limited TRD AC 4X4 Thunder Grey 270k miles. 2019 Limited TRD CM 4x4 Cement Grey 75k miles
    2000: Bilstein 5100's 16x8 589's with 265/75/16 and 1.25" spacers Flowmaster 50 series over the axle dump Pioneer touchscreen with backup camera Full interior and dash LED conversion Trailer brake controller with 7 pin Bedliner coat bumpers & trim ARE topper 2019: ARE topper with full Bedrug kit and Vortex rack TRD shifter 1.25" wheel spacers (I like to live dangerously) Red tow hooks for that +15 grip bonus
    Monumental achievement! Great job sir. Would love to hear the thoughts on the whole process now that it's done.
     
    MS22, MrDirtjumper[OP] and Tundra2 like this.
  26. Mar 15, 2021 at 6:50 AM
    #56
    MrDirtjumper

    MrDirtjumper [OP] Ol’ dickhead

    Joined:
    Jun 19, 2019
    Member:
    #32133
    Messages:
    1,053
    Gender:
    Male
    First Name:
    Josh
    Slam Angelo, Texas
    Vehicle:
    06 DC TRD, 2wd to 4wd Conv.
    Huge shout out to @FrenchToasty! The CV boot kit worked out perfectly.

    Im sure it can be done but I couldn’t figure out how to get the inner Joint off. I learned this after I fully packed the wheel side joint with grease and got the new boot all fastened up.

    So other than having to redo that joint twice, it all went smoothly.
     
    MS22, FrenchToasty and Tundra2 like this.
  27. Mar 15, 2021 at 9:23 AM
    #57
    rock climber

    rock climber New Member

    Joined:
    Oct 7, 2019
    Member:
    #37106
    Messages:
    1,601
    Gender:
    Male
    Colorado
    Vehicle:
    2001 Sequoia 4X4, 2000 AC 4X4
    Nice work!
     
    MS22, MrDirtjumper[OP] and Tundra2 like this.
  28. Mar 15, 2021 at 2:15 PM
    #58
    FirstGenVol

    FirstGenVol Brake Czar

    Joined:
    Dec 13, 2018
    Member:
    #22934
    Messages:
    12,915
    East TN
    Vehicle:
    2002 AC
    Damn that was fast. You really did your research before hand.
     
  29. Mar 15, 2021 at 7:43 PM
    #59
    MrDirtjumper

    MrDirtjumper [OP] Ol’ dickhead

    Joined:
    Jun 19, 2019
    Member:
    #32133
    Messages:
    1,053
    Gender:
    Male
    First Name:
    Josh
    Slam Angelo, Texas
    Vehicle:
    06 DC TRD, 2wd to 4wd Conv.
    Can’t forget the most important piece.

     
    Bmktw2, NUDRAT, MS22 and 4 others like this.
  30. Mar 16, 2021 at 6:37 AM
    #60
    MrDirtjumper

    MrDirtjumper [OP] Ol’ dickhead

    Joined:
    Jun 19, 2019
    Member:
    #32133
    Messages:
    1,053
    Gender:
    Male
    First Name:
    Josh
    Slam Angelo, Texas
    Vehicle:
    06 DC TRD, 2wd to 4wd Conv.
    Would I do it again? Yes. If for whatever reason I found myself in the absolutely perfect 2wd truck.

    For several reasons actually.
    1. Because of how easy it was. If I had a lift or even a second hand, this could have been done purely in a weekend.
    2. It gave me a chance to do maintenance on items that I probably would have never done had I bought a used 4wd truck.
    It definitely added some firmness to my steering.
    The push button is really slick. Every other 4wd I’ve owned was manual shift.
    We will see first hand how it affects mileage.

    That’s about all I can think of right now.
     
    Hi06silver, MS22 and KNABORES[QUOTED] like this.
To Top