1. Welcome to Tundras.com!

    You are currently viewing as a guest! To get full-access, you need to register for a FREE account.

    As a registered member, you’ll be able to:
    • Participate in all Tundra discussion topics
    • Transfer over your build thread from a different forum to this one
    • Communicate privately with other Tundra owners from around the world
    • Post your own photos in our Members Gallery
    • Access all special features of the site

The Stereo Slow-Build Begins

Discussion in 'Audio & Video' started by Danimal86, Oct 12, 2017.

  1. Sep 15, 2020 at 12:34 PM
    #241
    Danimal86

    Danimal86 [OP] Looks clean even when its dirty!

    Joined:
    Aug 29, 2017
    Member:
    #9321
    Messages:
    4,721
    Gender:
    Male
    First Name:
    Daniel
    Sacramento, CA
    Vehicle:
    2017 White Tundra SR5
    Gotcha. i really wanted to get the vx800/8i because its gives a lot of power for such a small frame. Are you the one that also had the 3way audiofrogs?
     
  2. Sep 15, 2020 at 12:38 PM
    #242
    aparker813

    aparker813 New Member

    Joined:
    Aug 4, 2019
    Member:
    #34160
    Messages:
    76
    Gender:
    Male
    Yessir! Its a great amp but if I was in your shoes already owning a super nice 5 channel HD, I'd have done the exact same instead of trying to sell the HD and start over. Plus the Helix should give you a bit more control over the tuning and more room to grow...you just gotta find room for everything!
     
  3. Sep 15, 2020 at 1:14 PM
    #243
    Danimal86

    Danimal86 [OP] Looks clean even when its dirty!

    Joined:
    Aug 29, 2017
    Member:
    #9321
    Messages:
    4,721
    Gender:
    Male
    First Name:
    Daniel
    Sacramento, CA
    Vehicle:
    2017 White Tundra SR5
    Yep, thats what i'm really scratching my head about. I cant really seem to find a good spot for everything. Ive got a big PG capactor that i would like to use, but i think its not going to happen. I just dont have the room to have it somewhere close to the amps. I think i'm going to roll the dice and try it without the cap. I've got a nice northstar battery and the charge voltage booster, so im thinking it should be good. i could always throw in an HO alternator, but probably not necessary.
     
  4. Sep 15, 2020 at 1:16 PM
    #244
    purplenova

    purplenova Not a new member

    Joined:
    Nov 9, 2018
    Member:
    #21513
    Messages:
    827
    Gender:
    Male
    First Name:
    Tom
    Ohio
    Vehicle:
    2016 Tundra Crewmax SR5
    Pillar Tape, Bullet Liner, 20% Tint, Tyger Star Armor Kenwood amp & AudioControl LC7i Tech12volts JL Tweeters
    I love reading these threads and seeing all the options for upgrading the sound in our trucks.

    I thought I picked the most inexpensive way to get better sound and really havent seen anything
    less expensive than my, on sale kenwood amp, ebay LOC and used FB marketplace sub.

    Then I read this thread and absolutely love the $$ you all will put into the quest for ultimate sound.
    Would love to be close enough to hear your tunes when you get done. Gotta sound incredible.
     
    This site contains affiliate links for which the site may be compensated.
    619Tundra likes this.
  5. Sep 15, 2020 at 1:47 PM
    #245
    619Tundra

    619Tundra New Member

    Joined:
    Sep 2, 2017
    Member:
    #9393
    Messages:
    974
    Gender:
    Male
    First Name:
    George
    San Diego, Caifornia
    Vehicle:
    2017 Black Tundra Double Cab SR5
    This is why I bought the Helix V Eight DSP. Small footprint for 8 channel amp plus built-in DSP.
     
    PNWTundra2021 likes this.
  6. Sep 21, 2020 at 7:42 AM
    #246
    spittoon

    spittoon New Member

    Joined:
    Jul 8, 2020
    Member:
    #48998
    Messages:
    23
    Gender:
    Male
    South Jersey
    Vehicle:
    2020 Tundra TRD Pro MGM CM
    Toyo OC ATIIIs, AMP Powersteps, Diamondback SE, Line-X, Tech12 JBL package, SPS Graphene coating, Front Runner Load racks w/rod carriers.
    For anyone that has converted the single sub to a dual 10 setup, how is that internal connection between the 2 made? Also, where did you all mount the bass knob, if using the JBL A5505. These are tech12volt setups..
     
  7. Sep 22, 2020 at 11:13 AM
    #247
    dkahs05

    dkahs05 New Member

    Joined:
    Mar 8, 2015
    Member:
    #1045
    Messages:
    203
    Gender:
    Male
    Vehicle:
    2020 Tundra TRD PRO
    As far as the bass knob I haven't installed mine anywhere I just have it where I can reach it to adjust. As far as the 2 10 inch subs, if you have them in a sub box just tie them together and run them to the amp.
     
    spittoon[QUOTED] likes this.
  8. Jan 23, 2021 at 1:20 PM
    #248
    Danimal86

    Danimal86 [OP] Looks clean even when its dirty!

    Joined:
    Aug 29, 2017
    Member:
    #9321
    Messages:
    4,721
    Gender:
    Male
    First Name:
    Daniel
    Sacramento, CA
    Vehicle:
    2017 White Tundra SR5
    Alright, for those of you that follow this thread....we need to travel back in time a little bit, to around late September 2020.
    One Friday morning, i set out to do what i thought would be a 1 day job. I had made myself a list of thing that needed to be done to take my stereo to the next level.

    I was upgrading from:
    1 HD900/5 Amp
    AudioFrog G60S Fronts (Passive)
    JL C5-650 Rears (Passive)
    2 10tw3 subs (500w rms split between the two)
    To:
    2 HD900/5 Amps
    AudioFrog G60S Front (Active)
    AudioFrog GS25 Front Mids
    JL C5-650 Rears (Passive) (stayed the same)
    2 10tw3 subs (Each sub will have 500w rms)

    My to-do's:
    Power:
    Upgrade 4ga to 1/0ga adding a breaker style fuse and a distribution block.

    Speakers:
    Remove T12V dash tweeters and L-Pad and clean up wiring, run new 12ga wires to all the speakers (dreading this), install 2.5" mids in dash corners, remove door speakers and install foam cups and speed rings, paint the mdf speaker spacers, run new wires from the amps to subs (each sub will be connected to its own 5ch amp).

    Signal:
    Install Helix DSP, run a butt load of RCA's back and forth from Drivers side to Passenger side, and tune the system with the Helix software

    The install Began:
    I started out with pulling both the front two seats and was needed to get rid of this rats nest of wiring (not proud of this install). I went ahead and disconnected the L-Pad and got rid of a ton of wiring that was going to the dash tweeters.
    IMG_20200918_083535.jpg

    I then went ahead and tackled what i new was going to be a pain was running the new power wire. I originally had a 4ga run from the battery across the firewall, along the wheel well and up through a grommet to the amp on the passengers side. I pulled all that out, and ran a 1/0ga wire to the drivers side going basically the same route. This wire was quite a bit bigger and much more difficult to work with. I wrapped the wire in split loom and tesa taped the ends since it was going to be going through some tight spaces and rubbing was a concern. I went with a breaker style 120amp fuse over an anl style fuse. I opted to install it on top of the fuse box. I secured it down using some bolts and a scrap piece of metal so it wouldn't rip up the plastic.
    IMG_20200919_114042.jpg IMG_20200919_114039.jpg

    The next step was to pull all the door panels paint the speaker adapter (you could see bare mdf through the door panel grills) install the speaker cups with foam in them and the speed rings. I added some furniture stuffing to the back of each of the cups and put on the speed rings
    IMG_20200918_090259.jpg MVIMG_20200918_110405.jpg
    IMG_20200918_112139.jpg

    Now when i was deciding if the GS25's mids i wanted to get would play nicely with my G60S's, or if i would be better off upgrading to some GS or GB series separates, i reached out to AudioFrog and got a response from the President Andy Wehmeyer and had a great conversation with him:
    "Hi Dan, As much as I’d love to sell you a new set of speakers, the GS25 will work perfectly and there’s no need to spend extra money in a big changeover if you’re going to change to an active system. Just remove the passive crossovers, but get a 47uF capacitor from Parts Express to put on the tweeter to protect it from mistakes or clicks and pops and you’ll be good to go." He gave me a link to a cap, and i ordered a few of them. I soldered them on and heat shrinked them.
    IMG_20200918_144015.jpg

    Now, i was really dreading running speaker wires to the doors. The main reasons was i knew i was going to have to fish some rather large gauge wire through a tight rubber boot. It ended up being a pain in the butt. Here's where you need to push wires through and the boot you will be running them through, i ended up removing that white plastic guide so you can get your hand in there:
    IMG_20200918_092054.jpg IMG_20200918_093030.jpg
    So basically you have to remove the boot from the door frame and remove the the tape on the end of the boot (where my thumb is) so you can open it up and run two sets of wires through there.
    IMG_20200918_093019.jpg IMG_20200918_093359.jpg
    It was as much of a pain in the ass as i thought it would be, but i was able to get both fronts done.

    I still needed to do the rears, but ran into a road block. The rear doors use a molex plug instead of a rubber boot to pass the wires through. No real way i could figure out how to run wires through there without drilling a hole, so i made the executive decision to leave the rears using the factory wires.
    IMG_20200918_123140.jpg

    Next up was to start working on installing the drivers side amplifier and the Helix DSP. I decided that it would be best to have the drivers side speakers running off of one amp and the passengers side off the other amp. Seemed logical since both amps are exactly the same, and might help with troubleshooting. I roughed out where the amp and helix would sit and wired it up. I went ahead and used a lable maker to mark all the RCA's and Speaker wires (really glad i did this!). I made a channel in the middle of the amp rack and attempted to run all the wires through there to under the carpet, but it ran out of space quickly. At this point, it was about 10pm on SATURDAY...DAY 2 of the install, and i was pooped.
    PXL_20200923_002607857.jpg

    So its 10pm and i'm exhausted, its past my bed time, and i don't want to do this anymore. The wife is asleep and i gonna keep at it. Since everything was installed and wired up, i just needed to set the Helix to accept the new inputs/output and i should be good to tune.
    I fired up the laptop and on the IO tab, you drag and drop the Inputs on the left and place them with the Ouputs on the right. Now, this took a bit of trial and error to get right. You need to be careful, because if you accidently send low frequency sound to you tweeters on accident, you are going to blow them. This is why AudioFrog Andy recommends installing that 47uF filtering cap as a failsafe (and i'm glad i did). Dont pay too much attention to how i have it setup here (more on this later)
    Helix IO.jpg

    I was playing around with it a little bit, its about midnight and i could tell, setting this thing up wasn't going to be a quick thing. i ended up calling a night at around midnight and would start in on the morning. Took 2 Motrin's and i was out.
    Woke up the next day and was determined to get this thing up and running. The subs sounded great, but there was still work that needed to be done to setup the speakers. The drivers side speakers kinda started to act strange where i was getting some static through them and could hear some alternator noise. I double checked all the connections and made sure the grounds were good. All of a sudden, drivers side speakers went dead....no output from them. I looked under the seat and saw that the indicator light was flashing Red/Green. Ruh Row. Looking through the manual, it says it could be a voltage issue.
    Now, i bought the second HD900/5 a week or so before the big install day off Facebook Marketplace from a local dismantler for a decent price ($400). When i picked it up, i was able to test it since the HD series uses plugs for all the power and speaker connections i was able to easily hook it up and make sure it worked. After testing it i decided to roll the dice on it since JL's inventory was getting low and the next best deal i could find was around $650 and would have to be shipped.

    I contacted JL's support and explained to them what was going on. They said to pull the amp and connect it directly to the battery and see if it does the same thing, which didn't solve the problem. I reached out to James at Tech12volts and he gave me some advice about what to do and decided to roll the dice and see if JL would repair it even if i'm not the original purchaser. The amp was shipped out on Sept 25th 2020 and the long wait had begun. James said that i should be patient since JL's inventory was depleted since nothing new was coming from china due to covid, they are probably running a limited crew. On their website i think it says that the turnaround time was 2-4 weeks. In the mean time, i jerry rigged some wires and was able to run the front L/R speakers and the subs off of my original HD900/5 so that i could at least have some tunes while i was waiting. I got that setup and the long wait began. Not going to lie, i was a little frustrated and bummed out. I wish i hadn't had messed with it and just would have left it how it was, but i knew i would eventually conquer the beast and have the best stereo i've ever had.

    Two months roll by, and still nothing. I suspect that it was not repairable and would need to be replaced. So i remain patent and another couple months go by....and finally.....last week....in January....of 2021, i got a shipment notification saying my amp was heading my way. Today the fed ex driver dropped off a package and inside was a BRAND NEW HD900/5. Not a bad deal for $640 (400+240 for the repair). So, I'm hoping that tomorrow i can finally finish the install and then focus on tuning this beast.
     
    Tundra Fan, 619Tundra and Cfincke like this.
  9. Jan 23, 2021 at 2:31 PM
    #249
    619Tundra

    619Tundra New Member

    Joined:
    Sep 2, 2017
    Member:
    #9393
    Messages:
    974
    Gender:
    Male
    First Name:
    George
    San Diego, Caifornia
    Vehicle:
    2017 Black Tundra Double Cab SR5
    This sounds like a nightmare. Lol. You can drill the back door plastic grommet and fish the wire thru the rubber boot. Look at taco tunes install video. Installer uses silicone spray to make it easier.
     
  10. Jan 23, 2021 at 2:35 PM
    #250
    Danimal86

    Danimal86 [OP] Looks clean even when its dirty!

    Joined:
    Aug 29, 2017
    Member:
    #9321
    Messages:
    4,721
    Gender:
    Male
    First Name:
    Daniel
    Sacramento, CA
    Vehicle:
    2017 White Tundra SR5
    It wasn't sunshine and butterflies. lol

    I'll look at that video. I'll probably just leave it how it is, but if its not too terrible, i might try running some new wires to the rears.
     
    619Tundra[QUOTED] likes this.
  11. Jan 25, 2021 at 9:45 AM
    #251
    aparker813

    aparker813 New Member

    Joined:
    Aug 4, 2019
    Member:
    #34160
    Messages:
    76
    Gender:
    Male
    I was following your progress over on DIYMA and recently wondered what was going on with your setup and repair. Long and awful road - excited for you to get it all wrapped up and tuned!
     
    619Tundra likes this.
  12. Feb 4, 2021 at 5:47 PM
    #252
    Tactical_TRD_Pro

    Tactical_TRD_Pro New Member

    Joined:
    Jan 27, 2021
    Member:
    #58243
    Messages:
    103
    Gender:
    Male
    First Name:
    Scott
    Vehicle:
    2016 Toyota Tundra TRD Pro

    @Danimal86 , can the Fix and DRC be paired with any speakers or just the JL's? I'm looking to go with Pioneers that Vector8 used.
     
  13. Feb 4, 2021 at 5:55 PM
    #253
    Tactical_TRD_Pro

    Tactical_TRD_Pro New Member

    Joined:
    Jan 27, 2021
    Member:
    #58243
    Messages:
    103
    Gender:
    Male
    First Name:
    Scott
    Vehicle:
    2016 Toyota Tundra TRD Pro

    @Danimal86 , to confirm, are those 12" subs?
    Thanks!
     
  14. Feb 4, 2021 at 6:09 PM
    #254
    Danimal86

    Danimal86 [OP] Looks clean even when its dirty!

    Joined:
    Aug 29, 2017
    Member:
    #9321
    Messages:
    4,721
    Gender:
    Male
    First Name:
    Daniel
    Sacramento, CA
    Vehicle:
    2017 White Tundra SR5
    The fix86 is a line out converter with some dsp features. It will fix the messed up factory signal and output a flat curve. Only useful if you are keeping the factory head unit.
    I've heard that the RF dsr1 may be a more powerful option. It will work with any amp, you don't connect speakers up to it, you connect an amp via rca's


    10's
     
  15. Feb 15, 2021 at 5:53 PM
    #255
    Danimal86

    Danimal86 [OP] Looks clean even when its dirty!

    Joined:
    Aug 29, 2017
    Member:
    #9321
    Messages:
    4,721
    Gender:
    Male
    First Name:
    Daniel
    Sacramento, CA
    Vehicle:
    2017 White Tundra SR5
    Teaser:
    PXL_20210215_201801197.jpg

    Ill be posting a full explanation of my tuning adventure.
     
  16. Feb 15, 2021 at 5:55 PM
    #256
    aparker813

    aparker813 New Member

    Joined:
    Aug 4, 2019
    Member:
    #34160
    Messages:
    76
    Gender:
    Male
    Excellent decision! That should make things way simpler, better sound and just better overall.
     
  17. Feb 16, 2021 at 9:10 AM
    #257
    Tactical_TRD_Pro

    Tactical_TRD_Pro New Member

    Joined:
    Jan 27, 2021
    Member:
    #58243
    Messages:
    103
    Gender:
    Male
    First Name:
    Scott
    Vehicle:
    2016 Toyota Tundra TRD Pro
    Nice, very nice!
     
  18. Feb 16, 2021 at 10:19 AM
    #258
    smslavin

    smslavin Behind a lens...

    Joined:
    Jul 15, 2017
    Member:
    #8578
    Messages:
    7,208
    Gender:
    Male
    First Name:
    Sean
    Hudson Valley
    Vehicle:
    2016 Tundra CrewMax SR5
    Some stuff
    i just drilled a hole for the new speaker wires on the rear door. popped in a rubber grommet and some silicone to seal it. easy peasy.
     
    619Tundra likes this.
  19. Feb 16, 2021 at 10:23 AM
    #259
    Danimal86

    Danimal86 [OP] Looks clean even when its dirty!

    Joined:
    Aug 29, 2017
    Member:
    #9321
    Messages:
    4,721
    Gender:
    Male
    First Name:
    Daniel
    Sacramento, CA
    Vehicle:
    2017 White Tundra SR5
    I dont think i could figure out how to get that panel off that's in front of the pillar....i may have also said F It once i saw the connector without a spot for new wires and didn't want to mess with it.
     
  20. Feb 16, 2021 at 10:32 AM
    #260
    smslavin

    smslavin Behind a lens...

    Joined:
    Jul 15, 2017
    Member:
    #8578
    Messages:
    7,208
    Gender:
    Male
    First Name:
    Sean
    Hudson Valley
    Vehicle:
    2016 Tundra CrewMax SR5
    Some stuff
    which panel? once you take the door sill panels (front and rear) off, you can get the bottom half of the pillar panel off. you may have to take the top half off too. can't remember. it's been awhile.

    i started with a small bit then gradually got larger until i could fit the speaker wires through. rubber grommet then some wd40 to make it slide. once it was in, sealed it up with some silicone.
     
  21. Feb 16, 2021 at 10:33 AM
    #261
    Danimal86

    Danimal86 [OP] Looks clean even when its dirty!

    Joined:
    Aug 29, 2017
    Member:
    #9321
    Messages:
    4,721
    Gender:
    Male
    First Name:
    Daniel
    Sacramento, CA
    Vehicle:
    2017 White Tundra SR5
    The one that the seatbelt goes through.
     
  22. Feb 16, 2021 at 10:37 AM
    #262
    smslavin

    smslavin Behind a lens...

    Joined:
    Jul 15, 2017
    Member:
    #8578
    Messages:
    7,208
    Gender:
    Male
    First Name:
    Sean
    Hudson Valley
    Vehicle:
    2016 Tundra CrewMax SR5
    Some stuff
    just went out to look. you shouldn't have to take the top half off. just the bottom half.
     
  23. Feb 16, 2021 at 10:41 AM
    #263
    Danimal86

    Danimal86 [OP] Looks clean even when its dirty!

    Joined:
    Aug 29, 2017
    Member:
    #9321
    Messages:
    4,721
    Gender:
    Male
    First Name:
    Daniel
    Sacramento, CA
    Vehicle:
    2017 White Tundra SR5
    Gotcha, thanks!

    Maybe one day i'll go back through and run new wires for the rears.
     
    smslavin[QUOTED] likes this.
  24. Feb 22, 2021 at 12:23 PM
    #264
    Danimal86

    Danimal86 [OP] Looks clean even when its dirty!

    Joined:
    Aug 29, 2017
    Member:
    #9321
    Messages:
    4,721
    Gender:
    Male
    First Name:
    Daniel
    Sacramento, CA
    Vehicle:
    2017 White Tundra SR5
  25. Feb 22, 2021 at 2:28 PM
    #265
    Danimal86

    Danimal86 [OP] Looks clean even when its dirty!

    Joined:
    Aug 29, 2017
    Member:
    #9321
    Messages:
    4,721
    Gender:
    Male
    First Name:
    Daniel
    Sacramento, CA
    Vehicle:
    2017 White Tundra SR5
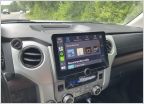
    Well, i made it about 3.5 years before i decided to pull the factory head unit. I still believe its possible to get a quality sound out of the factory head unit, but it was time for an upgrade.
    I've always been a Pioneer guy, but this time i wanted to switch it up. I was going back and forth between the Kenwood DMX1057 and the DMX1037s. The 1057 has navigation built being the main difference. Since i planned to use Android Auto 99% of the time, i opted to save some money and went with the 1037.
    I bought everything from @james@tech12volts (i think my stereo is now 100% from him), it came with the Maestro RR, dash kit, and all the adapters needed.
    I was really quite overwhelmed with the wiring on this thing. Its been quite a long time since i've installed a head unit, and the amount of wires that came with the Maestro was shocking. After watching a few Five Star Car Audio youtube videos, most of that wiring can be discarded. There's a single cable that goes from the head unit to the Maestro, and the Maestro to the obdII port.
    Here's what the back of the factory head unit looks like fyi:
    msGSk17RvfFeJISYcXDEHL4XdUV1nJw7lfQtuTiu_dfaa4d7b2917730919035bc988e162710a9c9ad5.jpg

    One thing i ran into was where to mount the microphone. In past vehicles, i opted to put it ontop of the A-pillar trim piece, but this time i wanted to go to the factory location. So with advice from @Desolate, there is just enough slack to go across the dash, up the A pillar, across the headliner and into the factory location.
    0drQkb_VyS2IDC2yqAxwD3EJJw0wU5cnHo69OX9Y_7dcbb92e91d2af4fb1342c978a2f71f3726ace91.jpg

    I ended up cutting the microphone clip that came with the head unit and used some VHB tape to hold it in place. Happy with the mount.

    After setting everything up and using it for a couple days, i'm more than pleased with it. Wireless android auto connects quickly, and the maps look absolutely amazing on the HD screen.
    xHSWRGgPIbB6NSn_DYFiSfYb5fBGf-fzUO4gygK6_3966db631b890654099e975ed38b3d03c5e03054.jpg
     
  26. Feb 22, 2021 at 7:29 PM
    #266
    Alt0174

    Alt0174 New Member

    Joined:
    Sep 26, 2020
    Member:
    #52787
    Messages:
    131
    Gender:
    Male
    Virginia
    Vehicle:
    2021 Limited
    Chromerectomy
    Does the Maestro RR integrate the OE GPS antenna, or did you have to mount the one that came with your new head unit?
     
  27. Feb 22, 2021 at 7:53 PM
    #267
    Desolate

    Desolate New Member

    Joined:
    Sep 8, 2019
    Member:
    #35846
    Messages:
    23
    Gender:
    Male
    Vehicle:
    2019 White Crewmax Off Road
    @Danimal86 I also found out while wirelessly screen mirroring your phone you can control everything on your phone through the touchscreen of the head unit! Not sure if anyone knew this already but it makes it really nice when watching Netflix for the kids!
     
  28. Feb 22, 2021 at 8:06 PM
    #268
    Danimal86

    Danimal86 [OP] Looks clean even when its dirty!

    Joined:
    Aug 29, 2017
    Member:
    #9321
    Messages:
    4,721
    Gender:
    Male
    First Name:
    Daniel
    Sacramento, CA
    Vehicle:
    2017 White Tundra SR5
    I haven't even tried screen monitoring yet.....I need to test it out!!!!!
    Thanks for the heads up!
     
  29. Feb 22, 2021 at 8:06 PM
    #269
    Danimal86

    Danimal86 [OP] Looks clean even when its dirty!

    Joined:
    Aug 29, 2017
    Member:
    #9321
    Messages:
    4,721
    Gender:
    Male
    First Name:
    Daniel
    Sacramento, CA
    Vehicle:
    2017 White Tundra SR5
    Yes with the adapter
     
    Alt0174[QUOTED] likes this.
  30. Feb 22, 2021 at 9:06 PM
    #270
    SloppyJ

    SloppyJ New Member

    Joined:
    Aug 3, 2018
    Member:
    #17712
    Messages:
    134
    Gender:
    Male
    NW Arkansas
    Vehicle:
    2018 White SR5 5.7 4x4 TSS Tundra
    Awesome thread. My speakers come in tomorrow and I'm starting my journey on Friday. Already got my head unit in but will have to pop it back out and run some RCAs. Not looking forward to the 1/0 through the firewall groumet.
     
To Top