1. Welcome to Tundras.com!

    You are currently viewing as a guest! To get full-access, you need to register for a FREE account.

    As a registered member, you’ll be able to:
    • Participate in all Tundra discussion topics
    • Transfer over your build thread from a different forum to this one
    • Communicate privately with other Tundra owners from around the world
    • Post your own photos in our Members Gallery
    • Access all special features of the site

MallCrl 2.0 - '21 SX Double Cab Build

Discussion in '2.5 Gen Builds (2014-2021)' started by Mallcrl, Jan 30, 2021.

  1. Jan 30, 2021 at 7:06 AM
    #1
    Mallcrl

    Mallcrl [OP] New Member

    Joined:
    Dec 27, 2020
    Member:
    #56690
    Messages:
    269
    Gender:
    Male
    First Name:
    Anand
    Maryland
    Vehicle:
    '21 DC SR5 SX
    This should be a solid way to contribute and build my post count, so here we go...

    I jumped into the Toyota world 2.5yrs ago with a 5th gen 4Runner. The build process has been a blast (and a learning experience), and it has taken us everywhere we could imagine both on road and off, but the 1GR struggles on long 80MPH highway stretches with as much weight as we are carrying; and a bit more interior room would be great.
    [​IMG]

    I have been eyeing Tundras for months, and when an opportunity presented itself just after Christmas, I knew it was time. Found a great sales person (Humberto @ Darcars Baltimore for any of you local people!) who went the extra mile in finding what I wanted, instead of what a dealer wanted to sell me (I contacted ~20 dealers); and we ended up getting a '21 Double Cab SR5 SX, as well as a '21 Tacoma TRD Off Road for my girlfriend.

    [​IMG]

    Even before I had secured a truck, parts were on the way.

    First to arrive was the DECKED drawer system -- Install was super straight forward, and spending a few hours in the garage w/ the heater running prepping everything was definitely the right choice. Lifting the two sides in and installing the drawers/wheels only took a few minutes with an extra set of hands. The new hand-tighten nuts they are using for the J-hooks are SUPER convenient
    [​IMG]
    [​IMG]
    [​IMG]

    Next up was a full swap of all bulbs to LEDs from Diode Dynamics (interior and exterior), as well as a set of OEM TRD Pro LED headlights. Headlights came from McGeorge Toyota and the adapter harnesses is Morimoto. Unlike my GF's Tacoma, switching both front/rear turn signals to LED did not require an added resistor.

    Two weeks after buying the trucks we had a 2 week trip to TX/NM planned, and knew neither the Taco or Tundra would be built in time, so it was a great time to have one last trip in the 4Runner before it goes up for sale. Luckily enough the great folks at Apex Overland were able to source my lift and snorkel, and on our way West we dropped the Tundra off.

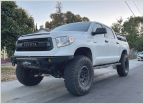
    Fast forward to this past week, we drove down to NC to pick it up and were met with this glorious sight
    [​IMG]

    Lift consists of
    • Toytec Aluma 2.5 Coilovers
    • SPC Upper Control Arms
    • Durobumps front bumpstops
    • Toytec Aluma 2.0 IFP Rear Shocks
    • Dobinsons HD Leaf Pack/greaseable bushings
    • SumoSprings rear bumpstops
    • Toytec Rear shackles
    They also handled an exhaust chop, body mount chop, mounted the wheels/tires (18x9 ET12 Level8 MK6 in Black w/ 285/75/18 Falken Wildpeak A/T3Ws), Dobinson Snorkel, and the install of the Bushwacker flares.

    The HD Leafpack was chosen because my added bed weight should be north of 700lbs (Drawers, ARB Elements, Group 31 AGM, bed rack, RTT, etc.); so currently, with just the drawers, it's a little (ok, a lot) tall. In the photo above it has the full stock suspension and 5 OEM wheels/tires in the bed. I did notice a little take-off vibration on the drive home (5-11mph), so some Coachbuilder carrier bearing spacers have been ordered. There's also a tiny bit of rub on the bumper when flexed, so a bumper shim has been ordered until the steel bumpers are built.

    To kill 2 birds with one stone, when we drove down to pick up the Tundra we had Apex level the Tacoma with a set of 5100s. It surprisingly made a huge improvement in ride quality.
    [​IMG]

    And yes, for anyone who noticed the details, I/we love the Level8 MK6 and Wildpeak AT/3Ws

    What's next? A lot! The garage has a huge pile of electrical/stereo stuff for when I can find a few days where outside temps start with a 4 (it definitely won't fit in the garage since the lift). I'll make replies to this post as that process gets going, but essentially what is waiting consists of
    • Gut the interior/door cards/headliner and apply butyl/CCF/MLV/Thinsulate
    • Replace door speakers (incl. adding sail panel tweeters in front), disconnect dash speakers; add under seat powered sub (possibly one under each front seat, still have to measure); Kenwood DNR-1007XR, Kicker KEY amp
    • ICS Dash mount
    • Rostra heated seat kits + passenger side lumbar
    • AJT Dash black out kit
    • OEM black SR dash pieces + interior door handles
    • TRD all black shift knob
    • 3rd gen Tacoma perforated leather steering wheel
    • Drivers side grab handle
    • Interior feed for switched/constant 12v, mounted on the rear wall (dual 12 outlet fuse blocks)
    • Switch Pros 9100 in a SDHQ center console mount
    • Icom 2730A radio
    • Uniden SDS200 scanner
    • WeBoost Drive Reach
    • Inverter
    • Lots of USB outlets
    • Dash cam
    • Valentine 1
    • ARB Twin compressor
    • Group 31 AGM in the bed with Victron AC charger, smart shunt, solar input, and 12 outlet fuse block)
    • Feniex 4200 Mini to control bed related lighting
    • ARB Elements on a DFG Off Road Tilt Slide
    • LOTS of KC Cyclones for ground/bed/under hood lighting
    • Diode Dynamics SS3 flush mount for the rear bumper
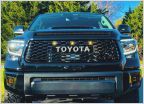
    • '17 TRD Pro Grille w/ AJT TSS Sensor mount and front camera
    I'm positive I'm missing stuff, parts have been piling up for the past month for both trucks, luckily her list is shorter than mine!
     
    Last edited: Mar 3, 2021
  2. Jan 30, 2021 at 7:34 AM
    #2
    Terndrerrr

    Terndrerrr guzzling dealer repellent

    Joined:
    Jul 8, 2019
    Member:
    #32965
    Messages:
    4,909
    Gender:
    Male
    Music City
    Vehicle:
    Dual 5.7s
    TRD Fox, RAS, 285/75 DTs, dual battery, SS3 Pro
    I came from a 5th Gen 4Runner as well. Crazy to think it is rated for more payload than the Tundra. I don’t regret my move at all as I’m sure you don’t; I think the Tundra is underrated due to the stock leafs, which you’ve taken care of already.

    How much higher than stock is your wheel well from the axle with the Decked and Dobinsons HD setup? I’m interested in the Decked, but I know I’ll have to do more than the shackles/stock leafs setup I have now.
     
  3. Jan 30, 2021 at 7:50 AM
    #3
    saybng

    saybng Just a member.

    Joined:
    Dec 13, 2015
    Member:
    #2243
    Messages:
    2,890
    Gender:
    Male
    First Name:
    Gary
    Ventura CA
    Vehicle:
    16 Tundra 1794 CM in BLACK!
    Method Nv's, falken wildpeak 275.65.20 Dirty deeds exhaust, 5100's all around...nothin fancy.
    Love it!:thumbsup: Which bushwacker flares are those?
     
  4. Jan 30, 2021 at 11:46 AM
    #4
    Mallcrl

    Mallcrl [OP] New Member

    Joined:
    Dec 27, 2020
    Member:
    #56690
    Messages:
    269
    Gender:
    Male
    First Name:
    Anand
    Maryland
    Vehicle:
    '21 DC SR5 SX
    Thank you!

    I'm 99% certain they are the extend-a-fender; honestly for once I just told a shop to order me what they have on their shop truck instead of doing the research myself.

    All I know is that it's the look I was going for and they extend just beyond the tires so I have a little coverage (I'm not a fan of the tire-beyond-fender look usually). Bonus points because my girlfriend loves the fact that it looks similar to the factory flares on her Tacoma... The two trucks were supposed to be the same color, but that wasn't happening due to availability in the area (she wanted white)
     
    Terndrerrr likes this.
  5. Jan 30, 2021 at 12:10 PM
    #5
    Mallcrl

    Mallcrl [OP] New Member

    Joined:
    Dec 27, 2020
    Member:
    #56690
    Messages:
    269
    Gender:
    Male
    First Name:
    Anand
    Maryland
    Vehicle:
    '21 DC SR5 SX
    I agree about the Tundra ratings, it can definitely handle way more than it's rated for; something I can't wholly say about the 4runner, at least not at substantial highway speeds through hilly terrain...

    I don't have a stock measurement, but I just went out and measured a hair over 28" from the center of the hub to the lip of the flare; only thing in the bed is the decked system (empty)
     
  6. Jan 30, 2021 at 12:31 PM
    #6
    Terndrerrr

    Terndrerrr guzzling dealer repellent

    Joined:
    Jul 8, 2019
    Member:
    #32965
    Messages:
    4,909
    Gender:
    Male
    Music City
    Vehicle:
    Dual 5.7s
    TRD Fox, RAS, 285/75 DTs, dual battery, SS3 Pro
    Thank you for that measurement!

    Yeah my 4Runner was rated for 1700lbs. 4wd non-KDSS. But it sure felt floaty and leaned into turns hard before I swapped out the suspension. Especially when loaded down.
     
  7. Jan 30, 2021 at 12:40 PM
    #7
    Mallcrl

    Mallcrl [OP] New Member

    Joined:
    Dec 27, 2020
    Member:
    #56690
    Messages:
    269
    Gender:
    Male
    First Name:
    Anand
    Maryland
    Vehicle:
    '21 DC SR5 SX
    Funny you mention that, my girlfriend drove my 4Runner a few times with the stock suspension and then refused, saying she hated how floaty it was. After the lift (Dobinsons extended travel front, heavy rear) she loved the way it drives and had no issues with driving it. Until this last trip with the RTT on it; even though it's <7", it causes the truck to really get blown around a lot more, and she again dislikes driving it. She does, however, love driving the Tundra, which is good news for us since we usually do the first ~30-36 hrs of our drives west in a single shot alternating every 4ish hrs
     
    Terndrerrr[QUOTED] likes this.
  8. Jan 30, 2021 at 1:26 PM
    #8
    300BLK

    300BLK New Member

    Joined:
    Aug 1, 2019
    Member:
    #34022
    Messages:
    803
    Vehicle:
    2014 Tundra SR5 - Black
    Build is looking great. Really like that snorkel. I'm in Maryland as well.
     
    Mallcrl[OP] likes this.
  9. Jan 30, 2021 at 1:32 PM
    #9
    ColoradoTJ

    ColoradoTJ Certified tow LEO Staff Member

    Joined:
    Feb 24, 2016
    Member:
    #2766
    Messages:
    35,611
    Gender:
    Male
    Colorado
    Vehicle:
    LML 3500HD
    Calibrated Power 5 Tune pack, Allison 1000 tune, PPE deep trans pan, Cold/Hot CAC pipes, Banks CAI, PCV reroute, resonator delete, S&B 62 gal fuel tank, B&W GN hitch
    Nice truck and welcome to the site.

    Your future plans are :thumbsup:
     
    Mallcrl[OP] likes this.
  10. Feb 2, 2021 at 5:34 AM
    #10
    thetastelingers

    thetastelingers Master Baiter

    Joined:
    Jun 18, 2019
    Member:
    #32067
    Messages:
    105
    Gender:
    Male
    Soddy Daisy, TN
    Vehicle:
    2021 MGM CM Sport
    In process
    You've got a large list there. Looks like it's well thought out and you know exactly what you want.
    Looking good so far. Will be watching!

    Welcome to the board
     
    Mallcrl[OP] likes this.
  11. Feb 7, 2021 at 12:33 PM
    #11
    Mallcrl

    Mallcrl [OP] New Member

    Joined:
    Dec 27, 2020
    Member:
    #56690
    Messages:
    269
    Gender:
    Male
    First Name:
    Anand
    Maryland
    Vehicle:
    '21 DC SR5 SX
    A few random updates from the weekend... Started the weekend off with tearing apart my GF's Tacoma to install a weBoost 4G-X and Midland MXT275 GMRS radio, that was fun. While the Tacoma interior is easier to take apart than the 4Runner, it still isn't as easy as the Tundra.

    This is absolutely, without question the easiest interior to take apart that I have ever encountered. Additionally, there seems to be extra space EVERYWHERE compared to the 4Runner/Tacoma. Gutted the whole interior down to the dash frame, applied 80mil CLD at near 100% on the floor/back wall/pillars, two sheets on the roof, then covered the back wall, headliner, and floor with 3M Thinsulate SM200L; also filled the void spaces in the pillars with the Thinsulate. I may have been able to get away with the SM400L or AU4002 (IIRC) Thinsulate for all the areas thus far, but figured I'd just go with the thinner stuff that I knew would fit.

    For the question of why Thinsulate... I used CLD/CCF/MLV in my 4Runner, and honestly the MLV is a huge pain to work with. Additionally, it didn't really seem to make any drastic difference. The Vanlife people seem to swear by the Thinsulate, and apparently it has impressive noise reducing power as well. We'll find out though, a truck is quite different than a cargo van turned RV.

    Headliner removal... Dropping it was easier than expected, and a bit harder. Very straight forward, remove the 2 phillips screws from the "outside" end of the visors, and the T20 torx on the catch; then the passenger handle and rear coat hooks are simply metal clips. Some people posted about removing them from the roof, I just squeezed them to get the handle/hanger off; that being said, I'm not sure how much of a pain it will be to get them back on, I haven't done that yet. Then 4 T20's from the roof console, 2 plastic clips where the dome light is, and 4 clips across the back of the headliner. The one harness I couldn't get undone was the blue antenna connector on the passenger side C pillar (I'm assuming Sirius?). I ended up popping the connectors off the C-pillar and then removing the "glue" that holds the wire on the headliner. The headliner drops with ferocity when it decides it doesn't want to be up any more, be prepared for it. Also, from what I can tell, there's no way of getting it "out" of the truck if you don't have the drop down rear window, this makes applying sound deadening on a lifted truck as the sun is going down... unique, also partially why I only put two pieces of CLD on the roof, I'm relying on the Thinsulate to do most of the work. To get it back up, I found it easiest to line up the two clips above the dome light first, pop those in and it will hold the whole headliner up, then you can worry about the four across the back of the roof. Having an extra set of hands makes this MUCH easier.

    Also built and started running the additional wire harnesses that will go throughout the truck for all the added electronics, disconnected the 3 dash speakers, and replaced the dash trim with the matte black parts from an SR. For anyone following that move, either the part number I ordered was wrong, or something got mixed up somewhere. The piece to the right of the steering wheel has an indentation in it, I would assume for hand clearance when using the column shifter. It also apparently requires a slightly different instrument cluster bezel, as they don't meet up exactly and leave a gap. Subsequently I'll be wrapping the stock piece with some matte black vinyl that I got for the door trim. I started reassembling that area of the dash and realized I forgot to put in the speedometer calibrator, looks like that will go in some other time when I feel motivated to take it all apart again.

    Hopefully tomorrow I'll take the doors apart, CLD both layers of the door skin and apply Thinsulate to the door cards, replace the interior handles with black ones from an SR, and wrap the trim. Additionally I bought both a set of new blank sail panels from T^coTunes (some forums block the name), as well as the OEM JBL sail panels to see which is easier to install my tweeters into. Front speakers are being replaced with Kenwood eXcelon KFC-XP184C components, and the rear doors are getting Hertz Dieci DCX130.3 coaxials. I have a pair of Kicker Hideaway 10's, hopefully I can fit one sub and the Kicker KEY200.4 under the passenger seat; if not, the amp will get placed on the back wall.

    ICS Dash plate will go in at the same time as the headunit, and after removing the center channel speaker, it provided an easy place to put a dual USB charger (in the speaker grille). Also need to install the Switch Pros 9100.

    I still need to route the 1/0AWG power wire in from the engine bay to feed power to everything, as well as find a location to mount the Blue Sea ML-ACR battery isolator.

    My Diode Dynamics 42" light bar arrived on Friday as well, and I still have more interior stuff to reinstall as the dash goes back together. The heated seats and passenger lumbar will be another time, as my fingers are way too fat to deal with the seat fabric (at least from doing them on my 4Runner), and my GF is way too busy with school stuff this weekend/week (besides the next two weekends of road trips we'll be taking both trucks). Looking at my pile/to-do list is like a never ending story; but I have to get the truck to some semblance to "ready" this week for the Overland Experts Recovery class this coming weekend in VA (and another one of their classes the following weekend in NC). The weather isn't looking great (the truck doesn't fit in the garage, so everything is done in the driveway), so this should be an interesting push.

    Now for the pics from this phase
    [​IMG]
    [​IMG]
    [​IMG]
    [​IMG]
     
  12. Feb 11, 2021 at 8:34 PM
    #12
    Mallcrl

    Mallcrl [OP] New Member

    Joined:
    Dec 27, 2020
    Member:
    #56690
    Messages:
    269
    Gender:
    Male
    First Name:
    Anand
    Maryland
    Vehicle:
    '21 DC SR5 SX
    As an update to the progress...

    I'm on day eleventy thousand of working outside in the cold, with my 2kw built-for-a-tent diesel heater warming the inside of the truck while I'm working in it.

    All the doors are done, there are WAY better/cleaner/neater examples of CLD'ing a door than my handiwork, so I'll let those photos slide. CLD application on the doors was really straightforward and easy, except for the bottom section of the outer panel of the front doors... That took some creative arm/hand positioning and roller application. Additionally, using 3M Thinsulate on the door panels was super super easy, plenty of room to tuck in extra layers of it.

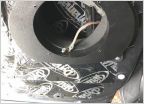
    I replaced all the door handles w/ the OEM black SR handles (except the drivers door, which I reassembled without swapping handles, but we aren't talking about that right now); and installed the 7" Kenwood eXcelon component in the front doors, and 5 1/4" Hertz Diece Coax's in the rears. I ordered a set of OEM JBL sail panels (~$34 from McGeorge Toyota), and the Kenwood tweeters literally popped right into the OEM brackets. There is more than enough wire from the door speaker up to the tweeter, and enough "foam" left over from the midbass to create a FastRing of sort for the tweeter. I also added a bit of 3M Thinsulate and CLD behind the tweeters.

    Also installed a Switch Pros 9100 using SDHQ mounts for both the main unit (behind the headlight) as well as in the interior for the switch panel; super easy, except pulling the wire harness through; that being said, my issue was more so the fact that I was pulling a 1/0AWG power wire as well as 6 18AWG wires and the 4 18AWG wires for the Switch Pros controller. The drivers side grommet will never be the same, but it all fits. I'll use the passenger side grommet for antenna wires coming from the hood mounts.

    In removing the center channel speaker, the grille became the perfect spot for a dual QC3.0 USB charger (for my tablet and inReach, that will mount on my ICS dash mount I installed as well); and power was run to a USB converter for the DashCam, a separate illumination relay to power extra footwell lighting, two AirOnBoard switches in the dash (Inverter and Rear locker), and switches in the center console (to turn the WeBoost/LTE Modem from switched power to constant, and the bypass for the ML-ACR battery isolator). I also built a panel on the back wall to hold the power distribution (12 outlets constant, 12 outlets switched, the switched 12v relay, inverter relay, and Icom IC-2730A) and installed the head unit and AJT Blackout kit.

    I completely flaked on taking photos of anything done today or yesterday, so I'll have to take more tomorrow when I'm tidying up the truck; we have a recovery class with OEX on Saturday, so the truck has to be in driving shape by then.

    Two pics of the black handles and OEM JBL sail panels though:
    [​IMG]
    [​IMG]
     
    619Tundra and 300BLK like this.
  13. Feb 15, 2021 at 8:28 PM
    #13
    Mallcrl

    Mallcrl [OP] New Member

    Joined:
    Dec 27, 2020
    Member:
    #56690
    Messages:
    269
    Gender:
    Male
    First Name:
    Anand
    Maryland
    Vehicle:
    '21 DC SR5 SX
    Still flaked on taking an appropriate number of photos, but at least some of the power is all taken care of.

    Spent a couple minutes and installed the RAM mount arms for our phones, tablet, and Garmin inReach today; the truck didn't get to do the OEX Recovery class this past weekend as the class was cancelled and we had (another) final hurrah with doing a trail ride in Uwharrie in the 4Runner. This weekend we'll be doing OEX's 4WD 101 class (we've already done the class in the 4Runner, this time it'll be in my Tundra and my gf's Tacoma).

    Everything fits really well, and the tablet tucks up close to the dash quite well and doesn't limit much of the view (much less than my 4Runner).

    [​IMG]
    [​IMG]

    Tomorrow there's the hope of doing the front bumper spacers and ARB twin compressor, as well as finalizing the overhead console HAM mount
     
  14. Feb 16, 2021 at 3:42 PM
    #14
    Mallcrl

    Mallcrl [OP] New Member

    Joined:
    Dec 27, 2020
    Member:
    #56690
    Messages:
    269
    Gender:
    Male
    First Name:
    Anand
    Maryland
    Vehicle:
    '21 DC SR5 SX
    Overhead console radio install is complete... The front bumper spacers were set aside and instead I just trimmed the bumper; we'll see if that solves the slight rubbing I've experienced, if not, the spacers will go in. Today's weather wasn't cooperating in the afternoon, so the ARB compressor will have to wait for better weather.

    On our 4Runner, the radio head was mounted to the rear-most part of the overhead console using L-brackets (slid between the console and headliner); the Tundra's sunglass holder seemed like the perfect spot to hide it. Getting it to fit was easier than expected; one hole drilled for the separation cable to pass into the holder from above, and a small notch cut out of the passenger side of the sunglass holder to allow the microphone cable to plug in.

    To hold the microphone I used a "Magnetic Mic" kit; the base of it is secured to the top side of the overhead console; getting the microphone side to fit onto the Icom mic took a bit of work, and required shaving down the plastic on the back of the microphone to allow the screw to capture enough threads. When not in use, the microphone will be kept in the center console, and other than the antennas on the outside of the truck, you won't see any of the install.

    Open
    [​IMG]

    Closed
    [​IMG]

    Speaking of antennas, I switched from the Tram lip-mount NMO mounts that I used on the 4Runner to the Midland lip-mount NMO's because they offered a smaller connector (to make it easier to pass through the OEM grommet). The mount for the radio is on the passenger side of the hood, in the same area a ditch-light bracket would occupy. I'm not sure if it is just the shape of the Tundra's hood, or the difference in mounts, but these Midlands mounts are SUPER flimsy and flexible, it may be perfect for a Ghost style antenna, but it is far from great for my current dual-band antenna. I have a pair of COMPACtenna SCAN-III's on the way that should arrive tomorrow, and I'll see how the mount does with those. The other antenna will go on the same mount, on the driver's side of the truck, and be connected to a Uniden SDS200 in the center console.
     
    Ltaco17 and El Two like this.
  15. Feb 16, 2021 at 3:51 PM
    #15
    TheBeast

    TheBeast The Beach

    Joined:
    Apr 27, 2016
    Member:
    #3246
    Messages:
    12,518
    Gender:
    Male
    SoCal
    Vehicle:
    2012
  16. Feb 16, 2021 at 8:09 PM
    #16
    Mallcrl

    Mallcrl [OP] New Member

    Joined:
    Dec 27, 2020
    Member:
    #56690
    Messages:
    269
    Gender:
    Male
    First Name:
    Anand
    Maryland
    Vehicle:
    '21 DC SR5 SX
    I don't but I can try to grab some; I had one in my 4Runner originally before upgrading to the Icom... In her truck it is installed under the drivers seat, with an ethernet extension run to the center console and then back out under the drivers side of it (just ahead of the seat) . The microphone plugs in to the ethernet extension when in use, and the rest of the time can be hidden away. On her truck the antennas for the GMRS (driver's side) and WeBoost (passenger's side) are installed on bed rail mounts:
    [​IMG]
     
    TheBeast[QUOTED] likes this.
  17. Feb 18, 2021 at 8:45 AM
    #17
    El Two

    El Two I’m only talking to my dog today.

    Joined:
    Jan 3, 2021
    Member:
    #57046
    Messages:
    197
    First Name:
    Lisa
    Vehicle:
    2018 SR5 Crewmax TRD Off Road
    How much time do you have? . . . . . . . . . . . . . . . . . . . . .......... Eaton rear eLocker, Camburg 1.5” shackles, Rear Seat Delete, S&B CAI, sPOD, Air Bag Helpers w/ Daystar Cradles, RCI engine & fuel tank skid plates, ABS Guards, Job Box Storage, Tailgate Power Lock, Desert Eagle Offroad tranny/cat security skid plate, Added Driver’s Side Grab Handle, VLEDS Footwell & Step Lighting, Anytime Front Camera, Illuminated Ignition Ring, Console Molle Panel, Sound Dampening in Ceiling/Doors/Floor, Yakima Rack, Paracord Grab Handle Wraps, BD Underhood Light, Tuffy Console Safe Insert, WeBoost System, Midland GMRS Radio, Console Interior Lighting, Power Inverter, Custom Center Switch Panel, and Dual Air Compressors
    @Mallcrl, I’m thinking about installing a WeBoost system and am curious about which internal antenna you used and where you installed it?
     
    TundraRV likes this.
  18. Feb 18, 2021 at 10:20 AM
    #18
    Mallcrl

    Mallcrl [OP] New Member

    Joined:
    Dec 27, 2020
    Member:
    #56690
    Messages:
    269
    Gender:
    Male
    First Name:
    Anand
    Maryland
    Vehicle:
    '21 DC SR5 SX
    So the Tundra will be getting the third WeBoost that I've installed (4Runner has the last generation 4G-X, the GF's Tacoma has the Drive 4G-X, and the Tundra has a Drive Reach). I've use the same interior antenna for all 3, which is current style standard antenna (this one).

    The 4Runner had a Expedition Essentials T4RPAM, which held our phones/tablet/inReach, and the antenna was mounted to it (with 3M VHB). The Tacoma uses Stiffy Mounts for the phones, and the interior antenna is placed under the plastic dash trim (above the radio) between both phones (other than the antenna on the bedrail the entire install is hidden). For the Tundra, I haven't mounted it yet, but it will probably live either under the ICS dash mount or on the cabin facing side of it.
     
    El Two[QUOTED] likes this.
  19. Feb 18, 2021 at 1:11 PM
    #19
    El Two

    El Two I’m only talking to my dog today.

    Joined:
    Jan 3, 2021
    Member:
    #57046
    Messages:
    197
    First Name:
    Lisa
    Vehicle:
    2018 SR5 Crewmax TRD Off Road
    How much time do you have? . . . . . . . . . . . . . . . . . . . . .......... Eaton rear eLocker, Camburg 1.5” shackles, Rear Seat Delete, S&B CAI, sPOD, Air Bag Helpers w/ Daystar Cradles, RCI engine & fuel tank skid plates, ABS Guards, Job Box Storage, Tailgate Power Lock, Desert Eagle Offroad tranny/cat security skid plate, Added Driver’s Side Grab Handle, VLEDS Footwell & Step Lighting, Anytime Front Camera, Illuminated Ignition Ring, Console Molle Panel, Sound Dampening in Ceiling/Doors/Floor, Yakima Rack, Paracord Grab Handle Wraps, BD Underhood Light, Tuffy Console Safe Insert, WeBoost System, Midland GMRS Radio, Console Interior Lighting, Power Inverter, Custom Center Switch Panel, and Dual Air Compressors
    So your mounting(s) is free of obstructions. Do you think the antenna could be mounted behind the trim panel on the passenger side? I’m trying to keep the cabin as uncluttered as possible but am concerned about blocking the signal.
     
    Last edited: Feb 18, 2021
  20. Feb 18, 2021 at 2:36 PM
    #20
    Mallcrl

    Mallcrl [OP] New Member

    Joined:
    Dec 27, 2020
    Member:
    #56690
    Messages:
    269
    Gender:
    Male
    First Name:
    Anand
    Maryland
    Vehicle:
    '21 DC SR5 SX
    Mounting the interior antenna on the backside of that trim panel should be fine assuming your phones/devices are within ~3ft; the antenna is small/light enough that the double sided tape it comes with could stick right to the back of the panel
     
    El Two likes this.
  21. Feb 18, 2021 at 4:05 PM
    #21
    El Two

    El Two I’m only talking to my dog today.

    Joined:
    Jan 3, 2021
    Member:
    #57046
    Messages:
    197
    First Name:
    Lisa
    Vehicle:
    2018 SR5 Crewmax TRD Off Road
    How much time do you have? . . . . . . . . . . . . . . . . . . . . .......... Eaton rear eLocker, Camburg 1.5” shackles, Rear Seat Delete, S&B CAI, sPOD, Air Bag Helpers w/ Daystar Cradles, RCI engine & fuel tank skid plates, ABS Guards, Job Box Storage, Tailgate Power Lock, Desert Eagle Offroad tranny/cat security skid plate, Added Driver’s Side Grab Handle, VLEDS Footwell & Step Lighting, Anytime Front Camera, Illuminated Ignition Ring, Console Molle Panel, Sound Dampening in Ceiling/Doors/Floor, Yakima Rack, Paracord Grab Handle Wraps, BD Underhood Light, Tuffy Console Safe Insert, WeBoost System, Midland GMRS Radio, Console Interior Lighting, Power Inverter, Custom Center Switch Panel, and Dual Air Compressors
    Sounds good. I’ll give it a try. Thanks for the info.

    I’ll edit/delete my pic so I don’t screw ip your build thread.
     
    Mallcrl[QUOTED][OP] likes this.
  22. Feb 21, 2021 at 2:13 PM
    #22
    Mallcrl

    Mallcrl [OP] New Member

    Joined:
    Dec 27, 2020
    Member:
    #56690
    Messages:
    269
    Gender:
    Male
    First Name:
    Anand
    Maryland
    Vehicle:
    '21 DC SR5 SX
    Had some fun with the big girl this weekend with Overland Experts' 4WD 101 class (retaking it with the Tundra, and my GF took her Tacoma; we did it last year both driving the 4Runner). Some takeaways... The Tundra is an absolute beast of a hill climbing machine; engine braking in 1st gear (w/ 4Lo) is amazing even with 35s; and side-hill stability is wild with a truck of this size (completely comfortable at angles that I wouldn't imagine trying in the 4Runner). We'll be back down in 3 weeks for the recovery class, and it'll be getting the Long Range America 46gal tank at the same time

    Also, it does great on 2 wheels!
    [​IMG]
     
    J&ATundra, El Two, JerryH and 5 others like this.
  23. Feb 23, 2021 at 11:55 AM
    #23
    Mallcrl

    Mallcrl [OP] New Member

    Joined:
    Dec 27, 2020
    Member:
    #56690
    Messages:
    269
    Gender:
    Male
    First Name:
    Anand
    Maryland
    Vehicle:
    '21 DC SR5 SX
    It's warm today, but our deck is raining snow-water on the driveway and it's windy, so not much got accomplished other than installing the Diode Dynamics 42" Stealth light bar. I'm fairly certain I can remove the mounting bolts for the bar to the brackets and slide the bar "into" the bumper and reinstall the bolts; but this works for me, and allows easy re-aiming. As for the install, probably <30 minutes, the longest part was using a gear wrench to remove/install the 6 bumper bracket nuts as they wouldn't spin well by hand.

    If only I had a legitimate reason to need traffic clearing power, the "burst strobe" mode on the Switch-Pros combined with this light bar would work perfectly...

    [​IMG]
     
    J&ATundra, Ltaco17 and JerryH like this.
  24. Feb 23, 2021 at 1:02 PM
    #24
    blackoutt

    blackoutt YEAH BUDDY!

    Joined:
    Oct 21, 2018
    Member:
    #20805
    Messages:
    975
    Indy
    Vehicle:
    07 DC Long Bed - Old Man Tan
    OEM+
    Welcome and nicely thought out build right of the bat! 4th gen 4runner to 3rd gen double cab convert here, still very happy with our decision for more interior room, on road comfort, and room for the family to grow.
     
    Mallcrl[OP] likes this.
  25. Feb 28, 2021 at 6:06 PM
    #25
    Mallcrl

    Mallcrl [OP] New Member

    Joined:
    Dec 27, 2020
    Member:
    #56690
    Messages:
    269
    Gender:
    Male
    First Name:
    Anand
    Maryland
    Vehicle:
    '21 DC SR5 SX
    Nothing super extravagant, but the ARB Twin compressor got installed at the end of last week. Mounted using the SDHQ compressor mount. A couple take-aways, SDHQ very specifically says to mount the support bracket to the truck first, then to the main mount; I found this to be nearly impossible, and instead mounted it (loosely) to the main bracket and then to the truck. The install was truly quite quick and painless. Now that I've done one, it would definitely take <1.5hrs as they state for the second one.

    The ARB power harness is almost the perfect length to reach the battery (just a hair long actually). As with seemingly everything else I touch, I stripped the provided harness down to specifically what I'm using/need. In this case, the switching harness was cut off completely, and just one wire was run to the switch pros for the trigger.
    [​IMG]

    As with seemingly everything else, the "little" one (my GF's Tacoma) got a bit of love as well, in the form of a TRD Pro grille, Diode Dynamics 30" Stealth light bar, and an ARB single compressor
    [​IMG]

    And for good measure, while I had the Tacoma in the driveway/garage this evening installing the air compressor, MallCrl 1.0 and 2.0 got to park next to each other...
    [​IMG]
     
    300BLK likes this.
  26. Mar 1, 2021 at 12:04 PM
    #26
    300BLK

    300BLK New Member

    Joined:
    Aug 1, 2019
    Member:
    #34022
    Messages:
    803
    Vehicle:
    2014 Tundra SR5 - Black
    Moving fast with this build. Looks great. Any trips planned soon?
     
    Mallcrl[OP] likes this.
  27. Mar 1, 2021 at 12:16 PM
    #27
    Mallcrl

    Mallcrl [OP] New Member

    Joined:
    Dec 27, 2020
    Member:
    #56690
    Messages:
    269
    Gender:
    Male
    First Name:
    Anand
    Maryland
    Vehicle:
    '21 DC SR5 SX
    We'll be back at OEX's property in just under two weeks for another training event (recovery class) for Overland Challenge, then back down next month for the challenge (volunteering), but no big trips planned as of yet. A weekend of camping somewhat locally is probably in the cards between the training and the challenge. With a bit of luck we'll be doing a couple bigger trips during the summer (GA Traverse, and possibly the PA sections of the MA-BDR), but that will hinge on when our AT Overland Atlas gets finished. If it's done early we'll be heading West for a few weeks, if it's done closer to it's expected date we'll be doing a very long straight-out and straight-back drive with our usual 4hr driver changes.
     
    Ltaco17 and 300BLK[QUOTED] like this.
  28. Mar 10, 2021 at 2:31 PM
    #28
    Mallcrl

    Mallcrl [OP] New Member

    Joined:
    Dec 27, 2020
    Member:
    #56690
    Messages:
    269
    Gender:
    Male
    First Name:
    Anand
    Maryland
    Vehicle:
    '21 DC SR5 SX
    It feels like it has been forever since I've updated this, the weather over the weekend wasn't conducive to working in a driveway, but the past few days have been!

    Second battery install is done, once the bed rack is built and installed and the bed/side lighting can then be added, wiring will be cleaned up inside this battery box; it's bugging me at the moment, but not enough to deal with it.

    Run down of everything I'm using (mostly everything?)
    • NOCO 8D Commercial Battery Box
      • NOCO Group 31 Battery Tray
        • Switched to J Hooks for battery tie down with strap as backup
        • Bolted into 8D box via (12) M5 bolts/nuts
        • Northstar PRO Group 31 AGM
      • Victron Smart Shunt
      • Victron Blue Smart IP67 AC Charger - 25A
      • Blue Sea ST Blade 12 Outlet Fuse Block
        • Currently powering a Feniex 4200 Mini controller for future bed lighting & Blue Sea BelowDeck panel (4x USB + 12v)
        • In the future will power the fridge, and power for our AT Atlas/heater/etc
      • Blue Sea MRBF Dual Outlet Block
        • 300A to ML-ACR
        • 100A to ST Blade
      • Attached to bed by (7) 3/8" bolts into bed rails
    • Northstar PRO Group 27F AGM replacing factory battery
      • SDHQ Battery Terminals
      • Blue Sea MRBF Single Outlet Block
        • 300A to ML-ACR
      • Longer J-Hooks (10") from Amazon (only really needed because of the plate that holds the ML-ACR/Bus bar)
    • GM Voltage Diode (The ArcLightLEDs booster that I ordered oddly decreased voltage in both modes, so I popped in an extra GM diode I had as a backup for the 4Runner) - Now charging around 14.5 at start up (~70ºF ambient)
    • Blue Sea ML-ACR Battery Isolator
      • Bypass/Override switch in center console
      • Aux. battery side has Blue Sea MRBF w/ 250A Fuse to Safety Hub 100
    • Blue Sea Safety Hub 100
      • Dual 40A Circuits to ARB Twin compressor
      • 175A feed to interior power distribution
      • ATC Fuses for future under hood lights and ground lights
    • Blue Sea Ground Bus Bar 150
    • 2/0AWG between aux battery and isolator, 1/0AWG for 2" run between main battery and isolator, 1/0AWG to Safety Hub, 1/0AWG for interior power, 6AWG for the ST Blade in the bed, 4AWG for the ground bus bar
    The ML-ACR and ground bus bar are mounted on a piece of 1/8" ABS, with another 1/8" ABS under it, except where the bolts come through. This would be the same as 1/4" ABS and countersinking the screw heads so they don't hit the battery. I was foiled in two ways on this part, I thought I had a few sheets of 1/4" ABS laying around (unfortunately only had 1/16", 1/8", and 1/2"), and the screws I have intended for 1/4" ABS have heads that are too large for the Blue Sea openings; so as to not press bolt heads into the battery case, I had to get creative. I'm not a mechanic, I'm not a fabricator, I'm just fumbling through.

    Running two 2/0AWG cables through one of the front-of-bed grommets is a pain when working alone. The now-modified grommet doesn't really stay in the opening very well, so at some point I'm going to want to seal that up, not sure as to how just yet. In hindsight I would have ordered 50ft sections of each and gone down the passenger side of the truck where the factory harness runs instead of the drivers side. Working around the mountings for the fuel tank was tight (when laying on your back with a lifted truck that is just far enough off the ground to not be easy to reach), and I ended up going inside the rear cab mount, above/outside the frame, inside the front cab mount, and then up along the fuel lines into the engine bay. We'll see on Friday if any of that is an issue when the Long Range America fuel tank gets installed.

    I still have plenty of wires left to run from the engine bay back to the rear bumper (ground lights, rear scene, and L/R scene), but those will all definitely run down the passenger side with the factory harness. I bought some generic L brackets from Amazon to see if I could mount up the Diode SSC2 side lights, but I'm not a fan of how they would sit; so I'll just wait for my LFD Off Road bed rack.

    I also installed the CaliRaisedLED bed channel stiffeners, easy/straight forward install. The most difficult part was getting the bed liner off of the bed bolts, and that wasn't too bad with an angled pick and flat head screw driver. The BelowDeck panel is mounted to a heated/angled piece of 1/8" ABS that is attached to the DECKED drawers with a pair of self tappers (going into the "ammo can" portion, not the sealed drawers). I'm not 100% that the chargers will last being in the elements, as I understand only the "front" of the panel is actually waterproof, but what's life without a bit of adventure!

    Final piece of this round, since the rest of my Diode Dynamics order from November arrived, was to pop in the SS3 Max fog lights. They were initially ordered for an LFD Off Road bumper for my 4Runner, thus they aren't the "angled" version that is normally included for the OEM replacement kits and are the regular "round" bezel; doesn't change their output in any way, but it does leave a gap between the light and the bumper. Light output and spread is outstanding from these shining into my garage (as expected, my girlfriend has the SS3 Pro SAE Fogs on her Taco), I'll be on the road by 2:30am on Friday morning headed to Apex Overland, so they'll get a few hours of testing on dark backroads.

    I also have a set of SS3 Max's in the Spot pattern, and need to find a home for them, somewhere. Again they were to go in a specific cut out on the bumper of the 4Runner, but that isn't happening any more; as well as a set of SS3 Pro flush mounts (rear bumper), and 3 pairs of SSC2s in flood, driving, and combo.

    Enough rambling.... On to the pictures!

    This was before the cover went on the ground bus bar, and yes, i need to recover some of the black heat shrink on the positive cables; I ran out with 1/0 & 2/0 red heat shrink. Looking at this picture I really need to sleeve the power line running into the cabin as it is a bit of an eyesore
    [​IMG]

    You can see where it cuts through the wheel well here, and just barely make out the path it takes over the frame
    [​IMG]
    [​IMG]

    The black cable is the plug in for the AC charger, and is back in the box now. I used a bit of left over 1" foam to seal up the cable outlets around the top of the box, we'll see how that works out. Either way, there are about 6-8 drain holes drilled in the bottom of the box in addition to the large opening where the battery cables come in.
    [​IMG]

    The excess of cable should be addressed as soon as some Anderson SB and PowerPole connectors show up (to allow "quicker" removal of the box).
    [​IMG]

    The Blue Sea BelowDeck panel is mounted here, and you can see the Feniex 4200 Mini controller mounted to the bed rail.
    [​IMG]
     
  29. Mar 11, 2021 at 5:03 PM
    #29
    100LL

    100LL smells better than Jet-A

    Joined:
    Feb 15, 2020
    Member:
    #42649
    Messages:
    367
    Gender:
    Male
    NW Oregon
    Vehicle:
    2020 SR5
    Potatoes.
    Love your build and I will be taking a lot of tips from you while building in my camper!

    What fender flares are those? Did you need to trim them to fit around the snorkel?
     
  30. Mar 12, 2021 at 6:28 AM
    #30
    Mallcrl

    Mallcrl [OP] New Member

    Joined:
    Dec 27, 2020
    Member:
    #56690
    Messages:
    269
    Gender:
    Male
    First Name:
    Anand
    Maryland
    Vehicle:
    '21 DC SR5 SX
    Thank you!

    They are the standard Bushwhacker flares, and yes about 1/4"-1/2" is trimmed at the top of the flare to clear the snorkel; that was handled by Apex Overland when they installed both.... Speaking of, this is going in at the moment

    20210312_090927.jpg
     
    CappyKD and 100LL[QUOTED] like this.
To Top