1. Welcome to Tundras.com!

    You are currently viewing as a guest! To get full-access, you need to register for a FREE account.

    As a registered member, you’ll be able to:
    • Participate in all Tundra discussion topics
    • Transfer over your build thread from a different forum to this one
    • Communicate privately with other Tundra owners from around the world
    • Post your own photos in our Members Gallery
    • Access all special features of the site

Passenger Floor Mat - No More Sliding

Discussion in 'General Tundra Discussion' started by ElNopal, Mar 16, 2020.

  1. Mar 16, 2020 at 12:36 AM
    #1
    ElNopal

    ElNopal [OP] Stay classy and be well

    Joined:
    Aug 17, 2019
    Member:
    #34762
    Messages:
    2,467
    Gender:
    Male
    First Name:
    Matt
    Willis TX
    Vehicle:
    19 Cavalry Blue CM
    ¡Hola! I came across this solution from several different sources and added my two cents to it too, so gracias to all of the contributors. I figured a write up may be helpful to others too, so my apologies if another exists previously.

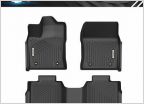
    While I think this could work for any floor mat of standard thickness that lends space for hole perforation, I used my current, fairly new passenger WeatherTech floor mat. I know the WeatherTech floor mats are a Love/Hate for most but I will keep mine until they eventually wear out. So this is what I did to help the pesky passenger side floor mat from sliding and the following parts were used:

    58694-76010 - Floor Mat Retainer Upper

    58698-76010 - Floor Mat Retainer Lower

    OEM Oval Floor Mat Clips


    https://www.ebay.com/itm/NEW-GENUIN...ING-CLAMPS-4PCS/171842317970?epid=14013360121


    One more advance apology, I inadvertently deleted some of the photos I intended to save (thought I had saved) for this write up...

    Start by placing the passenger floor mat in the desired location. Followed by taking one of the “OEM Oval Floor Mat Clips” upper pieces and selecting the best place on the floor mat to place it. The arrows were placed vertically to match the driver’s side floor mat.

    5DF4E54C-5B4B-496E-A47B-4F7C4B9BCBB1.jpg

    CEBA45F0-DBE6-405F-BE65-A84F6890B636.jpg

    Using a pen or Sharpie, trace the inside oval and around the outside rounded square. The “rounded square” is the reverse side that will protrude through the floor mat.

    With a sharp knife, carefully cut inside the traced lines, as to ensure a snug fit between the floor mat and the OEM Oval Floor Mat Clip.

    4866736E-CD03-4076-AB16-9AD28AD64CC0.jpg

    66D67D1D-2AD1-45AC-A298-5BB6D656185A.jpg


    The cut hole will allow for the upper OEM Oval Floor Mat Clip upper piece to fit through. Make sure to snug up the floor mat to seat the upper piece flange.

    F3D13694-04C7-47DA-A5ED-0C7B4FB5FB58.jpg

    Now take one of the OEM Oval Floor Mat Clip lower pieces and align the diagonal arrows with the reverse side of the upper arrows and then firmly press the upper and lower OEM Oval Floor Mat pieces together.

    0E390ABD-0FB6-4550-9F94-F35A501E2074.jpg

    Repeat the process for the other floor mat clip.

    3E3120C1-FCDA-4060-AF6A-2E4EE3F215B5.jpg

    Use a scrap piece of copy paper or light weight cardboard to make a quick template for the twist latching “Upper Floor Mat Retainer: 58694-76010”.

    6D63AE1C-813D-4EA6-818D-2BE6CF2BA5F0.jpg

    13CCEEC1-B3EF-4060-A6B6-386E3296E8BD.jpg

    The grip spikes are used to easily pierce the copy paper. With light pressure, mat around the rectangular like clips to form a general indentation of the area to clip out.

    4D84D060-ECF9-4364-B4EE-85E818571D0A.jpg

    16EF1554-7C2B-4205-B58B-D53FB1907B93.jpg

    Now it is time to remove each the passenger side kick panel and passenger scuff plate. There are plenty of threads on here to review on how to accomplish this.

    This allows for access to place the “Lower Floor Mat Retainer: 58698-76010” by gently pulling up on the carpet enough to gain a forearm’s reach. More on this in the upcoming steps.

    74E46AED-FADF-4036-9EEA-9982E6CDE8B6.jpg

    Make sure the floor mat is still where you would like it to remain. Start with the corner of the floor mat closest to center console to work on first.

    Purposely place the “Upper 58694-76010” on your template in one hand while using the other to gently lift up the floor mat corner enough to set the “Upper 58694-76010”, with template, to align properly with the oval opening of the floor mat when gently setting back down onto the carpet.

    (Lo siento, lost pic)

    Remove the floor mat completely while being careful not to disturb the template placement. Next remove the “Upper 58694-76010” off of the template. Now with the template remaining, take a sharp knife and cut out the rectangular shape. The cuts should be shallow and done with care as to not have the blade contact the floor board. This is primarily to preserve the knife’s blade more than the floor board.

    If the truck is stock, then generally there is relatively no chance of cutting into wiring or the like. However, be assertive, as only YOU can be sure of what is underneath the carpet area! There was absolutely nothing under mine but some small padding on the underside of the carpeting that was of no consequence.

    5EDA8E63-053D-4432-874A-6B13B0D9818D.jpg

    The initial cuts that were made were a tad bit too small. Therefore, it is suggested to cut slightly outside the lines of the previously made template.

    997513E9-DA02-4616-8B1A-6CAB515FCB7F.jpg

    8C658DC7-C94F-4546-825A-BB947F5D84E5.jpg

    Now pull up the carpeting and take one of the “Lower 58698-76010” pieces under the carpeting to the newly cut hole. Make sure to snug the “Lower 58698-76010” into carpet hole exposing all prong/clips. Now with the other hand place the “Upper 58694-76010” into the carpet hole. The joining of the two pieces will make an audible clicking sound when firmly pressed together.

    8C3C748B-04DF-4312-9F2E-DAA6E0C30073.jpg

    Now return the floor mat to inspect fitment. Now repeat steps to complete the second and last oval floor mat hole. Reinstall both the kick panel and scuff plate.

    89DC28F0-7F30-4C5D-902B-82C368E4CD6D.jpg

    272CFFFB-BB28-4AA7-B678-114CD7EB011B.jpg

    Gracias for your patience and I hope you enjoy a non-sliding passenger side floor mat!

    93D44598-F5DC-4A27-BAD3-DBF6A7DA7751.jpg
     
    Last edited: Mar 16, 2020
    This site contains affiliate links for which the site may be compensated.
    #1
  2. Mar 16, 2020 at 12:58 AM
    #2
    TXTundra2722

    TXTundra2722 Pipe Hitters Union

    Joined:
    Nov 26, 2018
    Member:
    #22236
    Messages:
    1,759
    Gender:
    Male
    Texas
    Vehicle:
    2015 Black Tundra
    Nice write up
     
    ElNopal[OP] and GODZILLA like this.
  3. Mar 16, 2020 at 3:41 AM
    #3
    TXRailRoadBandit73

    TXRailRoadBandit73 YOTAS,RAILROADER,RÖKnRÖLLN',BEER,MAX/GEMMA

    Joined:
    May 30, 2016
    Member:
    #3487
    Messages:
    50,308
    Gender:
    Male
    First Name:
    Adam
    The 956, TEXAS
    None yet
    Holy crap!!! Love this!!! Great write up!!! Need to do for WT pass side
     
    Voyagermike, ElNopal[OP] and GODZILLA like this.
  4. Mar 16, 2020 at 3:59 AM
    #4
    xtyfighterx

    xtyfighterx New Member

    Joined:
    Aug 28, 2016
    Member:
    #4360
    Messages:
    2,357
    Gender:
    Male
    First Name:
    Ty
    North Idaho
    Vehicle:
    2015 Black Crewmax Mid Travel
    Mid travel fox 2.5 coilovers 2.0 real shocks shims 295 70 18 trail grapplers pro accessories 32in light bar blacked out bed cover sway bar Moto metal 970 18x9
    Nice I just used Velcro lol no issues but maybe I’ll try this when it does fail. Thanks
     
    ElNopal[OP] likes this.
  5. Mar 16, 2020 at 9:42 AM
    #5
    TechWrench

    TechWrench New Member

    Joined:
    Feb 25, 2020
    Member:
    #43134
    Messages:
    203
    Gender:
    Male
    First Name:
    Gary
    Hawley, PA
    Vehicle:
    '08 Tundra White, DC SR5 5.7, TRD Off Road Pkg
    Toyota Bedliner, Under Cover Bed cover, Oem back-up camera system.
    Nice, but I wonder if putting these openings in the mat will then allow moisture to seep through to the carpets below?
     
    ElNopal[OP] likes this.
  6. Mar 16, 2020 at 10:21 AM
    #6
    ElNopal

    ElNopal [OP] Stay classy and be well

    Joined:
    Aug 17, 2019
    Member:
    #34762
    Messages:
    2,467
    Gender:
    Male
    First Name:
    Matt
    Willis TX
    Vehicle:
    19 Cavalry Blue CM
    Yes, I had the same wonder/reservation too.

    However, the carpet that was not covered by the floor mat was 100% exposed to the junk of winter (because my passengers would neglect to correctly affix the floor mat each time). This way if any weather or moisture happens to reach the carpeting it would be minimal in comparison to what I had happening prior. So that was the trade-off for me. Thus far, I am pleased and have not seen any down sides yet and winter for us continues on... ugh!

    Thanks for checking in!
     
    NewImprovedRon likes this.
  7. Mar 16, 2020 at 10:21 AM
    #7
    Mike19

    Mike19 New Member

    Joined:
    Mar 7, 2019
    Member:
    #27224
    Messages:
    201
    Gender:
    Male
    First Name:
    Mike
    Chi town
    Vehicle:
    2019 SR5 CM 4X4 TRD Sport
    TRD Exhaust, Bilsteins 6112/5100, CB Shims 2/1, CB +3 Shackles, Air Ride, RCI Engine and Trans Skid Plates, Cooper AT3 XLT 275/65/20
    Thanks for the idea. Just ordered mine.
     
    ElNopal[OP] likes this.
  8. Mar 16, 2020 at 10:30 AM
    #8
    ElNopal

    ElNopal [OP] Stay classy and be well

    Joined:
    Aug 17, 2019
    Member:
    #34762
    Messages:
    2,467
    Gender:
    Male
    First Name:
    Matt
    Willis TX
    Vehicle:
    19 Cavalry Blue CM
    Awesome, you’re welcome! Let us know how it goes!
     
  9. Mar 16, 2020 at 11:18 AM
    #9
    ZTundra

    ZTundra New Member

    Joined:
    Mar 21, 2019
    Member:
    #27916
    Messages:
    56
    Gender:
    Male
    First Name:
    ZACK
    Knoxville, TN
    Vehicle:
    2021 MGM Nightshade
    You said you did this on a weather tech mat. Do you have any pictures with them installed on them or just the all weather mats from Toyota?
     
  10. Mar 16, 2020 at 12:03 PM
    #10
    ElNopal

    ElNopal [OP] Stay classy and be well

    Joined:
    Aug 17, 2019
    Member:
    #34762
    Messages:
    2,467
    Gender:
    Male
    First Name:
    Matt
    Willis TX
    Vehicle:
    19 Cavalry Blue CM
    Perhaps, I may be mistaken... I did this on the Toyota floor mat that I believe is made by WeatherTech...?
     
  11. Oct 16, 2020 at 10:02 PM
    #11
    MaxMB

    MaxMB New Member

    Joined:
    Nov 23, 2019
    Member:
    #39055
    Messages:
    42
    Gender:
    Male
    Manitoba, Canada
    Thank you @ElNopal ! I made a template from my driver's side floor mat retainer clips and installed the passenger side in the mirror image.

    It was close, but it lined up with the weathertech mat's molded circular portions. In hindsight, I really should have just cut the holes in the weathertech mat and used that as my template to reduce the risk of failure, but it worked out.

    I also modified the factory mat to fit the new hooks as well - since I had to slice through some of the mat's channels, I cleaned the mat with alcohol and then layed a bead of rtv before compressing the retainer ring insert halves together. Seems to have worked out well, although I leave the weathertech mats in for more coverage, so my usage of the factory mats was limited.

    20201004_125625_copy_784x1613.jpg

    20201004_143841_copy_784x1613.jpg

    20201004_143919_copy_784x1613.jpg
     
    ElNopal[OP] likes this.
  12. Oct 16, 2020 at 10:12 PM
    #12
    ElNopal

    ElNopal [OP] Stay classy and be well

    Joined:
    Aug 17, 2019
    Member:
    #34762
    Messages:
    2,467
    Gender:
    Male
    First Name:
    Matt
    Willis TX
    Vehicle:
    19 Cavalry Blue CM
    Nice work! :thumbsup:

    That is a great tip about the RTV!
     
  13. Oct 19, 2020 at 10:36 PM
    #13
    2020 dc

    2020 dc New Member

    Joined:
    Jan 17, 2020
    Member:
    #41327
    Messages:
    233
    Gender:
    Male
    Vehicle:
    2020 tundra dc sr
    Thanks for the write-up. Currently i am using velcro but will give this a try.
     
    ElNopal[OP] likes this.
  14. Oct 26, 2020 at 7:38 AM
    #14
    browniemix33

    browniemix33 New Member

    Joined:
    Aug 13, 2020
    Member:
    #50740
    Messages:
    25
    Gender:
    Male
    New Hampshire
    Vehicle:
    2017 Metallic Grey Tundra Limited 4WD
    This is a lifesaver of a post. Been using the "eagleclaw clips" but not a ton of success. Starting this project this month will update on how it goes!
     
    ElNopal[OP] likes this.
  15. Oct 26, 2020 at 7:49 AM
    #15
    Beesta

    Beesta New Member

    Joined:
    Jan 26, 2019
    Member:
    #25160
    Messages:
    479
    Gender:
    Male
    First Name:
    Jay
    Loudoun County
    Vehicle:
    2019 Pro Midnight Black Metallic
    Well done Matt !!! Will do this when i come home.
     
    ElNopal[OP] likes this.
  16. Oct 26, 2020 at 7:53 AM
    #16
    Rebel Tundra Man

    Rebel Tundra Man New Member

    Joined:
    Aug 15, 2019
    Member:
    #34657
    Messages:
    240
    Gender:
    Male
    First Name:
    Tyler
    Western Kentucky
    Vehicle:
    2016 Black Limited CM
    4" RCX Lift, 20x10 Fuel Coupler's, 35x12.50x20 Nitto Ridge Grappler's, Color Match Front End, LED Bulbs, RCX Tube Steps, Green LED Underglow
    great write up, did not know these were a thing, I will be ordering, I do have a question though,

    Do I need to order x2 of this number, 58694-76010 - Floor Mat Retainer Upper
    and x2 of this number, 58698-76010 - Floor Mat Retainer Lower??

    or just one of each of them parts cover everything I need?
     
    ElNopal[OP] likes this.
  17. Oct 26, 2020 at 8:10 AM
    #17
    ndg2e

    ndg2e New Member

    Joined:
    Nov 8, 2017
    Member:
    #10841
    Messages:
    13
    Gender:
    Male
    Mt. Juliet, TN
    Vehicle:
    2017 Tundra 1794 4x4 CM SW
    4-Inch Lift, Fuel 20” Wheels, Nitro Ridge Grappler 35” Tires, Fender Flares, Rigid Fog Lights, LED Headlights, Spyder Taillights, VLED LED Interior/Exterior, TRD PRO Grille, Hood Bulge, Grille Surround, Black Out Emblems/Door Handles/Mirror Caps, Robin .50 Antenna, AJT Interior Blackout Kit, Bullydog BDX Tuner, Smittybuilt Tactical Seat Cover, Tuffy Safe, ARB Rear Differential Breather, Husky Floor Liners,Line X Spray-In Bed Liner, TRD Dual Exhaust, TRD Rear Sway Bar, Remote Start, TRD Front Skid Plate, Hood/Fender Paint Protection Film, and TRD Shift Knob
    Thank you for doing the research and sharing, this has bothered me so bad since I got it my truck.
     
    ElNopal[OP] likes this.
  18. Oct 26, 2020 at 9:06 AM
    #18
    ElNopal

    ElNopal [OP] Stay classy and be well

    Joined:
    Aug 17, 2019
    Member:
    #34762
    Messages:
    2,467
    Gender:
    Male
    First Name:
    Matt
    Willis TX
    Vehicle:
    19 Cavalry Blue CM
    Tyler, you will need 2 of each of the part numbers for a total of four parts to complete the passenger side. I used another couple of sets to complete the rear mats as well.

    The “uppers-the ones that twist to lock in the floor mat” are set into the lowers with the carpet in between. Please let me know if you have any additional questions.
     
  19. Oct 26, 2020 at 9:18 AM
    #19
    ElNopal

    ElNopal [OP] Stay classy and be well

    Joined:
    Aug 17, 2019
    Member:
    #34762
    Messages:
    2,467
    Gender:
    Male
    First Name:
    Matt
    Willis TX
    Vehicle:
    19 Cavalry Blue CM
    Best of luck and welcome! :thumbsup:

    ¡Gracias mi amigo, Jay!

    Glad it will be useful for you and welcome!
    :cheers:
     
  20. Oct 26, 2020 at 9:49 AM
    #20
    RitcheyRch

    RitcheyRch New Member

    Joined:
    May 23, 2018
    Member:
    #15551
    Messages:
    1,008
    Gender:
    Male
    First Name:
    Richard
    Santa Clarita, CA
    Vehicle:
    TRD Lowered & Supercharged Crewmax
    TRD Lowered and Supercharged
    Good job and thanks for sharing
     
    ElNopal[OP] likes this.
  21. Oct 26, 2020 at 10:06 AM
    #21
    Rebel Tundra Man

    Rebel Tundra Man New Member

    Joined:
    Aug 15, 2019
    Member:
    #34657
    Messages:
    240
    Gender:
    Male
    First Name:
    Tyler
    Western Kentucky
    Vehicle:
    2016 Black Limited CM
    4" RCX Lift, 20x10 Fuel Coupler's, 35x12.50x20 Nitto Ridge Grappler's, Color Match Front End, LED Bulbs, RCX Tube Steps, Green LED Underglow
    Thank you sir, thats what I thought it meant after seeing what you did but I wasnt 100% sure. might want to update that in the OP but this is added to the mod list forsure.
     
    ElNopal[QUOTED][OP] likes this.
  22. Oct 26, 2020 at 10:15 AM
    #22
    Rebel Tundra Man

    Rebel Tundra Man New Member

    Joined:
    Aug 15, 2019
    Member:
    #34657
    Messages:
    240
    Gender:
    Male
    First Name:
    Tyler
    Western Kentucky
    Vehicle:
    2016 Black Limited CM
    4" RCX Lift, 20x10 Fuel Coupler's, 35x12.50x20 Nitto Ridge Grappler's, Color Match Front End, LED Bulbs, RCX Tube Steps, Green LED Underglow
    This site contains affiliate links for which the site may be compensated.
    #22
    ElNopal[OP] likes this.
  23. Dec 28, 2020 at 10:27 AM
    #23
    browniemix33

    browniemix33 New Member

    Joined:
    Aug 13, 2020
    Member:
    #50740
    Messages:
    25
    Gender:
    Male
    New Hampshire
    Vehicle:
    2017 Metallic Grey Tundra Limited 4WD
    Just did this little project over the holidays and figured I would add my 2 cents...

    Similar to OP, I made a full cardboard cut out of the floor mat and traced out the holes I would be cutting into the passenger seat.
    IMG-6004.jpg
    When actually trying to get underneath the floor mat, it was helpful to unclip the little plastic binding on the side of the truck, allowed for much more arm space to get under the mat to place the under retainer.
    IMG-6003.jpg IMG-6002.jpg
    Finally, the clips listed at the beginning of this post off ebay do obviously work, but I found that calling Weathertech and asking for a duplicate pair of their clips that they put on the driver side mat fit a little bit better (again this is splitting hairs and is mostly just my OCD kicking in)
    IMG-6006.jpg

    Again, thanks to @ElNopal and all others commenting on the post, this problem was so frustrating for awhile and very relieved to say it will no longer be a problem.
     
    This site contains affiliate links for which the site may be compensated.
    #23
    ElNopal[OP] and jewsNbrews like this.
  24. Dec 28, 2020 at 12:54 PM
    #24
    ElNopal

    ElNopal [OP] Stay classy and be well

    Joined:
    Aug 17, 2019
    Member:
    #34762
    Messages:
    2,467
    Gender:
    Male
    First Name:
    Matt
    Willis TX
    Vehicle:
    19 Cavalry Blue CM
    Thanks for posting with an update. I am glad I went this direction for anchoring the passenger mat (and rear one) and I feel that you will be too! Nice work! :thumbsup:
     
    This site contains affiliate links for which the site may be compensated.
    #24
    jewsNbrews likes this.
  25. Dec 28, 2020 at 1:27 PM
    #25
    skylinekin

    skylinekin New Member

    Joined:
    Apr 7, 2019
    Member:
    #28778
    Messages:
    57
    Gender:
    Male
    Michigan
    Vehicle:
    2021 Tundra DC TRD PRO (Current), 2014 Tundra SR5 DC TRD OR (Sold)
    Thanks for the DIY, I was just thinking about this yesterday after i saw my passenger mat slid up into the footwell.
     
    ElNopal[OP] likes this.
  26. Jan 22, 2023 at 12:44 AM
    #26
    Tundrastruck91

    Tundrastruck91 New Member

    Joined:
    Feb 13, 2021
    Member:
    #59054
    Messages:
    617
    Gender:
    Male
    Vehicle:
    2024 TRD Pro Terra Tundra
    Just finished, great mod!! I did the same mirror image of driver's side. The holes are spaced 13.5 inches center to center and about 3 inches even from the base of floorboard under seat.20230121_173832.jpg 20230121_174000.jpg 20230121_174229.jpg 20230121_174217.jpg 20230121_174059.jpg
     
    jewsNbrews and ElNopal[OP] like this.

Products Discussed in

To Top