1. Welcome to Tundras.com!

    You are currently viewing as a guest! To get full-access, you need to register for a FREE account.

    As a registered member, you’ll be able to:
    • Participate in all Tundra discussion topics
    • Transfer over your build thread from a different forum to this one
    • Communicate privately with other Tundra owners from around the world
    • Post your own photos in our Members Gallery
    • Access all special features of the site

Katzkin Install Tips/Advice

Discussion in '2.5 Gen Tundras (2014-2021)' started by Danimal86, Oct 18, 2020.

  1. Oct 18, 2020 at 4:06 PM
    #1
    Danimal86

    Danimal86 [OP] Looks clean even when its dirty!

    Joined:
    Aug 29, 2017
    Member:
    #9321
    Messages:
    4,739
    Gender:
    Male
    First Name:
    Daniel
    Sacramento, CA
    Vehicle:
    2017 White Tundra SR5
    I'll be doing my katzkin Install at some point in the near future. I'll probably start with the smaller rear seat.
    For those that have installed katzkins, do you have any advice? Any tools that make the install go smoothly?
    I bought hog ring pliers a year ago when they were on sale because I knew I would get katzkin eventually. These are them:
    https://www.amazon.com/DEWALT-P7DW-...qid=1603062248&sprefix=dewalt+hog+ring&sr=8-3

    I feel like getting the plastic pieces off the seats may be a pain. Are they screwed in, or are they heald in by clips?

    I'm installing seat heaters, those just seem to lay on the foam?
     
  2. Oct 18, 2020 at 6:06 PM
    #2
    shawn474

    shawn474 Lego connoisseur

    Joined:
    Jul 23, 2019
    Member:
    #33569
    Messages:
    2,145
    Gender:
    Male
    MoCo, Maryland
    Vehicle:
    2019 Cement Tundra crew max TRD Off Road
    Take your time and make sure you fit them correctly around air bag sensors. Your hands will get sore and cut up - pace yourself. I used zip ties in a lot of places vs the hog rings. And be careful that you don’t pop the zippers. Having a helper compress the foam while you zip is advised. I took two basically full days to do my 4runner.
     
    Rica25 likes this.
  3. Oct 18, 2020 at 6:12 PM
    #3
    BlueRibbon4x4

    BlueRibbon4x4 Let’s color match it

    Joined:
    Aug 16, 2018
    Member:
    #18204
    Messages:
    3,016
    Gender:
    Male
    First Name:
    Geno
    Vehicle:
    2015 Blue Ribbon 4x4
    I believe @ElNopal would have some great advice.
     
    Rica25 and ElNopal like this.
  4. Oct 18, 2020 at 7:29 PM
    #4
    socaltundra951

    socaltundra951 Gentlemen Prefer Black Tundras

    Joined:
    Jun 19, 2019
    Member:
    #32150
    Messages:
    254
    Gender:
    Male
    Southern California
    Vehicle:
    Black CrewMax 5.7
    I actually just started this one myself, I did the 5 headrests first and the small rear seat. Seat was time consuming but it's not as scary as I thought. Just used a hog ring set and garage tools, work bench, etc.

    I actually found a really quick way to do the headrests, I had them down to just a few minutes a piece.

    20201018-192622.jpg
     
  5. Oct 18, 2020 at 7:30 PM
    #5
    Squatting Pigeon

    Squatting Pigeon Squattingpigeon.com Staff Member

    Joined:
    Apr 14, 2018
    Member:
    #14443
    Messages:
    56,134
    Gender:
    Male
    First Name:
    Holden
    North Texas
    Vehicle:
    GR Corolla
    Rica25 and Patch999 like this.
  6. Oct 18, 2020 at 8:46 PM
    #6
    Danimal86

    Danimal86 [OP] Looks clean even when its dirty!

    Joined:
    Aug 29, 2017
    Member:
    #9321
    Messages:
    4,739
    Gender:
    Male
    First Name:
    Daniel
    Sacramento, CA
    Vehicle:
    2017 White Tundra SR5
    I haven't looked closely at the leathers, but are they precut everywhere they need to be?
     
    Rica25 likes this.
  7. Oct 18, 2020 at 9:54 PM
    #7
    pearlpower

    pearlpower New Member

    Joined:
    Jul 14, 2020
    Member:
    #49315
    Messages:
    214
    Vehicle:
    2014 CrewMax in Radiant Red
    Rica25 likes this.
  8. Oct 19, 2020 at 5:41 AM
    #8
    ElNopal

    ElNopal Stay classy and be well

    Joined:
    Aug 17, 2019
    Member:
    #34762
    Messages:
    2,491
    Gender:
    Male
    First Name:
    Matt
    Willis TX
    Vehicle:
    19 Cavalry Blue CM
    I echo the other replies.

    However, in addition...

    Those are the hog ring pliers I was originally looking at. I didn’t get them because a family member (in the upholstery business) suggested that they don’t do as well in tight spots for upholstery...

    My understanding was that the heaters, for best service/operation, should be installed inside a recess delicately cut out of the seat foam as to lay “flush” with the original molded seat foam lines...

    I did not install heaters but was really close to pulling that trigger... I did a lot of research on it... There are plenty of great YT Videos on seat heater installs.

    There are just so many little tips and tricks to deal with on installing the Katzkins kit... Nothing too hard to figure out but I would have have loved to have picked someone else’s brain while doing it. Like on how to remove the front jumper seat’s fabric, how to remove the back seat console arm rest fabric, why are there no holes cut out for the said console (you have to cut your own), and other little odds and ends stuff! So, yes, test fit and test fit again until you absolutely love it! ...

    Anyhow, I shall be available, via PM, if you come upon any other questions, comments, concerns.

    Best of luck!
     
    Rica25, TRDFerguson and Patch999 like this.
  9. Oct 19, 2020 at 5:45 AM
    #9
    Patch999

    Patch999 SSEM #17 You are what you do when it counts

    Joined:
    Jul 28, 2018
    Member:
    #17466
    Messages:
    3,413
    Gender:
    Male
    First Name:
    Kyle
    TX
    Vehicle:
    2017 Bad@$$ TRD Pro
    Here is the write up I did when I installed mine. It shows the tools I needed. Most of the trim pieces have a torx screw then clips holding them on. It's a little time consuming but well worth it. I added seat warmers to my new truck a month or so ago and it's not quite the same but pretty close since most of the leather has to be taken off.

    https://www.tundras.com/threads/diy-katzkins-with-seat-warmers.31828/
     
  10. Oct 19, 2020 at 5:48 AM
    #10
    shawn474

    shawn474 Lego connoisseur

    Joined:
    Jul 23, 2019
    Member:
    #33569
    Messages:
    2,145
    Gender:
    Male
    MoCo, Maryland
    Vehicle:
    2019 Cement Tundra crew max TRD Off Road
    I did the Katzkin install on my 2014 4runner and swore I would never tackle that job again. I was thinking about attempting it on the Tundra and started calling around to local shops to see how much it would cost just to install (I was going to buy separately). I ended up going back and forth on this and took a chance getting the clazzio leather covers.......I am very impressed with the quality, fit and finish. Might be an option for you
     
  11. Oct 19, 2020 at 5:54 AM
    #11
    ElNopal

    ElNopal Stay classy and be well

    Joined:
    Aug 17, 2019
    Member:
    #34762
    Messages:
    2,491
    Gender:
    Male
    First Name:
    Matt
    Willis TX
    Vehicle:
    19 Cavalry Blue CM
    Drats!

    I missed your write up on this! Try as some of us may, I just have to relay, the site search bar does sometimes leave something left to be desired (or perhaps my user error)... I would have loved to have used this info... Nicely done!
     
    Rica25 and Patch999[QUOTED] like this.
  12. Oct 19, 2020 at 5:55 AM
    #12
    swank501

    swank501 New Member

    Joined:
    Oct 5, 2018
    Member:
    #20204
    Messages:
    314
    Gender:
    Male
    First Name:
    Steve
    Vehicle:
    2007 single cab 4x4
    TRD S/C Crewmax window conversion Auburn LSD Custom interior
    I did mine in 2007. Only used angled hog ring pliers and rings. Headrests were a pain and i was afraid i was going to break the stitch. Eventually used a plastic bag over the foam, pulled a vacuum on it to compress the foam, then the covers went on easily. then i pulled the plastic out.
     
  13. Oct 19, 2020 at 6:02 AM
    #13
    Patch999

    Patch999 SSEM #17 You are what you do when it counts

    Joined:
    Jul 28, 2018
    Member:
    #17466
    Messages:
    3,413
    Gender:
    Male
    First Name:
    Kyle
    TX
    Vehicle:
    2017 Bad@$$ TRD Pro
    Thanks. It seems to get buried in the search. Usually take me a while to find it when I see someone asking about installing them.
     
    ElNopal[QUOTED] likes this.
  14. Oct 19, 2020 at 6:22 AM
    #14
    panicman

    panicman Everyone remain calm.

    Joined:
    Mar 28, 2018
    Member:
    #13960
    Messages:
    1,739
    Gender:
    Male
    First Name:
    Eric
    PNW
    Vehicle:
    2018 SR5 CM TRDoffroad MGM
    I did my Katzkin/heated install in 2019. I actively resisted rushing. You have to be patient and persistent- and you’ll be pleased.

    The plastic trim is held on by screws, clips, and retention strips. Each seat is a little different.

    You’ll find that the heater kits have an adhesive backing. They adhere to the foam cushion. You’ll work the pad into crevices and smooth it down along the cushion contours. I followed @AlmightyCrash ’s walkthrough and cut small holes in the pad in order to fasten my hog rings. If you do this, be careful not to cut the heating element, only the fabric. (Tip)

    You’ll find that you start each seat by attaching the seating and back rest portions using hog rings. You’ll get used to using the pliers and rings fairly quickly, I found them to be very intuitive. (Tip) attach the cover using the hog rings and then lay the leather back and make sure each piece is square and not under an uneven tension side to side or front to back. If you get it uneven, clip the hog rings off and do it over before fully installing the leather.

    (Tip) have an extra pair of hands whenever you have to install the zippered portions of the front seats. The fit is very tight and the zippers WILL break if you try to force them.

    (Tip) the back of the rear seat is bristling with sharp metal edges. Didn’t cut myself, but you could do so easily. Use caution and maybe leather gloves lifting and manipulating the rear seat.

    That’s all I can think of. Good luck!
     
  15. Oct 19, 2020 at 7:11 AM
    #15
    Danimal86

    Danimal86 [OP] Looks clean even when its dirty!

    Joined:
    Aug 29, 2017
    Member:
    #9321
    Messages:
    4,739
    Gender:
    Male
    First Name:
    Daniel
    Sacramento, CA
    Vehicle:
    2017 White Tundra SR5
    Thanks everyone! It doesn't seem like a very difficult install, just maybe a little frustrating and time consuming. I may start in on it this weekend.

    I had a little bit of a concern that the hog ring pliers i have would be too wide to get into the nooks, so i may grab some standard ones just to be safe. I've had these things since Oct 2019, so i'll probably give them a try, and worst case i can return the new ones.

    For those that used plastic to vacuum out the air out of the headrest, how do you get the plastic out? Just pull it as it re-inflates?

    I remember reading about using a barrel sander to make a recessed pad for the seat heater to fit into. I'm not sure if i'll do this or not. @Patch999 can you feel the edges of the heaters through your covers (great write up btw, i'll have it open while i tackle it)
     
    Patch999 likes this.
  16. Oct 19, 2020 at 7:21 AM
    #16
    pearlpower

    pearlpower New Member

    Joined:
    Jul 14, 2020
    Member:
    #49315
    Messages:
    214
    Vehicle:
    2014 CrewMax in Radiant Red
    Headrest were the easiest part for me. Just crush it in one end, start to slip it on, keep crushing it against the carpet, and it will slip on without a hitch. Never pull on the stitches as they will tear. This goes for the whole project. Also, take plenty of pictures, the leather straps, hardware, etc., for reference.
     
    Last edited: Oct 20, 2020
  17. Oct 19, 2020 at 7:27 AM
    #17
    Patch999

    Patch999 SSEM #17 You are what you do when it counts

    Joined:
    Jul 28, 2018
    Member:
    #17466
    Messages:
    3,413
    Gender:
    Male
    First Name:
    Kyle
    TX
    Vehicle:
    2017 Bad@$$ TRD Pro
    No you can't feel them. You will cut and tape them so you can install the hog rings and the leather will keep them in place. Just test fit them with this in mind. Depending on how you cut them they will pull down into the creases once you use the hog rings. So if you want them further forward or back, push them into the creases before you start cutting so they end up where you want them. You will need to cut out a piece of the pad for the thermostat attached to the warmer to sit in.
    thermo.jpg
     
  18. Oct 19, 2020 at 2:02 PM
    #18
    socaltundra951

    socaltundra951 Gentlemen Prefer Black Tundras

    Joined:
    Jun 19, 2019
    Member:
    #32150
    Messages:
    254
    Gender:
    Male
    Southern California
    Vehicle:
    Black CrewMax 5.7
    All I have left today is the driver's seat, everything else is done. Slowly getting there, used the write up by @Patch999 to get me started.

    Just got the passenger side back in. Doing that 60 rear bench definitely sucked. 20201019-140056_01.jpg
     
  19. Oct 19, 2020 at 8:31 PM
    #19
    socaltundra951

    socaltundra951 Gentlemen Prefer Black Tundras

    Joined:
    Jun 19, 2019
    Member:
    #32150
    Messages:
    254
    Gender:
    Male
    Southern California
    Vehicle:
    Black CrewMax 5.7
    Finished this up today, tore the side zipper on the last dang seat, working on sewing that up while it's in the truck. About half way there buy at least the hard stuff is over. :thumbsup:
     
    Rica25 likes this.
  20. Oct 19, 2020 at 8:58 PM
    #20
    JoshuaA

    JoshuaA Canuck Member

    Joined:
    Dec 15, 2017
    Member:
    #11529
    Messages:
    2,710
    Southern Ontario
    Vehicle:
    Blaaack 2.5G
    Do it inside a warm room. Heat each piece in the drier on high to get it more pliable before application. Use a fabric streamer to work out creases. Compress that foam the best you can and stretch the leather back nice and tight for a smooth look. I would work each piece with your nicest fit that faces the door, the sides that you see when you open your doors. I would start at the back middle, then back seats.Your best work by experience will be the front seats last. Honestly do one seat per day because your hands will get tired and you’ll start cutting corners losing your methodical finesse you cared about at the beginning. You don’t want it to look like loose wrinkly covers. Watch some YouTube vids.

    While the fabric is off, it’s a good time to clean the foam. Tips are the same as cleaning/drying a memory foam mattress.
     
    Rica25 and panicman like this.
  21. Oct 24, 2020 at 5:23 PM
    #21
    Danimal86

    Danimal86 [OP] Looks clean even when its dirty!

    Joined:
    Aug 29, 2017
    Member:
    #9321
    Messages:
    4,739
    Gender:
    Male
    First Name:
    Daniel
    Sacramento, CA
    Vehicle:
    2017 White Tundra SR5
    So I installed one panel, holy hell....what a pain.

    The pliers are too wide to get in there....had to use zip ties. I'm going to order some different pliers.
     
    ElNopal likes this.
  22. Oct 24, 2020 at 5:45 PM
    #22
    Armstrs

    Armstrs New Member

    Joined:
    Sep 23, 2017
    Member:
    #9854
    Messages:
    88
    Gender:
    Male
    First Name:
    Steven
    East Texas
    Vehicle:
    2017 Silver CrewMax 5.7L 4x4
    Amp research power steps OEM tow mirrors OEM tonneau cover TRD Sway Bar Black Texas Lone Star plates :) Auto tail gate lock KB Voodoo 22” aluminum bed rack TRD Pro headlights Katzkin seats Black badges
    Yep. It’s been over a week since I did mine and my hands STILL hurt. I recommend taking before pictures so you have a reference. I did not re-install the rear seat latch cable correctly, pinched it, and had to order another one. $35 lesson learned I guess.
     
    ElNopal likes this.
  23. Oct 24, 2020 at 8:20 PM
    #23
    Danimal86

    Danimal86 [OP] Looks clean even when its dirty!

    Joined:
    Aug 29, 2017
    Member:
    #9321
    Messages:
    4,739
    Gender:
    Male
    First Name:
    Daniel
    Sacramento, CA
    Vehicle:
    2017 White Tundra SR5
    Dang.
    It was a pain just figuring out how to disassemble the seats. I ended up leaving the cable attached and kinda leaving them together.

    When I was putting the new cover on, I got all the clips on the back seated.....realized I didn't do any of the hog rings.....i amaze myself sometimes.

    I got to a point where I have to remove the seat flip bracket and stopped, do you happen to remember how that comes off? I think I'm going to try to do 1 panel a day.
     
  24. Oct 24, 2020 at 8:24 PM
    #24
    Patch999

    Patch999 SSEM #17 You are what you do when it counts

    Joined:
    Jul 28, 2018
    Member:
    #17466
    Messages:
    3,413
    Gender:
    Male
    First Name:
    Kyle
    TX
    Vehicle:
    2017 Bad@$$ TRD Pro
    It took me a bit to figure out the hog rings and I had to cut a few off because I missed. Just push them hard into the foam. It will give. It was much easier the second time round putting seat warmers in me next one.
     
  25. Oct 24, 2020 at 8:51 PM
    #25
    Armstrs

    Armstrs New Member

    Joined:
    Sep 23, 2017
    Member:
    #9854
    Messages:
    88
    Gender:
    Male
    First Name:
    Steven
    East Texas
    Vehicle:
    2017 Silver CrewMax 5.7L 4x4
    Amp research power steps OEM tow mirrors OEM tonneau cover TRD Sway Bar Black Texas Lone Star plates :) Auto tail gate lock KB Voodoo 22” aluminum bed rack TRD Pro headlights Katzkin seats Black badges
    I might remember. Which “seat flip bracket” part are you referencing? The metal latch that holds the seat down or up had two 12 or 13mm nuts. The plastic handle trim just took some gentle prying.
    For hog rings I got to where I would load the ring, hook the top edge around the bar in the cover, then use the pliers to push the ring and cover down to the bar in the foam.
     
  26. Oct 25, 2020 at 6:26 AM
    #26
    Danimal86

    Danimal86 [OP] Looks clean even when its dirty!

    Joined:
    Aug 29, 2017
    Member:
    #9321
    Messages:
    4,739
    Gender:
    Male
    First Name:
    Daniel
    Sacramento, CA
    Vehicle:
    2017 White Tundra SR5
    The one to lift the rear seat. The one that the release cable is attached to.
     
  27. Oct 25, 2020 at 7:30 AM
    #27
    socaltundra951

    socaltundra951 Gentlemen Prefer Black Tundras

    Joined:
    Jun 19, 2019
    Member:
    #32150
    Messages:
    254
    Gender:
    Male
    Southern California
    Vehicle:
    Black CrewMax 5.7
    You removed those? I never did...
     
  28. Oct 25, 2020 at 7:53 AM
    #28
    Armstrs

    Armstrs New Member

    Joined:
    Sep 23, 2017
    Member:
    #9854
    Messages:
    88
    Gender:
    Male
    First Name:
    Steven
    East Texas
    Vehicle:
    2017 Silver CrewMax 5.7L 4x4
    Amp research power steps OEM tow mirrors OEM tonneau cover TRD Sway Bar Black Texas Lone Star plates :) Auto tail gate lock KB Voodoo 22” aluminum bed rack TRD Pro headlights Katzkin seats Black badges
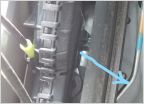
    There are two nuts holding them on (one of them circled in yellow.)The lock assembly is number 19 in the diagram below. I think I removed it and left it attached to the cable when separating the seat halves. But in hindsight I think if you pop the plastic cable holders (circled in orange) out, it should give enough slack to get the cable end out of the lock assembly.
     

    Attached Files:

  29. Oct 25, 2020 at 8:08 AM
    #29
    Asimov2025

    Asimov2025 Not Sure

    Joined:
    Feb 19, 2020
    Member:
    #42850
    Messages:
    1,009
    Gender:
    Male
    North Texas
    Non-stop mods
    ElNopal likes this.
  30. Oct 25, 2020 at 9:27 AM
    #30
    Danimal86

    Danimal86 [OP] Looks clean even when its dirty!

    Joined:
    Aug 29, 2017
    Member:
    #9321
    Messages:
    4,739
    Gender:
    Male
    First Name:
    Daniel
    Sacramento, CA
    Vehicle:
    2017 White Tundra SR5

Products Discussed in

To Top