1. Welcome to Tundras.com!

    You are currently viewing as a guest! To get full-access, you need to register for a FREE account.

    As a registered member, you’ll be able to:
    • Participate in all Tundra discussion topics
    • Transfer over your build thread from a different forum to this one
    • Communicate privately with other Tundra owners from around the world
    • Post your own photos in our Members Gallery
    • Access all special features of the site

Desert Putter

Discussion in '1st Gen Builds (2000-2006)' started by Desrat, Aug 28, 2020.

  1. Aug 28, 2020 at 3:10 PM
    #1
    Desrat

    Desrat [OP] New Member

    Joined:
    Mar 13, 2020
    Member:
    #43893
    Messages:
    71
    Gender:
    Male
    AZ
    Vehicle:
    06 Double Cab RWD V8
    Welcome to another "mad max" build!

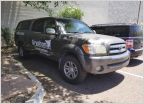
    The hope is to one day make this thing into a long travel prerunner build to blast around in on the weekends... big dreams, but right now it's my daily driver, so keeping things fairly simple. Doing most things myself for the sake of learning, especially when it comes to fabrication.

    Hoping to get some thoughts on where I've gone wrong, and maybe even where I've gone right with this build.

    Here's (roughly) where we are today:


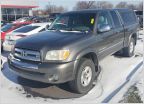
    And here's how it was when I bought the truck, around 8/19, with 133k miles, stock except for a K&N air intake.


    TO DO LIST:

    -
    Tires: thinking I will try a 285/70r17, something all-terrain and obvious like a KO2. Gonna wait til I wear out these ones that I got the truck with, don't wanna throw away perfectly good tires, even if they are kinda slick for my taste).

    -Another light bar on the roof.

    -Fabricate a chase rack for carrying additional supplies, and possibly for mounting the rooftop light bar.

    -Upgrade rear suspension (add a leaf? Bilsteins? Not sure yet).

    -Upgrade headlights, maybe to LED.

    -More window tint (I'm cooking in this thing for a couple minutes til that AC gets PUMPIN).

    -Put in a head unit with bluetooth.

    -Long term: long travel kit
     
    Last edited: Apr 2, 2024
    Darkness and drobb like this.
  2. Aug 28, 2020 at 3:16 PM
    #2
    Desrat

    Desrat [OP] New Member

    Joined:
    Mar 13, 2020
    Member:
    #43893
    Messages:
    71
    Gender:
    Male
    AZ
    Vehicle:
    06 Double Cab RWD V8
    The trip down memory lane begins:

    First thing I did was take off the running boards -- did it before I took the first picture. I then also went and dipped the wheels, as well as any fake-chrome, black.

    I also slapped on some KC hilites.


    To further aid lighting it up, I gave the truck a little vinegar and baking soda facial scrub.

    Before


    After

     
    Darkness likes this.
  3. Aug 28, 2020 at 3:24 PM
    #3
    Desrat

    Desrat [OP] New Member

    Joined:
    Mar 13, 2020
    Member:
    #43893
    Messages:
    71
    Gender:
    Male
    AZ
    Vehicle:
    06 Double Cab RWD V8
    A month into owning it, I backed into a pole :frusty:

    Took out a tail light, and put an apple-sized dent in the body. When building it back, ya gotta build it stronger...

    So I started with fabricating my own brush guards for the lights. Had access to only some very rudimentary tools, and my $150 Harbor Freight flux core welder. The result, before paint:


    On the truck:
    Oh, and I put a backup camera on the license plate! Not going to make the same mistake twice. Used a cheapo chineso unit that was <$40.

    https://www.amazon.com/gp/product/B06XKPQ6YZ/ref=ppx_yo_dt_b_search_asin_title?ie=UTF8&psc=1
     
    Darkness likes this.
  4. Aug 28, 2020 at 3:50 PM
    #4
    Desrat

    Desrat [OP] New Member

    Joined:
    Mar 13, 2020
    Member:
    #43893
    Messages:
    71
    Gender:
    Male
    AZ
    Vehicle:
    06 Double Cab RWD V8
    Next was a little front end work. I got a pair of Billy 5100s and leveled the front out. I also got to work on fabricating a "bumper" if you can call it that, most have called it a "ram"

    I didn't want to remove the crash bar yet, so it wasn't really possible to do a nicely angled pre-runner style skid plate that I was originally thinking about. This was some really basic work, the metal cost me probably $30 or so. Another $15 for paint and some fasteners.

    It was a fun thing to work on for a bit and I will replace it with something more slick once I move into a house with a garage/workshop.

    Part of the bumper:


    Before bumper + level, for comparison:


    After:


    Some more pics of the boxy bumper


    Last edited: Apr 2, 2024
    Darkness likes this.
  5. Aug 28, 2020 at 3:55 PM
    #5
    Desrat

    Desrat [OP] New Member

    Joined:
    Mar 13, 2020
    Member:
    #43893
    Messages:
    71
    Gender:
    Male
    AZ
    Vehicle:
    06 Double Cab RWD V8
    Next I started to pick up some recovery gear, and needed a place to mount it.

    I got some rivnuts, some 1 1/4 x 1 1/4 aluminum 6061 square tube, and went to work on making my own bed rails.

    3D printed a few of the components here, like the spacers that allow me to clamp down my traction boards with wingnuts.

    I also use my 3D printers to make stuff for inside the cabin, like little housings for the switches for my backup cam, exterior lights, etc.

    I haven't painted them or anything fancy yet, no surface finish. Might do that in the near future. Will also continue to add more mounting points for additional gear (shovels and such).

     
  6. Aug 28, 2020 at 4:00 PM
    #6
    Desrat

    Desrat [OP] New Member

    Joined:
    Mar 13, 2020
    Member:
    #43893
    Messages:
    71
    Gender:
    Male
    AZ
    Vehicle:
    06 Double Cab RWD V8
    Last thing I've got for now:

    A week or two ago, I picked up this Roadshock (another harbor freight beauty) 14" LED light bar. It got some decent reviews online -- saw a video where a guy submerged it in a tub of water, froze it, let it sit for 24+ hours and it was running the whole time and continued to run after he busted it out of the ice. So I figured I'd give it a test.

    Had to figure out a way to mount it. Wanted to put it on the lip on top of my bumper, but there was just not quite enough space -- it would interfere with the hood closing down all the way.

    So, I cooked up a little mounting system, using some of the leftover square tube from my bed rails, and bolted all my lights on.

    Top down view, with the hood open:


    Darkness likes this.
  7. Aug 28, 2020 at 4:21 PM
    #7
    KTMRider

    KTMRider New Member

    Joined:
    Aug 4, 2020
    Member:
    #50324
    Messages:
    239
    Gender:
    Male
    First Name:
    Ken
    Vehicle:
    2020 Tundra
    King's all around, Magnaflow exhaust, 18x9 Method 305 NV, Falken Wildpeak A/T3W 305/65/18 tires, tinted windows (shhhhh)
    I see your problem :boink::boink::boink:
    KTMHauler.jpg

    Just kidding :thumbsup::thumbsup:
     
    Desrat[QUOTED][OP] and Darkness like this.
  8. Jul 1, 2021 at 11:58 PM
    #8
    Desrat

    Desrat [OP] New Member

    Joined:
    Mar 13, 2020
    Member:
    #43893
    Messages:
    71
    Gender:
    Male
    AZ
    Vehicle:
    06 Double Cab RWD V8
    285/70/17s installed beginning of 2021

    PXL_20210403_215132955.MP.jpg
     
    Black Wolf likes this.
  9. Jul 2, 2021 at 12:00 AM
    #9
    Desrat

    Desrat [OP] New Member

    Joined:
    Mar 13, 2020
    Member:
    #43893
    Messages:
    71
    Gender:
    Male
    AZ
    Vehicle:
    06 Double Cab RWD V8
    About a month ago, went back to stock bumper. Bought a bigger light bar that wasn't gonna work well with the one I fab'd, but it looked like it would fit well on the stock one... Haven't quite worked it out yet though...

    Of course I also had to black out the new wheels

    PXL_20210530_023331783.MP.jpg
     
    Black Wolf and dbittle like this.
  10. Apr 2, 2024 at 8:02 PM
    #10
    Desrat

    Desrat [OP] New Member

    Joined:
    Mar 13, 2020
    Member:
    #43893
    Messages:
    71
    Gender:
    Male
    AZ
    Vehicle:
    06 Double Cab RWD V8
    Kind of forgot about this build thread, so here is a photo dump. I found a color matching camper shell for the double cab, which was incredibly lucky. Took a LOT of constant searching on craigslist, cars.com, and offerup, but I finally got one in 2022.

    It is great for camping trips - I just show up to the site, inflate my air mattress using the 12V outlets in the truck, throw it in the bed, and I'm set. The camper shell has screened windows that I can open when I sleep to get some airflow and that really helps keep the desert nights comfortable.

    I also went back (again) to my custom bumper. I think the utility of it while off-roading is unbeatable.

    Installed BFG KO2s as well. They are a lot quieter than the wranglers at highway speeds.

    PXL_20230506_014709340.MP.jpg
    PXL_20230430_183010887.MP.jpg
    PXL_20230430_150646150.MP.jpg
    PXL_20230226_192618540.MP.jpg
    PXL_20230226_192611522.MP.jpg
    PXL_20230226_185350910.MP.jpg
    PXL_20220813_185906680.jpg
    PXL_20220813_185659555.jpg
     
    The Black Mamba and des2mtn like this.

Products Discussed in

To Top