1. Welcome to Tundras.com!

    You are currently viewing as a guest! To get full-access, you need to register for a FREE account.

    As a registered member, you’ll be able to:
    • Participate in all Tundra discussion topics
    • Transfer over your build thread from a different forum to this one
    • Communicate privately with other Tundra owners from around the world
    • Post your own photos in our Members Gallery
    • Access all special features of the site

ICS FAB or Rago Fabrication

Discussion in '2.5 Gen Tundras (2014-2021)' started by azTony, Nov 5, 2019.

  1. Nov 5, 2019 at 1:56 PM
    #1
    azTony

    azTony [OP] member since sept, 2017 and over 1,600 messages

    Joined:
    Sep 16, 2017
    Member:
    #9693
    Messages:
    2,529
    Gender:
    Male
    First Name:
    Tony
    Sun Lakes, AZ
    Vehicle:
    *** OV Tune Order #4481 *** ECU 0CN21 ***
    2018 Tundra Platinum with Icon Stage 9 w/3.0 and billet UCA, Harrop Elockers, 5.29 on 37’s
    I had been looking for a solution to mount my guidance equipment, phone, radio, etc. since I started driving off-road with the Tundra and wanted to have the convenience I had with my old Landcruiser so I went to ICS FAB which at the time I liked being able to fill that hole on my dash for something useful so I ordered. They also offered a support plate for the bottom side of the dash which I liked because of the flimsy nature of the dash and looking at how the weight would be distributed with this plate I was sold so it was also purchased.

    If you want to see how to install these pieces there are plenty of threads and videos that show how easy this is to install, intimidating but relatively easy.

    Here is a snap shot of the underside where the plate mounts.
    UnderDash.jpg
    Here is the picture of the bracket on the dash with my RAM hardware installed.
    ics-1.jpg
    I ended up having to buy the longest arm RAM makes to get my iPad mounted where I could see it without blocking my view of the outside or the dash where I can see the cameras. At first glance this seemed to be what I was looking for! Please excuse the dirty windshield… cleaning starts after the install
    ics-2.jpg
    Then… I went off-road to test and although it provided me with what I wanted it had a lot of shake due to the long arm required to extend over the dash. It was not horrible but in the past with my Landcruiser I had a solution at first that vibrated a little but as time went on that “little” became a LOT.

    This was a setback to me and I started the search again.

    I ended up finding the Rago Fabrication’s Modular Dash Plate for the 3rd Gen Tundra. I started reading reviews and there seemed to be a lot of people steering away from it because it did not appear to be as “modular” as the ICS FAB solution at first glance. Looking at the ICS FAB bracket, it is made very well and has a lot of slots that provide a wide variety of ways to mount things… but a very small footprint to do so. When you look at Rago’s Modular Plate, it did not seem to be the true modular solution as was provided by ICS FAB and this was due to the lack of advertisement in my opinion (@MelissaRago). Granted there were a lot of pictures and advertisement but what was lacking was the solution of mounting that was missing.

    I ended up taking photos of both brackets, brought the photos into CAD so I could scale and overlay them onto one another, and I seen that the solution and options you have with the Rago mount are much more appealing that most everyone thought but again this is just one man’s opinion. The thing that really sold me was how close to the edge of the dash the Rago gets and they fill in the entire space of the Dash Divot.

    I then started the Pros and Cons of this changing from ICS FAB to Rago Fabrications. One of my main concerns in the very beginning was the need to drill holes in the dash. OUCH! When you first think about it then you always have the choice of removing things and putting the rubber cover over things so that is why I drilled the 4 holes required for the ICS FAB bracket.

    The one thing I had not seen was how the Rago bracket actually mounts to the dash, so I went hunting. I found someone that purchased one and they sent me a photo of the dash mounted bracket that you attach the top bracket to. Just finding out it had 2 brackets was a HUGE plus to me! Using the ICS FAB bracket you “do not have to, but it heps” (LOL) to mount your RAM mounts to the bracket before you mount it to the dash.

    At this point your head unit is laying on your center console, everything is ripped apart and you must figure out where you are putting your mounts. What? You do not have all your mounts? Well they say you can add them after the bracket is mounted but it is difficult. Yeah… difficult is the word.

    When I took my photos and overlaid them it appeared the Rago dash mount for their Modular Plate could be drilled to add 4 more holes that match the hole pattern of the ICS bracket but this is all from photos so there was a risk in buying the Rago Mount. I kept looking at the photos and finally figured it will be close but no matter what happens I can make it work so I ordered the Rago Fabrication Modular Dash Plate.

    First things first were to overlay the 2 brackets and see what I have to work with. There is a lot of room for slop here so be careful when you line them up to drill because the Rago plate fills that area so it better be centered, or you will notice it. To better help with alignment, the 3 “nipples” under the dash area were key to the alignment since both brackets account for it.

    Here is the overlay of the 2 with my center marks on where to drill (does not look centered because of pic angle)
    combo-1.jpg
    I drill the 4 holes and, in my opinion, these 4 new holes will have a good weight distribution and the under plate will help significantly. Pic after drilling
    combo-2.jpg
    Once these holes are drilled and dressed to remove any flashing/burring that occurred the assembly process is cake. Pic installed
    Rago-1.jpg
    This to me is the beauty of the approach to mounting using a primary dash mounted bracket and the top bracket can be removed at any time for any reason by removing 2 screws. The mounting of the RAM mounts is also simple since they utilized nut certs throughout.
    rago-2.jpg
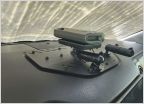
    This new mount changed my iPad mounting from using the longest RAM arm to the shortest RAM arm and the vibration, if any, is barely noticeable. I was also able to move my phone mount from my Hondo Garage vent mount to the Rago plate since it is so much closer to the dash edge. Various views after everything installed and mounted (remember the dirty windshield and huge crack in the background is only for your visual pleasure and was not damaged during install LMAO)
    1.jpg 2.jpg 3.jpg 4.jpg
     
  2. Nov 5, 2019 at 2:11 PM
    #2
    TheBeast

    TheBeast The Beach

    Joined:
    Apr 27, 2016
    Member:
    #3246
    Messages:
    12,518
    Gender:
    Male
    SoCal
    Vehicle:
    2012
    good stuff. I ran into similar issues with the RAM long arm as well. I use a RAM tough track to mount my devices since us gen 2 do not have RAGO or ICS fab.
    @Porschetech29 also runs something similar.

    RAM mounts/arms are pretty bulky. I'm giving a try with 67d arms see how that goes.

    https://www.67d.com/

    this was before:
     
    Last edited: Nov 5, 2019
    Porschetech29 and azTony[OP] like this.
  3. Nov 5, 2019 at 2:29 PM
    #3
    GravityGear

    GravityGear Parking Lot Prerunner

    Joined:
    Sep 9, 2018
    Member:
    #19180
    Messages:
    1,960
    Gender:
    Male
    First Name:
    Matt
    Aurora, CO
    Vehicle:
    2014 Black DC TSS Off Road 4x4 5.7
    Transfer Flow tank, Pinstripe Suit
    I have the ICS vibrations don't really bother me from the long arm, but I don't have a tablet on there. I will probably do the 67d arms in the future. Ram is... meh.
     
  4. Nov 6, 2019 at 1:06 PM
    #4
    ragofabrication

    ragofabrication New Member

    Joined:
    Jun 5, 2017
    Member:
    #8017
    Messages:
    68
    Gender:
    Female
    First Name:
    Melissa Rago
    Looks great!!! We are happy you were able to find a solution! Thank you for business and support of Rago Fabrication.
     
    AggiePhil and GELCW like this.
  5. Nov 21, 2019 at 1:06 PM
    #5
    Part_time

    Part_time Not a new member

    Joined:
    Dec 24, 2017
    Member:
    #11717
    Messages:
    1,446
    Gender:
    Male
    Oregon
    Vehicle:
    2017 MICA BRONZE SR5
    Does the Rago mod have a plate that goes under the dash. I see that you used the ICS plate.
     
  6. Nov 21, 2019 at 3:31 PM
    #6
    GravityGear

    GravityGear Parking Lot Prerunner

    Joined:
    Sep 9, 2018
    Member:
    #19180
    Messages:
    1,960
    Gender:
    Male
    First Name:
    Matt
    Aurora, CO
    Vehicle:
    2014 Black DC TSS Off Road 4x4 5.7
    Transfer Flow tank, Pinstripe Suit
    It does not. I went with ICS because of this.
     
    shellshock likes this.
  7. Nov 22, 2019 at 3:24 AM
    #7
    azTony

    azTony [OP] member since sept, 2017 and over 1,600 messages

    Joined:
    Sep 16, 2017
    Member:
    #9693
    Messages:
    2,529
    Gender:
    Male
    First Name:
    Tony
    Sun Lakes, AZ
    Vehicle:
    *** OV Tune Order #4481 *** ECU 0CN21 ***
    2018 Tundra Platinum with Icon Stage 9 w/3.0 and billet UCA, Harrop Elockers, 5.29 on 37’s
    @GravityGear you are correct, they do not offer one. I was going to make one myself but it has those 3 nipples under the dash (That is for you @GravityGear!) and I had already purchased the ICS mount and plate prior. I just sold the outer mount and kept the under dash plate.
     
  8. Nov 22, 2019 at 5:07 PM
    #8
    plumber802

    plumber802 New Member

    Joined:
    Apr 13, 2018
    Member:
    #14412
    Messages:
    909
    Gender:
    Male
    First Name:
    Andy
    Vermont
    Vehicle:
    2018 White Platinum CM
    What are these 67d arms you speak of?
     
  9. Nov 23, 2019 at 10:14 AM
    #9
    GravityGear

    GravityGear Parking Lot Prerunner

    Joined:
    Sep 9, 2018
    Member:
    #19180
    Messages:
    1,960
    Gender:
    Male
    First Name:
    Matt
    Aurora, CO
    Vehicle:
    2014 Black DC TSS Off Road 4x4 5.7
    Transfer Flow tank, Pinstripe Suit
    https://www.67d.com/

    It's a 20mm ball system, so you'll need converters to use standard 25mm (1 inch) stuff. They use metal balls and carbon arms, so it vibrates less, but it's substantially more expensive. About 1/3 more than RAM. Not super happy with RAM. The arm is squishing the ball, and that's where any vibration seems to be coming from. The heat on the dash isn't really helping the situation. If I remove the arm, there's a high spot where the arm isn't gripping the ball. The arm has permanently squished the rubber ball. I will be moving my current setup to the passenger side and replacing the driver side with the 67D. That is... when I feel like spending more money on this.
     
    plumber802[QUOTED] likes this.
  10. Nov 23, 2019 at 10:17 AM
    #10
    GravityGear

    GravityGear Parking Lot Prerunner

    Joined:
    Sep 9, 2018
    Member:
    #19180
    Messages:
    1,960
    Gender:
    Male
    First Name:
    Matt
    Aurora, CO
    Vehicle:
    2014 Black DC TSS Off Road 4x4 5.7
    Transfer Flow tank, Pinstripe Suit
    LOS PEZONES! Or is it LAS TETILLAS for that?

    That shit got deleted... I guess I wasn't being very helpful.
     
  11. Aug 1, 2020 at 2:50 PM
    #11
    klaytos

    klaytos New Member

    Joined:
    Aug 1, 2020
    Member:
    #50187
    Messages:
    3
    Sorry to kick the old post but I was wondering if anyone had a copy of the ICS mounting plate drilling template? I purchased the plate but it didn't include it.
     
  12. Aug 1, 2020 at 3:34 PM
    #12
    Zero One Actual

    Zero One Actual Member among Members

    Joined:
    Oct 17, 2017
    Member:
    #10330
    Messages:
    2,321
    When I got mine it was the cardboard box it came in. Check if there is a template on the box maybe?
     
  13. Aug 1, 2020 at 4:48 PM
    #13
    klaytos

    klaytos New Member

    Joined:
    Aug 1, 2020
    Member:
    #50187
    Messages:
    3
    Great....trashed the box already
     
  14. Aug 1, 2020 at 4:51 PM
    #14
    GravityGear

    GravityGear Parking Lot Prerunner

    Joined:
    Sep 9, 2018
    Member:
    #19180
    Messages:
    1,960
    Gender:
    Male
    First Name:
    Matt
    Aurora, CO
    Vehicle:
    2014 Black DC TSS Off Road 4x4 5.7
    Transfer Flow tank, Pinstripe Suit
    Just center the plate on the top side, tape it down with some blue tape and center punch the holes in your dash. The cutouts for LAS TETILLAS are big enough that you will have some room for error.
     
    Zero One Actual likes this.
  15. Aug 1, 2020 at 5:10 PM
    #15
    timsp8

    timsp8 Former Tundra owner for 13 years

    Joined:
    May 11, 2018
    Member:
    #15231
    Messages:
    3,524
    Gender:
    Male
    First Name:
    Tim
    NY
    Vehicle:
    2018 Tundra Limited Crewmax - Traded In
    Mine didn’t have a template either. I put the mount in place and centered it. Then was able to get a marker through the holes to mark the drill spots.
     
  16. Aug 1, 2020 at 5:35 PM
    #16
    SMK Shoe

    SMK Shoe Not New Member

    Joined:
    Sep 22, 2017
    Member:
    #9822
    Messages:
    539
    Gender:
    Male
    First Name:
    Paul
    Central North Carolina
    Vehicle:
    2017 Tundra TRD DC
    Step Bars, Rear Swaybar, 2,000 Watt Amp, 2-10" Subs, new door speakers, De-Badged, Hondo vent mounts, Calipers, 6112/5100 shocks, SPC UCA's, Front bumper, Bed Bars, bed rack, Fuel Rims
    I started out with the ICS mount and really liked it. But it always just looked out of place on the dash. Got the rago dash mount and LOVE it. looks extremely clean. Now my ICS just sits in a box of updated mod parts.
     
    AggiePhil likes this.
  17. Aug 1, 2020 at 5:47 PM
    #17
    klaytos

    klaytos New Member

    Joined:
    Aug 1, 2020
    Member:
    #50187
    Messages:
    3
    I'll tape it down and try it that way. I have the Rago mount to go on top of it. Anything I need to look out for when mating the two? Thank you for all your help.
     
  18. Aug 3, 2020 at 4:03 PM
    #18
    CaptainGrumpus

    CaptainGrumpus The Mailman

    Joined:
    Mar 6, 2020
    Member:
    #43588
    Messages:
    1,175
    Gender:
    Male
    First Name:
    Matt
    Maine
    Vehicle:
    2018 Inferno Tundra TRD
    Anyone know where to get the gold threaded inserts? I got mine in today and it doesn’t have any.
     
    Last edited: Aug 3, 2020
  19. Aug 4, 2020 at 4:48 AM
    #19
    azTony

    azTony [OP] member since sept, 2017 and over 1,600 messages

    Joined:
    Sep 16, 2017
    Member:
    #9693
    Messages:
    2,529
    Gender:
    Male
    First Name:
    Tony
    Sun Lakes, AZ
    Vehicle:
    *** OV Tune Order #4481 *** ECU 0CN21 ***
    2018 Tundra Platinum with Icon Stage 9 w/3.0 and billet UCA, Harrop Elockers, 5.29 on 37’s
    I would contact the company and ask what happened. Pretty much a major portion of the mount
     
  20. Aug 4, 2020 at 6:23 AM
    #20
    longcat

    longcat New Member

    Joined:
    Jul 22, 2016
    Member:
    #3959
    Messages:
    95
    Gender:
    Male
    First Name:
    Jon
    DFW / Texas
    Vehicle:
    2019 Cavalry Blue Tundra CrewMax
    sounds like they didn't install the threaded rivet nuts. You need the rivet nuts and a special tool to install them yourself. Reach back out to them. They will need to fix that issue.
     
    CaptainGrumpus likes this.
  21. Aug 4, 2020 at 7:05 AM
    #21
    TylerDurden311

    TylerDurden311 Paper Street

    Joined:
    Jan 5, 2019
    Member:
    #23997
    Messages:
    307
    Gender:
    Male
    Vehicle:
    2018 Tundra CM
    From what I can gather from the site is that the Blem models riv nuts are not powder coated, maybe an early design. The non blems will have powder coated inserts so the are not susceptible to rust. Not 100% sure though.
     
  22. Aug 4, 2020 at 7:31 AM
    #22
    CaptainGrumpus

    CaptainGrumpus The Mailman

    Joined:
    Mar 6, 2020
    Member:
    #43588
    Messages:
    1,175
    Gender:
    Male
    First Name:
    Matt
    Maine
    Vehicle:
    2018 Inferno Tundra TRD
    Ok thanks. I did get a blem. I’ve seen em with and without but there is no option for that on the site. I would have just bought a non-blem one if I knew about the rivets.
    I just sent em an email to see what they can do.
     
  23. Aug 4, 2020 at 7:40 AM
    #23
    TylerDurden311

    TylerDurden311 Paper Street

    Joined:
    Jan 5, 2019
    Member:
    #23997
    Messages:
    307
    Gender:
    Male
    Vehicle:
    2018 Tundra CM
    Let us know what you find out. I ordered a non-blem the other day after looking at the photos and trying to decipher the descriptions.
     
  24. Aug 4, 2020 at 8:07 AM
    #24
    CaptainGrumpus

    CaptainGrumpus The Mailman

    Joined:
    Mar 6, 2020
    Member:
    #43588
    Messages:
    1,175
    Gender:
    Male
    First Name:
    Matt
    Maine
    Vehicle:
    2018 Inferno Tundra TRD
    I just got a message back from Rago and they want me to send some pics of everything I got so I’ll have to do that after work.
     
  25. Aug 4, 2020 at 8:38 AM
    #25
    InfernoPRO

    InfernoPRO Technicolor BASTRD

    Joined:
    Jul 4, 2018
    Member:
    #16710
    Messages:
    440
    Gender:
    Male
    First Name:
    Scott
    Sacramento
    Vehicle:
    2015 Inferno TRD PRO
    The design has changed since the first production run. They no longer have gold rivet nuts. Your plate should have thickened metal with threaded holes in lieu of rivet nuts. This is much cleaner now.
     
    AggiePhil likes this.
  26. Aug 4, 2020 at 9:35 AM
    #26
    CaptainGrumpus

    CaptainGrumpus The Mailman

    Joined:
    Mar 6, 2020
    Member:
    #43588
    Messages:
    1,175
    Gender:
    Male
    First Name:
    Matt
    Maine
    Vehicle:
    2018 Inferno Tundra TRD
    Well that pretty much solves the mystery! I guess the photo of what I ordered vs what all the photos of it I see are two different things. I just took it for granted that I was getting one with the gold rivets.
     
  27. Aug 4, 2020 at 10:00 AM
    #27
    InfernoPRO

    InfernoPRO Technicolor BASTRD

    Joined:
    Jul 4, 2018
    Member:
    #16710
    Messages:
    440
    Gender:
    Male
    First Name:
    Scott
    Sacramento
    Vehicle:
    2015 Inferno TRD PRO
    Just double check you do have the threaded holes. I bought one of the blemished plates and it did have threaded holes.
     
  28. Aug 4, 2020 at 1:45 PM
    #28
    CaptainGrumpus

    CaptainGrumpus The Mailman

    Joined:
    Mar 6, 2020
    Member:
    #43588
    Messages:
    1,175
    Gender:
    Male
    First Name:
    Matt
    Maine
    Vehicle:
    2018 Inferno Tundra TRD
    4B86DC11-9D87-409F-ABA7-E3889FC60E50.jpg
    So I sent off a pic of what I got and Rago told me that the one with the gold rivets are the original version. The one I got is the updated version with the threaded holes. It looks good either way but something about that gold looked really cool to me. I guess I’m just gonna grab some more of those hex head screws that came with it and fill in the rest of the holes to give it a more finished look.
     
    InfernoPRO[QUOTED] likes this.
  29. Aug 4, 2020 at 2:37 PM
    #29
    CaptainGrumpus

    CaptainGrumpus The Mailman

    Joined:
    Mar 6, 2020
    Member:
    #43588
    Messages:
    1,175
    Gender:
    Male
    First Name:
    Matt
    Maine
    Vehicle:
    2018 Inferno Tundra TRD
    What drill bit size should I use for the holes on the dash? The YouTube video shows her using a step bit but I don’t have one.
     
  30. Aug 4, 2020 at 4:54 PM
    #30
    salmonator

    salmonator New Member

    Joined:
    Jan 8, 2019
    Member:
    #24185
    Messages:
    104
    Gender:
    Male
    Tigard, OR
    Vehicle:
    2019 Tundra SR5 4x4 DC
    I have the one with the riv-nuts. It’s better without, the new design is improved.

    When you tighten down a two hole RAM base, it sits above the dash plate due to the thickness of the riv-nut flange, there is a small gap.

    so with a RAM arm perpendicular to the two screws in the RAM base, the mount tends to rock/pivot since the full width of the base isn’t in contact with the plate. I’m going to cut some shims to fix it. Not an issue with my phone, but is with my iPad since it’s so much heavier.
     
    AggiePhil and CaptainGrumpus like this.

Products Discussed in

To Top