1. Welcome to Tundras.com!

    You are currently viewing as a guest! To get full-access, you need to register for a FREE account.

    As a registered member, you’ll be able to:
    • Participate in all Tundra discussion topics
    • Transfer over your build thread from a different forum to this one
    • Communicate privately with other Tundra owners from around the world
    • Post your own photos in our Members Gallery
    • Access all special features of the site

rochmpr V5 build - This is getting expensive

Discussion in '2.5 Gen Builds (2014-2021)' started by rochmpr, Apr 4, 2020.

  1. Apr 4, 2020 at 7:45 AM
    #1
    rochmpr

    rochmpr [OP] New Member

    Joined:
    Sep 8, 2019
    Member:
    #35834
    Messages:
    123
    Gender:
    Male
    First Name:
    Krister
    Walnut Grove, CA
    Vehicle:
    2020 CrewMax
    Lifted, sliders, 35 X 12.5's, Evo Corse and more stuff coming
    Good morning all. I am commencing on the latest build in the long line of a bad addition to modifying perfectly good vehicles. This is also yet another Toyota in a long line of Toyota's. You might say I have a double addition;
    • 1986 Toyota 4X4 SR5 Xtra Cab - Stolen at 286k miles
    • 1981 Toyota Hilux 4X4 - rochmpr V1 - Sold
      Winch Hill 5.jpg
    • 1997 Toyota Tacoma Xtra Cab 4X4 V6- Sold
    • 1992 Toyota Hillux Xtra Cab 3.n0 - rochmpr V2- Sold
      Fordyce - 06-28-03 - 3 - Squeeze Rock.jpg
    • 1999 Toyota Tacoma 4X4- Sold
    • 1997 Toyota FZJ-80 Triple Locked - rochmpr V3- Sold
    • 2014 Toyota 4Runner - rochmpr V4- Sold - 20190929_070223-1.jpg
    • 2005 Toyota Corolla (daugter's car)
    • 2015 Toyota Highlander Limited (wife's car)- Sold
    • 2020 Toyota Camry XSE (wife's car)
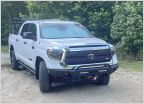
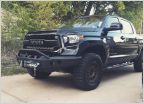
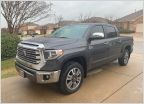
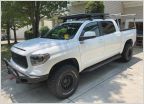
    • 2020 Toyota Tundra Limited - rochmpr V5- Purchased 3/7/20
    Lots of plans for this build and it will be starting today. Currently, thanks to SDQH, there is a pile of parts in the garage ready to go. Currently, the following are ordered or in the garage;
    • Camburg Kinetic UCA's
    • Icon 3.0 CDV Coil-overs
    • Icon RTX leaf springs
    • Icon Omega rear shocks
    • Wheeler's Offroad bump stops
    • Evo Corse 18X8.5 wheels
    • General Grabber X3 wheels in 35X12.5R18
    • White Knuckle Off Road sliders
    Future plans include:
    • Front bumper and winch, looking at C4 or Demello
    • RCI underbelly skids - Done
    • BMC to fit 37's at next upgrade
    • Gears and at least a rear ARB when upgrading to 37's - BMC Done
    • Rear Bumper
    • HAM Radio - Done
    • Safari Snorkel
    • ARB Twin Compressor - Done
    • Lots of costly miscellaneous crap - Ongoing

    20200403_173812-1.jpg
    20200330_115027-1.jpg

    20200321_123413-1.jpg
    20200403_120124-1.jpg
    20200403_173450-1.jpg
    20200403_173853-1.jpg
    20200403_173827-1.jpg
     
    Last edited: Sep 10, 2020
  2. Apr 4, 2020 at 9:35 AM
    #2
    georgiey22

    georgiey22 Moving to Idaho

    Joined:
    Nov 30, 2018
    Member:
    #22423
    Messages:
    857
    Gender:
    Male
    Vehicle:
    2019 Tundra | TRD Sport | Cavalry Blue | Crew Max
  3. Apr 4, 2020 at 11:46 AM
    #3
    TheBeast

    TheBeast The Beach

    Joined:
    Apr 27, 2016
    Member:
    #3246
    Messages:
    12,518
    Gender:
    Male
    SoCal
    Vehicle:
    2012
    nice. TAG.
     
  4. Apr 5, 2020 at 8:25 AM
    #4
    rochmpr

    rochmpr [OP] New Member

    Joined:
    Sep 8, 2019
    Member:
    #35834
    Messages:
    123
    Gender:
    Male
    First Name:
    Krister
    Walnut Grove, CA
    Vehicle:
    2020 CrewMax
    Lifted, sliders, 35 X 12.5's, Evo Corse and more stuff coming
    Yesterday, I was able to get the rear completed. Ran into some difficulties since it was a solo install. First issue I encountered was I did not jack the rear up high enough to swap in the new springs, which meant some rework to get the rear up higher. Once I got that accomplished, getting the RTX springs in with the shackle was a challenge. A ¾" longer shackle would have made no issue, so I had to devise a plan and used a ratchet strap to suck the spring up and compress it enough to elongate the spread of the eyes to get the shackle on. Coil springs re so much easier, just through a compressor on there and drive that bastard closed and put that sucker up in there. Once I go past that on one side, I had to use a bottle jack to jack up the side with the new spring to drop the other side to throw in the new spring and then repeat the ratchet strap and much easier the second time around. After that, cut the tail pipe at the last hanger, swapped out longer break lines and throw in the Coachbuilder drive line spacers done and onto the next phase, a cold beer.

    Here is the ABS wire out of the way to prevent damage.
    20200404_153309-1.jpg
    My helper
    20200404_153256-1.jpg
    Stock vs. Icon RXT
    20200404_153349-1.jpg
    After install, sitting about 3" higher (Option 1)
    20200404_153359-1.jpg
    A little celebration and relaxation.
    20200404_153359-11.jpg
     
  5. Apr 5, 2020 at 4:58 PM
    #5
    rochmpr

    rochmpr [OP] New Member

    Joined:
    Sep 8, 2019
    Member:
    #35834
    Messages:
    123
    Gender:
    Male
    First Name:
    Krister
    Walnut Grove, CA
    Vehicle:
    2020 CrewMax
    Lifted, sliders, 35 X 12.5's, Evo Corse and more stuff coming
    Half tempted to drive out in August, providing we can leave the house.
     
    Sgt Grunt likes this.
  6. Apr 6, 2020 at 3:20 PM
    #6
    gabex35

    gabex35 2020 Limited 4x4 with mods coming...

    Joined:
    Jun 29, 2018
    Member:
    #16580
    Messages:
    102
    Gender:
    Male
    San Diego
    Vehicle:
    2020 Cement Limited 4x4
    Nice to see a familiar name from T4R Forum. I just picked up a 2020 Limited today. I look forward to your build Devil Dog.
     
    rochmpr[OP] likes this.
  7. Apr 6, 2020 at 3:31 PM
    #7
    Squatting Pigeon

    Squatting Pigeon Squattingpigeon.com Staff Member

    Joined:
    Apr 14, 2018
    Member:
    #14443
    Messages:
    56,121
    Gender:
    Male
    First Name:
    Holden
    North Texas
    Vehicle:
    GR Corolla
  8. Apr 6, 2020 at 4:51 PM
    #8
    rochmpr

    rochmpr [OP] New Member

    Joined:
    Sep 8, 2019
    Member:
    #35834
    Messages:
    123
    Gender:
    Male
    First Name:
    Krister
    Walnut Grove, CA
    Vehicle:
    2020 CrewMax
    Lifted, sliders, 35 X 12.5's, Evo Corse and more stuff coming
    I won't be going all in right away, but looking to get the first stage done. You going to be building up as well?
     
  9. Apr 6, 2020 at 6:12 PM
    #9
    gabex35

    gabex35 2020 Limited 4x4 with mods coming...

    Joined:
    Jun 29, 2018
    Member:
    #16580
    Messages:
    102
    Gender:
    Male
    San Diego
    Vehicle:
    2020 Cement Limited 4x4
    Not as much as the 4Runner and definitely not for a while. Going to go much simpler and efficient with this one.
     
    rochmpr[OP] likes this.
  10. Apr 9, 2020 at 10:59 AM
    #10
    rochmpr

    rochmpr [OP] New Member

    Joined:
    Sep 8, 2019
    Member:
    #35834
    Messages:
    123
    Gender:
    Male
    First Name:
    Krister
    Walnut Grove, CA
    Vehicle:
    2020 CrewMax
    Lifted, sliders, 35 X 12.5's, Evo Corse and more stuff coming
    Well, not much to update, started working on the front and got the front Icon 3.0's in place and then the Camburg UCA and encountered a big problem. The UCA hit the fitting on the coil over going to the remote resi not allowing full droop. I reached out to Joey at SDHQ and he was very responsive and forgot to mention to flip sides with the coil over which places the fitting to allow the UCA to move freely. Of course, I have these installed and cursed a little, so I went out and removed both and started installing one side and got it into place and checked the clearance, and damnit, there's still contact. Then I head over to the other coil over and notice oil leaking out of the top. Yeah, at this point a few additional curse words flew smoothly out of my mouth and then I called Joey at SDHQ. After a quick conversation and emailing him some pictures, it looks like I am sending these back for repairs before they are even used. No fault of SDHQ or Joey. They have been great and very helpful. Now the wait continues...............................
     
  11. Apr 9, 2020 at 11:04 AM
    #11
    14burrito

    14burrito IG @14burrito

    Joined:
    Dec 14, 2014
    Member:
    #798
    Messages:
    3,819
    Vehicle:
    2014 SR5 CM 4x4 5.7
    @ADSracingshocks - F 3 point ohh / R 2.5 - w/clickers @camburgracing - uniball UCA @rigidindustries - 40" amber/white split, Dually XL, D2 @coopertires - 35/12.5/17 STT MAXX @bayareametalfab - low pro bed rack @toyotausa - 17" rock warrior @sdhqoffroad - rock sliders, a-pillar @hondogarage / @apple / @gaiagps / @dualgps- navigation @wheelersoffroadinc - superbumps
    Hit up Erick @state48overland when your ready for some future upgrades to get check off your list! He can get you squared away with some awesome deals on the Demello and gears!
     
    state48overland likes this.
  12. May 8, 2020 at 2:38 PM
    #12
    rochmpr

    rochmpr [OP] New Member

    Joined:
    Sep 8, 2019
    Member:
    #35834
    Messages:
    123
    Gender:
    Male
    First Name:
    Krister
    Walnut Grove, CA
    Vehicle:
    2020 CrewMax
    Lifted, sliders, 35 X 12.5's, Evo Corse and more stuff coming
    It's been a while, but I did finally get the front coil overs back from SDHQ and got them installed with the UCA's. Those went in a lot easier than expected with trying to fish the UCA bolt through everything that is in the way. Also, I was lucky and received my wheels as Mainline Overland was able to search their inventory and find 4 wheel, while all the remainder of Evo wheels are in an unknown state due to the shutdown in Italy. I went and had those wrapped with some General Grabber X3's in 35X12.5R18's. After that, it was on to some trimming with a cut-off wheel for the underside of the bumper to make sure there was enough clearance to adjust the caster forward. And, around the same time, I received a call from White Knuckle Off Road that the sliders were ready for pick-up, so I went for a little (13 hrs RT) drive to go pick them up and now, working on the installation of those and waiting for more goodies to arrive.


    20200428_191619-1.jpg

    20200428_191729-1.jpg

    20200430_120923-1.jpg

    20200430_121003-1.jpg

    20200503_164317-1.jpg
     
  13. Jun 24, 2020 at 9:38 AM
    #13
    rochmpr

    rochmpr [OP] New Member

    Joined:
    Sep 8, 2019
    Member:
    #35834
    Messages:
    123
    Gender:
    Male
    First Name:
    Krister
    Walnut Grove, CA
    Vehicle:
    2020 CrewMax
    Lifted, sliders, 35 X 12.5's, Evo Corse and more stuff coming
    It has been a while since I have made any updates. I am still trying to tweek and fine tune the front suspension to get it dialed in. In the mean time, last week I should have been on vacation in Hawaii with the family, unfortunately, due to COVID, we had to cancel. Since I was sitting at home, I decided that it was a good time to make a maiden voyage and hit a trail for the day with my son. We headed out to one of my favorite areas in the Sierra's and went into an easy trail for a shakedown. I entered from the easy side and ran the trail to the ridge and came back down the same way, as I knew the other way would have some very tight turns in the trees. This beast was so much different from the 4Runner, the size and wheelbase really change everything about approach and turning. All went well, no damage, just added the initial pin striping mod to the new paint.


    20200615_125142-1.jpg

    20200615_103830-1.jpg

    20200615_105907-1.jpg

    20200615_112941-1.jpg

    20200615_130821-1.jpg

    20200615_130950-1.jpg

    20200615_125159-1.jpg
     
    Last edited: Sep 3, 2020
  14. Jul 20, 2020 at 12:43 PM
    #14
    rochmpr

    rochmpr [OP] New Member

    Joined:
    Sep 8, 2019
    Member:
    #35834
    Messages:
    123
    Gender:
    Male
    First Name:
    Krister
    Walnut Grove, CA
    Vehicle:
    2020 CrewMax
    Lifted, sliders, 35 X 12.5's, Evo Corse and more stuff coming
    It's been a bit since I have posted any updates. Spent some time getting the front dialed in due to rubbing and alignment. With the remote reservoir mounting locations, the tires would rub the resi and hose at full lock. I opted to rub 1¼" spacers, which just moved the rubbing issue elsewhere. I ordered the Relentless Fab BMC plates and installed them similar to other write up here, except, I know from past experience that weld heat melts the mounts, no mater how careful you are, plus, with wanting to chop as close to the mount as possible without damaging it, I loosened ALL of the body mounts and jacked the cab up, one side at a time, and removed the bushing in order to cult, weld and paint. It's a bit more hassle, but well worth it in my opinion. This was followed up by an alignment, readjustment of the UCA's to move them forward and yet another alignment. I have also trimmed the lower inside area of the front bumper as well. Hopefully, this will be pretty good with some minor pinch welds to fix. I will find out this weekend with a trip to Ouray, CO.

    20200720_122716-1.jpg
    20200720_122729-1.jpg
     
    Sunnier, Darkness, rockmup and 5 others like this.
  15. Jul 20, 2020 at 12:46 PM
    #15
    rochmpr

    rochmpr [OP] New Member

    Joined:
    Sep 8, 2019
    Member:
    #35834
    Messages:
    123
    Gender:
    Male
    First Name:
    Krister
    Walnut Grove, CA
    Vehicle:
    2020 CrewMax
    Lifted, sliders, 35 X 12.5's, Evo Corse and more stuff coming
    Recently, I also received my RCI full skid plates and got those installed thanks to a helpful YouTube video. The instructions were complete crap (being truthful) and not all of the hardware was included that was listed on the instructions, so add in one trip to the hardware store and got those installed relatively smoothly, all things considered.

    20200720_122510-1.jpg
    20200720_122455-1.jpg
     
  16. Jul 20, 2020 at 1:00 PM
    #16
    rochmpr

    rochmpr [OP] New Member

    Joined:
    Sep 8, 2019
    Member:
    #35834
    Messages:
    123
    Gender:
    Male
    First Name:
    Krister
    Walnut Grove, CA
    Vehicle:
    2020 CrewMax
    Lifted, sliders, 35 X 12.5's, Evo Corse and more stuff coming
    And the latest endeavor has been installing an ARB Twin Compressor. Probably should have looked at the DIY page on this site, but that's like instructions, when all else fails, refer to "How To Manual". I am still waiting for the mount, no thanks to one vendor that has been experiencing fab delays yet keeps telling me it's going to ship this week for the last three weeks, I finally reached out to Rago Fabrication, who had one in stock and was able to turn that thing around today and get it shipped so I can have it to complete the install Wednesday before leaving Friday at 0'Dark-30 to start the 16 hour drive to Ouray.

    With regards to wiring, the under the hood portion is very straight forward, it's getting the harness into the cab where things become tricky. I utilized the factory harness grommet spare location. From the inside of the cab, I took some tie wire and stuck it into the space and pierced the nipple and then bent a 90 hook on the wire on the cab side. From there, I was able to locate the wire under the hood and pull it until the 90 hook reached the end of the nipple with stretched it our far enough to reach down with a utility knife and slice off the end. From there, I revered the procedure to pull the harness into the cab, the only thing was that it did not want to pull through the grommet. After a few attempts, I slathered the harness up with some die-electric grease and that sucker pulled right through with no effort. From there, I refereed to some write-up for where to tap power. I got out the Dremel to cut the opening for the switch and it installed nicely. I connected the compressor and powered everything up and it worked like a charm. Now, just waiting to complete the install this week before hitting the road.

    20200720_122350-1.jpg

    20200720_122528-1.jpg

    Currently, how the truck sits and looks:
    20200720_122441-1.jpg
     
    J&ATundra, saybng, MS22 and 7 others like this.
  17. Jul 20, 2020 at 1:11 PM
    #17
    RelentlessFabrication

    RelentlessFabrication relentlessfabrication.com Vendor

    Joined:
    Sep 12, 2018
    Member:
    #19307
    Messages:
    171
    Sparks, NV
    Nicely done. The extra effort and attention you put in looks great. Thanks for choosing our plates!

    Relentless Fabrication
    www.relentlessfabrication.com
     
    rochmpr[QUOTED][OP] likes this.
  18. Aug 5, 2020 at 6:55 AM
    #18
    rochmpr

    rochmpr [OP] New Member

    Joined:
    Sep 8, 2019
    Member:
    #35834
    Messages:
    123
    Gender:
    Male
    First Name:
    Krister
    Walnut Grove, CA
    Vehicle:
    2020 CrewMax
    Lifted, sliders, 35 X 12.5's, Evo Corse and more stuff coming
    Last week, the family and I headed out East to Ouray, CO to meet up with my "brother", @Sgt Grunt , of 30 years and spend some quality family time together. From the Sacramento area, it's about a 16 hour drive, so we broke it up into two days. Getting there was mostly a power drive with lots of seat time and got there Saturday evening in time to unload and order food and grab a cold welcome beer that we had waiting in the room.

    116430121_4406749216003575_7454863321747103874_n-1.jpg

    We all sat there and ate and let the kids play, the wives talked about what ever it is they talk about, and @Sgt Grunt and I made plans to run the Alpine Loop in the morning and got our things together. We got up early and attempted to get out right away, but, due to all the traveling and BS, we weren't quite organized and took a little longer to get our act together in the morning, but with minimal delay, we headed out and hit the trail and aired down. We headed up and ran agood portion of the Alpine Loop making to Engineer Pass, Cinnamon Pass, California Pass and Hurricane Pass as well as Animas Forks. As for the trail, it was a fairly easy trail, there was nothing technical that took any effort to get through, but the scenery was astonishing and the old mine site were incredible.

    20200725_191440-1.jpg

    20200726_080153-1.jpg

    20200731_134740-1.jpg

    20200726_081657-1.jpg

    20200726_083315-1.jpg


    20200726_084502-1.jpg

    20200726_090706-1.jpg

    20200726_092342-1.jpg
     
  19. Aug 5, 2020 at 7:00 AM
    #19
    rochmpr

    rochmpr [OP] New Member

    Joined:
    Sep 8, 2019
    Member:
    #35834
    Messages:
    123
    Gender:
    Male
    First Name:
    Krister
    Walnut Grove, CA
    Vehicle:
    2020 CrewMax
    Lifted, sliders, 35 X 12.5's, Evo Corse and more stuff coming
    Some more from the Day 1

    20200726_082846-1.jpg

    20200726_090706-1.jpg

    20200726_103004-1.jpg

    20200726_103440-1.jpg

    20200726_141738-1.jpg

    20200726_141710-1.jpg

    20200726_165921-1.jpg

    20200726_171057-1.jpg

    20200726_171030-1.jpg

    20200726_171138-1.jpg
     
  20. Aug 5, 2020 at 7:09 AM
    #20
    rochmpr

    rochmpr [OP] New Member

    Joined:
    Sep 8, 2019
    Member:
    #35834
    Messages:
    123
    Gender:
    Male
    First Name:
    Krister
    Walnut Grove, CA
    Vehicle:
    2020 CrewMax
    Lifted, sliders, 35 X 12.5's, Evo Corse and more stuff coming
    Day 2 was guys vs. gals day. We had arranged for the wives to get massages and we headed out with the kids to go check out some areas @Sgt Grunt was familiar with. We stopped at a river and let the boys throw rocks and goof off and be boys.

    20200727_095257-1.jpg

    20200727_104719-1.jpg

    20200727_105043-1.jpg

    20200727_130812-1.jpg

    20200727_130735-1.jpg

    20200727_095340-1.jpg
     
    jpod, Rica25, Wallygator and 6 others like this.
  21. Aug 5, 2020 at 7:23 AM
    #21
    Black Wolf

    Black Wolf Bigfoot Hunter, Sasquatch too, but not Yeti

    Joined:
    Apr 20, 2014
    Member:
    #378
    Messages:
    40,012
    Gender:
    Male
    First Name:
    Matt
    Aurora CO
    Vehicle:
    2022 Nissan Frontier SV 4X4
    TuwaPro rack, Z1 Offroad stuff, NISMO suspension stuff, FlowmasterFX Extreme exhaust, AIS, OVS, J&L can, other goodies on the way
    So......when are you moving out here to Colorado?!
     
    TheBeast likes this.
  22. Aug 5, 2020 at 7:34 AM
    #22
    rochmpr

    rochmpr [OP] New Member

    Joined:
    Sep 8, 2019
    Member:
    #35834
    Messages:
    123
    Gender:
    Male
    First Name:
    Krister
    Walnut Grove, CA
    Vehicle:
    2020 CrewMax
    Lifted, sliders, 35 X 12.5's, Evo Corse and more stuff coming
    Believe me, I would love to move out of California to a state that is not so Liberal and so high in taxes. There are a couple I would consider, but Colorado is not one of them, despite how spectacular the scenery is there.
     
  23. Aug 5, 2020 at 7:51 AM
    #23
    Black Wolf

    Black Wolf Bigfoot Hunter, Sasquatch too, but not Yeti

    Joined:
    Apr 20, 2014
    Member:
    #378
    Messages:
    40,012
    Gender:
    Male
    First Name:
    Matt
    Aurora CO
    Vehicle:
    2022 Nissan Frontier SV 4X4
    TuwaPro rack, Z1 Offroad stuff, NISMO suspension stuff, FlowmasterFX Extreme exhaust, AIS, OVS, J&L can, other goodies on the way
    Colorado is changing too. Getting kind of expensive when it comes to housing among other things. Nice CO pics though!
     
  24. Aug 5, 2020 at 8:00 AM
    #24
    rochmpr

    rochmpr [OP] New Member

    Joined:
    Sep 8, 2019
    Member:
    #35834
    Messages:
    123
    Gender:
    Male
    First Name:
    Krister
    Walnut Grove, CA
    Vehicle:
    2020 CrewMax
    Lifted, sliders, 35 X 12.5's, Evo Corse and more stuff coming
    Day 3 - We had planned to run Imogene Pass, but that evening, we found out there was a rock slide closing both Imogene Pass and Black Bear Pass from all of the rain due to thunderstorms. So we headed South through Silverton and then to Durango Mountain Resort and took a trail from there over to Telluride. It was a pretty much a forest service road with some great views.

    20200728_104912-1.jpg

    20200728_114852-1.jpg

    20200728_115259-1.jpg

    115961038_4406783509333479_5489916277547668977_n.jpg

    20200728_151738-1.jpg
     
    saybng, TK1979, Skey44 and 8 others like this.
  25. Aug 5, 2020 at 8:52 AM
    #25
    Tundraman479

    Tundraman479 New Member

    Joined:
    Mar 9, 2018
    Member:
    #13435
    Messages:
    123
    Gender:
    Male
    First Name:
    Barry
    Arkansas
    Vehicle:
    2018 Tundra CM Limited TRD Offroad Cement
    5100's top setting 295/70/18 Cooper Discoverer AT4's
    Looks awesome! Great pics and super nice truck!
     
    rochmpr[OP] likes this.
  26. Aug 24, 2020 at 7:43 AM
    #26
    rochmpr

    rochmpr [OP] New Member

    Joined:
    Sep 8, 2019
    Member:
    #35834
    Messages:
    123
    Gender:
    Male
    First Name:
    Krister
    Walnut Grove, CA
    Vehicle:
    2020 CrewMax
    Lifted, sliders, 35 X 12.5's, Evo Corse and more stuff coming
    About a month ago, I bought an ARB Twin Compressor, 4Wheel Parts had them for 10%, so I could pass up the deal. But, as typical, you buy one thing and you have to buy a lot of other things to get the install complete. I then ordered the Rago Fab mount and some fittings, universal quick connect fitting and a distribution block for future expansion. In order to mount the distribution block, I had to fab up a mount to attach to the Rago bracket. After that, the install is pretty straight forward.

    20200822_125903-1.jpg
     
    Wallygator, TOYOTARIG and Yzed608 like this.
  27. Aug 24, 2020 at 8:20 AM
    #27
    rochmpr

    rochmpr [OP] New Member

    Joined:
    Sep 8, 2019
    Member:
    #35834
    Messages:
    123
    Gender:
    Male
    First Name:
    Krister
    Walnut Grove, CA
    Vehicle:
    2020 CrewMax
    Lifted, sliders, 35 X 12.5's, Evo Corse and more stuff coming
    In addition to completing the compressor install, I also started work on modifying the Rago dash mount I also purchased. The mount is good, just missing some important options, mostly power. Since I was going to be drilling and cutting the mount, I opted for the blemish model to save a buck. The other thing while modifying the mount for my needs is taking into consideration the install of a HAM radio. I previously had the Yaesu FTM-400, so I purchased another one with all of the parts to install and get it functioning. So the plan is to have the head unit mounted on the dash mount, which requires a cable to rub back to the base unit. In order to keep the dash clean, I purchased an RJ-12 panel mount jack https://www.amazon.com/gp/product/B07KYRH49T/ref=ppx_yo_dt_b_asin_title_o06_s01?ie=UTF8&psc=1 to install in the Rago dash plate and then use a short patch cord from the face plate to this jack. This jack will then run back to the base unit in the dash.

    20200822_125838-1.jpg

    The next thing was to line everything up on the dash to make sure of placement prior to drilling. Drilling the hole for the USB was easy, used a 1-1/8" hole saw, no problem. I then marked out the location for the RJ-12 and thought this would be easy with a Dremmel and a cut of wheel Te hole was just under 1" square. I go so far before the Dremmel stopped cutting. Plan B, I drilled a hole and got out the jig saw and then rummaged through my blades. Plenty for wood and one used metal bit. Being about an hour round trip from the hardware store, I wet after it with the only bit I had and slowly made some ugly cuts to get the rough hole. I then had to go old school and work at finessing the hole with a file to clean it up and get the jack to fit.

    20200822_125815-1.jpg

    20200822_125745-1.jpg

    Since the Rago mount does not come with a backing plate, I then made one taking into consideration the power and data ports. I also had to modify the Rago mounting base. After that, I rattle canned everything with a nice coat of satin black paint and moved on to some wiring prep work.

    20200822_125728-1.jpg

    For making the install and removal of the plate easier, I added a connector in line to the USB port so you can connect / disconnect in the radio space of the dash.

    20200823_112457-1.jpg

    Now I am just waiting for the radio and some additional electrical parts to continue and complete this project.
     
  28. Aug 24, 2020 at 4:17 PM
    #28
    Yzed608

    Yzed608 New Member

    Joined:
    Jul 1, 2017
    Member:
    #8351
    Messages:
    980
    Gender:
    Male
    Wisconsin
    Nice! I always like to see custom stuff done.
     
    rochmpr[OP] likes this.
  29. Sep 3, 2020 at 2:33 PM
    #29
    rochmpr

    rochmpr [OP] New Member

    Joined:
    Sep 8, 2019
    Member:
    #35834
    Messages:
    123
    Gender:
    Male
    First Name:
    Krister
    Walnut Grove, CA
    Vehicle:
    2020 CrewMax
    Lifted, sliders, 35 X 12.5's, Evo Corse and more stuff coming
    Still waiting for miscellaneous parts and pieces to come in, but I purchased a Rago antenna mount and made a few changes to that as well. It comes with standard allen head fasteners, and with the tail gate, I thought it would be better to have tapered fasteners, so I tapered the opening. Also, a UHF ham radio mount has a larger mount, so I had to drill that our as well. I then mounted the bracket and realized that cable routing was going to be challenging since it would not cleanly fit between the tailgate and the bed side. Since I had the tail light out to mount the bracket and noticed all the room behind there, plus I was planning to route under the body to the engine bay and then into the cab, I decided that notching the tail light would be a good option for the cable routing. I broke out the grinder and put a V notch into the top of the tail light large enough for the cable to cleanly pass through without pinching the cable. I now have the cable routed to the engine bay, ham radio base mounted and dash torn apart. Nothing like progress, no matter how slow.

    20200902_185931-1.jpg

    20200902_185915-1.jpg
     
  30. Sep 8, 2020 at 7:49 AM
    #30
    rochmpr

    rochmpr [OP] New Member

    Joined:
    Sep 8, 2019
    Member:
    #35834
    Messages:
    123
    Gender:
    Male
    First Name:
    Krister
    Walnut Grove, CA
    Vehicle:
    2020 CrewMax
    Lifted, sliders, 35 X 12.5's, Evo Corse and more stuff coming
    Well, it looks like I got ahead of myself trying to work from memory on my previous install of the FTM-400. So when the radio arrive, I learned some lessons about the various phone / data connectors.

    1) The wire from the head set to the base is a 4P4C, but it is not an RJ-11/RJ-12 connector. It is the smaller RJ-9 connector.
    2) The wire from the mic is not an RJ-45 (8P8C), it is an RJ-12 (6P6C) connector

    So, with this new plethora of information, I did a little cursing since I had already installed the RJ-12 connector in the Rago dash mount and purchased a RJ-45 panel mount coupler for the dash to connect the mic. I then began scouring Amazon and the internet for various parts or adapters to make what I have work, and since the current RJ-12 connector was epoxied into the Rago mount, I had to get creative. So, below is what I ended up doing;

    1. Took the cable that came with the radio that goes from the head to the base and cut it into two pieces and put an RJ-11 connector on the cut ends of the cable. One length was about 10" long to go from the head to the connector on the dash. The other piece went from an RJ-12 coupler to to the head unit.
    2. Bought a Female X Female RJ-12 coupler that attached the the end of the RJ-12 jack pigtail mounted in the dash mount and then to the other length of factory cable (from above)
    3. The RJ-45 panel mount coupler can have the keystone connector swapped out to an RJ-12, so I bought an RJ-12 keystone and swapped it out
    4. With the connectors to the keystone, the required hole in the dash would be to large to utilize the screws, so I cut all of the connectors off to make it more slim and then epoxied the keystone to the panel mount face. After this, I was able to run all the cables and get a clean looking install look3
    This project also led to some other work, such as additional power and mounting of the head piece for the HAM radio. I will cover those in the following posts.

    RJ-12 Panel Mount for mic
    20200905_081939-1.jpg

    RJ-12 - Top with all connectors vs. bottom with connectors trimmed off and epoxied
    20200905_122013-1.jpg

    20200905_121959-1.jpg

    RJ-12 in dash for mic (Need to find small screws to finalize install)
    20200906_112632-1.jpg

    RJ-12 connector for Head to connect.
    20200906_112647-1.jpg
     

Products Discussed in

To Top