1. Welcome to Tundras.com!

    You are currently viewing as a guest! To get full-access, you need to register for a FREE account.

    As a registered member, you’ll be able to:
    • Participate in all Tundra discussion topics
    • Transfer over your build thread from a different forum to this one
    • Communicate privately with other Tundra owners from around the world
    • Post your own photos in our Members Gallery
    • Access all special features of the site

Front end kit replacement order?

Discussion in '1st Gen Tundras (2000-2006)' started by ifox, Jun 24, 2020.

  1. Jun 24, 2020 at 5:13 PM
    #1
    ifox

    ifox [OP] New Member

    Joined:
    Feb 4, 2020
    Member:
    #42177
    Messages:
    13
    Gender:
    Male
    Vehicle:
    2001 tundra v8 4.7 4wd
    2.5 in lift kit
    Hi again everyone. So I’m replacing my whole front end kit and I’m wondering the correct and best order to do it it. I have a 2001 4.7 4wd access cab i have a 2.5 inch lift kit but I am replacing my spacers with full length bike trim struts to give me my lift and jba upper control arms which will include the upper balljoint already set in them. So for upper and lower control arms, lower ball joint, inner and outer tie rod ends and struts, what order of disassembly and reassembly can anyone recommend, any recommendations other than that would be greatly appreciated as well thank yall
     
  2. Jun 24, 2020 at 7:38 PM
    #2
    ajmorenoaz

    ajmorenoaz New Member

    Joined:
    Jun 16, 2020
    Member:
    #48013
    Messages:
    81
    Gender:
    Male
    Vehicle:
    2000 Tundra Sr5
    Work from the bottom up and make sure you release the sway bar before you lift the truck or it’ll become tough later on
     
    Darkness likes this.
  3. Jun 25, 2020 at 9:38 AM
    #3
    Darkness

    Darkness Allergic to white

    Joined:
    Jul 23, 2018
    Member:
    #17315
    Messages:
    9,976
    Gender:
    Male
    First Name:
    Luis
    All over SoCal
    Vehicle:
    The darkest
    It's really dark
    How I would approach it, if you have 4wd you'll have extra steps that I wouldn't know about, in that case it may be easier to leave the spindle attached at top or bottom during this.

    This is at your own risk, if you aren't comfortable then pay a shop.
    1. Remove the sway bar end links while truck is on the ground
    2. Raise the front of the truck safely on stands
    3. Remove the lower shock bolt
    4. Remove the 3 upper shock bolts and pull out the coilover assembly, maybe mark the driver side one so you don't mix them up
    5. Remove and hang calipers by frame carefully
    6. Remove the rotors, keep track of which side goes where
    7. Loosen the nut connecting the tie rod ends, then remove the nut on outside tie rod end connecting to the ball joint
    8. Spin the outside tie rod end off, count and write down how many turns it takes, when you put new ones on theyll need the same number of turns for preliminary alignment
    9. Back the nut off on upper ball joint, don't remove. Use a pickle fork to release the upper arm from the joint, it will pop.
    10. Back the nut off on the lower ball joint, don't remove the nut, use a pickle fork on that as well, it is hard but it will release.
    11. Disconnect ABS sensor
    12. Now remove the nut on upper joint, then lower joint, remove spindle.
    13. Put spindle in a vise and use a ball joint press tool to pop that sonvabeesh out.
    14. Lower ball joint is held in with 4 small bolts, remove those carefully and pull off the joint, replace with new joint and new bolts, I use loctite
    15. Go back to your truck and remove that upper arm.
    16. Install your new arm, put the nut on the bolt but do not torque down that long bolt that goes through the pivot yet.
    17. Put your spindle in, lower ball joint first, tighten the nut and install the pin.
    18. Put your upper ball joint in
    19. Connect ABS sensor
    20. Spin your new outside tie rod on, connect it to lower ball joint and torque the nut, I sort the pin, then snug the lock nut where the rod spins on
    21. Reinstall coilovers, rotors, calipers, wheels
    22. Lower the truck, get in the bed and jump up and down, the idea is th bounce the truck a bit so the front arm bushings settle
    23. Now tighten upper arm pivot bolt to torque specs.
    24. Go for a drive, get home safe, crack a beer and be proud. Schedule an alignment.

    Tip: get a paint marker or even some nail polish and mark every bolt after you torque it to spec.
     
    MrAristo, halfbid, revtune and 2 others like this.
  4. Jun 25, 2020 at 11:02 AM
    #4
    bmf4069

    bmf4069 Yup, that's car parts in a dishwasher

    Joined:
    Sep 1, 2018
    Member:
    #18880
    Messages:
    7,340
    Gender:
    Male
    TX
    Vehicle:
    02 AC sr5 4wd v8
    Very nice! Only thing on 4wd is before you remove the spindle you have to remove the 35mm axle nut and cotter pin. Then I always use some #12 wire (because electrician. Coat hanger or bungee cords will work) to hold it up.

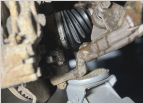
    Heres a 4wd spindle removed:

    20200208_180111.jpg

    20200208_181932.jpg

    And with the spindles out:

    20200208_180230.jpg
     

Products Discussed in

To Top