1. Welcome to Tundras.com!

    You are currently viewing as a guest! To get full-access, you need to register for a FREE account.

    As a registered member, you’ll be able to:
    • Participate in all Tundra discussion topics
    • Transfer over your build thread from a different forum to this one
    • Communicate privately with other Tundra owners from around the world
    • Post your own photos in our Members Gallery
    • Access all special features of the site

DIY: Steering Shaft Seal

Discussion in '1st Gen Tundras (2000-2006)' started by bajaphile, Jun 29, 2019.

  1. Jun 29, 2019 at 7:06 PM
    #1
    bajaphile

    bajaphile [OP] New Member

    Joined:
    Jun 7, 2019
    Member:
    #31590
    Messages:
    93
    Gender:
    Male
    Solana Beach, Ca
    Vehicle:
    2001 4x4 Limited
    Icon Coilovers, Icon AALs, JBA headers, 285/75r16 BFG KO2s
    Doing a first "how to" on this forum. The steering shaft seal is a pretty straightforward remove and replace to really make a difference in reducing engine noise getting into the cab. When I first drove my Tundra I thought it had a minor exhaust leak. After checking with a shop vac and smoke machine, I realized there was no leak. Doing some searches, I found a few threads on this steering shaft seal. A lot of people stated that they had been tracking down an exhaust leak at the manifolds for years only to find out it was just this seal which had fallen apart.

    Parts required: Steering shaft seal PN 45292-35090

    1) Park truck with wheels going straight ahead and steering wheel centered. Pull out key and lock your steering wheel so it doesn't turn when doing the maintenance. Throw your new seal in the freezer.

    2) Pull back carpet around the area behind the brake pedal where the steering shaft intercepts the firewall.

    3) Remove felt cover, held by Velcro around the steering shaft at firewall.

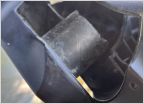
    4) Remove 3 10mm head bolts that hold metallic cover on around the steering shaft. What you'll see is the bronze bushing (seal) you'll be replacing: (Notice the rubber around the shaft is rotted and missing).

    20190629_114637.jpg

    5) Underneath the vehicle, all you'll need to do is remove the steering shaft coupler that attaches the steering shaft to the rack and pinion. This only requires removing two 12mm bolts.

    20190629_184053.jpg

    6) Once you've removed those, it's a good idea to mark the steering coupler so you know which way to put it back on.

    20190629_121037.jpg

    7) Now it's time to take the coupling off. You should be able to hit the coupler up off the rack and pinion with a brass drift, dowel or punch. The idea here is to slide it up the steering shaft. You may need to lube the splines a bit. My dad's truck here has some rust issues and it took a few good whacks to get it to move.

    20190629_121113.jpg

    8) Once the coulpler is up enough, you can pull it off the rack and pinion splines, then back down towards you and off completely. If you have to, you can hit it down with a dowel from the top of the engine. There is plenty of room to do so.

    20190629_124720.jpg

    9) From inside the vehicle, you can simply tap out the old seal down towards the engine/firewall. I've done this 2x now and it was very simple. No puller required. Old vs New seal:
    20190629_125102.jpg

    10) Using dielectric/silicone grease, or whatever grease you find suitable for rubber contact, you can grease up your steering shaft so the new seal can slide up and then eventually slide against for the next 100k miles.

    11) Pull the seal out of the freezer and add some grease to it. You can slide it up with your hands from the bottom and push it up into the firewall hole. It should stay there while you grab a longer wooden dowel and tap it into place.

    12) Put steering coupler back on, tighten the 12mm bolts, put together the inside covers and enjoy a new sounding truck! The difference in sound is remarkable! Very highly recommended. By the way, you can inspect your seal by looking up from beneath the truck with a flashlight. Easy to check, easy to replace and well worth the 1-2hrs of work, if that!
     
    Bob, BEATO, FrenchToasty and 26 others like this.
  2. Jun 29, 2019 at 8:34 PM
    #2
    Pudge

    Pudge Super Secret Elite Member #7

    Joined:
    Nov 8, 2016
    Member:
    #5136
    Messages:
    9,498
    Gender:
    Male
    First Name:
    Sean
    CT
    Vehicle:
    2015 Blue Ribbon Platinum
    TRD PRO grille, OCD consol organizers, DIY wireless phone charger, 33" Michelin Defender LTX MS, Bak revolver X2 tonneau, weathertech liners, 20% tints. DIY pop n lock, 2018 LED headlights, morimoto fogs, TRD shift knob, DirtyDeeds 8"BAM exhaust, kenwood HU,JL amp, Tech12volts Tundra full speaker upgrade w/sub, Swing case, and lots of fluid film
    Nice write up :thumbsup:
     
    MS22 and Professional Hand Model like this.
  3. Jun 30, 2019 at 5:21 AM
    #3
    Professional Hand Model

    Professional Hand Model A.K.A ‘Golden Hands’

    Joined:
    Apr 29, 2018
    Member:
    #14878
    Messages:
    15,007
    Gender:
    Male
    First Name:
    Fred
    ‘Somewhere’... a State of Mind
    Vehicle:
    2002 Tundra SR5 4WD 4.7L AC Silver Metallica
    Hand Protectors
    Sweet instructional. Probably stops the winter cold drafts, as well.
     
    NewImprovedRon likes this.
  4. Jun 30, 2019 at 5:44 AM
    #4
    Professional Hand Model

    Professional Hand Model A.K.A ‘Golden Hands’

    Joined:
    Apr 29, 2018
    Member:
    #14878
    Messages:
    15,007
    Gender:
    Male
    First Name:
    Fred
    ‘Somewhere’... a State of Mind
    Vehicle:
    2002 Tundra SR5 4WD 4.7L AC Silver Metallica
    Hand Protectors
    If I may, here is a schematic for your sweet repair to give us a big picture look.

    upload_2019-6-30_8-44-27.jpg
     
  5. Jun 30, 2019 at 6:27 AM
    #5
    bajaphile

    bajaphile [OP] New Member

    Joined:
    Jun 7, 2019
    Member:
    #31590
    Messages:
    93
    Gender:
    Male
    Solana Beach, Ca
    Vehicle:
    2001 4x4 Limited
    Icon Coilovers, Icon AALs, JBA headers, 285/75r16 BFG KO2s
    Yep! That is the one. Thanks for adding.
     
  6. Jul 1, 2019 at 7:18 AM
    #6
    00TundraZ

    00TundraZ New Member

    Joined:
    Mar 20, 2019
    Member:
    #27848
    Messages:
    266
    Gender:
    Male
    First Name:
    Zac
    Fort Wayne, Indiana
    Vehicle:
    2000 SR5 AC 4x4
    Great write-up! Concise, simple instructions, and great pictures.

    Thank you for taking the extra time to do this!
     
  7. Sep 9, 2019 at 6:38 PM
    #7
    Jeepmann

    Jeepmann New Member

    Joined:
    Aug 29, 2019
    Member:
    #35317
    Messages:
    1
    Gender:
    Male
    Very Helpful thanks
     
    bajaphile[OP] likes this.
  8. Mar 22, 2020 at 1:37 PM
    #8
    Alltimehigh

    Alltimehigh New Member

    Joined:
    Mar 28, 2019
    Member:
    #28302
    Messages:
    91
    Doing this today and cant make the old seal budge by trying to tap it out from the top. Any tips?

    Ill try to oil it up somehow in the meantime.

    Edit. Done. Not tough at all. Great writeup!
     
    Last edited: Mar 22, 2020
    NewImprovedRon likes this.
  9. May 14, 2020 at 6:27 AM
    #9
    FirstGenVol

    FirstGenVol Brake Czar

    Joined:
    Dec 13, 2018
    Member:
    #22934
    Messages:
    12,915
    East TN
    Vehicle:
    2002 AC
    Decided to check mine this morning. I'm pretty sure my exhaust manifolds need to be replaced but I bet this isn't doing me any favors either.


    0514200915a~2.jpg
     
    Hooptytrix and bmf4069 like this.
  10. May 14, 2020 at 8:47 AM
    #10
    Professional Hand Model

    Professional Hand Model A.K.A ‘Golden Hands’

    Joined:
    Apr 29, 2018
    Member:
    #14878
    Messages:
    15,007
    Gender:
    Male
    First Name:
    Fred
    ‘Somewhere’... a State of Mind
    Vehicle:
    2002 Tundra SR5 4WD 4.7L AC Silver Metallica
    Hand Protectors
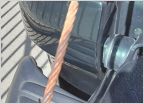
    Latex Acrylic Caulk in a squeeze tube with Gorilla Arm Technique from under truck. Fixed!
     
  11. May 17, 2020 at 6:24 PM
    #11
    Blueranger501

    Blueranger501 New Member

    Joined:
    Feb 23, 2020
    Member:
    #43069
    Messages:
    110
    I though my manifolds needed replacing. Got headers and noise was still there.

    Then I discovered the steering seal, whoops! At least I got headers out of it...
     
    bmf4069 and FirstGenVol like this.
  12. May 19, 2020 at 4:10 PM
    #12
    FirstGenVol

    FirstGenVol Brake Czar

    Joined:
    Dec 13, 2018
    Member:
    #22934
    Messages:
    12,915
    East TN
    Vehicle:
    2002 AC
    For anyone that does this job, you'll need a punch or dowel that's around 20-24" long in order to tap in the new seal.
     
  13. May 19, 2020 at 4:30 PM
    #13
    Professional Hand Model

    Professional Hand Model A.K.A ‘Golden Hands’

    Joined:
    Apr 29, 2018
    Member:
    #14878
    Messages:
    15,007
    Gender:
    Male
    First Name:
    Fred
    ‘Somewhere’... a State of Mind
    Vehicle:
    2002 Tundra SR5 4WD 4.7L AC Silver Metallica
    Hand Protectors
    Cab will be much quieter now. Less breezy on windy days in the winter, too. How much was the seal?
     
  14. May 19, 2020 at 4:40 PM
    #14
    FirstGenVol

    FirstGenVol Brake Czar

    Joined:
    Dec 13, 2018
    Member:
    #22934
    Messages:
    12,915
    East TN
    Vehicle:
    2002 AC
    I didn't drive it yet, but I did start and move the truck. I could already tell a difference.

    The part was only $13.00 or so. I combined it with the parts for the CV upgrade so I didn't get crushed with shipping on one part. Cool Springs Toyota is always around $8-10 to ship small items.
     
  15. Jun 12, 2020 at 12:17 PM
    #15
    FirstGenVol

    FirstGenVol Brake Czar

    Joined:
    Dec 13, 2018
    Member:
    #22934
    Messages:
    12,915
    East TN
    Vehicle:
    2002 AC
    @Pinay can we make this a sticky and un-sticky my PCV valve thread? This one is a lot more sticky worthy. I think a lot more people have this problem and don't realize it.
     
  16. Jun 12, 2020 at 12:22 PM
    #16
    Hooptytrix

    Hooptytrix Squeaky Chicken

    Joined:
    Nov 12, 2016
    Member:
    #5179
    Messages:
    1,627
    Gender:
    Male
    Dirty South
    Vehicle:
    2000 AC 4x4, 2001 AC 4x4 Sold. 2005 DC SR5 2WD
    This is why I the forum stays open in my browser, you never know what you will learn
     
  17. Jun 14, 2020 at 5:19 PM
    #17
    mscribellito

    mscribellito New Member

    Joined:
    Jul 26, 2019
    Member:
    #33724
    Messages:
    50
    Gender:
    Male
    First Name:
    Michael
    Vehicle:
    2006 White Regular Cab Tundra
    I replaced mine. What a world of difference. No more TICK TICK TICK.
     
  18. Jun 19, 2020 at 3:08 PM
    #18
    Basstoyota

    Basstoyota New Member

    Joined:
    Jun 19, 2020
    Member:
    #48174
    Messages:
    4
    Gender:
    Male
    First Name:
    Nick
    Vehicle:
    05 dc limited
    I just tried this. I ended up not being able to free the shaft splines out of the holder. Now my steering wheel is crooked from reefing on it too hard :(.
     
  19. Jun 19, 2020 at 3:10 PM
    #19
    Professional Hand Model

    Professional Hand Model A.K.A ‘Golden Hands’

    Joined:
    Apr 29, 2018
    Member:
    #14878
    Messages:
    15,007
    Gender:
    Male
    First Name:
    Fred
    ‘Somewhere’... a State of Mind
    Vehicle:
    2002 Tundra SR5 4WD 4.7L AC Silver Metallica
    Hand Protectors
    What are you going to do now?
     
  20. Jun 19, 2020 at 3:12 PM
    #20
    bmf4069

    bmf4069 Yup, that's car parts in a dishwasher

    Joined:
    Sep 1, 2018
    Member:
    #18880
    Messages:
    7,273
    Gender:
    Male
    TX
    Vehicle:
    02 AC sr5 4wd v8
    Take it back apart and center the wheel. Then put it back together.
     
    Basstoyota[QUOTED] likes this.
  21. Jun 19, 2020 at 3:21 PM
    #21
    FirstGenVol

    FirstGenVol Brake Czar

    Joined:
    Dec 13, 2018
    Member:
    #22934
    Messages:
    12,915
    East TN
    Vehicle:
    2002 AC
    You're gonna want to soak those splines in something overnight. Whatever you have on hand. Giver a good spray.
     
    Last edited: Dec 9, 2020
    Basstoyota[QUOTED] likes this.
  22. Jun 19, 2020 at 3:28 PM
    #22
    Basstoyota

    Basstoyota New Member

    Joined:
    Jun 19, 2020
    Member:
    #48174
    Messages:
    4
    Gender:
    Male
    First Name:
    Nick
    Vehicle:
    05 dc limited
    I used some pb but only let it sit for 20 mins or so. I will try to recenter the wheel. But also, now my vsc lights are on which just makes me wonder what could have caused that? Hmm
     
  23. Jun 19, 2020 at 3:34 PM
    #23
    FirstGenVol

    FirstGenVol Brake Czar

    Joined:
    Dec 13, 2018
    Member:
    #22934
    Messages:
    12,915
    East TN
    Vehicle:
    2002 AC
    I'd disconnect the battery and see if it goes off. That's odd. But you should be able to realign it tomorrow unless you hit it so hard you bent it. I doubt you did.
     
  24. Jun 19, 2020 at 10:19 PM
    #24
    Tekem

    Tekem New Member

    Joined:
    Jun 19, 2020
    Member:
    #48191
    Messages:
    2
    Gender:
    Male
    Vehicle:
    White Tundra/Sequoia limited 4x4
    Black rhino wheels, bilstein 5100 shocks and struts.
    Battery disconnect wont fix that steering angle sensor code. If centering the steering doesnt fix, you will need to use a paper clip and jumper the obdII at specific points for your truck.

    If its a 2002, tc and cg, turn the ignition switch to the on position, and press the brake pedal down 8 times within 5 seconds. Then turn the key to the off position and remove the jumper.

    If it still doesn't go away, you will need to run thru a list of precheck steps to clear the code as you have to demonstrate to the ECU the sensors are working...

    I can send you a link to the precheck or you can Google it for tundra/sequoia gen 1
     
  25. Jun 20, 2020 at 6:07 AM
    #25
    Professional Hand Model

    Professional Hand Model A.K.A ‘Golden Hands’

    Joined:
    Apr 29, 2018
    Member:
    #14878
    Messages:
    15,007
    Gender:
    Male
    First Name:
    Fred
    ‘Somewhere’... a State of Mind
    Vehicle:
    2002 Tundra SR5 4WD 4.7L AC Silver Metallica
    Hand Protectors
    Awesome info! Post up the link here for future reference. Better yet screen grab so we can see it without clicking.
     
    Basstoyota likes this.
  26. Jun 20, 2020 at 6:19 AM
    #26
    Tekem

    Tekem New Member

    Joined:
    Jun 19, 2020
    Member:
    #48191
    Messages:
    2
    Gender:
    Male
    Vehicle:
    White Tundra/Sequoia limited 4x4
    Black rhino wheels, bilstein 5100 shocks and struts.
  27. Jun 20, 2020 at 7:33 AM
    #27
    Basstoyota

    Basstoyota New Member

    Joined:
    Jun 19, 2020
    Member:
    #48174
    Messages:
    4
    Gender:
    Male
    First Name:
    Nick
    Vehicle:
    05 dc limited
    Fixed. I hate rust. I was able to get it slid up enough to straighten the wheel. Vsc lights are staying off. Could not get the shaft to slide down and off to get the new seal on but oh well! Thanks for the help
     
  28. Jun 20, 2020 at 7:41 AM
    #28
    Professional Hand Model

    Professional Hand Model A.K.A ‘Golden Hands’

    Joined:
    Apr 29, 2018
    Member:
    #14878
    Messages:
    15,007
    Gender:
    Male
    First Name:
    Fred
    ‘Somewhere’... a State of Mind
    Vehicle:
    2002 Tundra SR5 4WD 4.7L AC Silver Metallica
    Hand Protectors
    Squeeze some caulk up into the old seal from under the truck. If your seal still has rubber lips and hasn’t completely disintegrated the caulk will hold and seal the gap. Silicone or Acrylic squeeze tube with Gorilla Arm Technique. Clean well before caulking.
     
    Dannydirtyfingers likes this.
  29. Jun 27, 2020 at 9:03 PM
    #29
    Surf_spear_Mex

    Surf_spear_Mex New Member

    Joined:
    Jun 10, 2020
    Member:
    #47776
    Messages:
    217
    Gender:
    Male
    First Name:
    Patrick
    Vehicle:
    05 tundra ac
    Ordered my part, can't wait to get the new one on. Was hearing a ticking noise for the last few weeks (just bought it) figured I had an exhaust leak. I'll report back with results. Thank you for taking the time to write this up OP.
     
  30. Aug 30, 2020 at 7:12 AM
    #30
    FLJ23

    FLJ23 New Member

    Joined:
    Apr 29, 2020
    Member:
    #45693
    Messages:
    14
    Gender:
    Male
    SoCal
    Vehicle:
    2004 DC 4x4
    Stock for now

    Nice write up? Would this also cause play in steering wheel?
    I’ve replaced tie rods, sway bar bushings, end links. My rack bushings Are good and tight but still feels loose at steering wheel.
     
    Beatrice6028 likes this.

Products Discussed in

To Top