

-
Welcome to Tundras.com!
You are currently viewing as a guest! To get full-access, you need to register for a FREE account.
As a registered member, you’ll be able to:- Participate in all Tundra discussion topics
- Transfer over your build thread from a different forum to this one
- Communicate privately with other Tundra owners from around the world
- Post your own photos in our Members Gallery
- Access all special features of the site
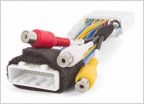 AV Video / AUX In for Entune Unit - Any Experience w/ This Cable?
 Floating head unit suggestions
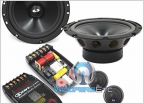 1st Gen Door speaker upgrade? Whatcha got?
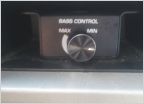 Where did you install your bass knob?
 Best head unit for complete system upgrade
 Swapping out Head Units
Upgrading the Audio - 2015 TRD Pro
Discussion in 'Audio & Video' started by MrTuRDPro, Jan 24, 2015.
Page 1 of 3
Page 1 of 3

