1. Welcome to Tundras.com!

    You are currently viewing as a guest! To get full-access, you need to register for a FREE account.

    As a registered member, you’ll be able to:
    • Participate in all Tundra discussion topics
    • Transfer over your build thread from a different forum to this one
    • Communicate privately with other Tundra owners from around the world
    • Post your own photos in our Members Gallery
    • Access all special features of the site

How To: 1st Gen Tundra HID Retrofit w/ Mini H1 7.0 Bi-Xenon Projectors

Discussion in '1st Gen Tundras (2000-2006)' started by minter66, Mar 1, 2019.

  1. Mar 1, 2019 at 7:19 AM
    #1
    minter66

    minter66 [OP] 2007 TSS CrewMax

    Joined:
    Jan 29, 2019
    Member:
    #25273
    Messages:
    502
    So my dad's birthday is coming up, and so I came up with an idea to retrofit the headlights in his 2000 Tundra since he is in is late 60's and seeing at night with yellow/hazed over halogens is probably pretty hard.

    I have documented everything I have done, so hopefully anyone wanting to do exactly what I did, can have an outlined path to follow.

    Obligatory disclaimer: I am not responsible for you destroying your truck, your headlights, your electrical system, your dog or your cat by you following these instructions. These are to visually assist you on your Bi-Xenon journey. Use these instructions at your own risk.

    Parts List:

    $270 - Morimoto Mini H1 Bi-Xenon Projectors
    (Full package here with HID Kit: Blam) You can buy the projectors and HID kit separately if you want to budget over multiple months. As long as the invoice is over $100, shipping is free.

    $61.60 OEM / Used Tundra 2000-2004 headlights. I found a driver & passenger headlight on ebay for $30.80 each, good condition, clear lenses, minor scratches that I would have to buff out. Compared to his yellow lenses, these look factory fresh.

    $8.99 - Nylon Auto Trim/Molding Kit. These were incredibly helpful in getting the headlights apart. The first headlight I used a metal paint scraper and it caused damage to the hot headlight plastic (not the lense). When I used these, no damage whatsoever. ( )

    Other common items:
    Oven
    Towel
    Cookie sheet
    Phillips screwdriver
    Slot screwdriver
    Gloves (the plastic / tray will be HOT)

    Step 1: Placing the headlight lens-down, remove the rubber boot cover, headlight bulbs and rubber breather tube. There is no need to remove plastic adjusting hardware on each side.

    Step 2: Remove the two metal clips on each side, you can do this now or after it comes out of oven, but best to do it now as its a race against time after it comes out of the oven.

    Step 3: Place headlight on a bath towel, which sits on top of a cookie sheet. I have heard of people using cardboard or carpet as well. At the temperatures we have the oven at, it doesn't matter too much.

    Step 4: Turn oven on and set to 225*. Let it fully pre-heat to the temperature. Place headlight inside and set for 10 minutes.

    Step 5: Wearing your gloves (I used cheap harbor freight mechanics gloves) remove the headlight from the oven. Leave the oven running at 225*. The best place I have found to start is the bottom, there is already a small gap there from the factory. Using your plastic pry bars, begin to separate the plastic by running the tool between the lens and plastic all the way around the headlight. Once a small gap is established around the entire headlight, return to your starting point and use prying/leverage to begin separating the plastic. The glue is a grey non-permaseal type.

    Factory gap:


    Initial "slice" into lens/glue:

    Begin of leverage/prying:

    You will most likely not get the headlight apart on the first try. The glue cools and hardens very quickly. I think my working time was less than 5 minutes. If the headlight starts to "freeze" up, stick it back in your still-running oven for another 10 minutes. Rule #1 of retrofits - DON'T FORCE ANYTHING.

    I was able to separate the lens from the housing after my second, 10-minute bake.

    Step 6: Separate the lens from the housing carefully. Try to keep the grey glue from touching the chrome. It will be visible if it does.

    Step 7:
    Remove the (3) black screws from the back of the housing. These secure the headlight bulb holder, and the reflector cap.

    Step 8: To remove the headlight reflector cap, pinch the "arms" and pull from the front of the headlight.

    Discard the screws and the cap, they will not be re-used.

    Step 9: I used mini-gatling gun shrouds, these have (4) screw holes that line up with the projector, there is only one way for them to line up. Get them lined up:


    And install the (4) blue screws:


    Your shroud is now mounted:


    I do not believe there is a need to JB weld these. The screws self-tap and are very secure when fully tightened. However, if you want to be 100% sure they won't come off, JB weld the shroud to the projector.

    Step 10: Remove the (3) small silver screws from the back of the projector. These hold the H1 bulb holder. Set the screws and bulb holder aside.

    Caution: Only use a small bit designed to fit small screws like this. They are very easy to strip out. Large bits will destroy these screws and then you just wasted a whole projector

    Step 11: Plug in the included wire harness to your projector. It can only fit one way. This is the most opportune time to test your Bi-Xenon shield. Using a 9v battery, hold one wire on the negative, and tap the other wire repeatedly (about 50 times) on the positive. You will hear a clicking/tapping as the shield moves up and down. This is to verify the shield is not defective and you will have the ability to use your brights.

    Step 12: Run your wires through the back of the reflector. I chose to run the wires through the small hole already available through the reflector.


    Step 13: Install your projector. I have included the picture below to show how it should be organized.

    Projector -> Rubber grommet (curved towards projector) -> 9003 Alignment Washer (curving away from projector) -> Crush nut. The alignment washer can only fit one way - it has a channel guide that prevents the projector from rotating.

    DO NOT FULLY TIGHTEN THE NUT - Once it is fully tightened down, it crushes the threads on the shaft. Finger tighten until you can align/level the headlights


    Step 14: Install the headlight bulb holder back onto the end of the projector and install the "U" shaped retainer into the holder as shown. I went ahead and inserted my wires into the wire connector and pushed the rubber grommets in.


    Repeat for the other headlight and then proceed to Part 2 (coming soon)

     
    Last edited: Mar 1, 2019
    This site contains affiliate links for which the site may be compensated.
    #1
    Riverdale21, allibubba, Voss and 7 others like this.
  2. Mar 1, 2019 at 7:22 AM
    #2
    Casper421

    Casper421 Toyota RidgeTrac driver!

    Joined:
    Jul 12, 2017
    Member:
    #8530
    Messages:
    4,130
    Gender:
    Male
    First Name:
    Chris
    In the woods
    Vehicle:
    06 DC
    Brings back memories. Nice work!
     
    Darkness likes this.
  3. Mar 1, 2019 at 7:29 AM
    #3
    mtntop

    mtntop New Member

    Joined:
    Jul 14, 2015
    Member:
    #1521
    Messages:
    363
    Gender:
    Male
    Colorado
    Vehicle:
    2004 4x4 Access Cab SR5
    awesome write up, thank for taking the time and effort to do this, I wish you were my son LOL. My future lighting plans include this retro fit.
     
    Voss and Darkness like this.
  4. Mar 1, 2019 at 7:30 AM
    #4
    minter66

    minter66 [OP] 2007 TSS CrewMax

    Joined:
    Jan 29, 2019
    Member:
    #25273
    Messages:
    502
    Part 2 -

    Finished it this weekend. No pun intended - night and day difference.

    Step 15

    Pop the hood, use a phillips screw driver to back out the plastic screw enough to where you can use a flat head to pop the retainer out.

    Use a 10mm socket to remove the black bolt.


    It took a bit of force and I was really apprehensive, but just push the corner lens towards the front of the car. I may have forward palm smacked it a few times.

    It's held in by plastic tabs that index into the fender. It will just pop out.


    Step 16

    Remove the corner light connector


    Step 17

    Remove the (3) 10mm nuts in yellow. Pull straight up and out - unplug the harness from the headlight bulb - set old headlight aside.


    Step 18

    Test mount your retrofitted headlights to make sure they look/fit correctly - also stand back and admire the new look


    Step 19

    Install your H1 HID bulbs into your housing.


    Lock them down with the bulb holder


    Step 20

    Compared to my Cavalier retrofit, there were multiple locations to mount controllers, ballasts and grounds. You may not prefer to do it how I did, I am just showing you where installed everything on my dads truck.

    Unbolt the battery tie down and shift the battery towards the engine. This frees up space to mount grounding points and a location to mount the Morimoto controller. The controller won't fit 100% straight up and down on the blue nut, I have mine angled about 45 degrees towards the firewall. Ground the drivers side harness to any of the grounding points on the fender. I chose the closest one to the headlight as the harness needs to stretch across the grill.


    Step 21

    I decided to just mount the ballast on top of the fuse box using 3M doublesided tape. It does not interfere with access to the fuse box. Be sure to wipe down/degrease the lid before using the tape.


    Step 22

    Install your igniters - I left these loose as they are sandwiched between the battery and headlight and don't have much play in them. They only can connect one way.

    Also, go ahead and connect the trucks 9003 plug into the matching 3-prong plug from the new harness. This does not power the headlights, it only signals the relay to power the headlights from the battery.

    Step 23

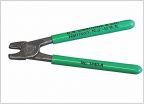
    Using wire snippers, remove these unnecessary connectors from the bulb harness:


    Step 24

    To mount the passenger side ballast, I drilled two small holes to the right of the passenger side headlight next to the radiator opening. I used small screws and washers to securely mount the ballast. I would recommend drilling a bit lower than where I did, as you have to unscrew the ballast to plug/unplug the connectors.


    Step 25

    I grounded the passenger side harness to the indicated fender bolt.


    Step 26

    TEST! With both headlights installed and all connections made, fire up your headlights and make sure both turn on. This is the first time to see if your projectors are level and balanced. With the lenses off, this is the most opportune time to hand-rotate your projectors to get them 100% level. It is still possible to rotate them from the back after baking/sealing, but its not as easy.

    Once you have them level, remove from the truck and I used a 1 1/16" socket to tighten and crush the nut on the back (this requires removing the H1 bulb holder and screws). Re-mount the headlight back onto the truck with the bulb holder installed and you can still tweak it left/right by hand. To ensure no slippage, I "spot-welded" the H4 adapter with JB weld to prevent it rotating due to road vibration, but honestly the crush washer does a great job securing it.


    Right projector was not level, left was spot on (I hairline adjusted these later)

    BE SURE TO TEST YOUR BRIGHTS AS WELL!!

    Step 27

    If everything fired up correctly and there are no issues, begin the process of securing wiring. I used zip ties. To secure the single wire running between the driver and passenger side, I zip tied it to the existing wire loom in the radiator support frame as shown:


    Step 28

    Remove both headlights, both bulbs, and the thin metal headlight retainer wire.

    Place onto preferred method for baking (mine was a metal pan with hand towels)


    Place lens loosely into headlight channel and then place into oven at 225* for 10 minutes. This softens the glue and makes it incredibly easy to just mash the lens back into the headlight channel. The glue will re-seal the headlight, but if you want to ensure it does not leak - add a little butyl glue into the channel before baking.

    Immediately after removing from oven, push lens into housing and be careful to not bow out the headlight housing channel, it is very malleable when the plastic is hot. If you do happen to bend something that is not supposed to bend, the plastic is pretty forgiving and you can just push it back in.

    Snap the two metal clips back on that you removed in step 2.

    Step 29

    Using a micro flat head or awl, carefully pry the plastic clips that are holding in your brights connectors. The wires now need to be run through the yellow grommet as shown below:


    Step 30

    It's a tight fit, and it looks like one of those rubber stress dolls when fully squeezed, but the yellow grommet will fit inside the OEM headlight seal. Snap everything onto the back of the headlight. In this photo I had it accidentally rotated to the right. There is a tab marked "top" - make sure that it is at the top.


    Step 31

    Don't forget the breather tube:


    Step 32

    Re-mount everything one final time, if happy, install all bolts and screws


    Step 33

    TEST DRIVE!!

    I suppose you could do this before baking with the lenses open, up to you.

    Go to a dark road where you can adjust your lights up and down. I basically stopped 20 feet from a parked car and adjusted to where my lights stopped just below the trunk lid. While not scientific - it works well.


    Now...the obligatory cutoff photos and final pictures.

    Final cutoff:


    Dark road turned to day:


    BEFORE:


    AFTER:


    FYI:
    I have no idea why it looks like there is a golf-ball sized chunk missing out of the bug deflector...as the photo below was taken AFTER this photo. Weird occular effect I guess.


    Hope this helps not only Tundras.com members, but also the thousands of guests or visitors that are searching google for " Minter66's super awesome guide to retrofitting a 1st gen (2000-2006) Toyota Tundra headlights with Morimoto 7.0 Mini H1's.
     
    Last edited: Mar 11, 2019
  5. Mar 1, 2019 at 11:37 AM
    #5
    Professional Hand Model

    Professional Hand Model A.K.A ‘Golden Hands’

    Joined:
    Apr 29, 2018
    Member:
    #14878
    Messages:
    15,007
    Gender:
    Male
    First Name:
    Fred
    ‘Somewhere’... a State of Mind
    Vehicle:
    2002 Tundra SR5 4WD 4.7L AC Silver Metallica
    Hand Protectors
    Pops must be stoked! I’d love to see the projectors in action, as I’ve considered doing this in the past and deemed it too much work and cost for the benefit.

    Still may do it do it.

    Some questions:

    1) Will the DTR still work (I like DTR and its an important safety feature)

    2) I understand the projectors are hard to adjust once installed. True or False?

    3) Plug and play or does one need to do wiring harnesses/relays/lunar module landings (joke), etc?

    I like the look of these. Most important thing is they need to perform beautifully for all the work and extreme cost associated. Thanks for the tutorial on these. You are a good son!
     
    Darkness likes this.
  6. Mar 1, 2019 at 12:59 PM
    #6
    minter66

    minter66 [OP] 2007 TSS CrewMax

    Joined:
    Jan 29, 2019
    Member:
    #25273
    Messages:
    502
    1) I do not believe his truck has daytime running lights ( I assume that is what you meant by DTR?). I borrowed his truck a LOT before I got my 2007, and never saw any indicator like my cavalier does (small green headlight icon that illuminates in drive/reverse). Maybe someone can inform me if the 2000 Tundra does have DRL's?

    2) As far as right/left or up/down adjustments, they are super easy to adjust and do so with the stock reflector adjusters. If you are referring to how to adjust the cutoff level if you didn't get it right the first time, I suppose you could try backing off the crush nut and rotating from the back of the headlight.

    3) Plug and play headlights sure...if you want to stick with Halogen H1 bulbs. If you want to really capture the power of these projectors, a H1 HID kit is your best bet. It comes all pre-wired in one wiring harness from The Retrofit source. Just need to run 1 wire to your battery, and ground 2 wires to the chassis. Everything else plugs in to the 9003 connector and the included HID ballasts (this will be in part 2 so you can better understand the process)

    I agree, for the effort I am putting in, these better work amazing - and based on pictures and video of H1 7.0's output, he will have amazing light output and color once I am done.

    I will have before/after photos as well as comparison photos between halogen and hid projectors. Maybe even a driving video.
     
  7. Mar 1, 2019 at 1:59 PM
    #7
    Professional Hand Model

    Professional Hand Model A.K.A ‘Golden Hands’

    Joined:
    Apr 29, 2018
    Member:
    #14878
    Messages:
    15,007
    Gender:
    Male
    First Name:
    Fred
    ‘Somewhere’... a State of Mind
    Vehicle:
    2002 Tundra SR5 4WD 4.7L AC Silver Metallica
    Hand Protectors
    The 02’ has daytime running lights. No indicator to let you know. They burn as soon as the ignition is fired. They also burn at 3/4 the light that the low beams burn.

    Thanks again for the post and pics.
     
  8. Mar 1, 2019 at 11:05 PM
    #8
    Darkness

    Darkness Allergic to white

    Joined:
    Jul 23, 2018
    Member:
    #17315
    Messages:
    9,976
    Gender:
    Male
    First Name:
    Luis
    All over SoCal
    Vehicle:
    The darkest
    It's really dark
    They will look amazing. I used a different model from retrofit source but I'm still happy every time I turn them on, especially on dark roads. Good job so far.
     
  9. Mar 11, 2019 at 8:25 AM
    #9
    minter66

    minter66 [OP] 2007 TSS CrewMax

    Joined:
    Jan 29, 2019
    Member:
    #25273
    Messages:
    502
    Part 2 done.

    Now...time to do my 2007 Tundra!
     
  10. Sep 28, 2019 at 10:31 AM
    #10
    merbesfield

    merbesfield New Member

    Joined:
    Sep 27, 2019
    Member:
    #36702
    Messages:
    23
    Gender:
    Male
    Would you consider offering this as a service?Nice work.
     
  11. Sep 30, 2019 at 10:10 AM
    #11
    minter66

    minter66 [OP] 2007 TSS CrewMax

    Joined:
    Jan 29, 2019
    Member:
    #25273
    Messages:
    502
    Thanks for the compliment, but unfortunately I won't be doing this as a service. The major thing is that this was done on my Dad's Tundra and I don't have a 1st gen at my disposal to test fit the headlights on to. I'd have to travel to his house every time and take apart his front end just to level/rotate each pair. Secondly, I only use OEM Toyota headlight housing and other than paying out the nose for brand new-old stock, I'd have to rely on eBay to find decent housings...

    Honestly, this was super easy, far easier than my 2nd gen retrofits. Go for it!
     
    This site contains affiliate links for which the site may be compensated.
    #11
    00TundraZ likes this.
  12. Sep 30, 2019 at 10:22 AM
    #12
    merbesfield

    merbesfield New Member

    Joined:
    Sep 27, 2019
    Member:
    #36702
    Messages:
    23
    Gender:
    Male
    I hear ya. I already replaced my factory lights with a cheap aftermarket. I could no longer get them to polish.
     
    This site contains affiliate links for which the site may be compensated.
    #12
  13. Sep 30, 2019 at 11:53 PM
    #13
    artsr2002

    artsr2002 2005 Tundra DC SR5

    Joined:
    Sep 2, 2019
    Member:
    #35520
    Messages:
    1,756
    'Yonder
    Vehicle:
    Red-Maroon-Something 05 DC 4.7 4x2
    I love the mini h1 7 projectors. Great performance and easy peasy install. Also, Motoholders are awesome. I'll be installing my D2S 5.0 in my F-150 soon.
     
  14. Dec 3, 2019 at 9:25 AM
    #14
    cammiller

    cammiller IG: cameron.a.mi

    Joined:
    Dec 3, 2019
    Member:
    #39477
    Messages:
    47
    Gender:
    Male
    First Name:
    Cameron
    Sulphur, Louisiana
    Vehicle:
    2004 Toyota Tundra Limited Phantom Grey Pearl
    Kicker speakers, Pioneer AVH-2550NEX Head Unit, DynaMat, LED Dash Conversion
    I will be doing this to my Tundra soon! Look awesome, especially due to the lack of after market headlights for these first gens.
     
  15. Dec 3, 2019 at 12:56 PM
    #15
    Hooptytrix

    Hooptytrix Squeaky Chicken

    Joined:
    Nov 12, 2016
    Member:
    #5179
    Messages:
    1,627
    Gender:
    Male
    Dirty South
    Vehicle:
    2000 AC 4x4, 2001 AC 4x4 Sold. 2005 DC SR5 2WD
    Nice work. I've been thinking about doing this but it's still pretty far down the list. I think my next project will be air horns or 12 hole injectors
     
  16. Jan 2, 2020 at 3:54 PM
    #16
    timesinfinity

    timesinfinity New Member

    Joined:
    May 4, 2017
    Member:
    #7558
    Messages:
    82
    Gender:
    Male
    First Name:
    drew
    northeast
    this thread helped me a ton, thank you!

    in case anyone runs into it: my 2005 and apparently some others have slightly offset bulbs in the headlight housing. mine were offset equally to about one o'clock and
    i had to grind down the "alignment" tabs on the new setup to allow them to rotate, level them and then tack them in with epoxy. it was a pain.

    also, FWIW, i was advised to go with the NHK G5-R projectors by the vendor i bought from... i don't recommend them in terms of ease or finish in comparison to the morimotos. they're fine, i'll use them, but i'd 100% go with the morimotos for quality control, number of folks using them and general support.

    and, in my opinion, definitely go with the screw in shrouds (used in this thread) and not the glue in ones. double check when you order them. way easier.
     
  17. Jan 2, 2020 at 4:13 PM
    #17
    KarmaKannon

    KarmaKannon Master of None

    Joined:
    Jun 3, 2019
    Member:
    #31428
    Messages:
    1,919
    Gender:
    Male
    Utah
    Vehicle:
    2006 Double Cab w/long travel
    Some junk
    This thread was a huge help to me when I did mine last week. I am very impressed with my headlights and I'm excited to see what better bulbs and the motoholders will do for me once I tune them a little. Right now I can actually move the bulb a little with my hand and it changes the hot spot a little. When my bulb holders get here I'll mess with tuning the hot spot.

    Like anything I've done and enjoyed, I will probably take my previous headlights apart and try to make everything even better next time. I'm thinking maybe a 3" projector and just a lot more tuning on the bulbs, holders, and flappers, before install. I think there's a lot of potential you can eek out of projectors if you take the time.

    IMG_20191229_140509.jpg

    IMG_20191229_164512.jpg
     
  18. Jan 3, 2020 at 7:21 AM
    #18
    SouthPaw

    SouthPaw The headlight guy

    Joined:
    Sep 11, 2019
    Member:
    #35992
    Messages:
    1,284
    Colorado
    Vehicle:
    2000 Limited 4x4 AC
    Couldn't agree more. This thread walked me through doing mine. I too have to take mine back apart to fix the halos I screwed up but I am confident on how to do it now.

    I got lucky with mine and the alignment came out perfect and the bulbs/projector are in there rock solid.
     
  19. Jan 3, 2020 at 8:14 AM
    #19
    Professional Hand Model

    Professional Hand Model A.K.A ‘Golden Hands’

    Joined:
    Apr 29, 2018
    Member:
    #14878
    Messages:
    15,007
    Gender:
    Male
    First Name:
    Fred
    ‘Somewhere’... a State of Mind
    Vehicle:
    2002 Tundra SR5 4WD 4.7L AC Silver Metallica
    Hand Protectors
    Unless you run an assembly line, plan on having to back and tweak any proto type made. This is the beauty of DIY on our trucks and allows better than OEM final product. This write up is well done by @minter66
     
    KarmaKannon likes this.
  20. Mar 2, 2020 at 7:46 AM
    #20
    Tundruh

    Tundruh New Member

    Joined:
    Jan 29, 2020
    Member:
    #41900
    Messages:
    21
    Gender:
    Male
    First Name:
    Tony
    VA BCH
    Vehicle:
    2005 Tundra Access Cab 4x4

    This is still a debate for me, if i want to do this or not. I have the 05 AC with the same headlight housing, except the AC / DC dont fit each other. I started with looking for the Smoked Headlight and Corners for the AC, because mine comes with the little light inside the housing. I WANT to see the light, it gives my AC its look, since no other ACs have them in other years. I beleive the 05-06 only had them. I just dont know if i want to spend the money on it.
     
  21. Mar 3, 2020 at 1:20 PM
    #21
    artsr2002

    artsr2002 2005 Tundra DC SR5

    Joined:
    Sep 2, 2019
    Member:
    #35520
    Messages:
    1,756
    'Yonder
    Vehicle:
    Red-Maroon-Something 05 DC 4.7 4x2
    Guys I recommend the MotoHolders for these projectors and for the D2S projectors as well. They are awesome and make installing and aligning the bulbs a piece of cake. That is all.
     
  22. Mar 3, 2020 at 1:22 PM
    #22
    SouthPaw

    SouthPaw The headlight guy

    Joined:
    Sep 11, 2019
    Member:
    #35992
    Messages:
    1,284
    Colorado
    Vehicle:
    2000 Limited 4x4 AC
    If I build a different set for my truck, I will give these a shot. As it sits now, my are damn sturdy.
     
  23. Mar 3, 2020 at 1:25 PM
    #23
    Professional Hand Model

    Professional Hand Model A.K.A ‘Golden Hands’

    Joined:
    Apr 29, 2018
    Member:
    #14878
    Messages:
    15,007
    Gender:
    Male
    First Name:
    Fred
    ‘Somewhere’... a State of Mind
    Vehicle:
    2002 Tundra SR5 4WD 4.7L AC Silver Metallica
    Hand Protectors
    Do we have pics?
     
  24. Mar 3, 2020 at 2:14 PM
    #24
    SouthPaw

    SouthPaw The headlight guy

    Joined:
    Sep 11, 2019
    Member:
    #35992
    Messages:
    1,284
    Colorado
    Vehicle:
    2000 Limited 4x4 AC
  25. Mar 3, 2020 at 6:23 PM
    #25
    KarmaKannon

    KarmaKannon Master of None

    Joined:
    Jun 3, 2019
    Member:
    #31428
    Messages:
    1,919
    Gender:
    Male
    Utah
    Vehicle:
    2006 Double Cab w/long travel
    Some junk
    I have a set of motoholders and I'm giving them a solid meh. It's a good idea, but they don't seem very sturdy and they make bulb adjustments difficult. I have higher hopes for the the d2s motoholders.
     
    SouthPaw likes this.
  26. Mar 4, 2020 at 8:58 AM
    #26
    minter66

    minter66 [OP] 2007 TSS CrewMax

    Joined:
    Jan 29, 2019
    Member:
    #25273
    Messages:
    502
    These have been in for over a year now, and there have been zero issues.

    In fact my parents on going on a trip to DC this weekend, when he comes back he will suddenly have a Pioneer Carplay unit with reverse camera.
     
    Voss and KarmaKannon like this.
  27. Mar 4, 2020 at 9:48 AM
    #27
    KarmaKannon

    KarmaKannon Master of None

    Joined:
    Jun 3, 2019
    Member:
    #31428
    Messages:
    1,919
    Gender:
    Male
    Utah
    Vehicle:
    2006 Double Cab w/long travel
    Some junk
    You must get along with your parents better than I do haha. Everytime I think of doing something nice for my parents they go on a rant about something I hold dear or they put up a new yard sign doing the same.
    Anyway you are a good kid! Hopefully my kid likes me that much.
     
    Voss and because_wumbo-truck like this.
  28. Mar 20, 2020 at 1:22 PM
    #28
    rock climber

    rock climber New Member

    Joined:
    Oct 7, 2019
    Member:
    #37106
    Messages:
    1,601
    Gender:
    Male
    Colorado
    Vehicle:
    2001 Sequoia 4X4, 2000 AC 4X4
    Thanks for this incredibly helpful write up! I literally just did this and followed your instructions.

    One thing I did differently that helped a lot was I left the light in the oven for 20 minutes. I tried 10 minutes and it was still really hard to pry apart and I felt like I was gong to break something. After 20 minutes I didn't have to apply much pressure at all.
     
  29. Mar 20, 2020 at 5:56 PM
    #29
    minter66

    minter66 [OP] 2007 TSS CrewMax

    Joined:
    Jan 29, 2019
    Member:
    #25273
    Messages:
    502
    Then it was totally worth the time and effort to document and write up.

    Glad it helped and thanks for the feedback
     
    Voss likes this.
  30. Jul 18, 2020 at 8:38 PM
    #30
    FLJ23

    FLJ23 New Member

    Joined:
    Apr 29, 2020
    Member:
    #45693
    Messages:
    14
    Gender:
    Male
    SoCal
    Vehicle:
    2004 DC 4x4
    Stock for now
    do you remember what parts you ordered?
    Like what shroud preference, harness type, did you get shroud adapters?
     

Products Discussed in

To Top