

-
Welcome to Tundras.com!
You are currently viewing as a guest! To get full-access, you need to register for a FREE account.
As a registered member, you’ll be able to:- Participate in all Tundra discussion topics
- Transfer over your build thread from a different forum to this one
- Communicate privately with other Tundra owners from around the world
- Post your own photos in our Members Gallery
- Access all special features of the site
 Blazing Blue Vinyl Wrap
 Short Antenna
 Long term storage computer reset
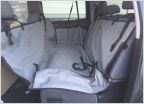 Rear Seat Dog Transport Help
 Remote start from phone
Lonky Leather Steering Wheel Cover, 12 month update.
Discussion in 'General Tundra Discussion' started by bvia, Jan 15, 2020.

