1. Welcome to Tundras.com!

    You are currently viewing as a guest! To get full-access, you need to register for a FREE account.

    As a registered member, you’ll be able to:
    • Participate in all Tundra discussion topics
    • Transfer over your build thread from a different forum to this one
    • Communicate privately with other Tundra owners from around the world
    • Post your own photos in our Members Gallery
    • Access all special features of the site

How To: 2nd Gen Tundra HID Headlight Retrofit w/ Morimoto D2S 5.0 Bi-Xenon Projectors

Discussion in '2nd Gen Tundras (2007-2013)' started by minter66, Apr 23, 2019.

  1. Apr 23, 2019 at 9:55 AM
    #1
    minter66

    minter66 [OP] 2007 TSS CrewMax

    Joined:
    Jan 29, 2019
    Member:
    #25273
    Messages:
    502
    The lighting on pretty much all stock Tundras is terrible. Unless you have the new LED headlamps, you are using incandescent bulbs that came with your Tundra.

    After doing this retrofit, I feel it is very easy to retrofit projectors and HID's into a 2nd gen to improve lighting and safety.

    I have documented everything I have done, so hopefully anyone wanting to do exactly what I did, can have an outlined path to follow, as I was struggling to find any information on the process to retrofit our headlights.

    Obligatory disclaimer: I am not responsible for you destroying your truck, your headlights, your electrical system, your dog or your cat by you following these instructions. These are to visually assist you on your Bi-Xenon journey. Use these instructions at your own risk.

    Parts List:

    $145 - Morimoto Morimoto Mini D2S 5.0 Projectors Link (Full package here with HID Kit: Wham ) You can buy the projectors and HID kit separately if you want to budget over multiple months. As long as the invoice is over $100, shipping is free.

    $135 - Hylux Standard D2H HID Kit (Link:Blam). I got the 4500K bulbs but upped them to 5500K later on as the color was too yellow for me.

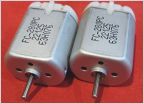
    $100 OEM / Used Tundra 2010 headlights. I found a driver & passenger headlight on craigslist for $50 each, decent condition, clear lenses, minor scratches that I would have to buff out. Also, since they were from a 2010 Tundra, an added bonus was the electric headlight leveler motors already installed.

    $8.99 - Nylon Auto Trim/Molding Kit. These were incredibly helpful in getting the headlights apart. The first headlight I used a metal paint scraper and it caused damage to the hot headlight plastic (not the lense). When I used these, no damage whatsoever. ( )

    $4.99 - 2 inch 40 grit twist-lock abrasive discs from Harbor freight ( )

    $3.99 - 2 inch disc holder for the abrasive discs ( )

    $16.99 - Carbon steel 18 pc hole saw bits ( )

    Other common items:
    Oven
    Towel
    Cookie sheet
    Drill
    Phillips screwdriver
    Slot screwdriver
    Gloves (the plastic / tray will be HOT)
    Bits to remove hex screws in headlight.

    Step 1: Placing the headlight lens-down, remove all screws, rubber caps, plastic hardware, bulbs circled in yellow (many many thanks to @ccress83 for this awesome photo). You may leave your headlight level motors on or take them off, completely up to you. I left mine on.


    Step 2:
    Pre-heat oven to 200 degrees. Speaking from experience, anything over 200 degrees will melt the top of your headlight. I deformed my tabs at the top a little by going to 220 degrees. Place headlight on bakers rack on the lowest shelf possible. Heat for 10 minutes and then remove


    Step 3: Wearing your gloves, remove the tray and carefully set down on a non-burnable surface (I used my granite countertops). I found the best place to start prying is the gap in the corner above the high beam location. The glue is very weak once heated to 200 degrees, it will not take much to start separating it from the housing. Before you go all muscle man on the lens and separate by hand, be sure to use a slot screw driver to slip the black tabs on top and bottom over the clear notches, otherwise you might damage them. I was able to separate lens from housing in one try. No re-heat necessary.


    Step 4: Use a slot screw driver to push the silver tabs together, this will release the headlight bulb shield.


    Remove from front:


    Step 5: This is where it gets fun. Using the abrasive discs and holder, grind down the raised circular bulb section on the back of the headlight reflector. Again, thanks to @ccress83 and his photo, essentially the yellow section needs to go bye-bye and the red section needs to be ground down to a point where the locking nut can thread successfully onto the projector shaft. So before cutting out the yellow, I just ground down the whole assembly first. You will know you are getting close when the material that holds the bulb in place starts to get really thin/break off.


    Step 6: Using the circular drill bits, use the one that most closely matches the red circle and start to cut. Its not a perfect match, but very very close. It will cut out the remaining material that will allow the projector shaft to slide through the hole. If it cant slide through, not enough material has been removed. I used a rat tail file to clean it up better after the cutting.


    You want the material as flush to the reflector as you can, without losing a "flat" surface that will allow the locking ring to be flat against the reflector - meaning dont just grind until you blow through the back of the reflector housing - and don't make it so thin that when you crank down on the locking nut it cracks/breaks the back of the housing.


    Step 7: Test mount the projector.


    You'll know you have enough depth when you can count five metal ridges once the ring is full locked on.


    Step 8: Test fit the shrouds. I used the Apollo shrouds and I was able to clip these on without having to shave/cut anything on the shroud. It was tight, but it worked.


    Step 9: Remove your old headlights and filler panels. My truck is a 2007, so the plastic on my filler panels was old and brittle. I broke the bottom plastic pin. I hope you have better luck.


    Remove the left (2) black retainer pins with a slot screw driver and then pull straight out on the right side where the pins push into the fender. Good luck.


    Step 10: Test fit your headlight. If you want to use the bi-xenon's as your brights (shield open), you will need to plug in the brown and white wire into the back of your projector and connect it to your 9005 plug. If you want to use both your 9005 incandescent bulbs PLUS your bi-xenons, you will need to buy this 9005 splitter (Link) (ONE FOR EACH SIDE) and plug all three up. I will say, having (4) high beams is crazy bright (photos at the end)


    Critical: Mount your D2H bulbs into the projector and secure with the plastic headlight retainer. Then see if you have enough clearance between the engine bay frame and the headlight.


    As you can see, I just barely clear it. If it is hitting/rubbing against the metal, cut/notch out a tiny bit and bend it out of the way so it doesn't contact the bulb

    Step 11: Install your HID kit and fire them up. I had just set my lenses in loosely, so I pulled them off so I could rotate by hand the projector. Get your cutoff lines level. The best place for this is a light colored wall/garage door on level ground. I don't have that due to my cabinets, so I got it as close as possible, then drove around at night for 20 minutes making adjustments.


    Important: Make sure your headlights have full range of motion up/down. For some reason my passenger side would only adjust up a few inches where-as my drivers side could point to the stars. From excellent advice given to me by @eledobleu

    I can only guess this variation comes from how the holes are cut out of the back of the projectors. My drivers side had a "lip" of material left over on the bottom that naturally raised the projector, where I must have filed away this extra material on the passenger side. If you cannot raise them to proper levels, the fix is later in this how-to.

    So after cut off is made level and range of motion is confirmed, carefully remove them (so as to not bump your projector rotation) and JB weld the ring/projector to the housing.

    Also, if you want to make sure your shrouds don't come loose from hard jolts/bumps - JB weld the shroud to the projector. I just put some JB weld on the (6) tabs and clipped it into place on the projector. Make sure not to glop it on there as it can get on the projector lens. A small amount goes a long way.


    If you do not have full range of motion - @eledobleu has an excellent and cheap fix, literally 2 cents worth. Add 2 pennies and place them at the top between the threads and thread locker to raise the projectors up. Add more pennies the more you want it to go up. Stick the pennies in and hold them while twisting the locking nut. Lock it down as hard as you can and then JB weld the ring, pennies and projector all together.


    Step 12 (optional): Once JB weld has cured, re-mount and verify cut off lines are straight and you can raise/lower both appropriately.

    Before getting ready to seal everything back together - take a microfiber cloth and clean the inside of your clear lenses to make sure nothing got on the inside during the retrofit. I do NOT recommend wiping down the chrome in your housings, as it is very thin and rubs off very easily.

    Step 13: Heat oven to 200 degrees - insert lens loosely into grooves on housing, bake for 10 minutes. Once you pull it out of the over, "smash" the lens into the grey glue and channel, ensuring the tabs slip over the clear notches and everything seals up nice and tight.

    Step 14: Re-install all screws, rubber caps, plastic hardware, bulbs previously circled in yellow. I threaded my high beam connector through the yellow cap after cutting the two cables that were not needed. If you aren't going quad-high beams, ignore this step.


    Step 15: Install retrofitted headlights into truck - and go for an amazing drive at night.

    Cutoff (street is not level):

    Full street coverage:

    Quad high beams:

    Kept it as OEM looking as possible:


    Last edited: Apr 19, 2022
  2. Apr 23, 2019 at 9:58 AM
    #2
    TheBeast

    TheBeast The Beach

    Joined:
    Apr 27, 2016
    Member:
    #3246
    Messages:
    12,518
    Gender:
    Male
    SoCal
    Vehicle:
    2012
    excellent. tag tag and tag for later reading ;)
     
    Mountun Goat likes this.
  3. Apr 23, 2019 at 10:20 AM
    #3
    airosey

    airosey 2009 CrewMax Limited 4x4

    Joined:
    Dec 29, 2017
    Member:
    #11806
    Messages:
    199
    Gender:
    Male
    First Name:
    Chris
    East TN
    Vehicle:
    2009 CrewMax Limited 4x4
    WHEELS MotoMetal 962’s 20x12 -44 offset SUSPENSION Energy Suspension Bump Stops Pro Comp 6” Lift Kit Body mount chop - BMC King Front Shocks with Remote Resi King Rear Shocks with Remote Resi Toyota TRD Rear Sway Bar Pro Comp ProRunner UCA's Toytec Adjustable Lift Shackles DRIVETRAIN Energy Suspension Rack Bushings (progress) TIRES Fuel Mudder M/T 37x13.5x20 EXTERIOR BulletLiner Truck Bed Liner PerformanceAccessories 3" Body Lift Performance Accessories Gap Guards Go Rhino Dominator D2 Nerf Bars Undercover SE Tonneau Cover AUDIO JL Audio HD900/5 JL Audio HD750/1 Dynamat Extreme Closed Cell Foam Install (progress) JL Audio Stealthbox Pioneer SPH-DA120 (AppRadio 4) INTERIOR Black Suede Headliner Carbon Fiber Vinyl Wrap Suede Door Panel Insets Steering Wheel Cover AJT Design Shift Knob AJT Design Key Fob LIGHTING Door panel accent lighting Swapped all interior lights to LED Morimoto Custom Retrofit Headlights Morimoto XB LED Fog Lights COSMETIC Debadged All Emblems Powdercoated ProComp Lift Parts Envy Grille (progress) G2 Brake Caliper Paint - Gold Toyota Fender Flares PERFORMANCE Unichip programmer StopTech Drilled and Slotted Rotors Borla Turbo XL Muffler K&N Air Filter STORAGE Rotopax 4 gallon fuel pack Diesel Power Hang A Hitch TOWING Elevated Suspension Tow Brackets Razor Auto Aluminum Shackles ELECTRICAL Optima Yellow Top Battery
    Excellent write up!
     
  4. Apr 23, 2019 at 10:25 AM
    #4
    YZTundy

    YZTundy New Member

    Joined:
    Dec 1, 2018
    Member:
    #22469
    Messages:
    107
    Gender:
    Male
    Denver, Co
    2011 Crewmax Rock Warrior
    Great write up!
     
  5. Apr 23, 2019 at 10:30 AM
    #5
    dcsleeper408

    dcsleeper408 BASTRDS

    Joined:
    Nov 10, 2015
    Member:
    #2081
    Messages:
    4,946
    Gender:
    Male
    First Name:
    mark
    San Jose CA
    Vehicle:
    2015 TRD PRO
    Clean and simple :thumbsup: nice job!
     
  6. Apr 23, 2019 at 10:37 AM
    #6
    saybng

    saybng Just a member.

    Joined:
    Dec 13, 2015
    Member:
    #2243
    Messages:
    2,890
    Gender:
    Male
    First Name:
    Gary
    Ventura CA
    Vehicle:
    16 Tundra 1794 CM in BLACK!
    Method Nv's, falken wildpeak 275.65.20 Dirty deeds exhaust, 5100's all around...nothin fancy.
    Well done!!
     
  7. Apr 24, 2019 at 5:50 AM
    #7
    minter66

    minter66 [OP] 2007 TSS CrewMax

    Joined:
    Jan 29, 2019
    Member:
    #25273
    Messages:
    502
    Thanks for the positive feedback. I didn't do this write up for me, it's to help that lurker on the internet (like I once was) who wanted to retrofit headlights but had no clear direction.

    Really hope this helps.
     
  8. Apr 24, 2019 at 3:25 PM
    #8
    Dr_Al

    Dr_Al New Member

    Joined:
    Oct 10, 2018
    Member:
    #20385
    Messages:
    567
    Gender:
    Male
    First Name:
    Al
    I've read a few writeups on how to do it but without that many pictures. I'm wondering if the after market lights you can buy off of eBay use the same glue. The lenses on my '07 are just starting to get cloudy. Finding used ones in good shape can be difficult.
     
    This site contains affiliate links for which the site may be compensated.
    #8
    Mountun Goat likes this.
  9. Apr 24, 2019 at 6:57 PM
    #9
    minter66

    minter66 [OP] 2007 TSS CrewMax

    Joined:
    Jan 29, 2019
    Member:
    #25273
    Messages:
    502
    I was advised to not buy aftermarkets / Chinese headlights for two reasons:

    1)Headlight adjusters are junk and will break almost immediately when trying to align
    2)The plastic is not very UV resistant and will yellow quicker than OEM.

    I guess a good compromise would be to buy aftermarkets, use the lenses on your stock housings and keep them waxed.

    I’m about to sell off my old housings plus an extra lens, plus grey butyl from the retrofit source, so keep your eyes open, you might like their condition
     
    Mountun Goat likes this.
  10. Apr 30, 2019 at 12:04 PM
    #10
    ccress83

    ccress83 Be A Good Human

    Joined:
    Aug 20, 2016
    Member:
    #4253
    Messages:
    62
    Gender:
    Male
    First Name:
    Colin
    Cleveland Ohio
    Vehicle:
    2011 Tundra CM TRD Off-Road Limited
    AFE Dry Drop in Filter, Morimoto XB LED Fogs , LED Taillights, Morimoto D2S retro w/profile HI-Lens LED Brights, 3/1 LRO Level, Dirty Deeds 8', TRD Rear Sway Bar,
    Thanks for the shout out, glad i could help, wish I would have taken more pictures. I wish I had money to do another retro cause for some odd reason i love doing this. Just to add more to the grinding/sanding, and to not take anything away from minter. I used a dremel with a sanding bit like this.[​IMG] With one hand sanded the yellow circle out[​IMG] and with the other hand held a shop vac to prevent it getting messy.(Obviously do and use whatever you have or whatever you want.)
     
  11. Sep 9, 2019 at 7:02 AM
    #11
    blackoutt

    blackoutt YEAH BUDDY!

    Joined:
    Oct 21, 2018
    Member:
    #20805
    Messages:
    975
    Indy
    Vehicle:
    07 DC Long Bed - Old Man Tan
    OEM+
    I did this on my 4runner with a bolt in bracket and it was the best mod I've ever done, now I'm wanting to do the Tundra and see there's no brackets available since they never came with projectors but threaded ring attachment should work well enough. Great write up!
     
  12. Sep 9, 2019 at 7:43 AM
    #12
    minter66

    minter66 [OP] 2007 TSS CrewMax

    Joined:
    Jan 29, 2019
    Member:
    #25273
    Messages:
    502
    Yep, straight up grinding/hacking/screwing on these.

    I have a 2014 Scion tC that came with Halogen projectors. I am very happy to see that they are direct swaps with the RX350 projectors. Just unbolt the old ones, bolt in the new ones and align. Wish it was that easy on this Tundra.
     
  13. Sep 9, 2019 at 11:09 AM
    #13
    blackoutt

    blackoutt YEAH BUDDY!

    Joined:
    Oct 21, 2018
    Member:
    #20805
    Messages:
    975
    Indy
    Vehicle:
    07 DC Long Bed - Old Man Tan
    OEM+
    Ordered some G5-R projectors, HID setup, and a pair of aftermarket housings from AM-Autoparts to hack up. Might just be the best ~$400 I'll ever spend on the ol girl.
     
    Mountun Goat likes this.
  14. Sep 12, 2019 at 5:47 PM
    #14
    Fozzy360

    Fozzy360 New Member

    Joined:
    Aug 5, 2019
    Member:
    #34183
    Messages:
    57
    Gender:
    Male
    First Name:
    Hunter
    Virginia
    Vehicle:
    2010 Tundra Crewmax Limited
    Stock
    nice
     
    Mountun Goat likes this.
  15. Sep 12, 2019 at 6:14 PM
    #15
    Mountun Goat

    Mountun Goat She baaaaaahd

    Joined:
    Feb 19, 2018
    Member:
    #13002
    Messages:
    5,747
    Gender:
    Male
    First Name:
    Dan
    EhBerta, Canadia
    Vehicle:
    It’s a Goat.
    Nice write up. Saved for later.
     
  16. Sep 19, 2019 at 9:35 AM
    #16
    blackoutt

    blackoutt YEAH BUDDY!

    Joined:
    Oct 21, 2018
    Member:
    #20805
    Messages:
    975
    Indy
    Vehicle:
    07 DC Long Bed - Old Man Tan
    OEM+
    Getting around to doing this. Grinding is done with! Write up is super helpful!

    20190918_211313.jpg
     
    Mountun Goat likes this.
  17. Sep 19, 2019 at 10:45 AM
    #17
    minter66

    minter66 [OP] 2007 TSS CrewMax

    Joined:
    Jan 29, 2019
    Member:
    #25273
    Messages:
    502
    Mountun Goat likes this.
  18. Sep 20, 2019 at 6:38 PM
    #18
    blackoutt

    blackoutt YEAH BUDDY!

    Joined:
    Oct 21, 2018
    Member:
    #20805
    Messages:
    975
    Indy
    Vehicle:
    07 DC Long Bed - Old Man Tan
    OEM+
    Not perfect but not bad. All in about 12hrs of labor fumbling through it and taking my time for cleanliness. Very happy with the stockish looking results and light output!

    20190920_211443.jpg 20190920_211405.jpg 20190920_201610.jpg
     
    Tundra3k, Yotaholic, Zebruaj and 2 others like this.
  19. Sep 21, 2019 at 4:31 AM
    #19
    biasrutus

    biasrutus New Member

    Joined:
    Jan 18, 2019
    Member:
    #24687
    Messages:
    14
    Gender:
    Male
    Great write up. Congrats on the DIY. I did this earlier this year and it was little nerve racking, but ended up being one of my all time favorite upgrades I have done on a vehicle. Very rewarding.

    I used these parts:
    My brights are ridiculous since I have that splitter wire. The HID cutoff moves out of the way and my high beams light up powered by the morimoto 2stroke. If you are doing a retrofit, I would highly recommend doing this to your high beams, upgrading the blinkers, and the fogs.

    [​IMG]
     
    This site contains affiliate links for which the site may be compensated.
    #19
    blackoutt and Mountun Goat like this.
  20. Sep 21, 2019 at 8:57 AM
    #20
    minter66

    minter66 [OP] 2007 TSS CrewMax

    Joined:
    Jan 29, 2019
    Member:
    #25273
    Messages:
    502
    Very Very nice! I love the stock/chrome look. Excellent output and cutoff
     
    Mountun Goat likes this.
  21. Sep 25, 2019 at 5:26 PM
    #21
    Fozzy360

    Fozzy360 New Member

    Joined:
    Aug 5, 2019
    Member:
    #34183
    Messages:
    57
    Gender:
    Male
    First Name:
    Hunter
    Virginia
    Vehicle:
    2010 Tundra Crewmax Limited
    Stock
    Looks good
     
  22. Oct 22, 2019 at 4:21 AM
    #22
    Zebruaj

    Zebruaj New Member

    Joined:
    Oct 8, 2019
    Member:
    #37139
    Messages:
    657
    Gender:
    Male
    MN
    Vehicle:
    08 CM SR5
    Just what I was looking for. Easy to follow directions.
    I grabbed an extra set of OEM headlight housings. Just need to convince the wallet and brain that this is doable.
     
  23. Oct 22, 2019 at 5:15 AM
    #23
    Cfincke

    Cfincke Mall Crawler but capable

    Joined:
    Jul 7, 2016
    Member:
    #3797
    Messages:
    1,977
    Gender:
    Male
    First Name:
    Chris
    San Antonio
    Vehicle:
    2014 Tundra 1794 CM 5.7 4x4 sunset bronze
    5.29s, Auburn LSD, 37x12.50R18, Icon coilovers and shocks, SPC UCA's, Tech 12 Volts sound system, Enve Grill
    I did my retrofit over several months using an extra set of lights so my truck was never down. (not much free time with my son now)
    This is a very helpful write-up, i referenced it and a few others that were 3rd gen specific.
    Takes time and patients. fully test the lights and adjust the cut off line before closing up the lights. My neighbors house was vacant for 3 weeks between tenants, so I asked the owner to use their garage to adjust my lights on the inside wall of their garage.
     
  24. Oct 23, 2019 at 6:07 PM
    #24
    Apollothetundra

    Apollothetundra New Member

    Joined:
    Nov 9, 2018
    Member:
    #21510
    Messages:
    88
    Gender:
    Male
    First Name:
    Trevor
    Vehicle:
    07 Super White 5.7l V8 295,000
    When modifying my lights like putting my projectors in or my halos or painting I always would get the headlight lenses good in the gray glue. Then use some clear ge waterproof all purpose silicone and go around the seams as well just to have a perfect seal. Good write up
     
  25. Oct 23, 2019 at 6:38 PM
    #25
    ninjajay

    ninjajay Posting from the toilet

    Joined:
    Dec 28, 2017
    Member:
    #11787
    Messages:
    2,155
    Gender:
    Male
    First Name:
    Jason
    Spoolston, TX
    Vehicle:
    2018 MGM 1794 TRD 4x4
    Toytec/Radflo Lift, Ambit RS02 18x9+0, Bridgestone Revo 3 295/70/18
    Great post. I'd add right before step 13 to make sure the insides of the lenses and housing in general are as clean as possible before sealing back up
     
    Apollothetundra likes this.
  26. Oct 29, 2019 at 8:30 AM
    #26
    minter66

    minter66 [OP] 2007 TSS CrewMax

    Joined:
    Jan 29, 2019
    Member:
    #25273
    Messages:
    502
    Added - also with a note about cleaning/rubbing the chrome.
     
  27. Dec 11, 2019 at 8:13 AM
    #27
    Civiceg94

    Civiceg94 New Member

    Joined:
    Apr 22, 2018
    Member:
    #14670
    Messages:
    379
    Gender:
    Male
    NYC
    Vehicle:
    2007 Toyota Tundra Crewmax 5.7 Limited
    Horn baffle delete Fox 2.5 DSC Setup DAP TUNED RW WHEELS 285/75/17 AT3 LTX
    Great write up. I didnt have luck with mine. Light out put is horrible. B40D76A3-60A0-4D95-A65B-97AC5E3A7F79.jpg19E89BC3-8713-49B4-B249-BC29DE7E8245.jpg C
     
  28. Dec 11, 2019 at 8:23 AM
    #28
    minter66

    minter66 [OP] 2007 TSS CrewMax

    Joined:
    Jan 29, 2019
    Member:
    #25273
    Messages:
    502
    Something....isn't right with either your lenses or your mounting location. Are the HID bulbs fully seated deep into the projector?

    What projectors did you buy?
     
  29. Dec 11, 2019 at 8:37 AM
    #29
    Civiceg94

    Civiceg94 New Member

    Joined:
    Apr 22, 2018
    Member:
    #14670
    Messages:
    379
    Gender:
    Male
    NYC
    Vehicle:
    2007 Toyota Tundra Crewmax 5.7 Limited
    Horn baffle delete Fox 2.5 DSC Setup DAP TUNED RW WHEELS 285/75/17 AT3 LTX
    Same as you i copied the kit that trs sales i just didnt buy the hid. The d2s bulb didnt work with my hid kit so i tried my 9006 and it went in but not completely i figured it shouldve work.
     
  30. Dec 11, 2019 at 10:43 AM
    #30
    minter66

    minter66 [OP] 2007 TSS CrewMax

    Joined:
    Jan 29, 2019
    Member:
    #25273
    Messages:
    502
    I believe that is your problem right there, to me it seems as if the bulb is not fully seated into the housing and thus cannot focus the light correctly in the bowl.

    HID bulbs must be precisely in the middle for it to reflect in the bowl and focus through the glass lens.

    There are cheap D2S kits out there, I would highly recommend getting one and trying again, as you are missing out.
     
    Civiceg94 likes this.

Products Discussed in

To Top