1. Welcome to Tundras.com!

    You are currently viewing as a guest! To get full-access, you need to register for a FREE account.

    As a registered member, you’ll be able to:
    • Participate in all Tundra discussion topics
    • Transfer over your build thread from a different forum to this one
    • Communicate privately with other Tundra owners from around the world
    • Post your own photos in our Members Gallery
    • Access all special features of the site

H1 LED fitment in Spyder V2 for 2nd Gen

Discussion in 'Lighting' started by NateDiz, Jul 25, 2019.

  1. Jul 25, 2019 at 9:27 AM
    #1
    NateDiz

    NateDiz [OP] Sunday Tunday

    Joined:
    Jun 19, 2019
    Member:
    #32132
    Messages:
    162
    Gender:
    Male
    First Name:
    Nathan
    So Cal
    Vehicle:
    2013 MGM CrewMax TRD
    Trd Pro Suspension, spyder headlights with morimoto HID, Raceline Defender Wheels, AFE filter, Dirty Deeds 8” exhaust
    Here is a little write up of installing the following LED's in the Spyder V2 for 2nd Gen

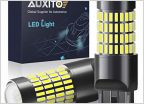
    These are the LED's I tested
    https://www.amazon.com/gp/product/B07PKPFHQ9/ref=ppx_yo_dt_b_asin_title_o00_s00?ie=UTF8&psc=1

    And here are the headlights
    https://www.amazon.com/gp/product/B07CMG4DWB/ref=ppx_yo_dt_b_asin_title_o07_s00?ie=UTF8&psc=1
    Few notes on this
    1. I decided to purchase the 3 year warranty through squaretrade from Amazon knowing that all aftermarket headlights eventually start to peal (even genuine spyders). It was 8 dollars for 3 years. seemed like a no brainer.
    2. This amazon seller didnt advertise them as genuine spyders, however when they showed up at the house, they were in fact genuine spyders.
    [​IMG]
    3. Mine did not come adjusted what so ever. you will need to spend some time at night adjusting to make sure you have good coverage right in front of you. If you dont adjust you might be fooled to think the leds arent bright.

    OK, Moving on.

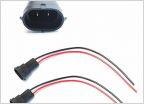
    The install was really straight forward and i dont feel the need to go into detail on the how except for one thing. You treat the pigtail hanging off the new light that goes to the DRL tube as if it were a bulb. So it plugs directly in the old side marking receptacle like so

    upload_2019-7-25_8-38-58.jpg

    So installing the actual LED's into the headlights is a little tricky due to the cooling fan that sticks out the back of most LED's.

    Here are some pictures of what i did to make it work for this particular set of LED's

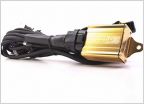
    This is the bulb it comes with
    upload_2019-7-25_8-41-12.jpg

    Take it out like so

    upload_2019-7-25_8-41-32.jpg

    You have to cut the boot a little to then fit the collar of the led bulb

    upload_2019-7-25_9-20-54.jpg

    upload_2019-7-25_9-21-20.jpg

    upload_2019-7-25_9-21-33.jpg

    upload_2019-7-25_9-21-49.jpg

    upload_2019-7-25_9-22-5.jpg

    upload_2019-7-25_9-22-19.jpg

    Ok now some info about those bulbs specifically

    I think they are decent quality bulbs. i would probably give them a 4 out of 5 considering they are only 30 bucks. you will def get more output from a 150 dollar set, but maybe not. ive never wanted to spend that much on lights.

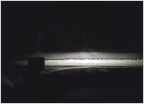
    I think if you get the headlights adjusted just right, they will produce plenty of light. I havent been able to do that part yet so they are still pointed what feels like straight down ahah. However i think these paired with the same color temp led fog light would be a great setup for lots of visability. i will update later with night pictures after i adjust the levels.

    UPDATE: Orientation of how the bulb sits inside the collar does matter. I found that it works best if you have the pigtail of the led coming straight down. also, if put a little pressure on the led as its installed you can kinda see a little better how the light is reflected inside the projected. Its not the best quality, so it really does take some adjusting to get it just right. Certainly not bad quality, just not the best. They really were not designed to have really high light output from the low beams. All that to say im sure its plenty for street driving once fully adjusted to even hight.
     
    Last edited: Jul 25, 2019
    Jrharvey02 likes this.
  2. Jul 25, 2019 at 1:00 PM
    #2
    NateDiz

    NateDiz [OP] Sunday Tunday

    Joined:
    Jun 19, 2019
    Member:
    #32132
    Messages:
    162
    Gender:
    Male
    First Name:
    Nathan
    So Cal
    Vehicle:
    2013 MGM CrewMax TRD
    Trd Pro Suspension, spyder headlights with morimoto HID, Raceline Defender Wheels, AFE filter, Dirty Deeds 8” exhaust
  3. Jul 25, 2019 at 2:28 PM
    #3
    TRD-tv

    TRD-tv Menace2Ohio

    Joined:
    Aug 29, 2018
    Member:
    #18768
    Messages:
    893
    Gender:
    Male
    Cleveland OH
    Vehicle:
    2012 MGM Tundra TRD
    I love you brother! Your an absolute legend! Thanks a million, I'll give this a long study this evening and attempt it next week! You are the man!

    Thanks for the write up!
     
    NateDiz[QUOTED][OP] likes this.
  4. Jul 25, 2019 at 6:16 PM
    #4
    TRD-tv

    TRD-tv Menace2Ohio

    Joined:
    Aug 29, 2018
    Member:
    #18768
    Messages:
    893
    Gender:
    Male
    Cleveland OH
    Vehicle:
    2012 MGM Tundra TRD
    what is that in the top of your hand?
     
  5. Jul 25, 2019 at 9:53 PM
    #5
    NateDiz

    NateDiz [OP] Sunday Tunday

    Joined:
    Jun 19, 2019
    Member:
    #32132
    Messages:
    162
    Gender:
    Male
    First Name:
    Nathan
    So Cal
    Vehicle:
    2013 MGM CrewMax TRD
    Trd Pro Suspension, spyder headlights with morimoto HID, Raceline Defender Wheels, AFE filter, Dirty Deeds 8” exhaust
    That’s the part the comes with the led. The led just slides into that piece after installing that piece in the headlight. Like this

    upload_2019-7-25_21-53-8.jpg
     
  6. Mar 12, 2020 at 7:06 PM
    #6
    Cbjohnson81

    Cbjohnson81 New Member

    Joined:
    Mar 12, 2020
    Member:
    #43866
    Messages:
    2
    Gender:
    Male
    First Name:
    Barrett
    i found the write up for the Gen 2's but couldnt find it for our first gens. i see the pictures here but there no real clear (to me) explaination of where these wires are running. Is this a supplement for the 2nd gen post to make it relevent to our wiring?
     
  7. Mar 12, 2020 at 7:12 PM
    #7
    NateDiz

    NateDiz [OP] Sunday Tunday

    Joined:
    Jun 19, 2019
    Member:
    #32132
    Messages:
    162
    Gender:
    Male
    First Name:
    Nathan
    So Cal
    Vehicle:
    2013 MGM CrewMax TRD
    Trd Pro Suspension, spyder headlights with morimoto HID, Raceline Defender Wheels, AFE filter, Dirty Deeds 8” exhaust
    So as an update (and I should have done this sooner) I determined that even after doing this the way I wrote it up, whenever it rained, I got pretty bad condensation inside the headlight. That being said, my second test was to take them out and install the morimoto H1 HID kit from theretrofitsource. Ever since then, I’ve had zero condensation issues inside the headlight. I need to do a full update to this thread, but for now this quick reply will have to do since I’m currently doing bath time with my kids lol
     
    TruckyTruck likes this.
  8. Mar 12, 2020 at 8:03 PM
    #8
    TruckyTruck

    TruckyTruck Dumbest Username

    Joined:
    Jan 6, 2014
    Member:
    #20
    Messages:
    3,613
    Gender:
    Male
    First Name:
    Gary
    Texas
    I'd like to see pictures of the morimoto bulb in the Spyder housing. Seems like an awkward fit to me. I have had housings and the morimoto kit for a few months now and haven't installed them. I'm not all that sure of the process, but after trying to fit the bulb, it didn't seem very secure.
     
  9. Feb 3, 2023 at 7:24 PM
    #9
    TruckyTruck

    TruckyTruck Dumbest Username

    Joined:
    Jan 6, 2014
    Member:
    #20
    Messages:
    3,613
    Gender:
    Male
    First Name:
    Gary
    Texas
    Did you ever get any pictures of this? Your install? After all these years, I’m finally putting mine on the truck with hids in the morning
     

Products Discussed in

To Top