

-
Welcome to Tundras.com!
You are currently viewing as a guest! To get full-access, you need to register for a FREE account.
As a registered member, you’ll be able to:- Participate in all Tundra discussion topics
- Transfer over your build thread from a different forum to this one
- Communicate privately with other Tundra owners from around the world
- Post your own photos in our Members Gallery
- Access all special features of the site
 Just the tip...
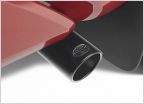
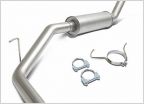 First Gen Tundra Best Exhaust setup
 Ba muffler question
 Air filter options on a supercharged 2015 Tundra
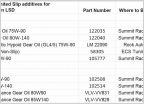 Gear Oil without Limited Slip additives for TrueTrac, Helix, Torsen, Grip Pro differentials
 Leveling TRD Exhaust
SABM Review
Discussion in 'Performance and Tuning' started by birdman076, Jun 25, 2019.
Page 1 of 2
Page 1 of 2


