1. Welcome to Tundras.com!

    You are currently viewing as a guest! To get full-access, you need to register for a FREE account.

    As a registered member, you’ll be able to:
    • Participate in all Tundra discussion topics
    • Transfer over your build thread from a different forum to this one
    • Communicate privately with other Tundra owners from around the world
    • Post your own photos in our Members Gallery
    • Access all special features of the site

@TundraTex 2016 CrewMax Audio Build

Discussion in 'Audio & Video' started by TundraTex, Sep 25, 2016.

  1. Sep 25, 2016 at 9:57 AM
    #1
    TundraTex

    TundraTex [OP] FRAC On!

    Joined:
    Sep 9, 2016
    Member:
    #4476
    Messages:
    1,151
    Gender:
    Male
    First Name:
    Lou
    DFW Texas
    Vehicle:
    '16 TSS CM 4x4
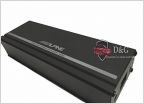
    Received my major Audio build components from Crutchfield on Thursday!

    gear.jpg

    I'll be incrementally installing the mod components since I don't have time to do it all in one shot. I'm starting with the least intrusive to most. I'll be installing in the following sequence...
    1. Amp Power Line
    2. Door Component Speakers and Crossovers
    3. 5-channel Amp Install under Driver's seat and Sub-Woofer wiring to rear seat area
    4. LCQ-1 LOC/EQ install under front passenger seat (Removing Factory Amp)
    5. Sub-Woofer (and Sound Mat?) install behind rear seat.
    6. Finish with ACR and Amp control installation in dash area (location TBD)
    This sequence allows me to maintain audio operation throughout the build and to drive the vehicle without too many missing pieces. I haven't made a final decision on my Sub-Woofer components yet, but I can still get things underway.
     
    hebnern, TundraDan723, Kilos and 4 others like this.
  2. Sep 25, 2016 at 10:57 AM
    #2
    TundraTex

    TundraTex [OP] FRAC On!

    Joined:
    Sep 9, 2016
    Member:
    #4476
    Messages:
    1,151
    Gender:
    Male
    First Name:
    Lou
    DFW Texas
    Vehicle:
    '16 TSS CM 4x4
    Day 1 Power Line Installation

    I bought the Rockford Fosgate 4 Amp Power kit for this installation. It was 25% off through Crutchfield since I bought it along with the Amp purchase. It comes with everything I'll need except for the proper fuse. The kit includes a 100 Amp fuse but the amp needs an 80 Amp. So I ordered a two-pack for 5 bucks.

    Amp Kit.jpg

    So on to step 1 and the first decision... where to install the fuse holder. it's highly reccomended to install the fuse within 12" of the battery. Accordingly the kit comes with a 12" battery cable with the terminal lug already crimped in place! So on to the engine compartment...

    IMG_2075.jpg

    I've seen a number of different installation locations for the Fuse block. My first choice was to mount it on the fender wall near the fuse box. Unfortunately that would take more that the 12" cable allotment. I thought about mounting it to the fuse box or the fuse box cover. However, I couldn't find a good spot on or in the box itself (not enough room) and if I mounted it to the cover, it would route across the top of the fuse box and prevent the easy/free removal of the fuse box cover when needed. So ultimately I decided to secure it with a couple tie wraps to an existing harness coming out of the side of the fuse box. I think it will work very nicely.

    Here's the battery cable after installation, very neat and easy... I may shorten the cable length to the fuse holder once I decide that this is the final location. NOTE: The fuse will not be installed until the final step. No need to have a live cable floating around un-terminated!
    IMG_2113.jpg IMG_2114.jpg

    The next step was routing the amp-side line from the cab, through the firewall. I had been dreading this step until I did it. It was actually quite easy. Toyota did us all a favor and has included a pre-made penetration point in the existing firewall feedthrough boot. I didn't take a "before" picture, but here is the after pic from inside and then one with the split-loom installed...

    Power Boot.jpg IMG_2119.jpg

    As I said, Toyota made this one easy for us. There is a pre-existing feedthrough hole on the inside of the boot. On the engine bay side there is a sealed rubber "nipple" that's about 1 inch long. I cut the tip off of the nipple, sprayed a bit of silicone spray into the feedthrough and on the cable, and pushed a few inches of the cable through from the inside. Then I went to the engine bay and pulled through the remaining length necessary to reach the fuse. Very simple and as you can see from the picture it makes a nice tight seal.

    Nipple.jpg Power Boot Eng.jpg

    I finished everthing off by wrapping with split loom and then coiling the excess cable under the driver's seat until I get to the amp install.

    Sill Power.jpg
     
    Last edited: Sep 25, 2016
    willrun4fun and Firemedic1428 like this.
  3. Sep 25, 2016 at 11:42 AM
    #3
    TundraTex

    TundraTex [OP] FRAC On!

    Joined:
    Sep 9, 2016
    Member:
    #4476
    Messages:
    1,151
    Gender:
    Male
    First Name:
    Lou
    DFW Texas
    Vehicle:
    '16 TSS CM 4x4
    Day 1.5 - I had a little extra time so on to the Front Speaker Installation.

    I'm going to be installing the AudioControl LCQ-1 LOC/EQ. I'll be removing the factory amp and will be using the existing speaker wiring to the doors. So the Speaker install is simply a matter of swapping the speakers/tweeters and installing the crossovers. The hard part of this task, was figuring out where to put the crossovers so they wouldn't interfere with the cover panel or any of the internal door/window mechanisms.

    Removing the door panel is easy enough and well documented all over the web, so I won't repeat the description here. This is what it looks like under the cover; before and after...

    IMG_2104.jpg IMG_2106.jpg

    I'm using Infinity Reference 6520's in the front doors. They were $50 bucks off from Crutchfield and came with tweeters and crossovers along with Crutchfield's free Scosche mount adapters and harness adapter. Mounting the speaker was simple enough; remove original speaker, mount new speaker to mount adapter, connect new wire to speakers, mount adapter/speaker assy. to the door.

    Since I'm using a passive cross-over and component mids/tweets, I connected the factory door speaker harness to the Crutchfield harness adapter and extended the wire length to reach the crossover input terminals. Then I ran wiring from the new woofer to the crossover and ran tweeter wiring to the sail panel location. I'll be modifying the sail panels and adding the new tweeters there. I can do that later on without having to remove the main door panel again. I turned on the radio to make sure the new speaker worked, and it sounded great! Already a noticeable difference in bass response and overall clarity compared to the factory speakers.

    Repeated this for the front passenger door and called it a day!

    IMG_2107.jpg
     
  4. Sep 25, 2016 at 4:36 PM
    #4
    TundraTex

    TundraTex [OP] FRAC On!

    Joined:
    Sep 9, 2016
    Member:
    #4476
    Messages:
    1,151
    Gender:
    Male
    First Name:
    Lou
    DFW Texas
    Vehicle:
    '16 TSS CM 4x4
    Day 2: Rear Speaker Installation

    Not as much time today, so I decided to just finish the speaker installs. Pretty simple after the experience of the front doors was under my belt. Removed the rear door panels; right, then left.
    IMG_2109.jpg IMG_2110.jpg

    The crossover had to be mounted closer to the handle brace and a little higher on the door in order to clear the foam on the inside of the door panel. It took a couple attempts of trial and error to get the location correct, but everything fits great now. Rear speakers were a breeze; mount to the adapters and run wires to the crossover. I replaced the factory rear door tweeters with the Infinity tweets. Since the new tweets are being fed by the crossover, I just taped up the factory tweeter harness and tie-wrapped it out of the way. No pictures, but I used a combination of one of the infinity mounting adapters and the almighty tie-wrap to lock everything in place with the factory tweeter bracket in the door panel. Nice and secure, and sounds great!

    Hmm... took a whole lot less time to post this info than it did to figure everything out and do the mod. Next step will be the Amp. I'm all out of weekend, so maybe I'll make some progress this week in the evenings after work.
     
    Last edited: Dec 8, 2016
  5. Sep 25, 2016 at 9:06 PM
    #5
    Firemedic1428

    Firemedic1428 New Member

    Joined:
    Sep 25, 2016
    Member:
    #4660
    Messages:
    30
    Gender:
    Male
    Vehicle:
    2022 Blueprint Platinum CM
    Lookin good!:thumbsup:
     
    TundraTex[OP] likes this.
  6. Sep 27, 2016 at 5:50 PM
    #6
    TundraTex

    TundraTex [OP] FRAC On!

    Joined:
    Sep 9, 2016
    Member:
    #4476
    Messages:
    1,151
    Gender:
    Male
    First Name:
    Lou
    DFW Texas
    Vehicle:
    '16 TSS CM 4x4
    Make a tiny bit of progress tonight by modifying the Sail panels for the front tweeters. Made my measurements for the mount hole position and then used a hole saw bit on the drill press to cut the hole.

    IMG_2122.jpg

    Did a little bit of clean-up around the edges and removed some of the rear-side structural flange material to accomodate the mounting nut, then installed the tweeter bracket... And finally the tweeter....

    IMG_2123.jpg IMG_2124.jpg

    I'll install them tomorrow night...
     
  7. Sep 29, 2016 at 9:26 PM
    #7
    TundraTex

    TundraTex [OP] FRAC On!

    Joined:
    Sep 9, 2016
    Member:
    #4476
    Messages:
    1,151
    Gender:
    Male
    First Name:
    Lou
    DFW Texas
    Vehicle:
    '16 TSS CM 4x4
    Sails connected and installed... Here's the driver's side.
    .Drv-Sail.jpg
     
    TSpivey14, D4x4TRD, 925tundra and 3 others like this.
  8. Sep 30, 2016 at 8:30 AM
    #8
    r_cya

    r_cya New Member

    Joined:
    Sep 30, 2016
    Member:
    #4716
    Messages:
    1
    Gender:
    Male
    Great, clean work sir! I am watching you!!! :)

    Thanks,
    RC
     
    TundraTex[OP] likes this.
  9. Sep 30, 2016 at 9:00 AM
    #9
    TheBeast

    TheBeast The Beach

    Joined:
    Apr 27, 2016
    Member:
    #3246
    Messages:
    12,518
    Gender:
    Male
    SoCal
    Vehicle:
    2012
    looking good. Subscribing :militarypress:
     
    TundraTex[OP] likes this.
  10. Sep 30, 2016 at 4:35 PM
    #10
    Bannock452

    Bannock452 New Member

    Joined:
    Apr 12, 2016
    Member:
    #3114
    Messages:
    359
    Gender:
    Male
    First Name:
    Brandon
    Murrieta, CA
    Vehicle:
    2016 White Crewmax 4x4 SR5
    King coilovers 35x12.50-18
    Looks great and clean work!! I have everything I need to do my audio upgrade at this time but I messed up on my front 6x9s. They are too deep and won't fit with the window down. Looking for other options at this time. Might have to do what you did and go with a 6.5 component.
     
    TundraTex[OP] likes this.
  11. Oct 1, 2016 at 7:31 AM
    #11
    TundraTex

    TundraTex [OP] FRAC On!

    Joined:
    Sep 9, 2016
    Member:
    #4476
    Messages:
    1,151
    Gender:
    Male
    First Name:
    Lou
    DFW Texas
    Vehicle:
    '16 TSS CM 4x4
    Did you buy mount adapters? If so, are they oriented correctly? When I first went to install mine, I instinctively oriented them to somewhat of a flush mount orientation so they fit somewhat inside the door. They should actually protrude out from the door to hold the speaker away from the interior components of the door.
     
    TSpivey14 likes this.
  12. Oct 4, 2016 at 7:10 PM
    #12
    TundraTex

    TundraTex [OP] FRAC On!

    Joined:
    Sep 9, 2016
    Member:
    #4476
    Messages:
    1,151
    Gender:
    Male
    First Name:
    Lou
    DFW Texas
    Vehicle:
    '16 TSS CM 4x4
    Step 3. I decided to mount my amp under the driver's seat and my LCQ-1 under the passenger seat. Since both required seat removal and center console removal (to facilitate wire routing) I decided to take the plunge and do it all together, so on Saturday morning I started the work...
    cab.jpg

    The amp required a mounting bracket, so the first step was to figure out the exact location and fabricate the mounts. Before I had completely removed the seat, I placed the amp in position and figured out how much space I needed. I pretty much eye-balled it and figured an inch stand-off from the carpet would clear the floor heating/cooling vent and still give me enough clearance from interfering with the seat mechanism at it's lowest setting. I used some aluminum bar stock from Lowes to fab the brackets...

    IMG_2133.jpg IMG_2136.jpg

    I finished the first one (always the hardest) and duplicated a second, then finalized the location to avoid interference with the vent.


    IMG_2138.jpg

    I spent a fair amount of time checking underneath the floor to make sure I wouldn't be drilling into anything but structure.... Then I took the plunge...


    IMG_2140.jpg IMG_2139.jpg

    With the brackets formed and installed, I needed to make a few cuts inthe carpet to make sure everything would lay flat and look right...

    IMG_2152.jpg IMG_2157.jpg IMG_2156.jpg

    Next, Time to paint the brackets and finish the mechanical installation...
    IMG_2160.jpg IMG_2163.jpg IMG_2165.jpg IMG_2166.jpg


    Now I needed to find a spot for the amp ground cable attachment. The nice engineers at Toyota were kind enough to include a pre-threaded 10mm bolt hole in the driver's sill trough. So I made sure I had the bolt that worked (same bolt used for the license plate mount) and sanded off the finish so I would have a solid ground connection...

    IMG_2146.jpg IMG_2147.jpg IMG_2148.jpg

    Next step was to make all the wiring connections, re-position the carpet and be done with the Amp install. I ran the RCA input cables and the amp output lines over to the LCQ-1 and the J144/145 harness adapters. I also routed a subwoofer wire back to the rear seat area. Not sure which side I'm going to install the sub on, so I included enough wire on the end to reach all the way to the right rear seat location. Then I coiled it up and stashed it under the left rear door sill cover.

    I used self-adhesive tie-wrap anchors to help organize the routing. I like to keep the wiring neat.

    IMG_2168.jpg

    Amp installation complete!

    IMG_2175.jpg
     

    Attached Files:

    Last edited: Dec 5, 2016
  13. Oct 4, 2016 at 7:26 PM
    #13
    MotoTundra

    MotoTundra The Ocho

    Joined:
    Jan 6, 2014
    Member:
    #8
    Messages:
    7,645
    Gender:
    Male
    First Name:
    Don
    -TRS Mini D2S Retrofit on TRD Pro Headlights (Apollo 2.0 Shrouds, 35w XB Ballasts, 5500k Bulbs) -Baja Designs Squadron R Sport Aux lights. -TRD Pro Grill -TRD Rear Sway Bar -BakFlip VP Tonneau w/BakBox -Dipped wheels & bumpers -Iron Cross HD steps -Undercover Swingcase -SunTek Paint Protection film -Tinted glass -Bedmat -OEM Towing Mirrors
    This thread is great! Great work with the amp brackets! The more I read the more I want to do an audio overhaul!
     
    TundraTex[OP] likes this.
  14. Oct 4, 2016 at 7:51 PM
    #14
    TundraTex

    TundraTex [OP] FRAC On!

    Joined:
    Sep 9, 2016
    Member:
    #4476
    Messages:
    1,151
    Gender:
    Male
    First Name:
    Lou
    DFW Texas
    Vehicle:
    '16 TSS CM 4x4
    Step 4: LCQ1 installation.

    The LCQ1 is a Line Out Converter (LOC) and Equalizer (EQ) all in one nicely engineered box. It is desiged to take amplified outputs from the Head Unit (or factory amp) and adjust them to line level inputs for the after-market amp. It does a lot of other things as well including Bass Restoration with adjustable trigger threshold, channel summing (for full spectrum audio to the crossovers), remote turn-on input from HU and send to amp, and of course, EQ.

    I did a lot of research to determine the best way to install this and whether or not to keep the factory amp. It turns out that the center dash speaker, front dash tweeters, and rear door speakers are fed directly by the HU and do not go through the factory amp. These feeds are wired in parallel through the factory amp which feeds the Front door speakers and rear tweeters. I have no idea what useful purpose the amp serves other than to provide a place to plug in J144 and J145. So since there is full spectrum, gain level audio coming out of the HU, I decided the factory amp would create an unecessary noise source in my audio chain and take up precious real estate under the passenger seat. I've seen some write-ups where people experienced noise or "hiss" problems using the factory amp in the chain. I believe removing it is absolutely the right answer.

    So the factory amp is out! The brackets, however are another story, and were quite useful for the LCQ1. The LCQ1 has mounting tabs built into its case but is a little over an inch wider than the factory amp. No problem. I added aluminum angle to the factory brackets to provide mount points for the LCQ1. Then I drilled a new mount hole in the aft factory bracket in order to reposition it for the extra width. This provided a nice sturdy easy mount with no need to modify the carpet.

    IMG_2170-arrow.jpg

    Once the mount was taken care of, it was time to do the wiring. I didn't want to modify the factory harnesses, so fortunately there are adapters to take care of this. J144 is a 10-pin connector and mates with the 10-pin connector in the Metra 70-1761 harness kit. (Provided to me, free of charge from Crutchfield). The 12-pin was another story entirely. I spent a tremendous amount of time trying to find a matching connector. I eventually found the toyota part number for the male mating connector, but the shell plus all the pins and wire leads would have been about 70 bucks!!! Crazy talk. So with much googling and researching, I stumbled on the solution.

    I found the part number (Y-TYT02) from a company called Apps2Car. It's a "Y" cable with two 12-pin male connectors for $9.99 on Amazon! So I cut one of the connectors out of the "y" and had my mating connector.

    IMG_2108.jpg IMG_2171.jpg

    Next step was to wire up everything to the LCQ1 and amp wiring and test it out!

    IMG_2172.jpg IMG_2173.jpg

    After rocking out to some amped/EQ'd Garth for a few minutes, I declared success and straightened up all the wiring and carpet. Next step... The Sub...

    IMG_2174.jpg

    One additional comment... My configuration maintains the existing dash tweeters and center speaker. They are fed independently by the HU and are not wired down to J144/145. So I have an 11-speaker system plus the sub when it's installed. if the dash speakers cause a problem when I do my final EQ I'll just disconnect them and leave them in place. I don't believe they will cause any problems at this point.
     

    Attached Files:

    Last edited: Dec 5, 2016
    1lowlife, H2o, trdprobped17 and 3 others like this.
  15. Oct 4, 2016 at 8:17 PM
    #15
    MotoTundra

    MotoTundra The Ocho

    Joined:
    Jan 6, 2014
    Member:
    #8
    Messages:
    7,645
    Gender:
    Male
    First Name:
    Don
    -TRS Mini D2S Retrofit on TRD Pro Headlights (Apollo 2.0 Shrouds, 35w XB Ballasts, 5500k Bulbs) -Baja Designs Squadron R Sport Aux lights. -TRD Pro Grill -TRD Rear Sway Bar -BakFlip VP Tonneau w/BakBox -Dipped wheels & bumpers -Iron Cross HD steps -Undercover Swingcase -SunTek Paint Protection film -Tinted glass -Bedmat -OEM Towing Mirrors
    Nice. A successful sound test is great news!
     
  16. Oct 4, 2016 at 8:21 PM
    #16
    TundraTex

    TundraTex [OP] FRAC On!

    Joined:
    Sep 9, 2016
    Member:
    #4476
    Messages:
    1,151
    Gender:
    Male
    First Name:
    Lou
    DFW Texas
    Vehicle:
    '16 TSS CM 4x4
    Indeed. I didn't let the smoke out of anything and nothing melted... Success!!
     
    MotoTundra[QUOTED] likes this.
  17. Oct 4, 2016 at 8:24 PM
    #17
    MotoTundra

    MotoTundra The Ocho

    Joined:
    Jan 6, 2014
    Member:
    #8
    Messages:
    7,645
    Gender:
    Male
    First Name:
    Don
    -TRS Mini D2S Retrofit on TRD Pro Headlights (Apollo 2.0 Shrouds, 35w XB Ballasts, 5500k Bulbs) -Baja Designs Squadron R Sport Aux lights. -TRD Pro Grill -TRD Rear Sway Bar -BakFlip VP Tonneau w/BakBox -Dipped wheels & bumpers -Iron Cross HD steps -Undercover Swingcase -SunTek Paint Protection film -Tinted glass -Bedmat -OEM Towing Mirrors
    Absolutely!
     
  18. Oct 29, 2016 at 11:27 PM
    #18
    TundraTex

    TundraTex [OP] FRAC On!

    Joined:
    Sep 9, 2016
    Member:
    #4476
    Messages:
    1,151
    Gender:
    Male
    First Name:
    Lou
    DFW Texas
    Vehicle:
    '16 TSS CM 4x4
    OK, back to the Audio project... I spent a lot of time trying to figure out what kind of Sub enclosure to buy. Bottom line: I finally decided to build my own because there was nothing out there that met all my specs.

    I don't plan to power a block party with my system, I just want nice crisp audio... with "presence". So my system is sized accordingly and I just need some nice bass fill. I have the LCQ-1 LOC/EQ so I can put as much thump in the Bass mix as i want while still keeping things a little reigned in.

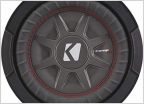
    So I finally settled on the Kicker CompRT67 Sub. It is a thing of beauty, and if it sounds half as good as it looks and feels, I'll be elated.
    I took some more measurments behind the rear seat and came up with a quick drawing for the enclosure. Kicker provided the minimum recommended volume dimensions, so I made sure I had enough space while minimizing the overall size. This is my 1:2 scaled drawing. I scaled and pasted in a pic of the speaker just to make sure I'll have clearance. The box will be 15" wide. The other dimensions (scaled) are on the drawing.

    Sub-box.jpg
    I cut all the MDF tonight. I hope to put everything together tomorrow.
     
    HKTAT2S, trdprobped17, Jsena and 3 others like this.
  19. Oct 30, 2016 at 9:59 AM
    #19
    MotoTundra

    MotoTundra The Ocho

    Joined:
    Jan 6, 2014
    Member:
    #8
    Messages:
    7,645
    Gender:
    Male
    First Name:
    Don
    -TRS Mini D2S Retrofit on TRD Pro Headlights (Apollo 2.0 Shrouds, 35w XB Ballasts, 5500k Bulbs) -Baja Designs Squadron R Sport Aux lights. -TRD Pro Grill -TRD Rear Sway Bar -BakFlip VP Tonneau w/BakBox -Dipped wheels & bumpers -Iron Cross HD steps -Undercover Swingcase -SunTek Paint Protection film -Tinted glass -Bedmat -OEM Towing Mirrors
    Nice, nice....

    :popcorn:
     
  20. Oct 30, 2016 at 10:19 AM
    #20
    4RNR

    4RNR トヨタ

    Joined:
    Sep 16, 2016
    Member:
    #4560
    Messages:
    65
    America
    Vehicle:
    16 Tundra SR5 CM
    Switched from 16 Taco
    Just WOW, beautiful job! I'm doing upgrade to my system later this or beginning of the next year.
    I didn't carefully read your write up and maybe it's somewhere, but why you added tweeters vs upgrading/swapping those in dash?
    Thanks!
     
  21. Oct 30, 2016 at 10:25 AM
    #21
    MotoTundra

    MotoTundra The Ocho

    Joined:
    Jan 6, 2014
    Member:
    #8
    Messages:
    7,645
    Gender:
    Male
    First Name:
    Don
    -TRS Mini D2S Retrofit on TRD Pro Headlights (Apollo 2.0 Shrouds, 35w XB Ballasts, 5500k Bulbs) -Baja Designs Squadron R Sport Aux lights. -TRD Pro Grill -TRD Rear Sway Bar -BakFlip VP Tonneau w/BakBox -Dipped wheels & bumpers -Iron Cross HD steps -Undercover Swingcase -SunTek Paint Protection film -Tinted glass -Bedmat -OEM Towing Mirrors
    We'll see what OP says, but I think it's bc the factory head unit powers the dash speakers and the factory amp (which he replaced) powered the door speakers. Best to leave them as is if keeping the stock head unit.
     
  22. Oct 30, 2016 at 11:51 AM
    #22
    TundraTex

    TundraTex [OP] FRAC On!

    Joined:
    Sep 9, 2016
    Member:
    #4476
    Messages:
    1,151
    Gender:
    Male
    First Name:
    Lou
    DFW Texas
    Vehicle:
    '16 TSS CM 4x4
    Thanks for the kind words, 4RNR. I added new tweeters up front for three reasons.

    First, the Head Unit directly powers the center dash speaker, front dash tweeters, and rear door speakers. The Front door speakers and aft tweeters are fed by the factory amp in parallel to the HU-driven speakers. In my installation, my new amp feeds all the tweeters and mids. So I kept the dash speakers to maintain as much of the original impedance balance on the HU as possible. This means less likelihood of overdriving or saturating the HU internal amp. Overdriven amps with unbalanced loads can be a source of thermal noise - and I don't want noise in my audio feed.

    Secondly. I wanted to minimize additional wire routing. In my installation, all four door mid/tweet pairs are fed by their respective passive crossovers. I utilized the factory wiring for the door speakers to route signal from my new amp to the door crossovers, then wired the band-passed audio signals from the crossover to their respective speaker. If I had replaced the front tweeters, I would have had to route tweeter wires from the front door crossovers, through the door hinge conduits and up to the dash tweeter locations... lots of PITA routing work. By installing tweeters in the front sail panels, all the wiring mods happened under the door panel with easy access.

    Thirdly. The new tweeter mounts are adjustable and allow the tweeters to be aimed at the driver and passenger positions. The higher the frequency, the more directional and attenuated the sound power. So for best high frequency presence, aiming the tweeters and moving them closer to the listener ears is better. Admittedly, this has only a small influence in the overall spectral quality of a truck cab, but it's still the right way to do it IMHO.

    Hope this helps. Thanks for the good question.
     
    Last edited: Dec 8, 2016
    trdprobped17, Kilos and 4RNR[QUOTED] like this.
  23. Nov 13, 2016 at 8:41 PM
    #23
    TundraTex

    TundraTex [OP] FRAC On!

    Joined:
    Sep 9, 2016
    Member:
    #4476
    Messages:
    1,151
    Gender:
    Male
    First Name:
    Lou
    DFW Texas
    Vehicle:
    '16 TSS CM 4x4
    The Audio mod is finally complete. I finished up the Sub-box build this week and installed everything today.
    IMG_2217.jpg IMG_2229.jpg

    I really wanted to mount the sub behind the passenger side rear seat. The passenger side seat is smaller and therefore easier to remove and reinstall, but the tire jack equipment is mounted under the seat on that side and I didn't want to relocate it. There are also existing mount points on the driver's side rear cab wall. I think the JBL-equipped trucks use these for the factory sub mounting. So I went with the driver's side, even though it was a harder installation.

    As a side note.... The first mod I made to this truck was the ESP under-seat storage locker. It mechanically interfaces with the rear seat mounts to lock into the floor. However, to do this, the seats must be manipulated a bit to the rear and then they slide forward into the locker mount interface. This means that to accomodate the seat installation, the sub box needs to be even more shallow because the front surface and speaker face need about an inch of clearance behind the seat back. Unintended consequences of multiple mods! A bit of a pain, but worth it.

    I mounted the box using external angle brackets into the floor and I also used a 6mm bolt through the back of the box into the factory mount point on the back cab wall.

    I gave everything a quick ops check and then re-installed the rear seat. I'll tweak the final EQ sometime this week, but it already sounds great. I'm very happy I decided to do this mod. Now I can start focusing on my FRAC-AV video mod!
     
    Last edited: May 21, 2017
    trdprobped17 likes this.
  24. Nov 13, 2016 at 8:50 PM
    #24
    MotoTundra

    MotoTundra The Ocho

    Joined:
    Jan 6, 2014
    Member:
    #8
    Messages:
    7,645
    Gender:
    Male
    First Name:
    Don
    -TRS Mini D2S Retrofit on TRD Pro Headlights (Apollo 2.0 Shrouds, 35w XB Ballasts, 5500k Bulbs) -Baja Designs Squadron R Sport Aux lights. -TRD Pro Grill -TRD Rear Sway Bar -BakFlip VP Tonneau w/BakBox -Dipped wheels & bumpers -Iron Cross HD steps -Undercover Swingcase -SunTek Paint Protection film -Tinted glass -Bedmat -OEM Towing Mirrors
    :bowdown::headbang::yay:

    Nothing like wrapping up a job like that!!
     
    TundraTex[OP] likes this.
  25. Dec 5, 2016 at 11:21 AM
    #25
    battaglia03

    battaglia03 New Member

    Joined:
    Sep 29, 2016
    Member:
    #4707
    Messages:
    3
    Hey All,

    First off very nice setup and install,

    question- I see you have speaker wire with blue tape on it, where does that come from/go to?

    also do I even need to pull the head unit and splice into anything in the back HU harness or are all the door speakers fed from the factory amp for me to just splice from there?

    thanks in advance!

    -Joey
     
  26. Dec 5, 2016 at 11:34 PM
    #26
    TundraTex

    TundraTex [OP] FRAC On!

    Joined:
    Sep 9, 2016
    Member:
    #4476
    Messages:
    1,151
    Gender:
    Male
    First Name:
    Lou
    DFW Texas
    Vehicle:
    '16 TSS CM 4x4
    Thanks! And thanks for asking your questions, it made me realize that I didn't provide a very good description of the final wiring configuration.

    The speaker wire is carrying the Amplified Audio signals from the Amp (Under the Driver's Seat) to the appropriate J144/J145 adapter connector pins for distribution through the factory harness to the Door Crossovers/Speakers.

    No need to mess with the Head Unit or cut into the factory harnesses under the passenger seat (as long as you are using the adapters)!! That's the beauty of this installation! J144 is a 10-pin connector and mates with the 10-pin connector in the Metra 70-1761 harness kit. J145 is a 12-pin connector and is one half of a "Y" cable, part number (Y-TYT02) from a company called Apps2Car. After my installation, I ran across a better solution for these connectors. You can find them here at a site called AutoHarnessHouse.com.

    All the signals you need flow through the two factory amp connectors under the passenger seat! (J144 & J145).

    See the pinouts and connector diagrams below ...

    The "wire color" column indicates the factory harness wire colors so you can be sure what signal you are working with - the adapter connector wires may have different colors in some cases. That obviously doesn't matter, just make sure you are connecting the proper adapter pin/wire to the signal in the "connects to" column. PLEASE NOTE: if you are using a different LOC/EQ and/or amplifier, reference the "Factory Signal" Column to make sure you are routing signals properly according to your equipment configuration.

    J144-145 Pinout.jpg

    J144.jpg J145.jpg

    Hope this Helps!

     
    Last edited: Feb 5, 2019
  27. Dec 6, 2016 at 1:55 AM
    #27
    040Tundra

    040Tundra Teddy 2013-2019

    Joined:
    Nov 13, 2016
    Member:
    #5188
    Messages:
    3,809
    Gender:
    Male
    First Name:
    Aaron
    Las Vegas, NV
    Vehicle:
    040 '16 CM LTD 4x4
    A little of this and a little of that.
    @TundraTex Nice write up and diagrams with pics!! Job well done sir

    What size sub did you go with?
     
  28. Dec 6, 2016 at 7:17 AM
    #28
    TundraTex

    TundraTex [OP] FRAC On!

    Joined:
    Sep 9, 2016
    Member:
    #4476
    Messages:
    1,151
    Gender:
    Male
    First Name:
    Lou
    DFW Texas
    Vehicle:
    '16 TSS CM 4x4
    I used the Kicker Comp RT67 which is a 6-3/4" dual coil sub. It handles 300W Peak / 150W RMS. Its very shallow mount depth makes it perfect for the CrewMax.
     
    040Tundra[QUOTED] likes this.
  29. Dec 7, 2016 at 10:46 AM
    #29
    battaglia03

    battaglia03 New Member

    Joined:
    Sep 29, 2016
    Member:
    #4707
    Messages:
    3
    Tex,

    thanks for the reply I am gonna continue my install this weekend and hope it works out well. If you wanna laugh, I am also upgrading my tundra with the same setup you are installing for which I had previously installed on my 2014 Tacoma.
    So I pulled the HU from my tundra, figured out the wires to the speakers by cutting 1 by 1 and seeing what went off, and then went to go splice a feed to the line converter. Before I spliced in I decided to check the mounting location for under the passenger seat and then, WTF, there is a factory amp under there! and there are speaker wires going to it! Through further investigation I discovered that the speaker wires were coming from the HU to the factory amp. Sooooo long story short I had to resplice the wires to the head unit and then ask you how you wired in yours from the factory amp. I hope my splice does not affect the sound quality and I am pissed because I scratched my dash trying to pull out the cigarette lighter dash panel.

    It is what it is and I hope the install goes smooth after this, thanks for the info, keep yall posted!
     
  30. Dec 7, 2016 at 11:11 AM
    #30
    SuperSilverTundra

    SuperSilverTundra i didnt pull up i Landed

    Joined:
    Jul 1, 2016
    Member:
    #3735
    Messages:
    1,192
    Gender:
    Male
    First Name:
    Nick
    Los Angeles California
    Vehicle:
    16 TUNDRA 5.7 PLATINUM-PRO
    3"/1" TOYTEC 18x9 XD818 Heist 295/70r18 COOPER XLT DirtyDeeds BAMuffler 2018 LEDs KatzKin Leather S&B CAI
    all that work just for a 6"sub wtf at least throw a 10'' in there
     

Products Discussed in

To Top