

-
Welcome to Tundras.com!
You are currently viewing as a guest! To get full-access, you need to register for a FREE account.
As a registered member, you’ll be able to:- Participate in all Tundra discussion topics
- Transfer over your build thread from a different forum to this one
- Communicate privately with other Tundra owners from around the world
- Post your own photos in our Members Gallery
- Access all special features of the site
Quick Links: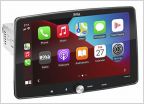 Stereo and speaker system upgrade
  Anyone upgrade the OEM backup cam to an HD 1280x720p?
  New and looking for head unit replacement with CarPlay options.
 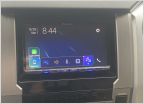 Upgrade my audio to Apple car play
 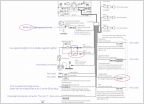 Request for help determining the rest of the connection points for new head unit
  Want to upgrade all stereo and speakers in 2002 limited tundra
OEM Audio+ Install
Discussion in 'Audio & Video' started by jmdaniel, Jul 8, 2019.


