1. Welcome to Tundras.com!

    You are currently viewing as a guest! To get full-access, you need to register for a FREE account.

    As a registered member, you’ll be able to:
    • Participate in all Tundra discussion topics
    • Transfer over your build thread from a different forum to this one
    • Communicate privately with other Tundra owners from around the world
    • Post your own photos in our Members Gallery
    • Access all special features of the site

Newb installation thread- Pioneer DMH-WT8600NEX into a 2018 SR5 Entune Non-JBL

Discussion in 'Audio & Video' started by panicman, Dec 28, 2021.

  1. Dec 28, 2021 at 10:47 AM
    #1
    panicman

    panicman [OP] Everyone remain calm.

    Joined:
    Mar 28, 2018
    Member:
    #13960
    Messages:
    1,741
    Gender:
    Male
    First Name:
    Eric
    PNW
    Vehicle:
    2018 SR5 CM TRDoffroad MGM
    After reading about HU choices for the Tundra, comparing what appear to be the top 2 models (Kenwood and Pioneer), and trying to absorb as much installation detail as possible, I struck before Christmas- choosing the Pioneer due to the dash fit, and the simple fact that it was the only one available during the ongoing supply chain crisis.

    I have an 18 SR5 with non-JBL, and factory amplifier. In 2020, I upgraded my system to a 5 channel amp, a 12” subwoofer, and all new door speakers and sound deadening medium. That thread is located here: https://www.tundras.com/threads/2018-sr5-non-jbl-audio-upgrade.65640/#post-1800747

    The sound is good, but I want to upgrade the HU and really take advantage of the hardware I installed.

    The factory navigation is, bluntly, terrible. Most of my family fleet now has CarPlay, and I really want it in the Tundra.

    I like to do these things myself. YouTube has alot of installation reviews for this HU on other vehicles. This site has a number of threads on installing this head unit, but no detail, and questions go unanswered either because the users aren’t obsessively checking in like I do, or because they had the unit installed by someone else and can’t answer. So guys, I’m going in, trial by fire. Guts to hopeful glory, I’ll detail this process as closely as I can and create the thread I wish I had found; one for a handy newb who knows very little about how all this works.

    Thread highlights:
    12/28/21- started thread
    12/28/21- setup Maestro adapter
    12/30/21- learned new information. Plan to not use the Metra dash trim kit.
    12/31/21- other needed adapters
    1/1/22- bench assembly of main harness
    1/2/22- installation
    1/15/22- review features, refine settings
    1/18/22- Satellite workaround (adapter not needed)
    2/13/22- perfected fit and created gaskets to promote a more factory appearance
    2/15/22- replaced broken USB adapter so dash usb/charging port functions like factory.
     
    Last edited: Feb 26, 2022
  2. Dec 28, 2021 at 11:25 AM
    #2
    panicman

    panicman [OP] Everyone remain calm.

    Joined:
    Mar 28, 2018
    Member:
    #13960
    Messages:
    1,741
    Gender:
    Male
    First Name:
    Eric
    PNW
    Vehicle:
    2018 SR5 CM TRDoffroad MGM
    Under the tree this year was the new head unit and the necessary Maestro adapter.

    The Maestro adapter is mentioned in many threads but not accurately described. It is an interface between your chosen vehicle and your chosen aftermarket head unit. It allows your vehicles native buttons and functions to work on the aftermarket HU just like they did on the factory HU, or in some cases, work much better.

    This Maestro comes with a USB cable and 6 harnesses. AE61515A-95CA-43E0-A035-07F8241EBF4A.jpg
    It is smaller than a deck of cards.
    2DE626C1-445C-422F-BD3A-9FEFE6CC6D5D.jpg
    13FA21E4-A5F2-4810-88E5-955FA9108375.jpg

    In order to apply the unit to your truck, you need to ‘flash’ it using your Mac or Windows PC. You’ll need to go online, find the website in the instructions, install some drivers, install an app, and register.
    35B254F1-751E-4303-823B-08D276D839B8.jpg
    From there you just follow prompts to select your vehicle, select your new HU, and then confirm all of the controls that will retain the factory functions in your truck. Maestro had them all correct, so it was quick.
    You need to select your model vehicle (JBL, Non-JBL with amp, Non-JBL with no amp).

    Specify your HU, and HAVE THE SERIAL NUMBER WITH YOU.

    Tip: just plugging the Maestro into my PC did not bring it up. There is a small button that I had to press, which activated a green lamp on the unit, and suddenly my PC could “see” the Maestro. This is not described in the instructions.
    F0896E75-0A10-427C-B134-856F235742F4.jpg
    During this process, the website tells you about additional hardware needed to install your chosen HU. In my case, I had already ordered the T02 harness and the Metra dash hardware kit because I knew I would need those. But, I learned I would also need an antenna adapter, a satellite antenna adapter, and a USB adapter so I can use my factory USB input on the dash. Ordering those now delays my installation by a few days.

    At this point you also have access to the installation guide for your setup through the app. You can download and or print it. The app actually brings up the guide for every Toyota model, so sift through them until you find yours, otherwise you’ll waste a ton of paper.
    6B7C3474-D1B7-41B2-B65B-0D85E4FF3B08.jpg
    As the parts peter in, I’ll keep updating.
     
    Last edited: Dec 28, 2021
    willy, the red, Patch999 and 2 others like this.
  3. Dec 28, 2021 at 11:32 AM
    #3
    panicman

    panicman [OP] Everyone remain calm.

    Joined:
    Mar 28, 2018
    Member:
    #13960
    Messages:
    1,741
    Gender:
    Male
    First Name:
    Eric
    PNW
    Vehicle:
    2018 SR5 CM TRDoffroad MGM
    My chosen HU is the Pioneer described in my thread title.
    2534ABF7-A8DA-451E-8908-B109076A6F5E.jpg

    It comes with a wireless remote, hardware, and several harnesses and wires.
    5E59534E-1553-4338-8772-4B67D3874E7C.jpg

    In order to be fitted to the Tundra dash, a separate kit is needed. When I get it I will update my thread. It replaces the current trim that houses the soon-to-be-gone volume knob and function buttons. It also builds out the frame of the new HU so that it will integrate with the existing dash hole.
     
    Patch999 likes this.
  4. Dec 28, 2021 at 12:19 PM
    #4
    Cruzer

    Cruzer Wheeling Full Size

    Joined:
    Oct 12, 2020
    Member:
    #53461
    Messages:
    3,130
    Gender:
    Male
    First Name:
    Cruz
    Sunnyvale, CA
    Vehicle:
    Build Page: Cruzer's Re-Build for the Rubicon
  5. Dec 28, 2021 at 12:30 PM
    #5
    Piki

    Piki New Member

    Joined:
    Dec 24, 2017
    Member:
    #11713
    Messages:
    291
    Gender:
    Male
    Vehicle:
    2017 Tundra crewmax 1794 TRD
    Good job OP
     
    willy and panicman[OP] like this.
  6. Dec 28, 2021 at 8:47 PM
    #6
    panicman

    panicman [OP] Everyone remain calm.

    Joined:
    Mar 28, 2018
    Member:
    #13960
    Messages:
    1,741
    Gender:
    Male
    First Name:
    Eric
    PNW
    Vehicle:
    2018 SR5 CM TRDoffroad MGM
    Metra dash kit arrived. Here’s how it comes.
    BF33B95F-E312-432D-B673-DBD2E0993E83.jpg

    This kit comes with the dash piece, the side members, and a pocket should you choose a DIN stereo, which would leave a gap in the dash. This HU is a DDIN (double DIN), so the little pocket won’t be used.
    0F33137A-6573-4E43-B8E1-DA793ED93DE5.jpg

    Here is a pic of this HU installed in another Tundra. My goal will be to get the Pioneer to fit at least this well.
    66C9C922-3A2A-4492-BE85-9E7E62382594.jpg
     
    Last edited: Dec 29, 2021
    Beesta, huntsonora, the red and 2 others like this.
  7. Dec 29, 2021 at 7:19 AM
    #7
    tlpru

    tlpru New Member

    Joined:
    Aug 11, 2016
    Member:
    #4163
    Messages:
    83
    Gender:
    Male
    First Name:
    trent
    Southlake, Texas
    Vehicle:
    2016 Trd Pro
    added power mirrors, auto fold mirror, 2019 TRD head and FOG lights, FORTIN remote start, retrax tonneau cover, 18" fuel BFGK02, TRD sway bar, TRD intake
    outstanding...

    thanks for the information..... I am in the same boat, upgraded speakers and added a sub (tech12volts.. infinity package).... no I'
    m ready for a new headunit.
     
    panicman[OP] likes this.
  8. Dec 29, 2021 at 8:07 AM
    #8
    jeffw6236

    jeffw6236 New Member

    Joined:
    Nov 4, 2016
    Member:
    #5090
    Messages:
    446
    Gender:
    Male
    First Name:
    Jeff
    San Antonio
    Vehicle:
    2019 MGM CrewMax 4x4
    Not sure if this will help you but here’s my Pioneer 7600 installed. It’s got a 9” screen.

    there is a shroud that you install on the back of the unit to cover where the screen mounts. But when using that you lose all the ability to adjust unless you have the screen sticking way out. I wanted it close in so removed the shroud and was able to push it back. For some perspective I can barely squeeze a finger behind the screen and only part way. You’ve got to look really close to see the mounting bracket. I’m real happy with it.

    B553F283-86A0-4D32-8C0F-A3FBFE0C2AC6.jpg

    5C32966E-F43B-4A2D-9A9F-B985526ECF20.jpg

    F4BD8FC0-9729-4AF7-9FCE-7B6E57BF10AC.jpg
     
    panicman[OP] likes this.
  9. Dec 29, 2021 at 9:59 AM
    #9
    panicman

    panicman [OP] Everyone remain calm.

    Joined:
    Mar 28, 2018
    Member:
    #13960
    Messages:
    1,741
    Gender:
    Male
    First Name:
    Eric
    PNW
    Vehicle:
    2018 SR5 CM TRDoffroad MGM
    Yes- that helps! Thank you!
     
  10. Dec 29, 2021 at 5:54 PM
    #10
    plact88

    plact88 MGM SR5 CM

    Joined:
    Aug 10, 2021
    Member:
    #66585
    Messages:
    78
    Gender:
    Male
    First Name:
    Brian
    Tucson, AZ
    Vehicle:
    2021 MGM Tundra Crewmax
    VLED Interior VLED Cargo Light VLED Reverse Light Driverside Grab Handle Bilstein 5100 front 2nd setting TRD Dual Exhaust Black Chrome AJT Chrome Delete TRD Air Filter Tyger Side Steps TVD Vinyl Decals MGM Tundra Radio Decals TVD Vinyl Decals MGM Tailgate Handle Decals Tundra Tailgate Badge Chrome Moto Metal 970 wheels 275/70/18 KO2 Tires TRD Rear Sway Bar MGM Door Handles and Mirror Caps TRD Pro LED Black Housing Headlights Black Housing LED Fog Lights AJT Black Door Handles AJT Black Steering Wheel Controls Tacoma Leather Steering Wheel Pedal Commander TRD Pro Hood Scoop 12 Volt Solutions Remote Start Clazzio Leather Seat Covers
    I was just trying to do some research on this install and found your thread. I too have been researching how to install this stereo. Will enjoy your posts as you go through the process. I have a 2021 non jbl crewmax. The research I've done it looks like I we need the Meastro mrr, another part called a TO2, and then some other adapters for USB, antennae, and rca. Am I on the right path? Is that all that's needed to install this HU?
     
    panicman[OP] likes this.
  11. Dec 29, 2021 at 7:35 PM
    #11
    kaymonster

    kaymonster Member

    Joined:
    Jun 23, 2019
    Member:
    #32287
    Messages:
    91
    Gender:
    Male
    San Diego
    Vehicle:
    2018 Platinum
    3.5" lift, 35/12.5 Nitto Recon Grappler
    I found Crutchfield's website helpful. Select your vehicle and it tells you exactly what all you need to install.
     
    Henry1jg and panicman[OP] like this.
  12. Dec 29, 2021 at 7:56 PM
    #12
    plact88

    plact88 MGM SR5 CM

    Joined:
    Aug 10, 2021
    Member:
    #66585
    Messages:
    78
    Gender:
    Male
    First Name:
    Brian
    Tucson, AZ
    Vehicle:
    2021 MGM Tundra Crewmax
    VLED Interior VLED Cargo Light VLED Reverse Light Driverside Grab Handle Bilstein 5100 front 2nd setting TRD Dual Exhaust Black Chrome AJT Chrome Delete TRD Air Filter Tyger Side Steps TVD Vinyl Decals MGM Tundra Radio Decals TVD Vinyl Decals MGM Tailgate Handle Decals Tundra Tailgate Badge Chrome Moto Metal 970 wheels 275/70/18 KO2 Tires TRD Rear Sway Bar MGM Door Handles and Mirror Caps TRD Pro LED Black Housing Headlights Black Housing LED Fog Lights AJT Black Door Handles AJT Black Steering Wheel Controls Tacoma Leather Steering Wheel Pedal Commander TRD Pro Hood Scoop 12 Volt Solutions Remote Start Clazzio Leather Seat Covers
    Thanks. I will look there.
     
  13. Dec 29, 2021 at 10:01 PM
    #13
    panicman

    panicman [OP] Everyone remain calm.

    Joined:
    Mar 28, 2018
    Member:
    #13960
    Messages:
    1,741
    Gender:
    Male
    First Name:
    Eric
    PNW
    Vehicle:
    2018 SR5 CM TRDoffroad MGM
    I think you’re on the right track. With this head unit, you’ll need the Maestro, the Metra dash kit, TO2 harness, and adapters for antenna, satellite, and USB.

    I’ll keep up my posts!
     
    plact88[QUOTED] likes this.
  14. Dec 29, 2021 at 11:56 PM
    #14
    panicman

    panicman [OP] Everyone remain calm.

    Joined:
    Mar 28, 2018
    Member:
    #13960
    Messages:
    1,741
    Gender:
    Male
    First Name:
    Eric
    PNW
    Vehicle:
    2018 SR5 CM TRDoffroad MGM
    Here is basically what the Metra dash kit looks like assembled.
    0905F06A-0C61-4240-8FA8-373CC79C9622.jpg After tinkering for a couple of hours carefully, I have found that I really can’t get the display any lower or flatter than the one I pictured. Here is the best I’ve come up with, without cutting into either the dash kit or the actual display.
    1F468F7B-B256-4F1D-B9A7-4DCEADB47AD3.jpg

    Ideally I’d love to get the display a bit lower so that I can tuck it under the lip of the dash. However, the display is constructed with brackets that basically allow it to sit in one position within the Metra dash kit. I have circled the brackets that prevent more manipulation below. It is possible to jut the display further out of the Metra trim kit, but that would create a larger void behind the display that would look unfinished.
    55F2269A-96EC-4801-90B6-F61403BB1E30.jpg
    Jeffw6236 posted above that there is a piece of display trim that hides those brackets. I have found, like him, that the trim creates way too tight a fit. I am going to leave it out for the time being.
    92468B80-E69C-4FDA-9D0E-E4536BEDDEAD.jpg
     
    Dantdodge and jeffw6236 like this.
  15. Dec 30, 2021 at 12:13 AM
    #15
    saybng

    saybng Just a member.

    Joined:
    Dec 13, 2015
    Member:
    #2243
    Messages:
    2,891
    Gender:
    Male
    First Name:
    Gary
    Ventura CA
    Vehicle:
    16 Tundra 1794 CM in BLACK!
    Method Nv's, falken wildpeak 275.65.20 Dirty deeds exhaust, 5100's all around...nothin fancy.
    Following along..:thumbsup:
     
    panicman[OP] likes this.
  16. Dec 30, 2021 at 12:28 AM
    #16
    panicman

    panicman [OP] Everyone remain calm.

    Joined:
    Mar 28, 2018
    Member:
    #13960
    Messages:
    1,741
    Gender:
    Male
    First Name:
    Eric
    PNW
    Vehicle:
    2018 SR5 CM TRDoffroad MGM
    It’s a temptation to trim those brackets off at the top. But, I’d hate to plug everything in, have it not work, and then try to make a warranty claim. If everything works great, then perhaps my tin snips will get a workout in the future.
     
    TheGreyTundra28 and Piki like this.
  17. Dec 30, 2021 at 6:22 AM
    #17
    jeffw6236

    jeffw6236 New Member

    Joined:
    Nov 4, 2016
    Member:
    #5090
    Messages:
    446
    Gender:
    Male
    First Name:
    Jeff
    San Antonio
    Vehicle:
    2019 MGM CrewMax 4x4
    on mine, I’ve got to really lean in to see those brackets. You almost have to be looking for them. I’ve thought about hitting them with some black paint at some point. I’m satisfied for now though.
     
    panicman[QUOTED][OP] likes this.
  18. Dec 30, 2021 at 6:37 AM
    #18
    OGDark Knight

    OGDark Knight New Member

    Joined:
    Feb 14, 2021
    Member:
    #59101
    Messages:
    260
    Gender:
    Male
    First Name:
    Jeff
    Vehicle:
    2019 Platinum, 14 4Runner Trail, 95 Land Cruiser 80
    Trans cooler. Pioneer 8600. TRD Pro suspension.
    You can get it closer by not using the metra brackets.
    Scroll down from this post to see how its done. I did similar in my 4runner with great results. https://www.tundras.com/threads/rev...oneer-dmh-wt8600nex.71017/page-2#post-2455198
     
    panicman[QUOTED][OP] likes this.
  19. Dec 30, 2021 at 7:46 AM
    #19
    Armstrs

    Armstrs New Member

    Joined:
    Sep 23, 2017
    Member:
    #9854
    Messages:
    88
    Gender:
    Male
    First Name:
    Steven
    East Texas
    Vehicle:
    2017 Silver CrewMax 5.7L 4x4
    Amp research power steps OEM tow mirrors OEM tonneau cover TRD Sway Bar Black Texas Lone Star plates :) Auto tail gate lock KB Voodoo 22” aluminum bed rack TRD Pro headlights Katzkin seats Black badges
    I have the 7600, but for reference,
    I really liked Kaymonsters setup in the other thread, but ultimately my setup currently is:
    Flipped the lcd mounting bracket upside down so i could mount the screen as low as possible on the chassis.
    Drilled new mounting holes slightly lower and further back in the metra kit. And I still used the rear lcd cover.

     
    Tufftoy, the red, evanhauer and 3 others like this.
  20. Dec 30, 2021 at 10:24 AM
    #20
    panicman

    panicman [OP] Everyone remain calm.

    Joined:
    Mar 28, 2018
    Member:
    #13960
    Messages:
    1,741
    Gender:
    Male
    First Name:
    Eric
    PNW
    Vehicle:
    2018 SR5 CM TRDoffroad MGM
    That’s great! Thank you guys. Ok, I will try deleting the Metra kit and redrill the stock bracket. That flush fit will make me way happier. Now if my harnesses would just get here….
     
    Last edited: Jan 1, 2022
  21. Dec 30, 2021 at 2:03 PM
    #21
    panicman

    panicman [OP] Everyone remain calm.

    Joined:
    Mar 28, 2018
    Member:
    #13960
    Messages:
    1,741
    Gender:
    Male
    First Name:
    Eric
    PNW
    Vehicle:
    2018 SR5 CM TRDoffroad MGM
    Credit here to @kaymonster, this is his pic, and he achieved the flush mount that I think is ideal. I know alot of folks like a floating display, but I prefer an in-dash appearance. If you don’t follow the thread linked above, kaymonster got his display to fit this way by using the factory mount and not using the Metra kit.
    D99E142D-CADF-49C2-A885-121A3663A971.jpg
     
    Jman208, willy, the red and 8 others like this.
  22. Dec 30, 2021 at 2:07 PM
    #22
    Sundog

    Sundog Zoom Zoom

    Joined:
    Oct 30, 2019
    Member:
    #38050
    Messages:
    1,120
    Gender:
    Male
    First Name:
    Mike
    MNSP
    Vehicle:
    2014 Red CM Tundra
    :popcorn:

    Looks good
     
  23. Dec 30, 2021 at 7:46 PM
    #23
    kaymonster

    kaymonster Member

    Joined:
    Jun 23, 2019
    Member:
    #32287
    Messages:
    91
    Gender:
    Male
    San Diego
    Vehicle:
    2018 Platinum
    3.5" lift, 35/12.5 Nitto Recon Grappler
    Ya, basically trial and error drilling holes in the factory bracket until I achieved the desired depth...took a few times until it was fully flush and secure...while not over tightening or under tightening. Take care as it's easy to bend the screen if overtightened.
     
  24. Dec 31, 2021 at 12:04 PM
    #24
    panicman

    panicman [OP] Everyone remain calm.

    Joined:
    Mar 28, 2018
    Member:
    #13960
    Messages:
    1,741
    Gender:
    Male
    First Name:
    Eric
    PNW
    Vehicle:
    2018 SR5 CM TRDoffroad MGM
    Thanks for the tips- helps a lot.

    Over the last 3 days the rest of the parts rolled in.

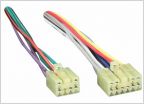
    The TO2 (big harness), and the radio antenna adapter-
    6391D3A7-188C-442A-BABE-C1F5665716C9.jpg

    And this morning the final 2 adapters, the sTO2 (satellite antenna adapter) and the USB2 adapter (allows me to use dash USB input) arrived, so now I just need uninterrupted time to get this done.
    D1C2E794-0C89-466F-8C97-10261F7E6D64.jpg
    CF7FD55A-3376-4DDE-8FF8-6287AEC8EC92.jpg
    I think this will have to wait until Sunday, but I may work on the wiring on the work bench as much as I can before tearing into the dash.
     
    willy and HulkSmurf14 like this.
  25. Jan 1, 2022 at 11:39 AM
    #25
    panicman

    panicman [OP] Everyone remain calm.

    Joined:
    Mar 28, 2018
    Member:
    #13960
    Messages:
    1,741
    Gender:
    Male
    First Name:
    Eric
    PNW
    Vehicle:
    2018 SR5 CM TRDoffroad MGM
    I had a couple hours to ponder the various harnesses and research how these integrate. The Pioneer comes with a main harness that needs to be married to the TO2 harness. Here’s the unboxed TO2 harness:
    A9C447E9-00F3-46B9-A154-993FADB1FB79.jpg
    the main harness is on the left, the coiled harness on the right is for the OBD functions (which will provide access to vehicle sensors and data), and that is installed in a different step. The instructions in the installation guide are pretty good at detailing how to proceed. For this HU, you cut off the white and gray RCA speaker plugs. Then, there are about 14 wires that must be spliced to the Pioneer’s main harness. Here I have soldered some and am about to heat shrink the first couple of splices.
    5AE8A848-F1D2-4522-A973-04ABA7AAC88A.jpg
    iDataLink did a good job matching most of the colors of the wires on the radio harness to the TO2, and they have an easy to read legend that tells you how to mate the wires that do not match. You can use butt connectors, but I prefer solder. I soldered and shrink wrapped each connection, and then dressed up the new part of the harness with a WireCare sheath. After installing the Maestro unit to the new harness, it now looks a lot more plausible as a plug and play harness between the vehicle and the new HU.
    E58FB2EE-6763-4A71-9F43-3EC32E7B864E.jpg
     
    Last edited: Jan 1, 2022
    Jman208, Henry1jg, JoelThor26 and 4 others like this.
  26. Jan 1, 2022 at 8:05 PM
    #26
    TundraPJ

    TundraPJ New Member

    Joined:
    Nov 27, 2019
    Member:
    #39216
    Messages:
    213
    Gender:
    Male
    First Name:
    JP
    DFW, Texas
    Vehicle:
    '19 SR5 TRD Off-Road
    Fox TRD Pro Shocks BFG KO2’s Dirty Deeds 14” BAMF n-fab nerf bars
    Great info. Following!
     
  27. Jan 2, 2022 at 6:31 AM
    #27
    BrandonL812

    BrandonL812 New Member

    Joined:
    Aug 5, 2018
    Member:
    #17783
    Messages:
    979
    Gender:
    Male
    First Name:
    Brandon
    Vehicle:
    2017 Sequoia LTD
    Rx350 retrofitted, Morimoto Led fogs. interior and exterior leds swap. TRD drop in filter. Carbon filter delete. Led DRL panels. TRD Shift knob.
    Don’t know if you plan on screen mirror or adding external device through the hdmi or not. But if you do, make sure to get the Full HD 1080p hdmi cable only. 4k cable will not work on these unit.
    Great build log. I like seeing photos of the progress. This will help out future owner looking to do the same.
     
    willy, texasrho83 and panicman[OP] like this.
  28. Jan 2, 2022 at 5:01 PM
    #28
    panicman

    panicman [OP] Everyone remain calm.

    Joined:
    Mar 28, 2018
    Member:
    #13960
    Messages:
    1,741
    Gender:
    Male
    First Name:
    Eric
    PNW
    Vehicle:
    2018 SR5 CM TRDoffroad MGM
    3D9139F7-6E68-48B7-BFA3-CD787944E35A.jpg
    Alright- finished the major parts of the installation about an hour ago and have done test driving with Apple car play, phone calls, etc..

    Grabbing dinner, cleaning up the mess in the garage and then I’ll do the coup de grace write up.

    Spoiler: not 100% done yet.
    9BE75C48-A29E-4E88-B2F5-95A3152578B2.jpg
     
    willy, the red, DeesCrewMax and 5 others like this.
  29. Jan 2, 2022 at 7:38 PM
    #29
    panicman

    panicman [OP] Everyone remain calm.

    Joined:
    Mar 28, 2018
    Member:
    #13960
    Messages:
    1,741
    Gender:
    Male
    First Name:
    Eric
    PNW
    Vehicle:
    2018 SR5 CM TRDoffroad MGM
    I started the installation around 10am today. I do recommend joining your radio harness to the TO2 adapter on the bench where you can have plenty of light, stand up or sit straight, and make it a clean job.

    First step was pulling the negative battery lead and removal of the stock unit. Lots of videos on this.
    A6A4A6CB-8956-4F41-835D-45801884B7D1.jpg
    Remove the shift knob and center console assembly.

    Then remove the lowest dash panel, the one with the charging ports and USB/aux inputs. To do this, open the charger covers, hook your thumbs in each, and wrap your fingers around the bottom the panel and start tugging moderately. It’ll pop loose.
    6B7E1960-8843-432E-82B6-941B46A3C859.jpg
    Once that’s out of the way, grab the lower edge of the climate control panel and pull up fairly gently. It’ll pop out easily. Unplug the one small harness that feeds the panel. (Make a mental note that there is wiring here for the air bags. That way you don’t panic later the way I did.)

    With that gone you’ll have 4 10mm bolts to remove and the stereo pulls out of the dash. Here are the glamour shots:
    FF1680A8-AADA-4759-8590-7389ACD02D85.jpg
    7368D19D-544C-4BD5-B1A8-6ECF5E3AB3C7.jpg
    10mm socket and a magnet tool for the deeper bolts.
    F8F3F22A-9008-4D19-AB35-25FA94AE9A6E.jpg
    Start carefully removing sockets. They are almost all unique, so you shouldn’t have to mark them or remember their positions.
    Set the stereo aside, but if you like this installation, you’ll want to remove the factory brackets. Using @kaymonster ’s images, I was able to widen the holes on the factory brackets, grind off the positioning posts, and easily achieve the flush mount that he masterfully pioneered. Here’s what that looked like.
    5A0ACB62-FD67-45A9-8940-1B56CB68D3B3.jpg
    F7C44000-99D8-4F35-9222-158A978D74EF.jpg
    4FD80E7D-2FD6-4527-8A93-A4C7FB1B8086.jpg
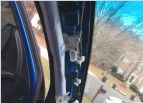
    Now, with installation looming, final prep included removing the driver A pillar to run the cord for the new microphone, pull the overhead console to install the new mic, and throw that bench-wired harness into the dash. Pop the SRS badge on the pillar to expose a 10mm bolt. Remove that and then the pillar cover will pull off from a couple of clips. 4D2D7294-84D4-4DE5-9D79-5807670C52E5.jpg
    The harness really does just plug into the main sockets that are hanging out of the dash. Pictures of that are not needed. You will need to fish two wires for this installation though. The OBD wire I fished down behind the dash to the footwell area, where the OBD port is. I used a straightened coat hanger, ran it down into the the footwell and then taped the smaller sockets to the wire and fished that up and out of the dash.
    B1C9705C-A8A1-4E5D-82F2-FAEAA191FC53.jpg
    Not a good place for a cable to suddenly drop out while I’m driving, I used one zip tie to fasten the belly of the OBD cable to the bottom of the trim here, out of sight.
    E5D1D00F-40BB-4DAC-A96E-4EBCA65C4B57.jpg

    I used the same fishing wire to run the mic wire. Starting at the hole in the dash, I sent the fish wire sideways to the pillar area until I could see it and retrieve it. I taped the mini jack to my fish wire and carefully pulled it out at the dash hole. The mic cord is ten feet long, so no reason not to just run it to the stock mic location like @Armstrs has shown and described.
    The mic wire is small and black. It is in this picture, running alongside the existing factory loom.
    43DDE06E-8E16-4BA7-BA81-F43EED1E1E38.jpg

    Hang tight, starting a new post!
     
    Last edited: Feb 26, 2022
    Jman208, the red, DeesCrewMax and 3 others like this.
  30. Jan 2, 2022 at 8:36 PM
    #30
    panicman

    panicman [OP] Everyone remain calm.

    Joined:
    Mar 28, 2018
    Member:
    #13960
    Messages:
    1,741
    Gender:
    Male
    First Name:
    Eric
    PNW
    Vehicle:
    2018 SR5 CM TRDoffroad MGM
    With the mic wire run, I replaced the pillar cover.

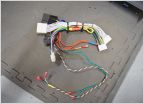
    With the Pioneer on the bench, I started installing everything I could there. You won’t use everything, I found. Of all the RCA connections, only one is used for the rear back-up camera. The rest really can only clip or plug in one way. 6B1DFB9F-DA36-4513-B4DE-D302F668C400.jpg
    After plugging in every connection and adapter, you have a mess o’ wires that looks like this. The last connection I made was the (I thought) USB connection for the dash. I was wrong.
    C6572FA5-43A9-48AC-83CD-DE21358F7CDE.jpg
    Again, not much in the way of images, but I gathered the wires into more organized bundles and tucked them up as much as I could and started working the new HU into position. There is enough space for everything, but it’s kind of tight. Without bolting it together, I reconnected the battery and gritted my teeth as I turned the key on. It worked!
    8BFF10A8-1BEF-4C21-8E0E-5B4A96FC3EE1.jpg
    After a few basic set up prompts, it found my iPhone and started wireless Apple CarPlay.

    However, I had an airbag warning that made me nervous I had snagged something fishing wires, or perhaps disrupted something in the A pillar. After a little frantic checking, I remembered that the climate panel has a button and indicator for the airbag system.

    I tried the USB plug (had to buy an adapter for that) and I get no signal, no charging.

    I tried satellite (had to buy an adapter for that too) and nada. Looks like I need a separate receiver for that. Not sure I care about that one.

    I drove around. CarPlay is awesome. Waze worked perfectly. The display is huge. The reverse video is a bit grainy blown up, but clear and bright.

    The phone works seamlessly, and my wife reports that my voice is clearer with less echo.

    The sound is excellent. It’s obvious that this HU is putting out a way better signal with way more power. If I could get the USB-in to work, I’m sure I’ll be blown away. If anyone can help me… please. I beg…

    The app you download to help customize and update the HU is very bad. I can’t stress that enough, it’s terrible. The instructions don’t work. The process is a never ending death loop.

    I think I need to tune my amp again with the new HU. It sounds good, but volume level 8 shouldn’t drive you out of the vehicle like an exposure accident. I think my gains are set too high. I’ll look at that.

    Installation- I got that flush mount I wanted! The only drawbacks I see are the predictable small gap that is left, and the fact that without the factory stereo OR the Metra dash kit, the top of the climate panel has nothing to clip in to. It’s not rattly or loose, but the top is just not secured in. I tried to modify the Metra panel by cutting most of it away and mounting only the bottom edge, but it just doesn’t work. I will probably look hard at building a bracket that will fit in there to retain that panel better. Also, the small gap that is left around the unit can be filled easily with some rubber or foam stripping. As you can see from the pictures, the gap is not really noticeable.
    727E66E9-8669-4E27-8F7C-B092E6BE1CB0.jpg
    6D5CB512-89A7-4BE4-B75D-C99DAB835ED4.jpg
     

Products Discussed in

To Top